Spetz Specs No. 8285: step-by-step site work guide
Dry Stone Field Boundary Wall: Through Stones, Top Lift, and Coping Stones
The complete step-by-step guide made from TheStoneRanger's YouTube video, free on Spetz. For the video, a step-by-step player and answers to your questions, see the Dry Stone Field Boundary Wall: Through Stones, Top Lift, and Coping Stones project page.
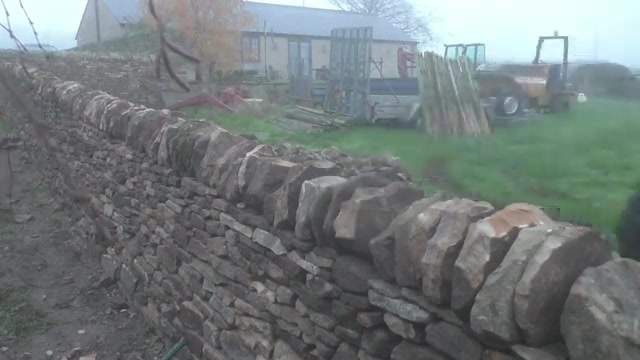
3 steps, 4 parts, 5 tools, 4 materials
Overview
Finished size: 4.5 m long, 12 in wide at top
The Job
- Complete the upper half of a 4.5 m dry stone field boundary wall.
- Build face stones and hearting between through stones, level the top lift, then cap with half-moon coping stones.
- Finished top is 12 in wide, self-supporting, no mortar.
Why This Way
- Through stones bond both faces so the wall acts as one mass.
- Tight hearting locks face-stone tails and prevents hollow centres.
- Upright coping stones shed rain and lock the top course down.
What It Takes
- Stone walling hammer, tape measure, string lines on batter frames, waist-high wooden dressing table.
- About 30 flat slabs for copers, plus face stones and hearting rubble.
- Time not stated; allow a full working day for the 4.5 m stretch.
What Decides Success
- Every face stone sits flat against the string line with no rock.
- Top lift is dead level and 12 in wide before any coper goes on.
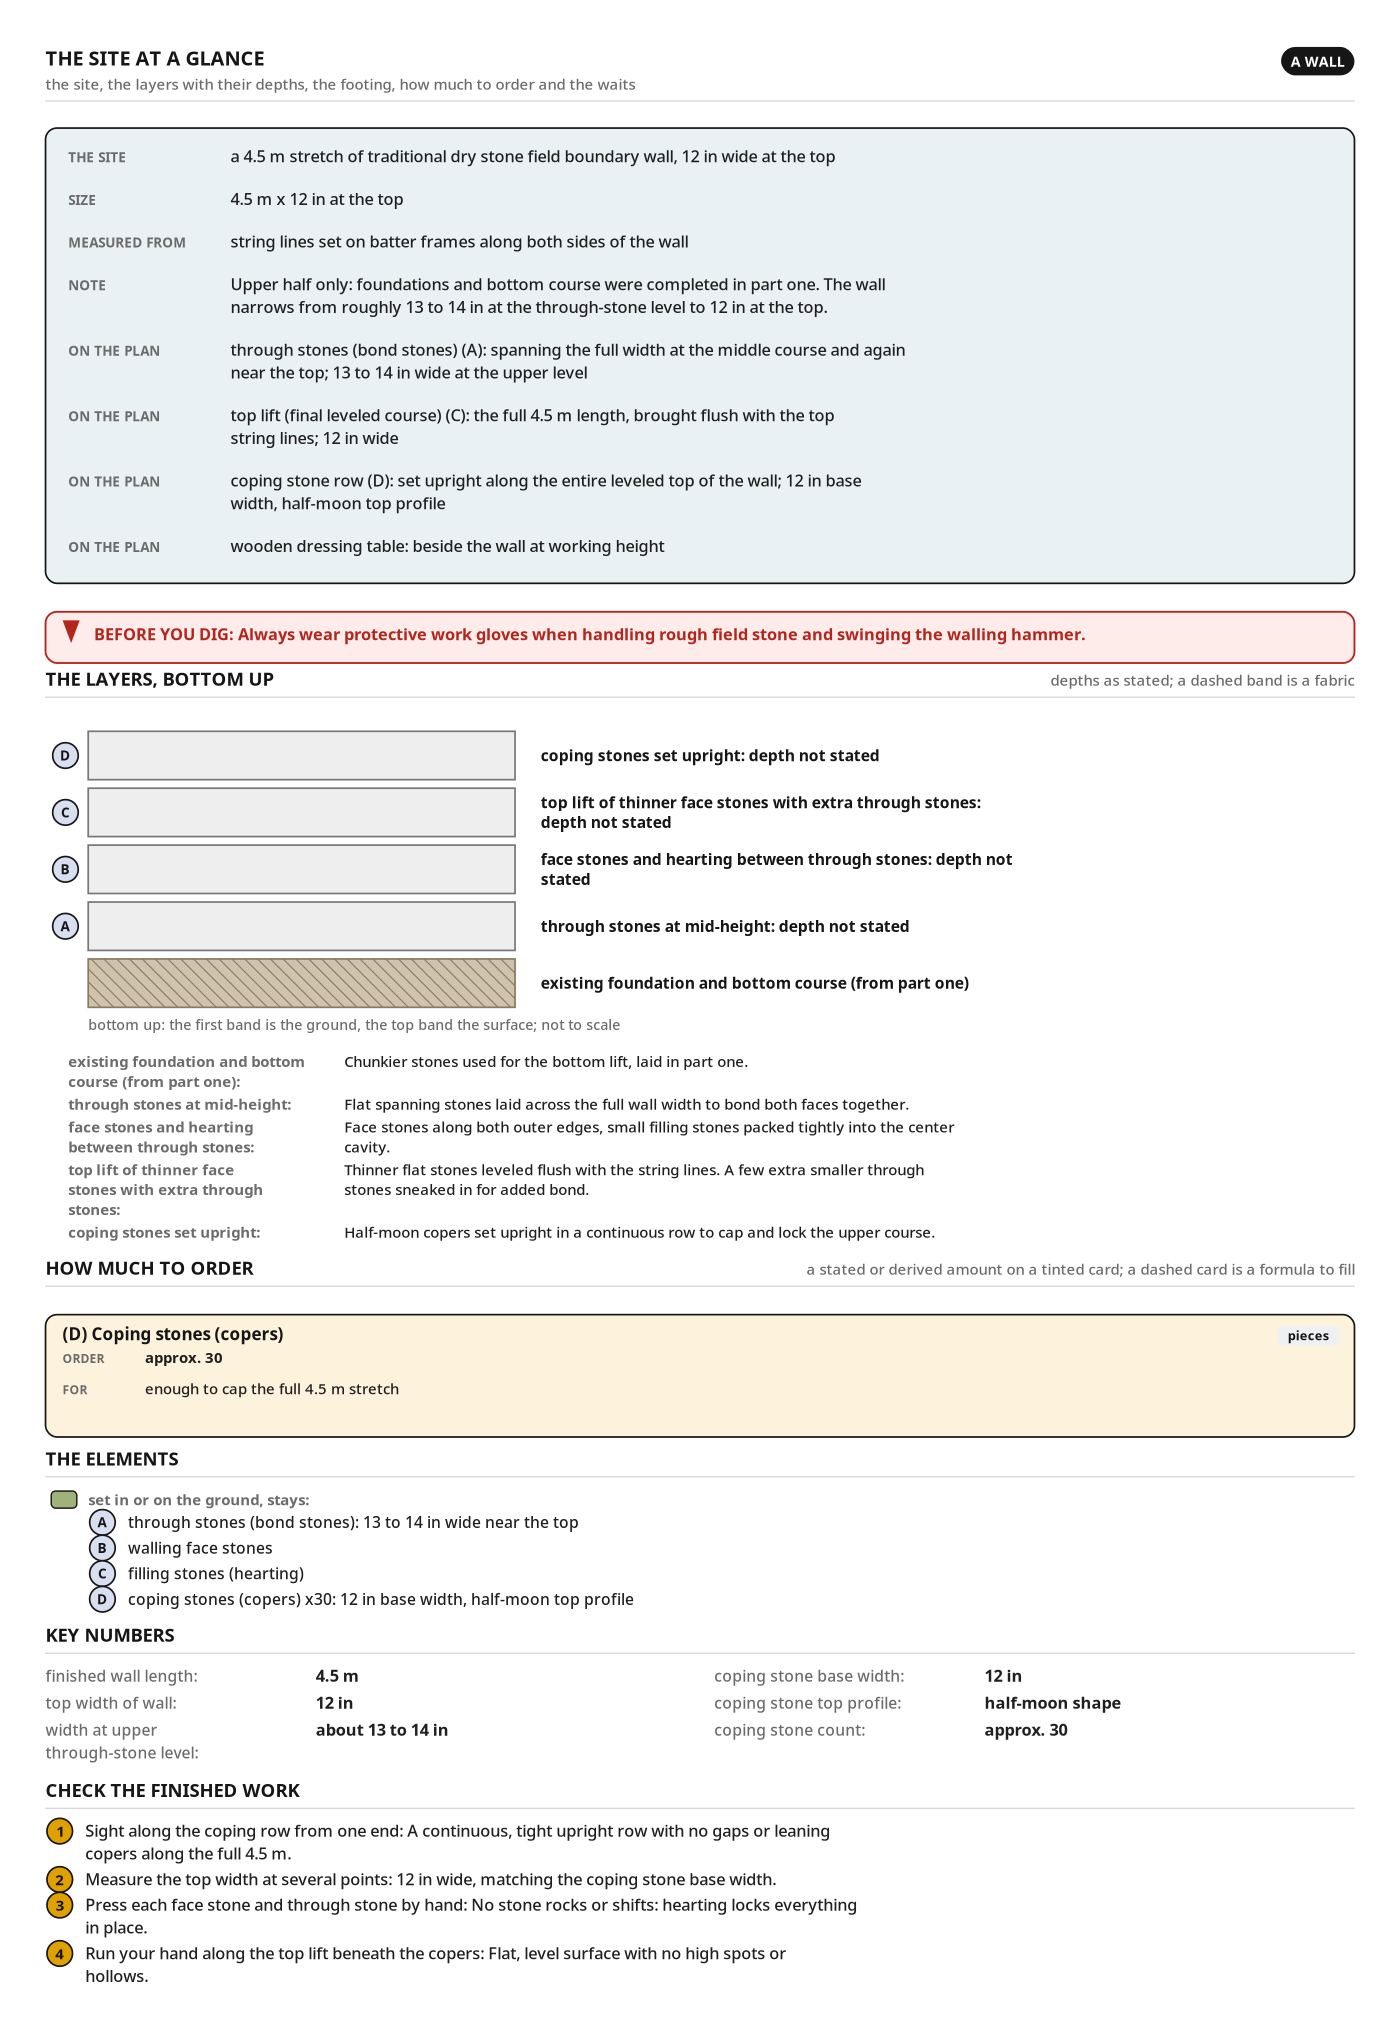
The site at a glance
- The site: a 4.5 m stretch of traditional dry stone field boundary wall, 12 in wide at the top
- Size: 4.5 m x 12 in at the top
- Measured from: string lines set on batter frames along both sides of the wall
- Order Coping stones (copers): approx. 30
- finished wall length: 4.5 m
- top width of wall: 12 in
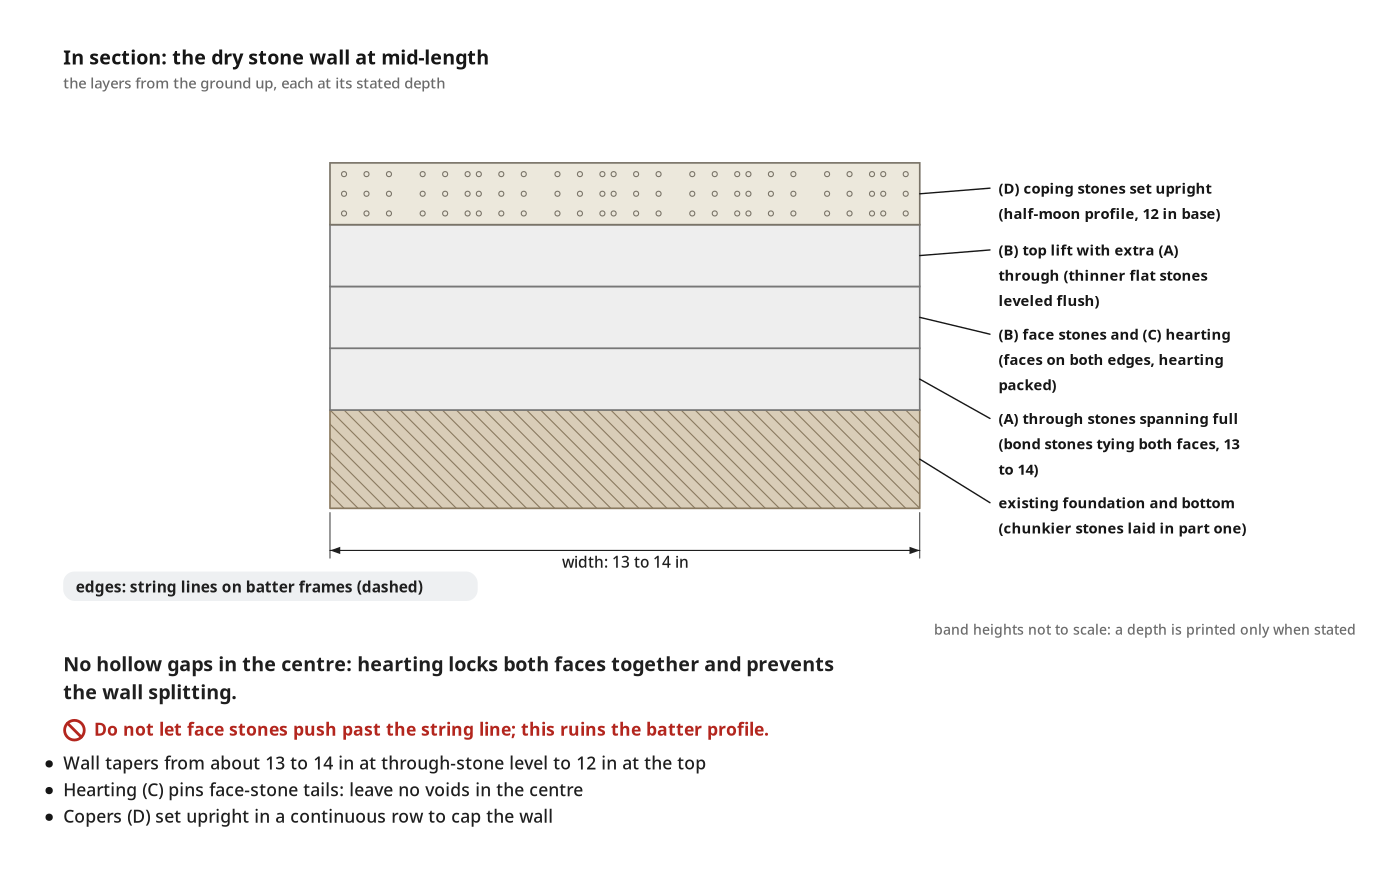
- width at upper through-stone level: about 13 to 14 in
- coping stone base width: 12 in
- coping stone top profile: half-moon shape
- coping stone count: approx. 30
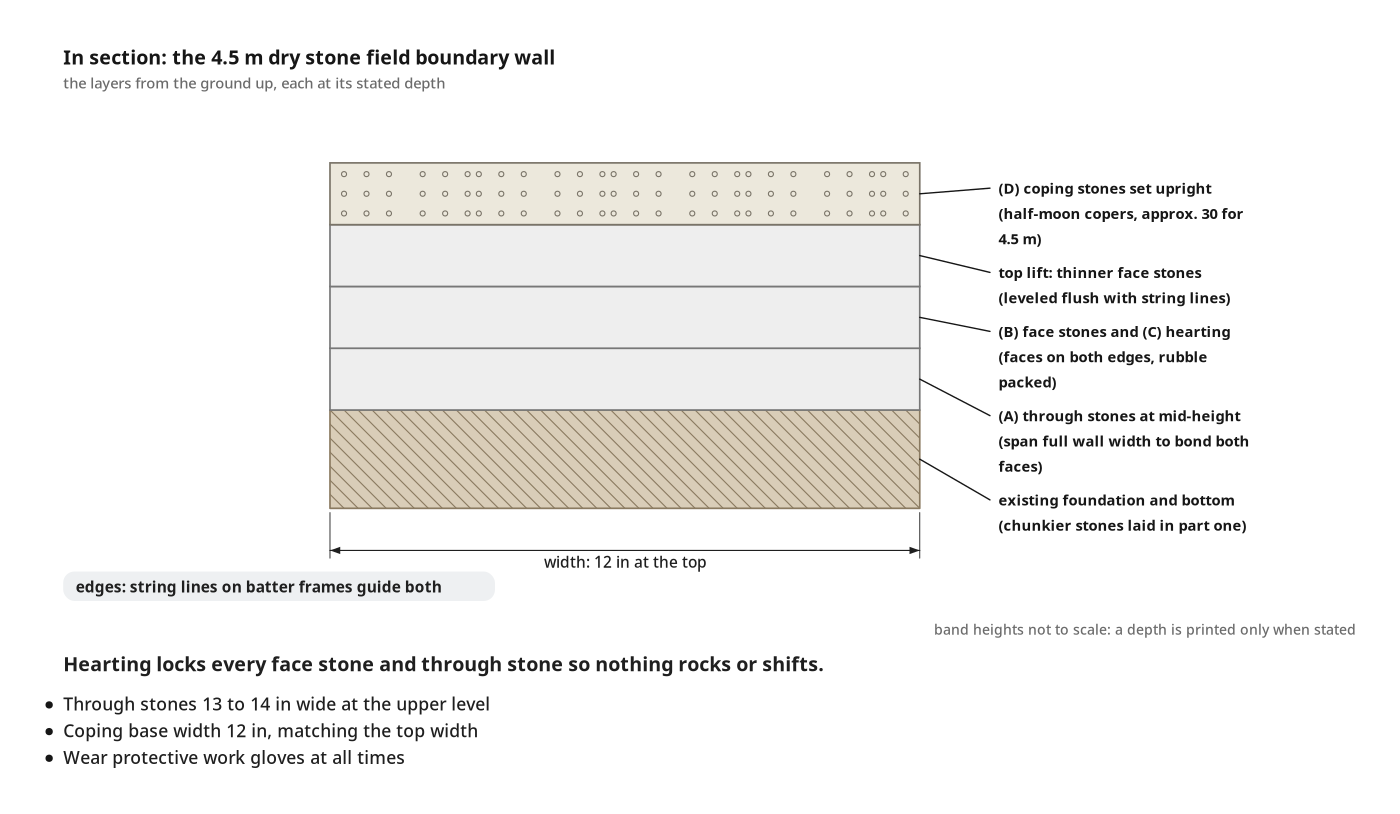
The layers, bottom up
- 1. existing foundation and bottom course (from part one)
- 2. through stones at mid-height
- 3. face stones and hearting between through stones
- 4. top lift of thinner face stones with extra through stones
- 5. coping stones set upright
Before you dig
- Always wear protective work gloves when handling rough field stone and swinging the walling hammer.
Health and safety
Stone Hammer Safety
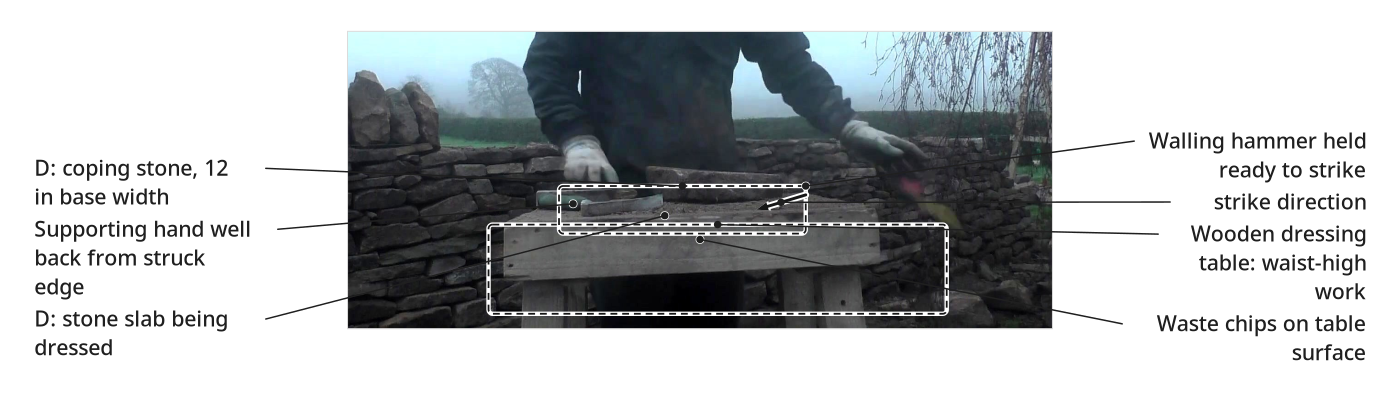
- Keep your supporting hand well back from the edge being struck when dressing stones with the walling hammer.
- Wear safety glasses every time you swing the hammer; stone chips fly unpredictably and can cause eye injury.
- Strike squarely and let the hammer weight do the work; glancing blows send sharp fragments sideways.
- Never use a hammer with a loose or cracked head; inspect the handle and wedge before each session.
Lifting Heavy Stone
- Through stones and coping stones are heavy and awkward; ask a helper to lift any stone you cannot manage alone.
- Bend at the knees and keep the stone close to your body; never twist your back while carrying or placing stone.
- Use the wooden dressing table at waist height when shaping multiple coping stones to avoid repeated bending and back strain.
Cuts and Crush Injuries
- Wear protective grip work gloves at all times when handling rough field stone; edges can slice unprotected skin.
- Set stones down deliberately; dropping a stone onto the wall can crush fingers or dislodge lower courses onto your feet.
- Wear steel-toe or heavy-duty boots to protect your feet from falling stones and sharp offcuts on the ground.
Flying Chips and Dust
- Dressing coping stones into half-moon profiles produces sharp stone chips; keep bystanders well clear of the dressing table.
- Prolonged hammer dressing creates fine stone dust; wear a dust mask when shaping several copers in a row.
- Clear stone offcuts and hearting rubble from your work area regularly to prevent tripping near the wall.
Before you dig
- Foundations and bottom course (chunkier stones) are in place from part one.
- String lines are set on batter frames along both sides to guide the batter angle.
- Through stones are laid across the full wall width at mid-height, bonding both faces.
- Sort remaining stone: thinner flat pieces for the top lift, small angular rubble for hearting.
- Have about 30 flat stone slabs on hand for coping.
- Set up the wooden dressing table beside the wall at comfortable working height.
- Wear protective work gloves at all times when handling rough stone and swinging the hammer.
Tools
- Stone walling hammer (masonry pick / stone-dressing hammer, OX)
- Work gloves (protective grip work gloves)
- String lines and batter frames (masonry guide strings and wooden A-frame profiles)
- Wooden stone-dressing table (portable wooden workbench) (optional)
- Tape measure (retractable pocket tape measure)
Materials
- Through stones (bond stones) (flat spanning field stones)
- Walling face stones (natural dry-walling stones, thinner stones for the top lift)
- Filling stones (hearting) (small rubble / stone offcuts)
- Coping stones (copers) (approx. 30, flat stone slabs shaped into half-moon copers, 12 in bottom width, rounded half-moon top profile, 12 in wide along the base)
Elements
| Part | Name | Qty | Size | Notes |
|---|---|---|---|---|
| A | through stones (bond stones) | count yours | 13 to 14 in wide near the top | Span the full wall width to bond both faces together. Extra smaller ones added near the top for bond as the wall settles. |
| B | walling face stones | count yours | Thinner pieces saved for the top lift. Set along both outer edges between through stones, aligned with string lines. | |
| C | filling stones (hearting) | count yours | Small angular rubble packed tightly into the center cavity between the two outer faces to solidify the wall. | |
| D | coping stones (copers) | x30 | 12 in base width, half-moon top profile | approx. 30 · Flat stone slabs dressed to a half-moon shape on a worktable, then set upright in a continuous row along the leveled top. |
Before you start
Stone Sorting
- Sort remaining stone into three piles: thinner flat pieces for the top lift, small angular rubble for hearting, flat slabs for coping.
- Chunky stones belong in the bottom course only: do not use them in the top lift.
String Lines
- Raise the string lines on the batter frames to final top-lift height.
- Both lines must be level and set at the 12 in top width.
Step by step
Step 1: Build between the through stones
The course between through stones is built solid on both faces with a tightly packed centre, level with the through-stone tops.
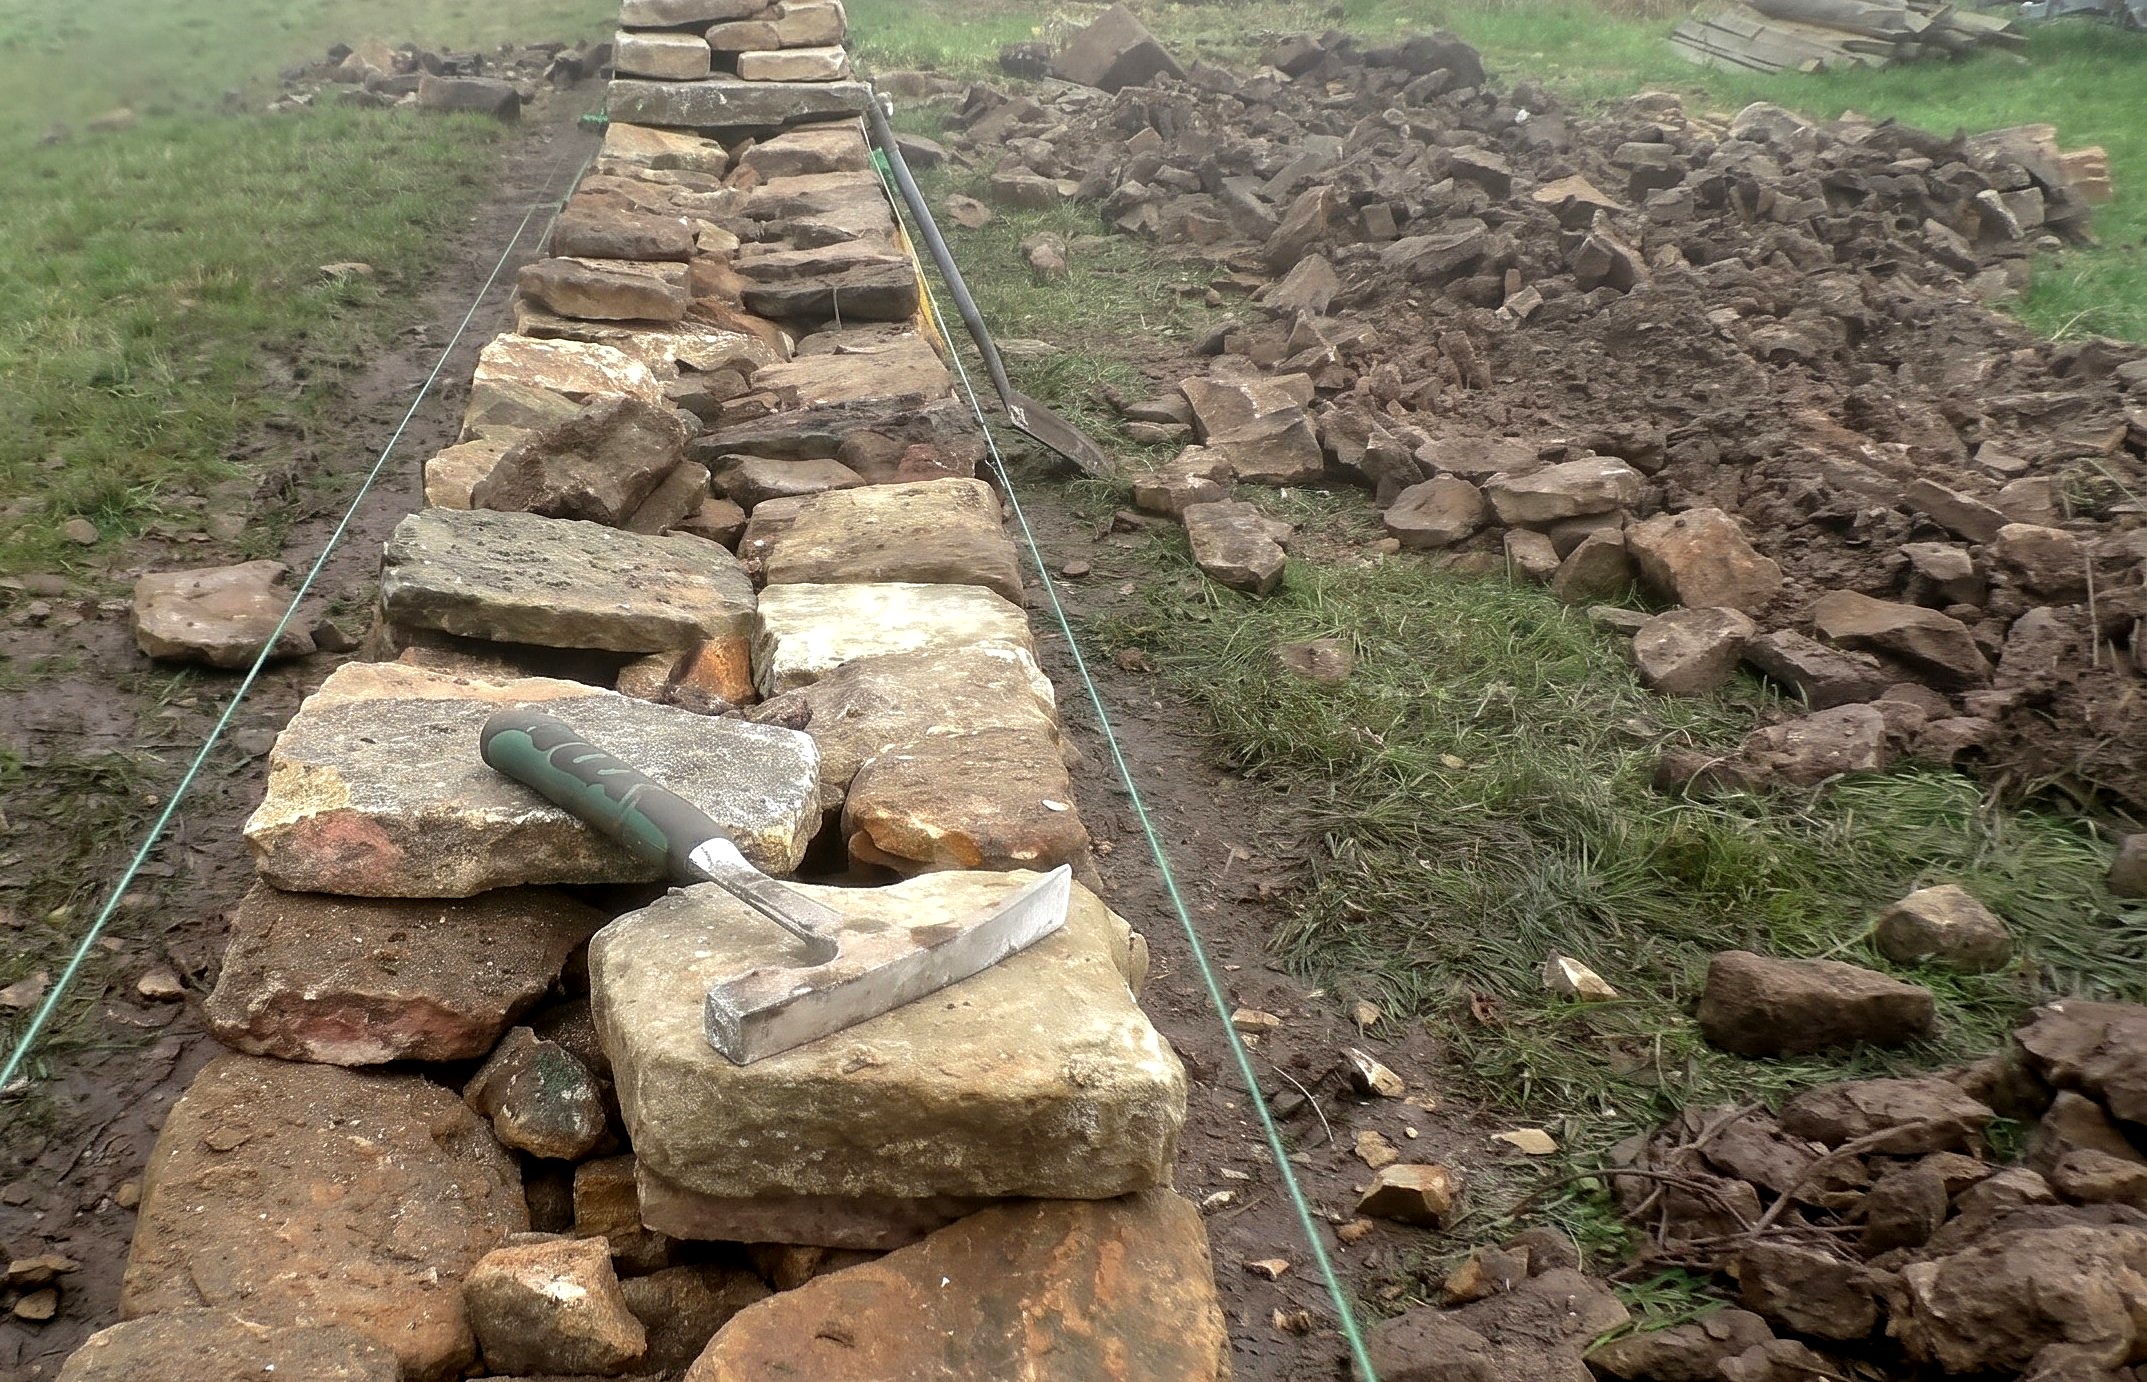
Parts in this step: (A) through stones (bond stones), (B) walling face stones, (C) filling stones (hearting)
You'll need: Stone walling hammer, Work gloves, String lines and batter frames, Through stones (bond stones), Walling face stones, Filling stones (hearting)
- 1.1 Fit and dress face stones between the through stones
- Select flat-faced walling stones (B) and test-fit them along both outer edges between the through stones (A).
- Flip each stone to find the flattest bedding face before committing.
- Knock off high spots with the walling hammer so the stone sits flat and does not rock.
- Keep every outer face aligned with the string line: do not let any stone push past it.
- Build tight against both sides of each through stone so it is locked into the wall.
- 1.2 Pack filling stones into the center cavity
- Place small angular filling stones (C) into the centre channel between the two face-stone rows.
- Tap and wedge each hearting stone down with the hammer so it pins the face-stone tails.
- Leave no hollow gaps; voids in the centre weaken the bond between faces.
- 1.3 Build the course up level with the through stones
- Continue laying face stones (B) along both string lines and packing hearting (C) into the centre.
- Work the full length until the section reaches through-stone height.
- Check both faces follow the string lines and no stone rocks when pressed.
Key measurements
- Wall width at through-stone level: about 13 to 14 in
- Tip: Test-fit and flip stones to find the flattest bedding face before trimming.
- Tip: Save thinner pieces for the top lift: chunky stones belong in the bottom course.
- Heads up: Do not let face stones push past the string line; this ruins the batter profile.
Before you move on: Both faces follow the string lines, no stone rocks when pressed, and the course is level with the through-stone tops along the full length.
Step 2: Lay extra through stones and level the top course
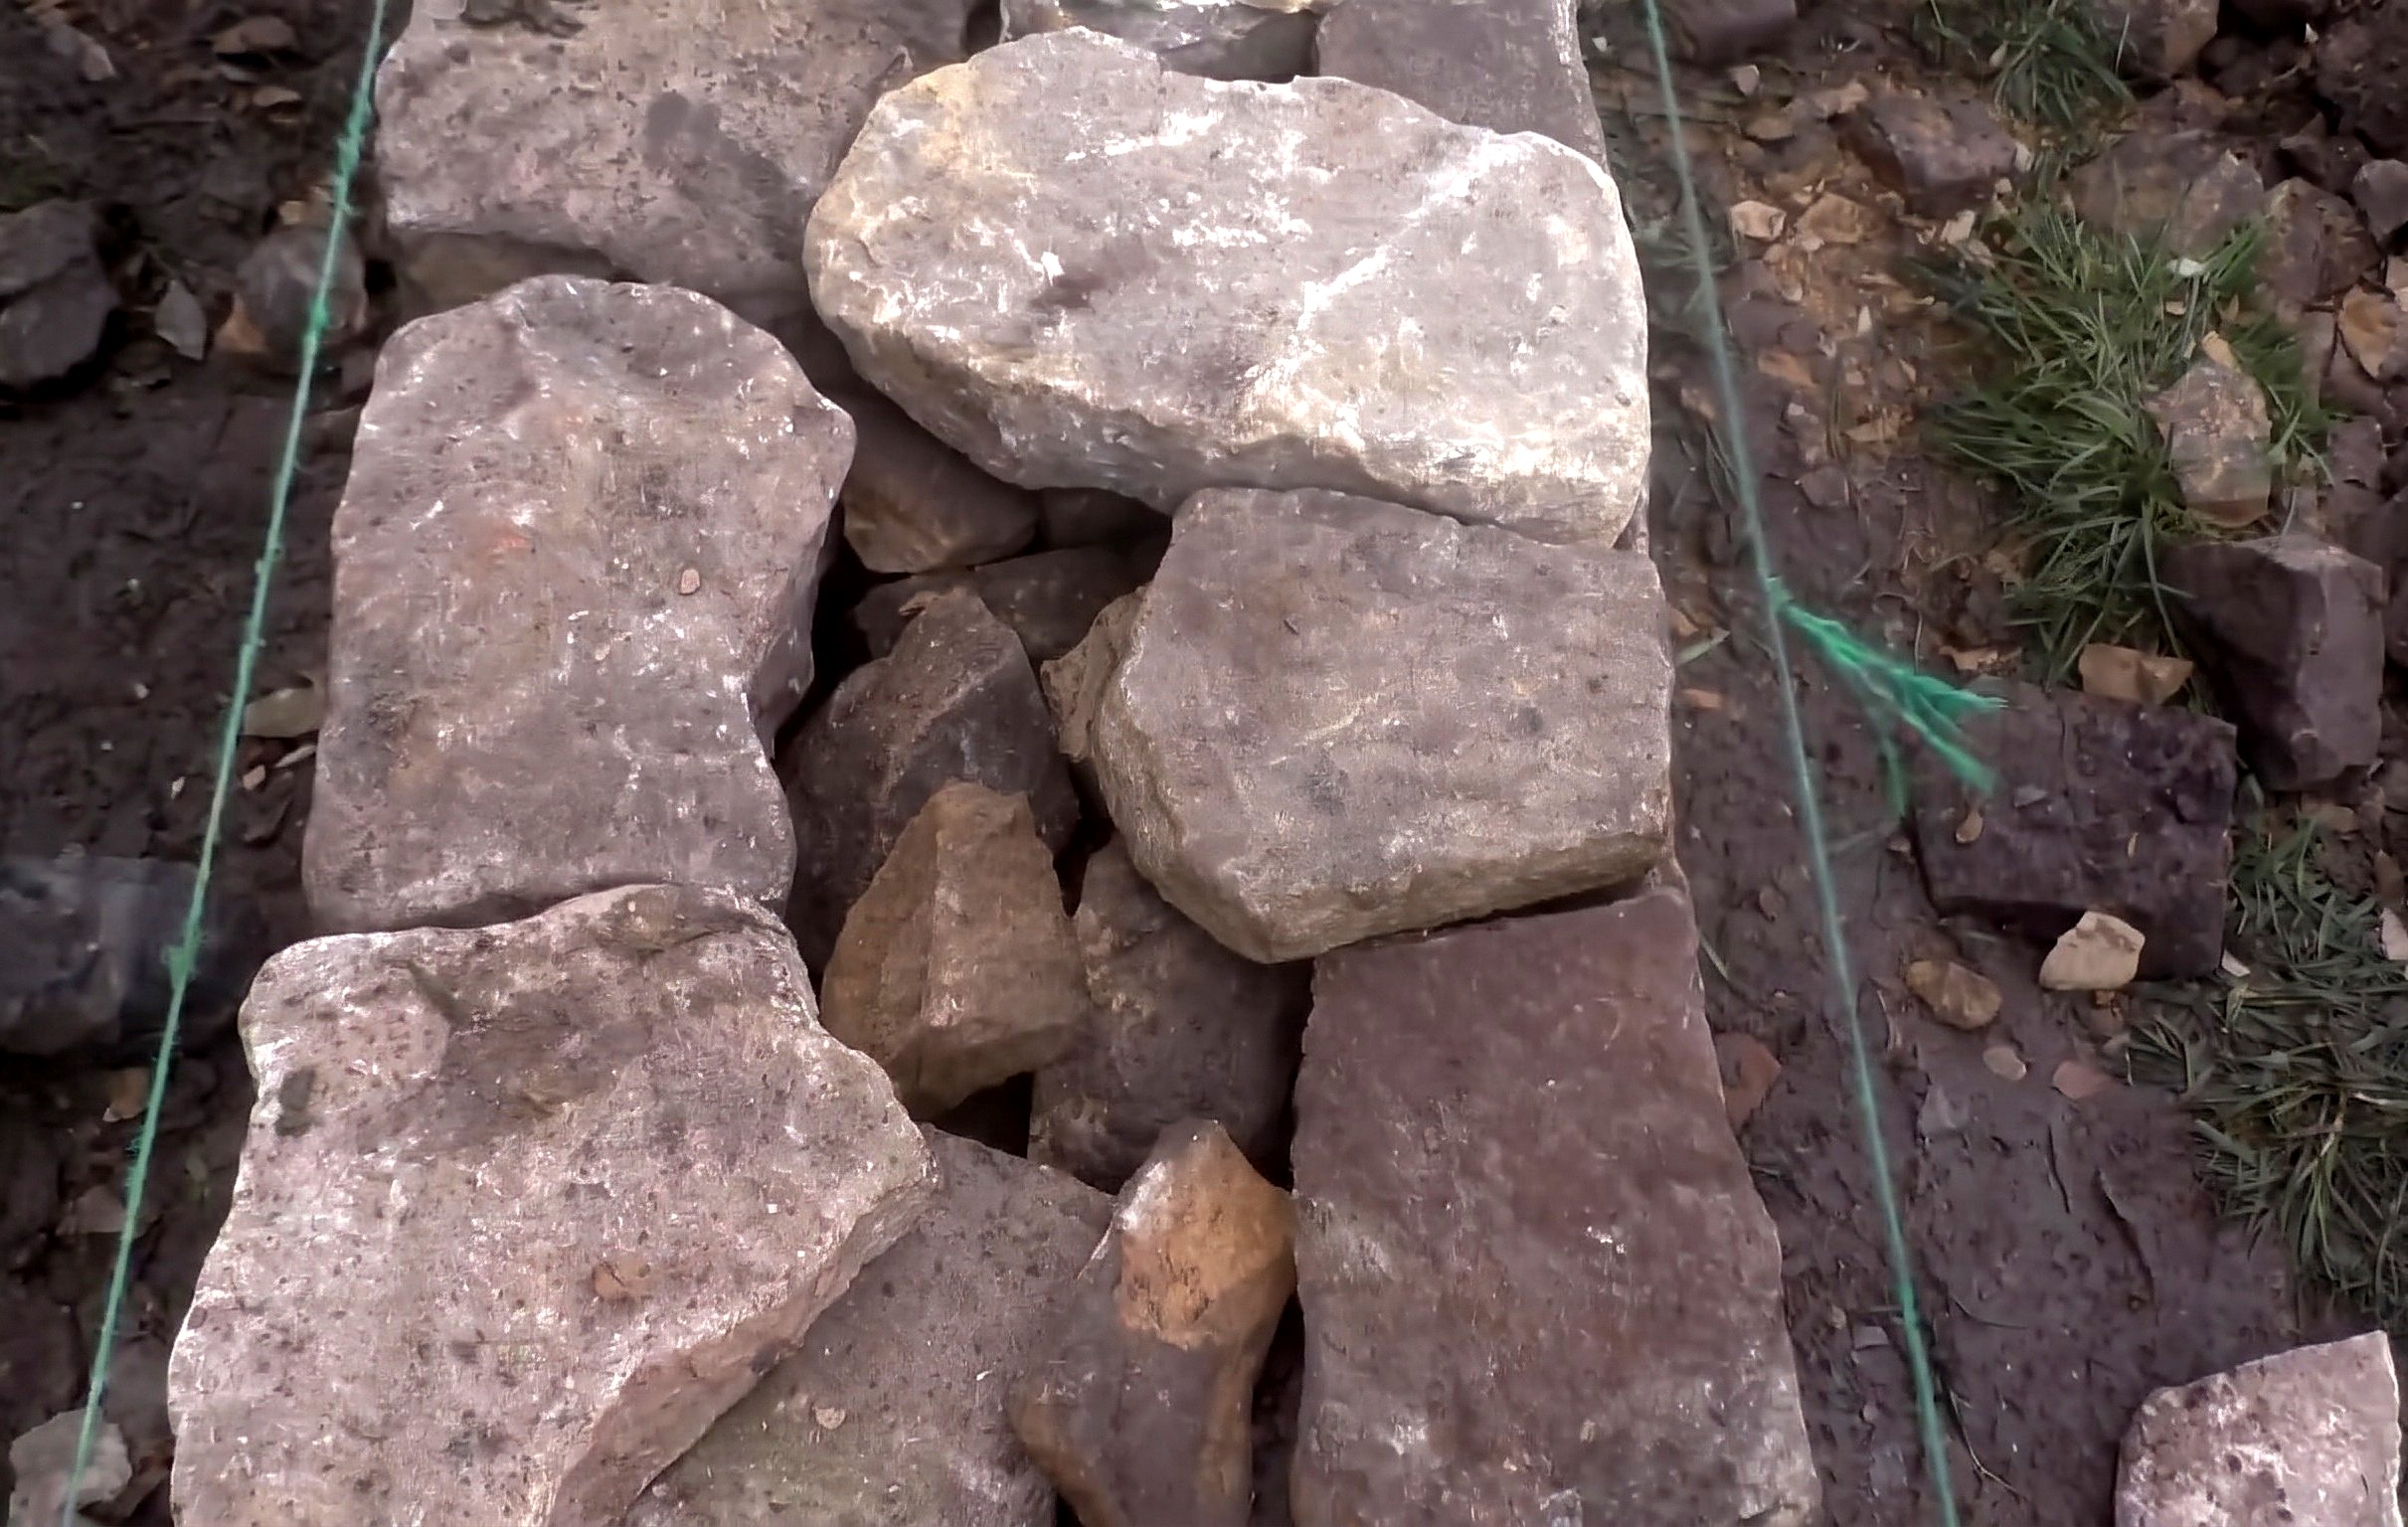
Wall top is flat, level with the string lines, exactly 12 in wide, ready for coping stones.
Parts in this step: (A) through stones (bond stones), (B) walling face stones, (C) filling stones (hearting)
You'll need: Stone walling hammer, Work gloves, String lines and batter frames, Through stones (bond stones), Walling face stones, Filling stones (hearting)
- 2.1 Place extra through stones and pack the upper cavity
- Pack filling stones (C) into the upper centre cavity.
- Lay smaller through stones (A), about 13 to 14 in wide, across the full wall width between the two string lines.
- Slide a thin shard under any rocking corner so the through stone beds solid.
- These extra through stones add bond as the wall settles over the next couple of years.
- 2.2 Dress and lay thinner stones level with the top string lines
- Select thinner flat face stones (B) for the final course.
- Trim edges with the walling hammer so each stone sits flush with the raised string lines.
- Set them along the top to create a flat, continuous 12 in wide bed for the coping stones.
- No stone should sit high or uneven; copers must rest on a flat surface.
Key measurements
- Extra through stones near top: about 13 to 14 in wide
- Finished top width: 12 in
- Tip: Add a few extra smaller through stones in the upper course for bond as the wall settles.
- Tip: Use thinner flat stones on the final course; they level flush with the lines more easily.
Before you move on: Top surface is flat and level with the string lines along the full 4.5 m; top measures 12 in wide.
Step 3: Measure, dress, and set the coping stones
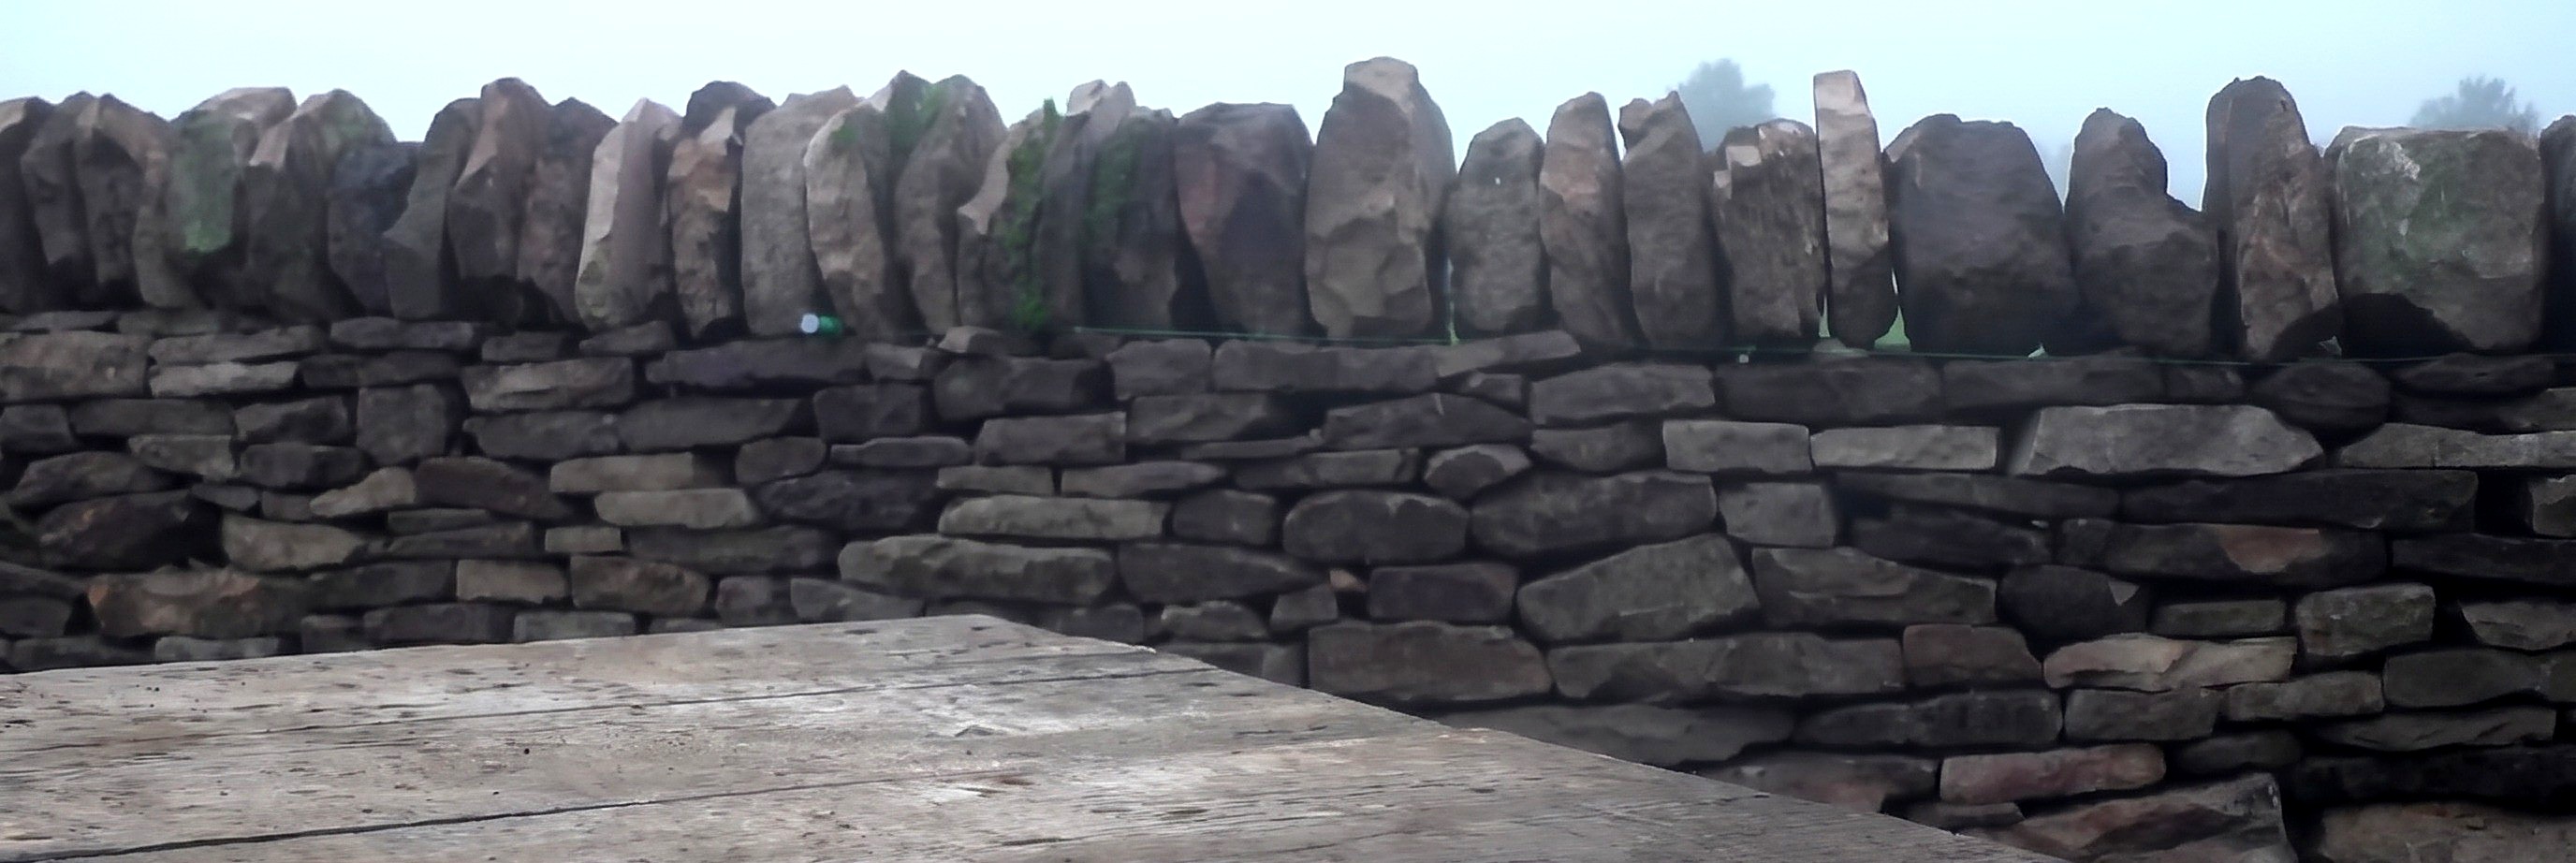
About 30 half-moon coping stones, dressed to a 12 in base, set upright in a continuous row capping the full 4.5 m wall.
Parts in this step: (D) coping stones (copers)
You'll need: Stone walling hammer, Work gloves, Tape measure, Wooden stone-dressing table, Coping stones (copers)
- 3.1 Measure and mark the 12-inch coping stone width
- Lay a flat stone slab on the wooden dressing table.
- Measure 12 in across the flat bottom edge with the tape measure.
- Scribe a mark showing where the excess will be dressed off.
- 3.2 Hammer the coping stone into a half-moon shape and set it on the wall
- Knock off bulk waste with the walling hammer while the stone lies flat on the table.
- Stand the stone on edge and refine the top into a rounded half-moon profile.
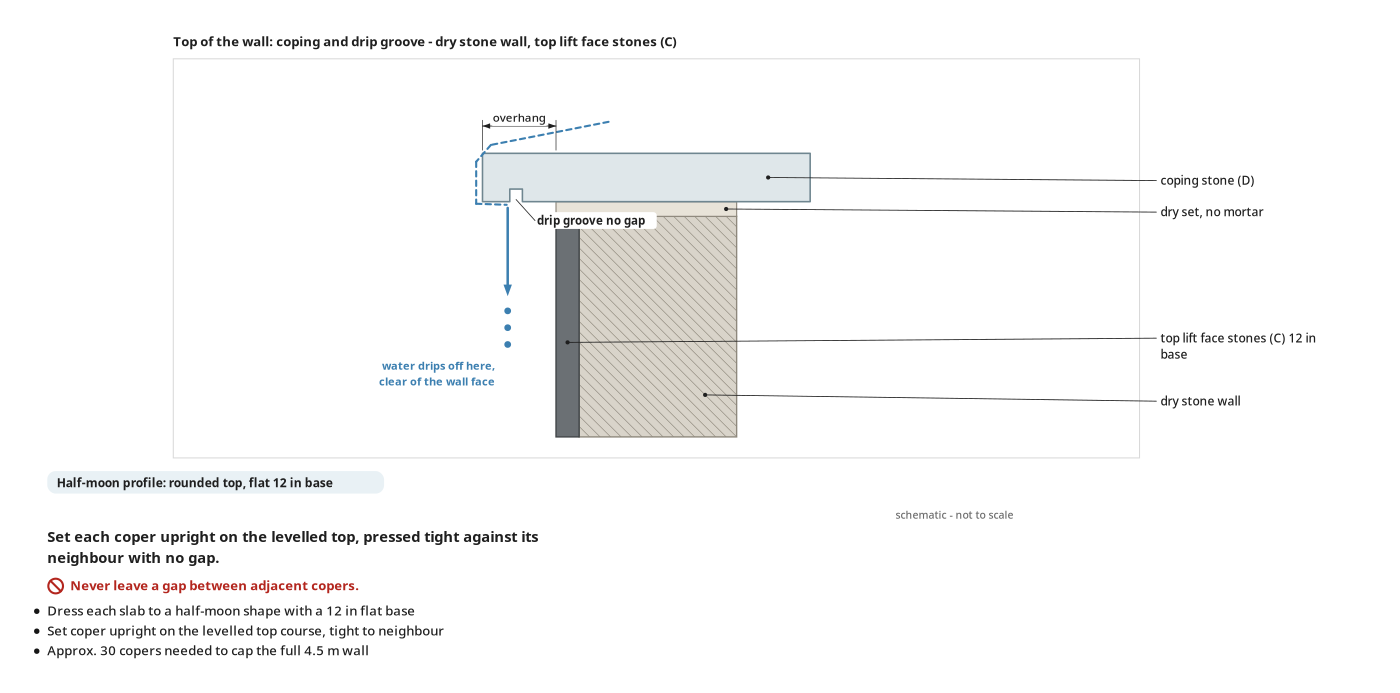
- Carry the dressed coper to the wall; set its 12 in flat base upright against the previous coper.
- Press it tight so no gap remains between adjacent copers.
- 3.3 Repeat measuring, dressing, and setting for the remaining coping stones
- Repeat the measure, mark, dress, and set sequence for all remaining copers.
- About 30 coping stones (D) needed to cap the full 4.5 m stretch.
- Set each one tight in a continuous upright row along the levelled top.
- Match hammer weight to each stone's thickness and hardness; keep different weight hammers on the table.
Key measurements
- Coping stone base width: 12 in
- Coping stone top profile: half-moon shape
- Coping stone count: approx. 30
- Finished wall length: 4.5 m
- Tip: Use the waist-high dressing table for all coping work to avoid back strain.
- Tip: Keep different weight hammers on the table to match each stone's thickness and hardness.
- Heads up: Keep your supporting hand well back from the edge being struck.
Before you move on: Every coper sits upright and tight against its neighbour; the row runs the full 4.5 m with no gaps; each base measures 12 in.
Finishing
Last Touches
- Brush loose chips and dust off the coping stones and wall faces.
- Remove string lines and batter frames once the finished row is satisfactory.
Settling
- The wall will settle over the next couple of years as stones bed in.
- Extra through stones near the top add bond that tightens as the wall settles.
Care
- Inspect the coping row after heavy frost or storms; reset any coper that shifts.
- If face stones loosen over time, repack hearting behind them to restore bond.
Variations
- Natural flat slate slabs with a flat bottom edge can substitute for dressed half-moon copers if you lack stone-dressing tools.
Check the finished work
| Check | What you should see | If not |
|---|---|---|
| Sight along the coping row from one end. | A continuous, tight upright row with no gaps or leaning copers along the full 4.5 m. | Remove and re-dress any coper that leans or leaves a gap; reset it tight against its neighbours. |
| Measure the top width at several points. | 12 in wide, matching the coping stone base width. | |
| Press each face stone and through stone by hand. | No stone rocks or shifts: hearting locks everything in place. | Pull the loose stone, repack hearting underneath, and reset. |
| Run your hand along the top lift beneath the copers. | Flat, level surface with no high spots or hollows. |
These Specs are built from TheStoneRanger's video “Dry Stone Field Boundary Wall: Through Stones, Top Lift, and Coping Stones”. Open the Dry Stone Field Boundary Wall: Through Stones, Top Lift, and Coping Stones project page.
