Spetz Specs No. 2042: step-by-step restoration guide
Refinishing and Painting Kitchen Cabinets
The complete step-by-step guide made from Kathartic Studios's YouTube video, free on Spetz. For the video, a step-by-step player and answers to your questions, see the Refinishing and Painting Kitchen Cabinets project page.
4 steps, 10 tools, 11 materials
Overview
The Piece
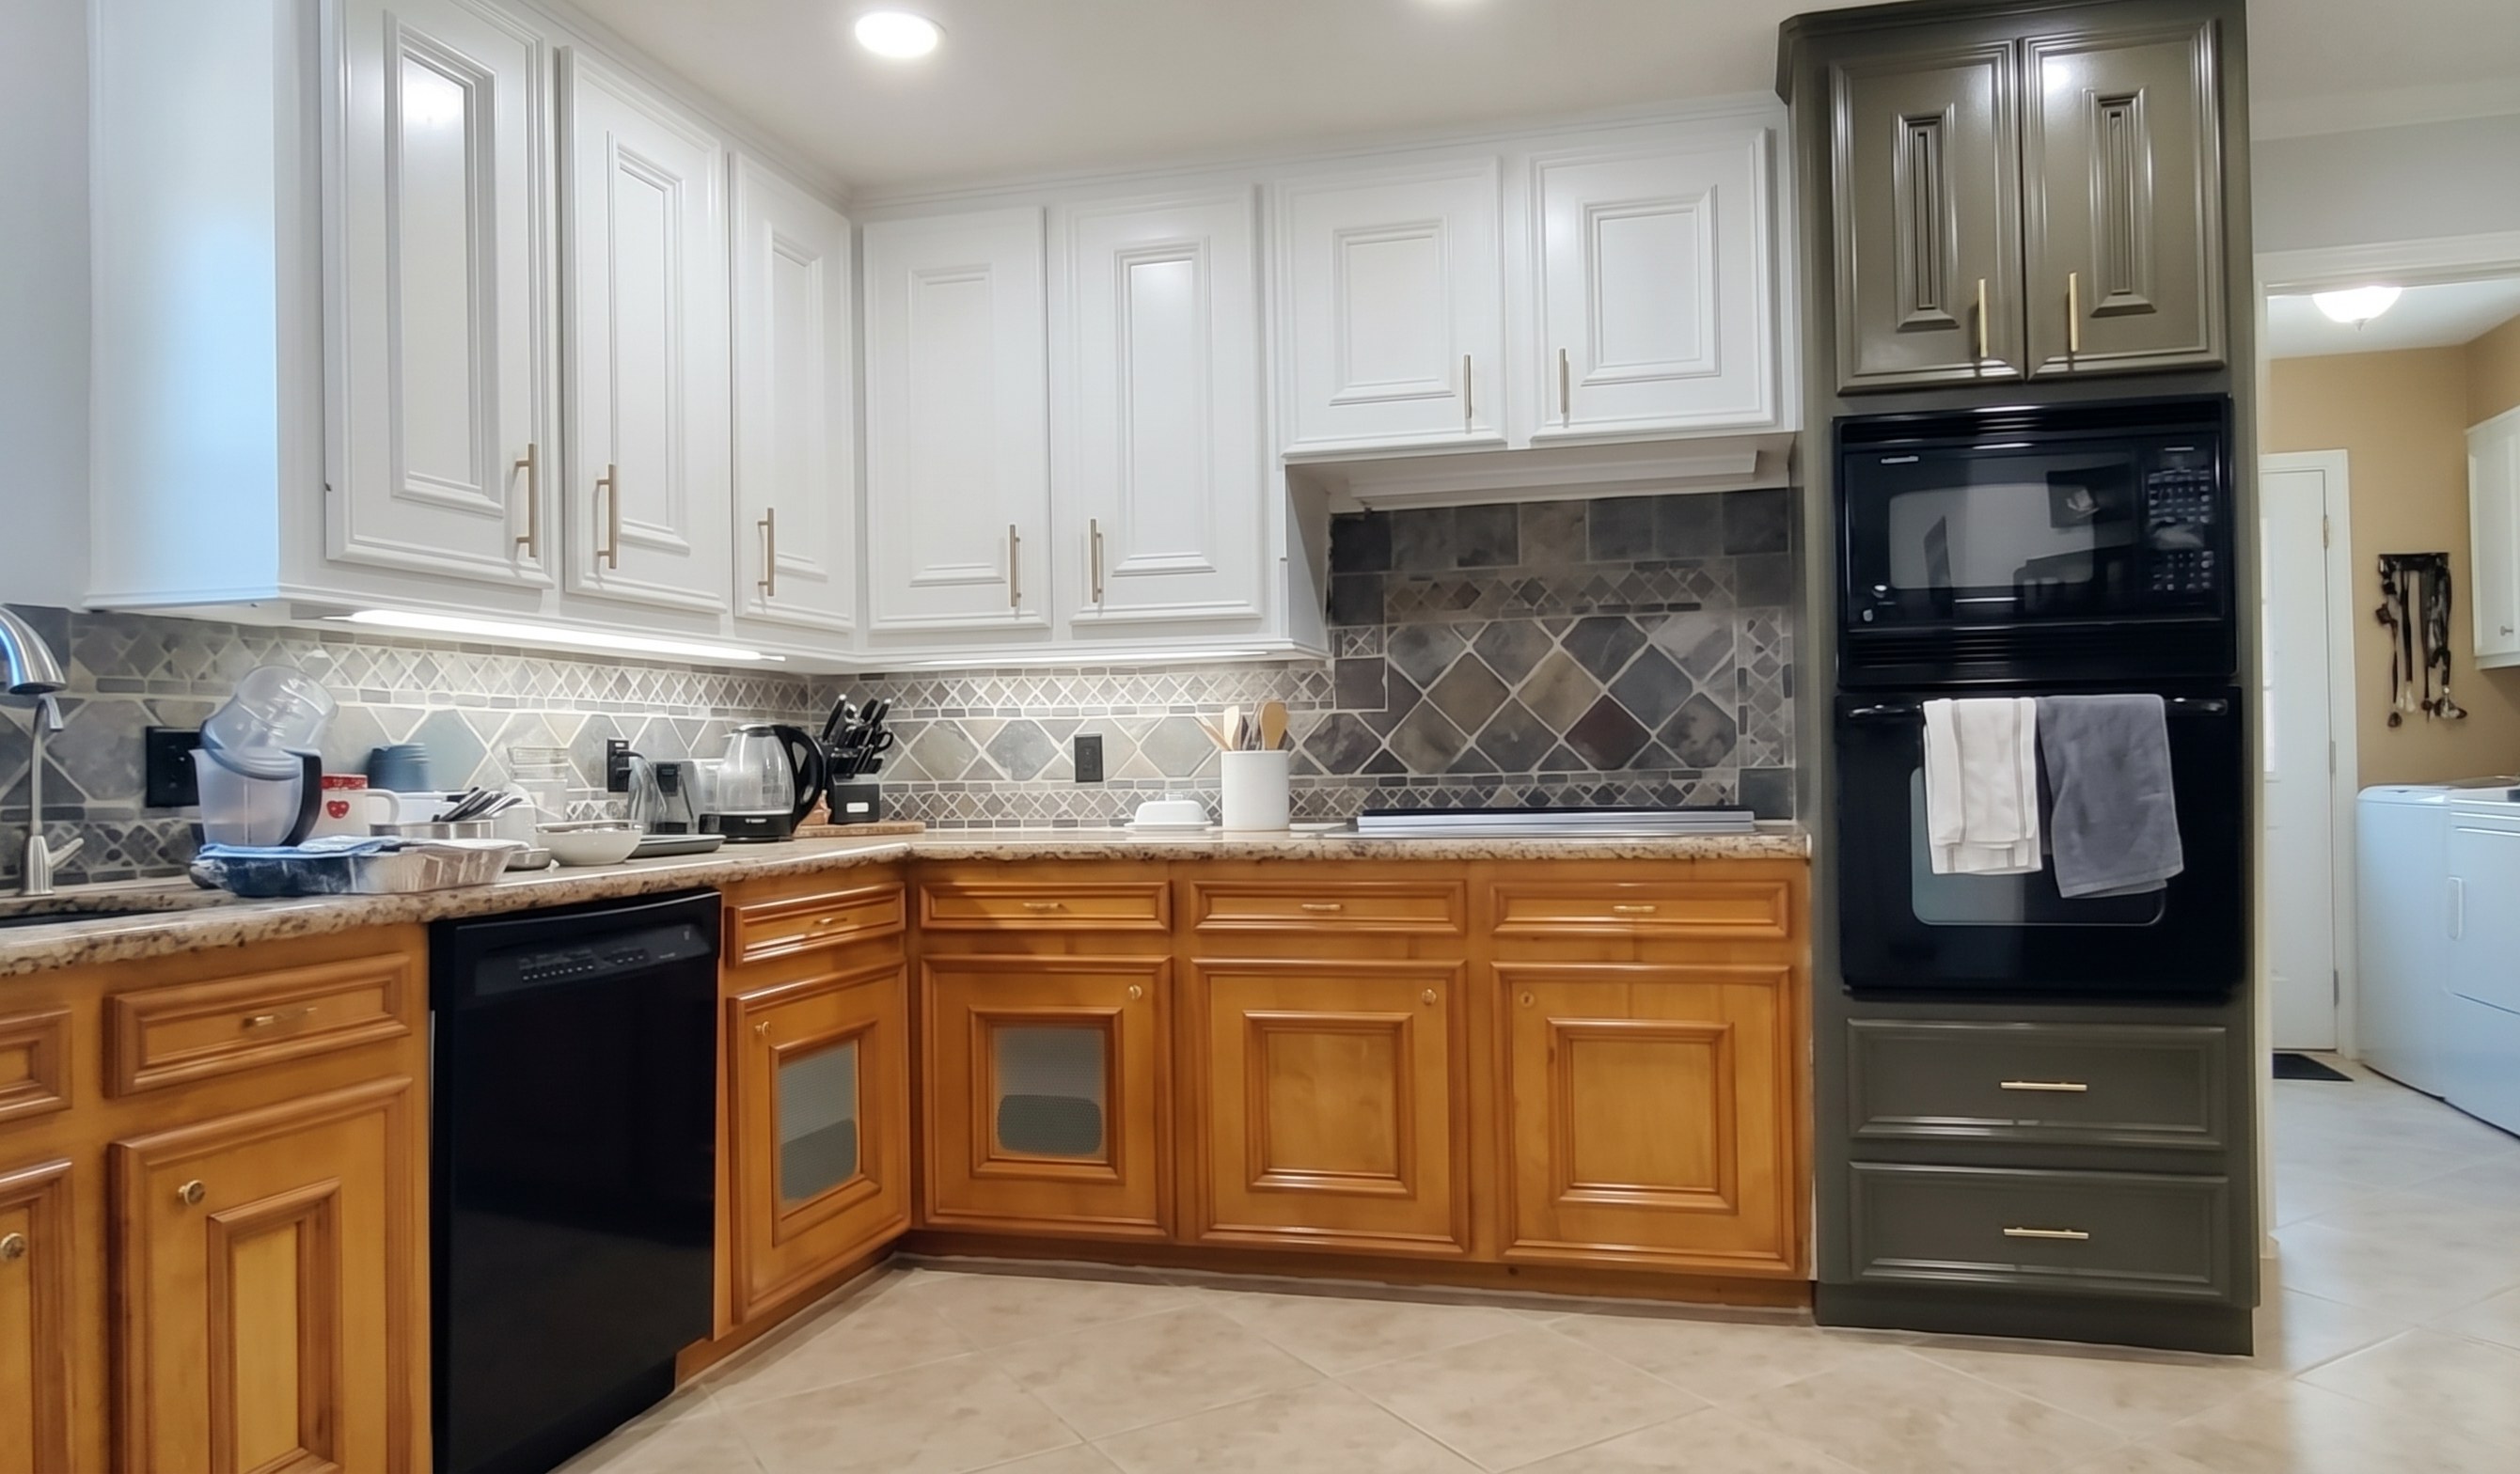
- Restore 30-year-old solid wood kitchen cabinets with chipping high-gloss varnish.
- Check doors first: strip solid wood, or heavy-sand veneer and existing paint.
- Keep sturdy cabinet boxes and original soft-close hinges instead of buying new.
The Target Look
- Smooth, modern Pure White semi-gloss finish with gold bar pulls.
- Water-based urethane trim enamel prevents yellowing and withstands frequent cleaning.
What It Takes
- Plan for several weeks; quadruple your time estimate.
- Work in phases: finish upper cabinets before starting lowers.
- Expect chemical stripping mess, multi-coat drying waits and HVLP spray gun setup.
What Decides Success
- Strip and sand until no peeling varnish or residue remains.
- Shellac primer on bare wood blocks yellow tannin bleed under white paint.
Health and safety
Chemical Strippers and Solvents
- Wear chemical-resistant gloves, safety glasses, and protective clothing when applying gel paint strippers and after-wash cleaning solvents.
- Work outdoors or in a well-ventilated space when using strippers, after-wash solvents, and shellac-based primer to avoid strong fumes.
- Keep flammable after-wash solvents, shellac-based primer, and stripper residue away from heat sources, sparks, and open flames.
- Place scraped varnish sludge and solvent-soaked rags in a sealed metal container to prevent fire hazards and chemical exposure.
Sanding and Spray Painting
- Wear a respirator mask inside the spray tent when spraying water-based urethane enamel to keep atomized paint out of your lungs.
- Wear a dust mask and safety glasses when sanding bare wood, shellac-based primer, and enamel coats with 180 to 400 grit sandpaper.
- Avoid inhaling aerosol mist and work in fresh air when applying silicone spray lubricant to the cleaned cabinet hinges.
Compressor and Electrical Tools
- Keep the air compressor and cordless drill away from flammable cleaning solvents and shellac primer vapors to prevent spark ignition.
- Depressurize the air compressor hose before disconnecting the HVLP gravity feed spray gun for cleaning or refilling.
- Never point the pressurized HVLP spray gun or air compressor hose at yourself or anyone else.
- Unplug the ultrasonic cleaner before filling or emptying the tank, and keep electrical cords dry while cleaning hardware.
Scraping and Door Handling
- Push metal scrapers and wire brushes away from your hands and body to prevent slips and cuts while stripping varnish.
- Wear protective gloves when scrubbing with the wire brush so stiff bristles and chemical residue do not injure your hands.
- Support cabinet doors securely while removing or reinstalling hinges with the cordless drill so heavy doors do not drop.
The piece & its condition
- Thick 30-year-old high-gloss varnish is chipping and peeling on the wood.
- Scratches, dings and gouges mar the bare wood under the old finish.
- Detailed door trim grooves trap stubborn varnish that flat scrapers cannot reach.
- Without shellac primer, raw wood bleeds yellow tannins into white paint.
- Original 1990s soft-close hinges are stiff with old varnish and dust.
Tools
- Chip Brush
- Scrapers (Plastic and Metal)
- Wire Brush
- Paint Brush and Roller
- HVLP Gravity Feed Spray Gun (Paint Sprayer, Central Pneumatic, 20oz)
- Air Compressor
- Spray Tent (Wagner) (optional)
- Ultrasonic Cleaner (Jewelry Cleaner) (optional)
- Drill (Cordless Drill/Driver, DeWalt)
- Painting Pyramids
Materials
- Paint & Varnish Stripping Gel (Stripping Gel, Citristrip)
- Premium Stripper (Gel Stripper, Klean Strip, Fast, Paste, Non-Methylene Chloride Formula, 1 Gallon (3.78L))
- Paint Stripper After Wash (Cleaning Solvent, Klean Strip, Paint Stripper Remover, 1 Quart (946 mL))
- Sandpaper (180 grit)
- Wood Filler
- BIN Shellac-Base Primer (Shellac-Based Primer, Zinsser)
- Sandpaper (220 grit)
- Emerald Urethane Trim Enamel (Water-Based Enamel Paint, Sherwin Williams, Semi-Gloss, Pure White (SW 7005))
- Sandpaper (400 grit)
- Gold Bar Pulls (Cabinet Hardware, gold)
- Silicone Lubricant (Spray Lubricant, Blaster)
Finishes & supplies, in the order they go on
| Product | What it does | Mix & coats | Dry time | Applied with |
|---|---|---|---|---|
| Paint & Varnish Stripping Gel | Initial mild chemical test to soften old varnish. | 1 coats | Chip Brush | |
| Premium Stripper | Dissolve thick 30-year-old high-gloss varnish to bare wood. | 2 coats | Chip Brush | |
| Paint Stripper After Wash | Remove chemical stripper residue and neutralize bare wood. | 1 coats | ||
| Sandpaper | Remove final finish traces, smooth scratches, and add tooth to bare wood. | |||
| Wood Filler | Fill deep gouges, scratches, and dings flush with the wood. | 1 coats | ||
| BIN Shellac-Base Primer | Bond to bare wood; block yellow tannins and odors from bleeding through white paint. | 1 coats | Paint Brush and Roller | |
| Sandpaper (220 grit) | Flatten brush marks and roller texture on dry shellac primer. | |||
| Emerald Urethane Trim Enamel | Give a hard, non-yellowing, wipeable Pure White (SW 7005) semi-gloss cabinet finish. | Thinned slightly with water (exact ratio not stated in guide), 3 coats | 4 to 6 hours between coats; 1 to 2 extra days before reassembly; up to 1 month full cure | HVLP Gravity Feed Spray Gun |
| Sandpaper (400 grit) | Remove dust nibs, drips, and blemishes between dry urethane enamel coats. | |||
| Silicone Lubricant | Lubricate cleaned original hinges so doors glide smoothly. | 1 coats |
Before you start
Workspace
- Set up a ventilated stripping area and a plastic-lined spray tent.
- Set up a dust-free door drying station with painting pyramids.
Take It Apart
- Remove doors and original hinges before prepping surfaces.
- Box original hinges to deep-clean and reuse.
Test First
- Test chemical stripper on one door to check it cuts old varnish.
- Practice HVLP spray gun patterns on scrap cardboard before doors.
Step by step
Step 1: Strip, Sand, and Prep Cabinet Doors
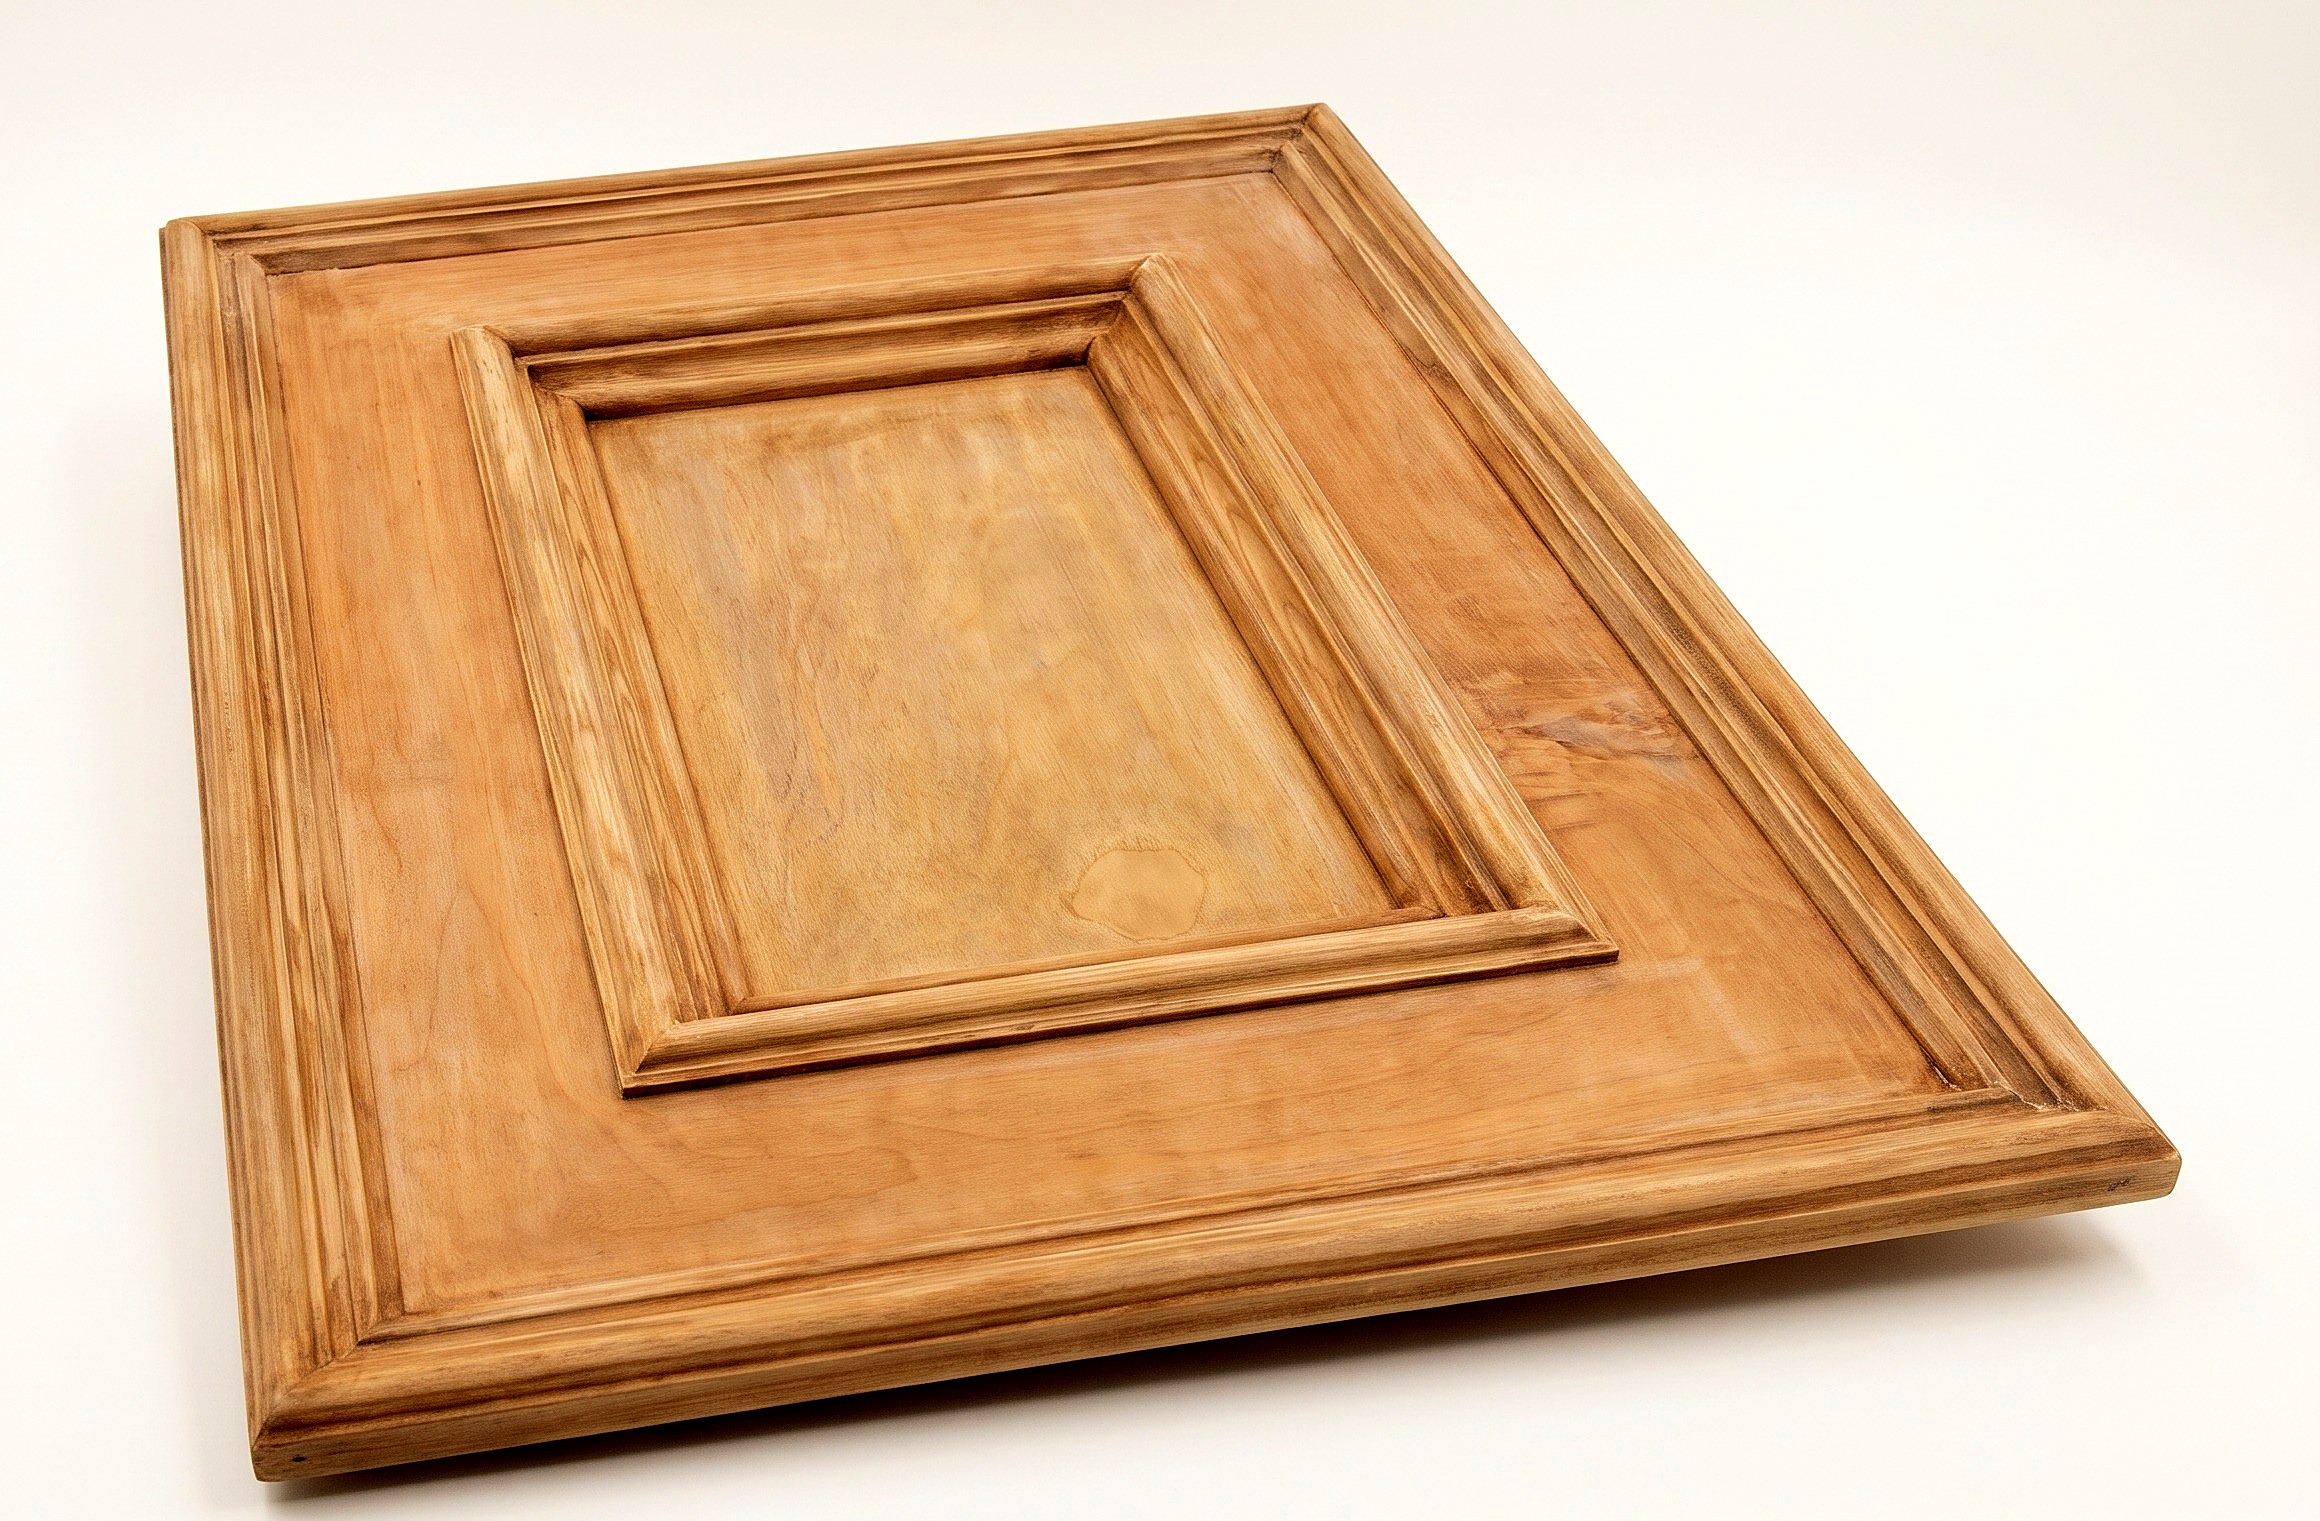
Doors and boxes stripped to clean, smooth bare wood with gouges filled.
You'll need: Chip Brush, Scrapers, Wire Brush, Paint & Varnish Stripping Gel, Premium Stripper, Paint Stripper After Wash, Sandpaper, Wood Filler
- 1.1 Apply Chemical Stripper
- Coat doors thickly with gel stripper using a chip brush.
- Use heavy-duty gel stripper instead of mild if 30-year-old varnish resists.
- Cover wet stripper with plastic cling wrap to prevent early drying.
- Let chemical sit until high-gloss varnish bubbles and softens.
- 1.2 Scrape Off Old Varnish
- Lift softened varnish off flat panels with plastic and metal scrapers.
- Scrub detailed trim profiles with a wire brush to pull varnish from corners.
- Gently clean narrow grooves with a small flathead screwdriver.
- Strip stubborn spots a second round until bare wood shows.
- 1.3 Clean and Neutralize the Wood
- Wipe stripped wood with paint stripper after-wash, removing chemical residue.
- Let neutralized wood dry before sanding.
- 1.4 Sand the Bare Wood
- Sand bare wood with 180-grit sandpaper to remove varnish traces.
- Work evenly across panels and profiles for porous primer tooth.
- On unknown veneer or old paint, skip chemical stripping and heavy-sand.
- 1.5 Fill Imperfections
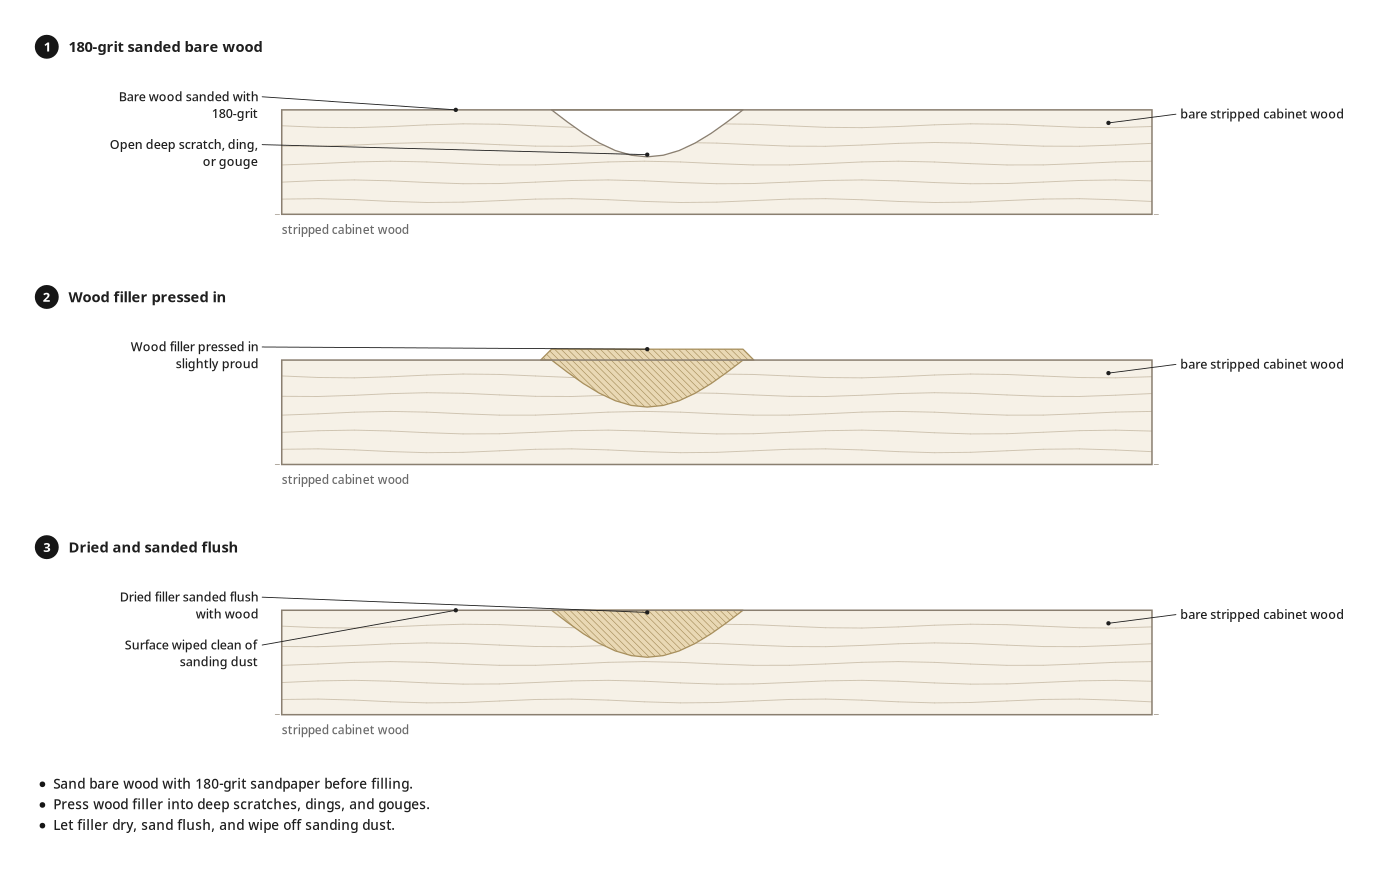
- Press wood filler into deep door scratches, dings, and gouges.
- Let filler dry, then sand flush with the wood.
- Wipe off sanding dust for a clean priming surface.
Key measurements
- Initial bare-wood sanding grit: 180 grit
- Stripper applications for thick varnish: 2 rounds
- Tip: Cover stripper with plastic wrap to keep gel wet and active longer.
- Tip: Clear soft varnish from tight trim grooves with a small flathead screwdriver.
- Heads up: Use strippers in a ventilated area with chemical-resistant gloves and eye protection.
Before you move on: Feel wood and check grooves so no glossy varnish, peeling, or chemical residue remains.
Step 2: Roll/Brush on Primer
Cabinet boxes and doors sealed with stain-blocking shellac primer and sanded smooth.
You'll need: Paint Brush and Roller, Painting Pyramids, BIN Shellac-Base Primer, Sandpaper
- 2.1 Apply Primer Coat
- Lay cabinet doors flat on painting pyramids in the drying area.
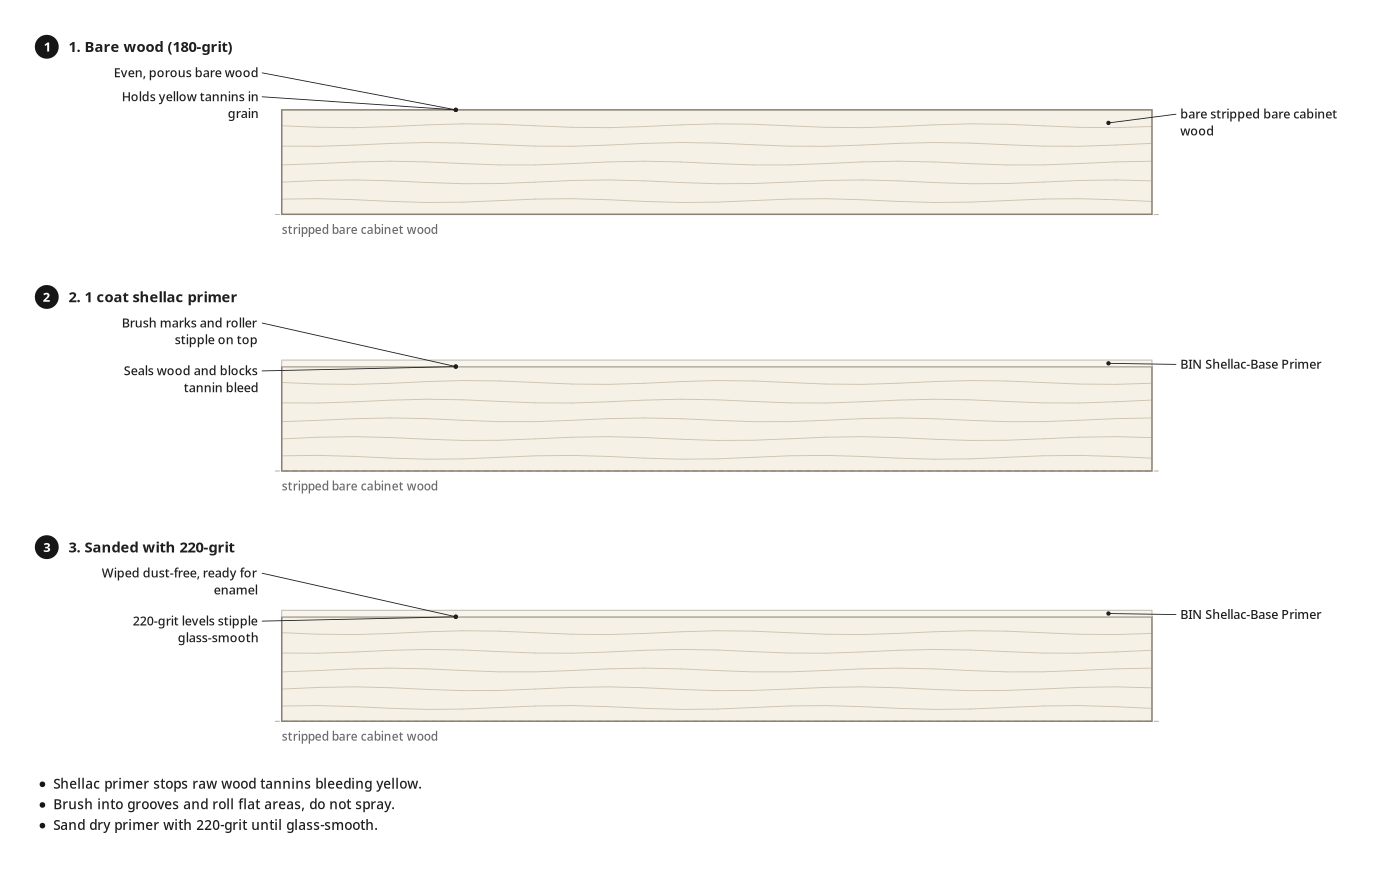
- Brush shellac primer into detailed grooves and roll flat areas.
- Brush and roll instead of spraying; oil-based shellac resists water cleanup.
- Let side one dry, then flip and prime side two.
- 2.2 Sand the Primer
- Lightly sand dried primer with 220-grit sandpaper.
- Knock down brush marks and roller stipple until glass-smooth.
- Wipe sanding dust off doors and cabinet boxes.
Key measurements
- Primer sanding grit: 220 grit
- Primer: 1 coat on door backs, fronts, and cabinet boxes
- Tip: Apply shellac-based primer under white paint to stop raw wood tannins bleeding yellow stains through.
Before you move on: Feel primed doors to check roller texture is flat and no raw wood shows.
Step 3: Spray Paint with HVLP
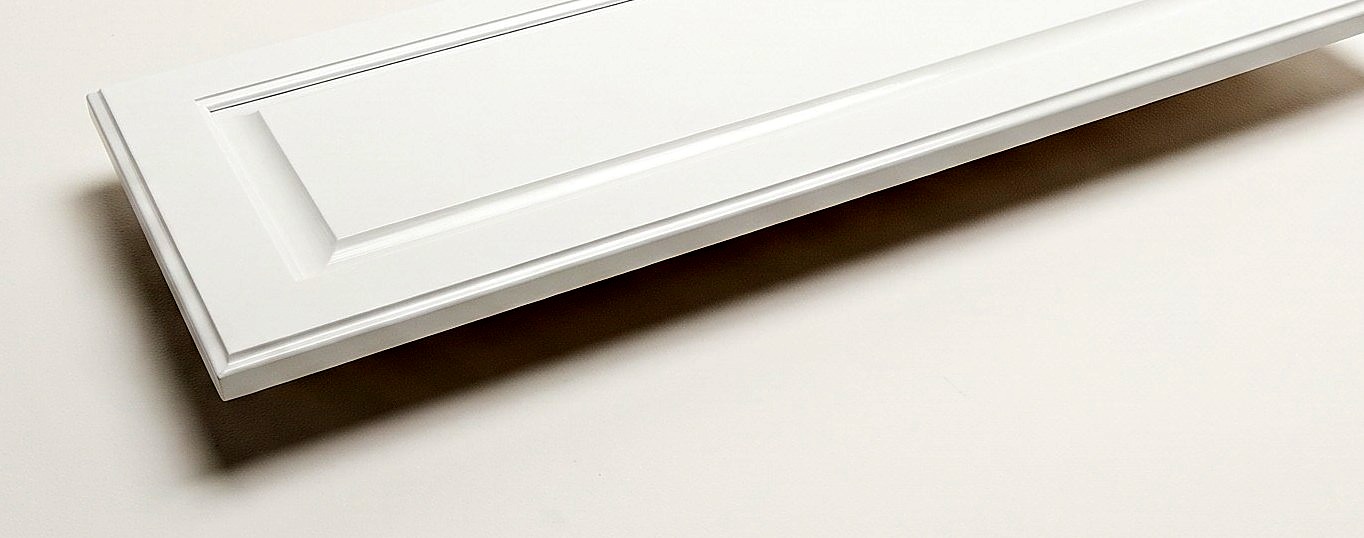
Doors and cabinets coated in smooth, drip-free Pure White urethane trim enamel.
You'll need: HVLP Gravity Feed Spray Gun, Air Compressor, Spray Tent, Painting Pyramids, Emerald Urethane Trim Enamel, Sandpaper
- 3.1 Prepare Paint and Sprayer
- Line the spray tent with plastic sheets to contain overspray.
- Stir the urethane trim enamel and pour through a mesh strainer.
- Thin the paint slightly with water to flow through the HVLP gun; exact ratio is not specified, so follow sprayer manufacturer testing.
- Connect the 20 oz gravity-feed HVLP spray gun and large air compressor.
- 3.2 Spray the Doors
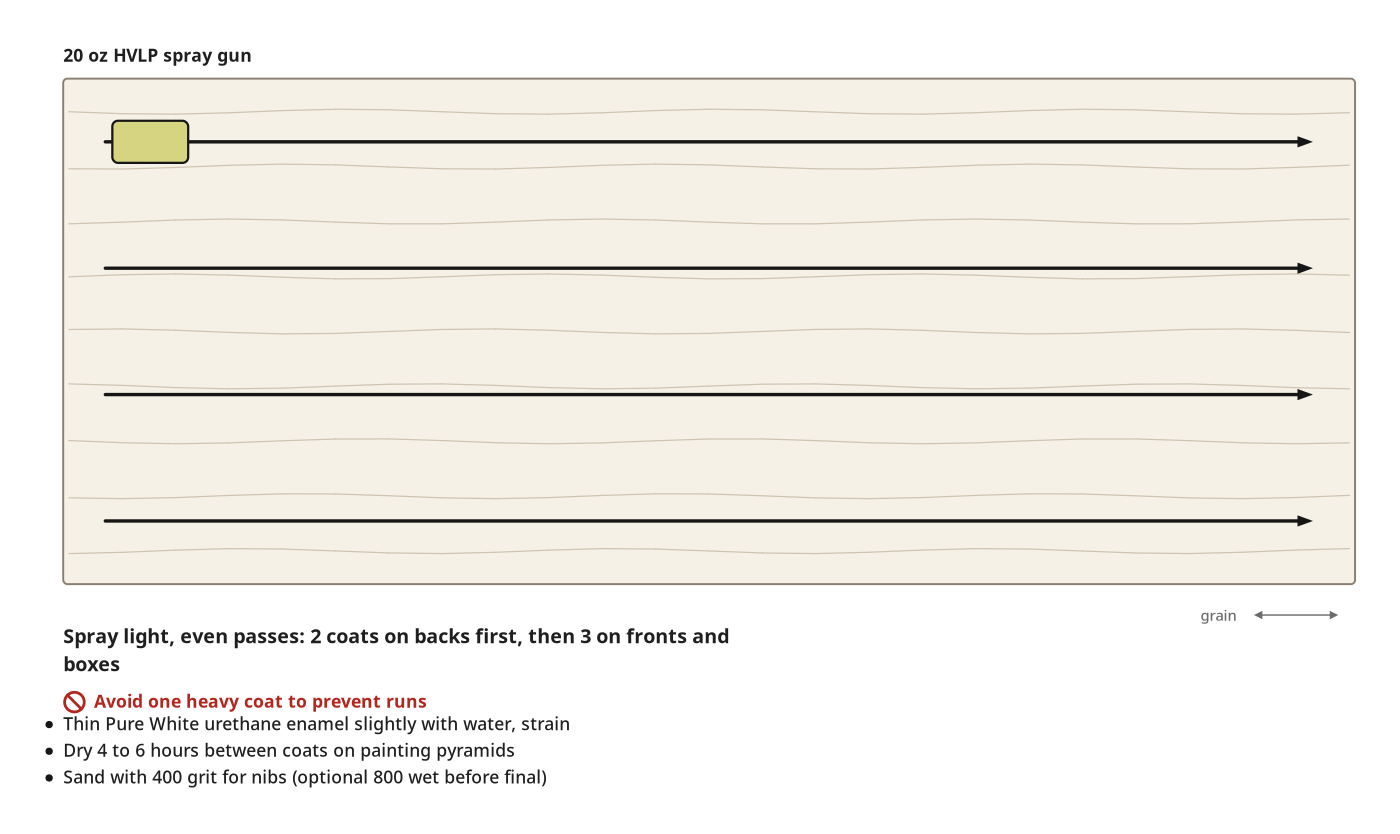
- Spray light, even coats on cabinet door backs first.
- Dry wet doors on painting pyramids in a closed, dust-free area.
- Flip dry doors to spray fronts: two coats on backs, three on fronts and boxes.
- Dry 4 to 6 hours between coats per the label.
- 3.3 Sand Between Coats
- Lightly sand with 400-grit sandpaper between dried coats.
- Level dust nibs, blemishes, or minor drips before the next coat.
- Wet-sand optionally with 800-grit sandpaper before the final coat for extra smoothness.
- Wipe off sanding dust before the next enamel layer.
Key measurements
- Spray gun cup capacity: 20 oz
- Between-coat grit: 400 grit (optional 800-grit wet sand before final coat).
- Paint coats on door backs: 2 coats
- Door fronts and cabinet boxes: 3 coats.
- Dry time between coats: 4 to 6 hours
- Tip: Spray multiple thin coats, not one heavy coat, to prevent runs and sags.
- Tip: Paint one fewer coat on inside door backs to save time and material.
- Heads up: Wear a respirator mask while spray painting to protect lungs from atomized enamel.
Before you move on: Check dry doors in bright light for full white coverage without drips or dust nibs.
Step 4: Reassembly & Hardware
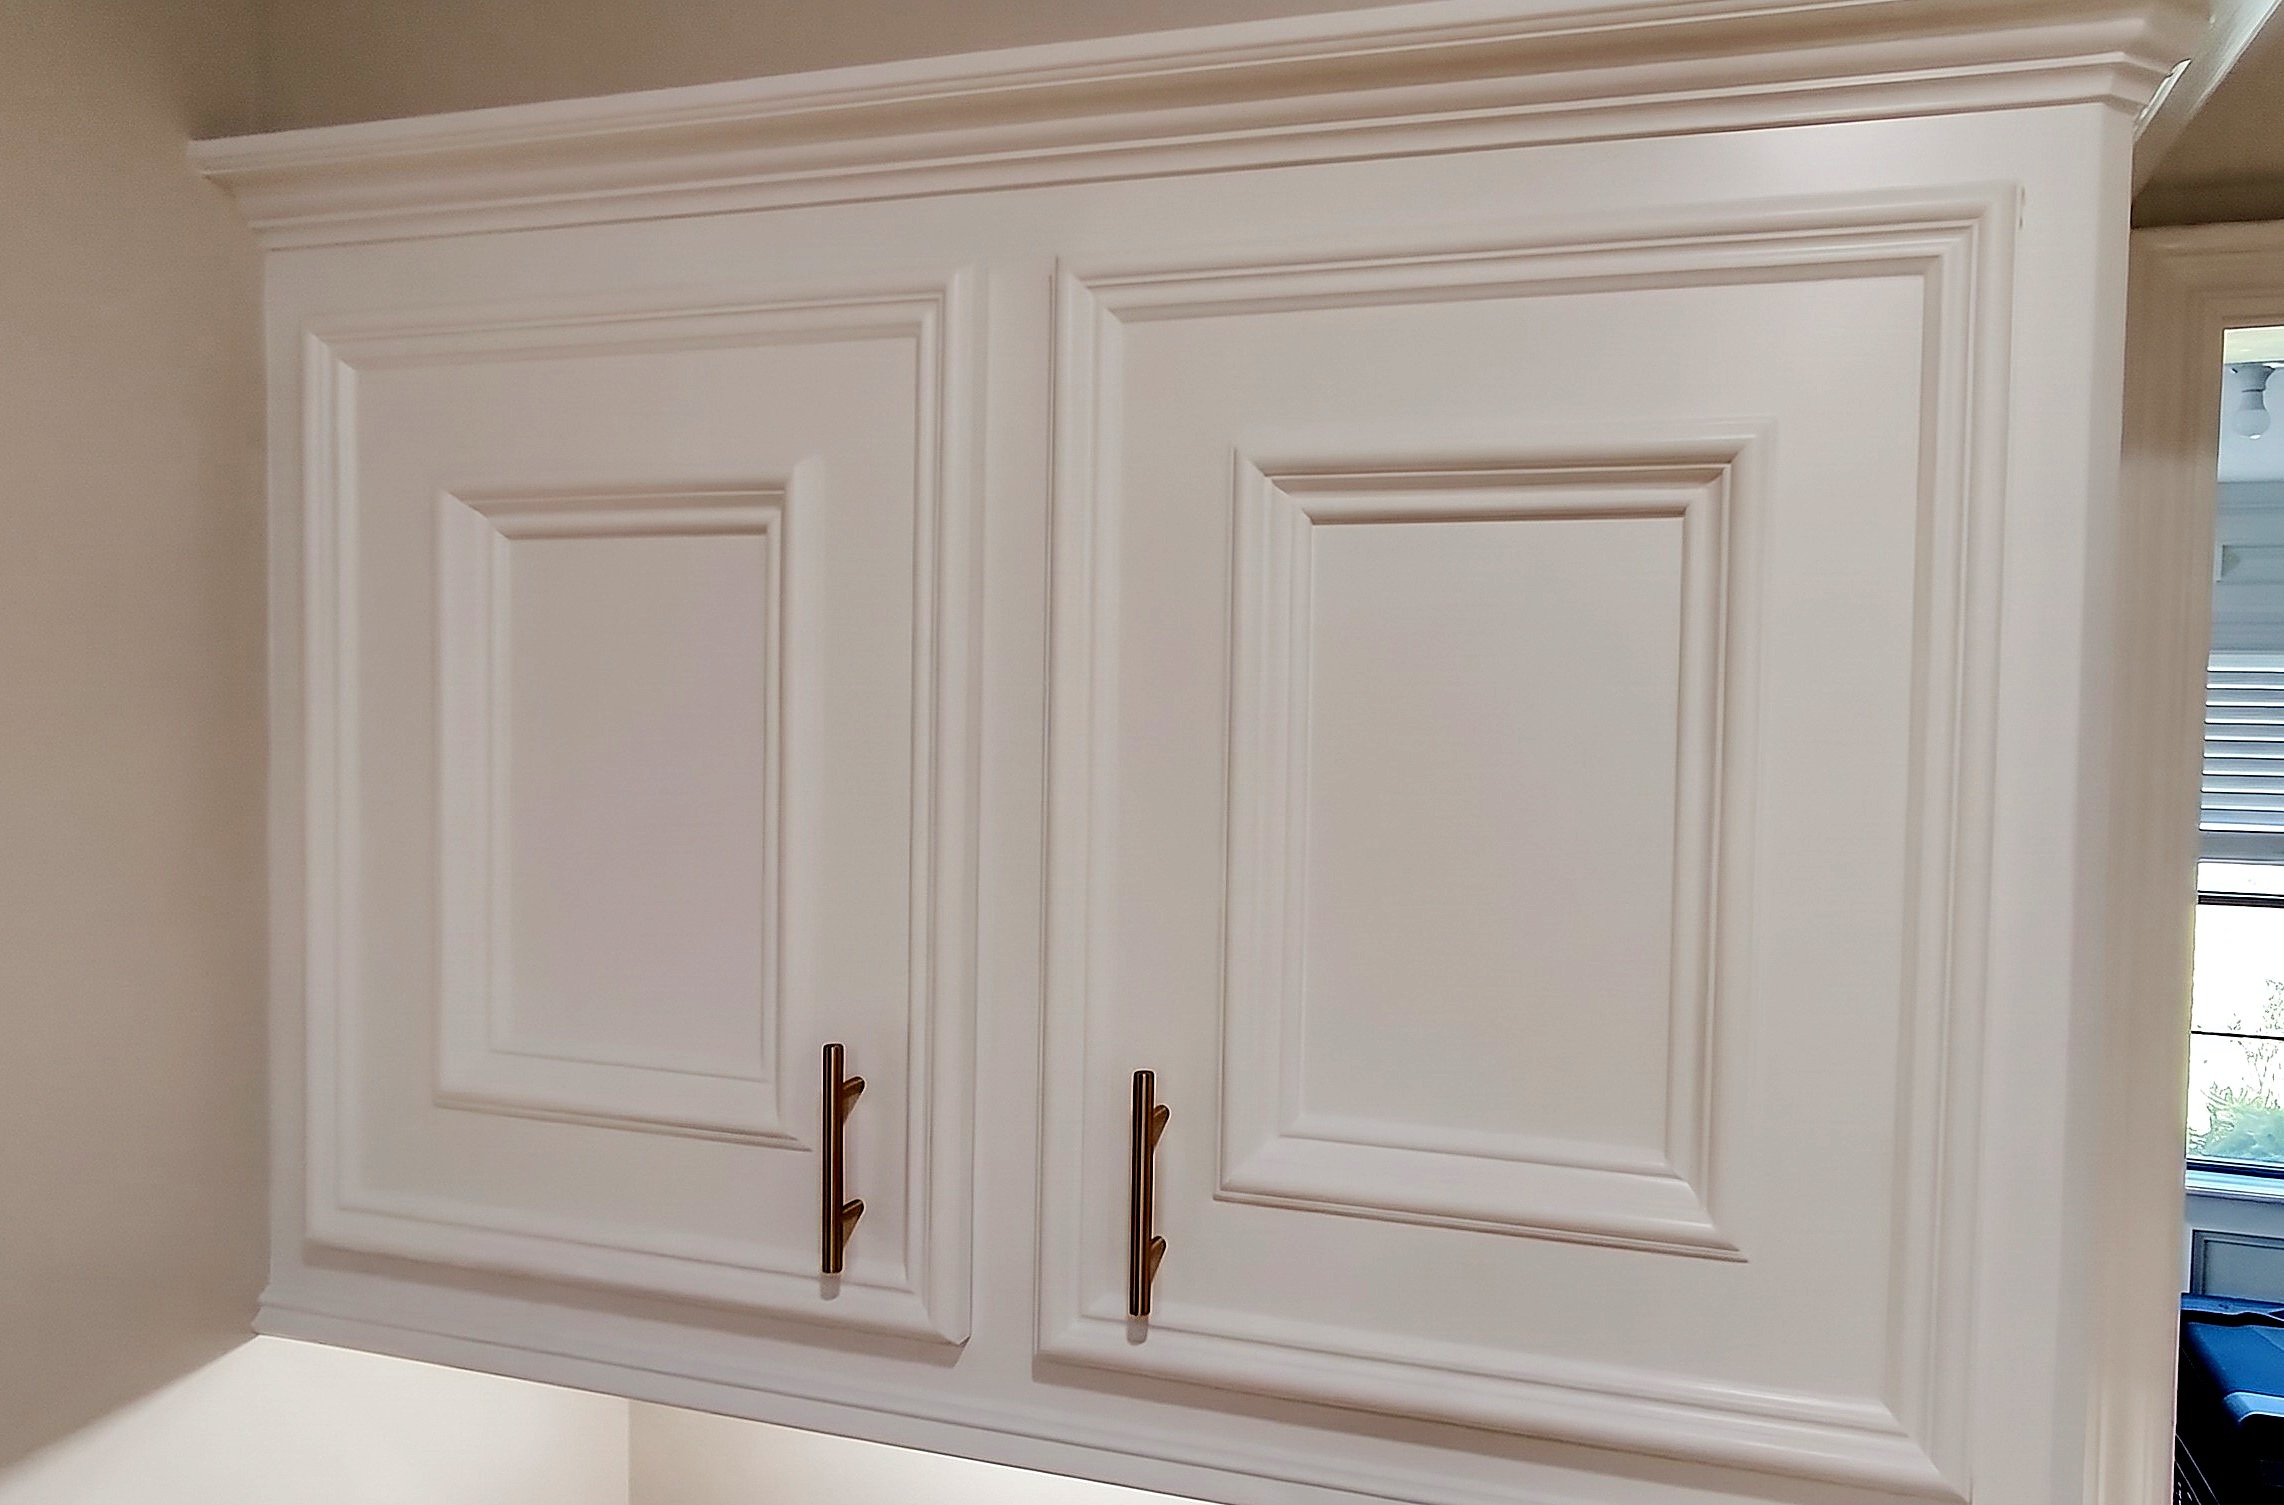
Install restored hinges and new gold bar pulls on cured doors, then hang level on the cabinets.
You'll need: Ultrasonic Cleaner, Drill, Gold Bar Pulls, Silicone Lubricant
- 4.1 Clean and Restore Hinges
- Submerge dusty, varnish-coated original hinges in denatured alcohol in an ultrasonic cleaner.
- Run the cleaner until old varnish lifts to bare factory metal.
- Dry hinges; spray moving joints with silicone lubricant for smooth motion.
- 4.2 Measure and Drill for New Handles
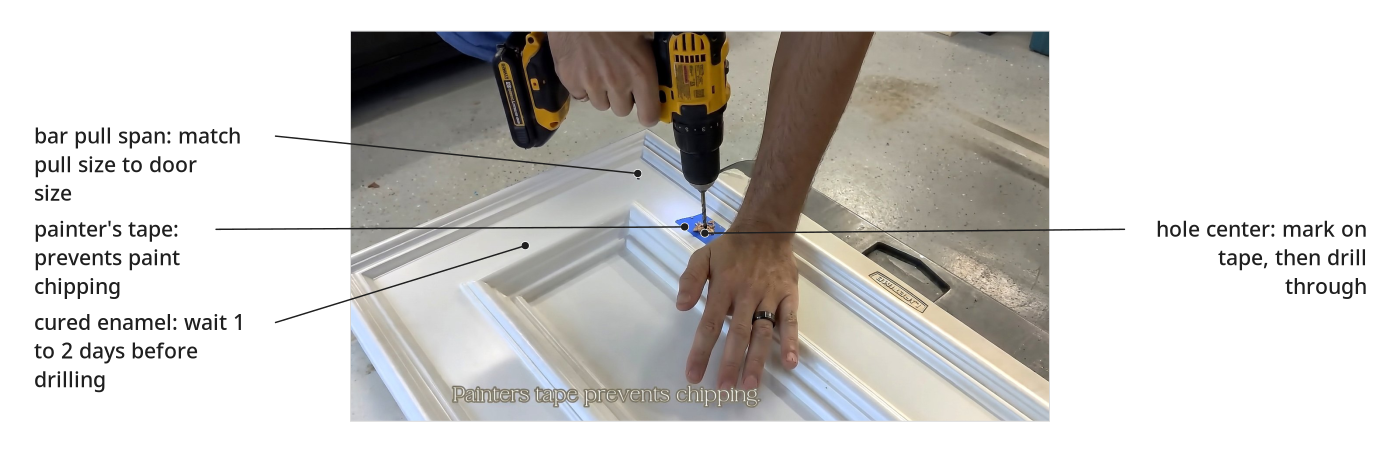
- Pick larger gold bar pulls for big doors, smaller pulls for small doors.
- Put painter's tape over handle spots and mark hole centers.
- Drill handle holes through the tape to keep fresh paint from chipping.
- 4.3 Install Hardware and Rehang Doors
- Wait an extra 1 to 2 days after the final coat before handling doors for reassembly.
- Screw new gold bar pulls and cleaned original hinges to the doors.
- Hang doors on cabinet boxes; adjust hinge screws until level.
Key measurements
- Reassembly wait: 1 to 2 extra days after final coat.
- Full paint cure time: up to 1 month
- Tip: Reuse original soft-close hinges to avoid drilling new hinge cup holes and re-leveling doors from scratch.
- Heads up: Do not rush reassembly; uncured enamel scratches and dings before hardening.
Before you move on: Open and close each door; check for smooth hinges, straight pulls, and even gaps.
Finishing
Cure
- Let paint dry to the touch 4 to 6 hours between coats.
- Wait 1 to 2 extra days before reinstalling hardware and doors.
- Handle doors gently up to 1 month until urethane enamel cures hard.
Care
- Wipe cured urethane enamel with mild soap and water as needed.
- Water-based urethane enamel resists yellowing over time, unlike oil-based topcoats.
Reassembly
- Reinstall cleaned factory hinges in existing holes to keep alignment.
- Match bar pull lengths to door sizes for balanced proportions.
Alternatives
- Heavy-sand instead of chemically stripping over sound paint or veneer.
- Pair Pure White uppers with Muddled Basil (SW 7745) accent stacks.
Test it before you call it done
| Check | What you should see | If not |
|---|---|---|
| Check stripped, 180-grit sanded doors on flat panels and in trim grooves. | Even, bare, porous, smooth wood without glossy varnish spots or crevice gunk. | Reapply gel stripper, scrape grooves with a small flathead screwdriver, wash with after-wash, and resand. |
| Run fingertips over the dry, 220-grit sanded shellac primer. | Smooth, opaque white surface without roller stipple or yellow tannin bleed-through. | Spot-prime yellow stains with shellac primer and sand smooth with 220-grit paper. |
| Check each dry HVLP enamel coat under angled light. | Even, glass-smooth white coverage with no runs, sags, or embedded dust. | Sand blemishes flat with 400-grit sandpaper, wipe clean, and spray the next coat lighter. |
| Test door swing and inspect around newly drilled bar pull holes. | Doors swing quietly on lubricated hinges; handle bases cover clean, chip-free holes. | Add silicone lubricant to stiff hinges; touch up chipped drill edges with a small brush. |
These Specs are built from Kathartic Studios's video “Refinishing and Painting Kitchen Cabinets”. Open the Refinishing and Painting Kitchen Cabinets project page.
