Spetz Specs No. 6031: step-by-step restoration guide
Rustic Farmhouse Dining Table Refinish
The complete step-by-step guide made from Kathartic Studios's YouTube video, free on Spetz. For the video, a step-by-step player and answers to your questions, see the Rustic Farmhouse Dining Table Refinish project page.
5 steps, 7 tools, 6 materials
Overview
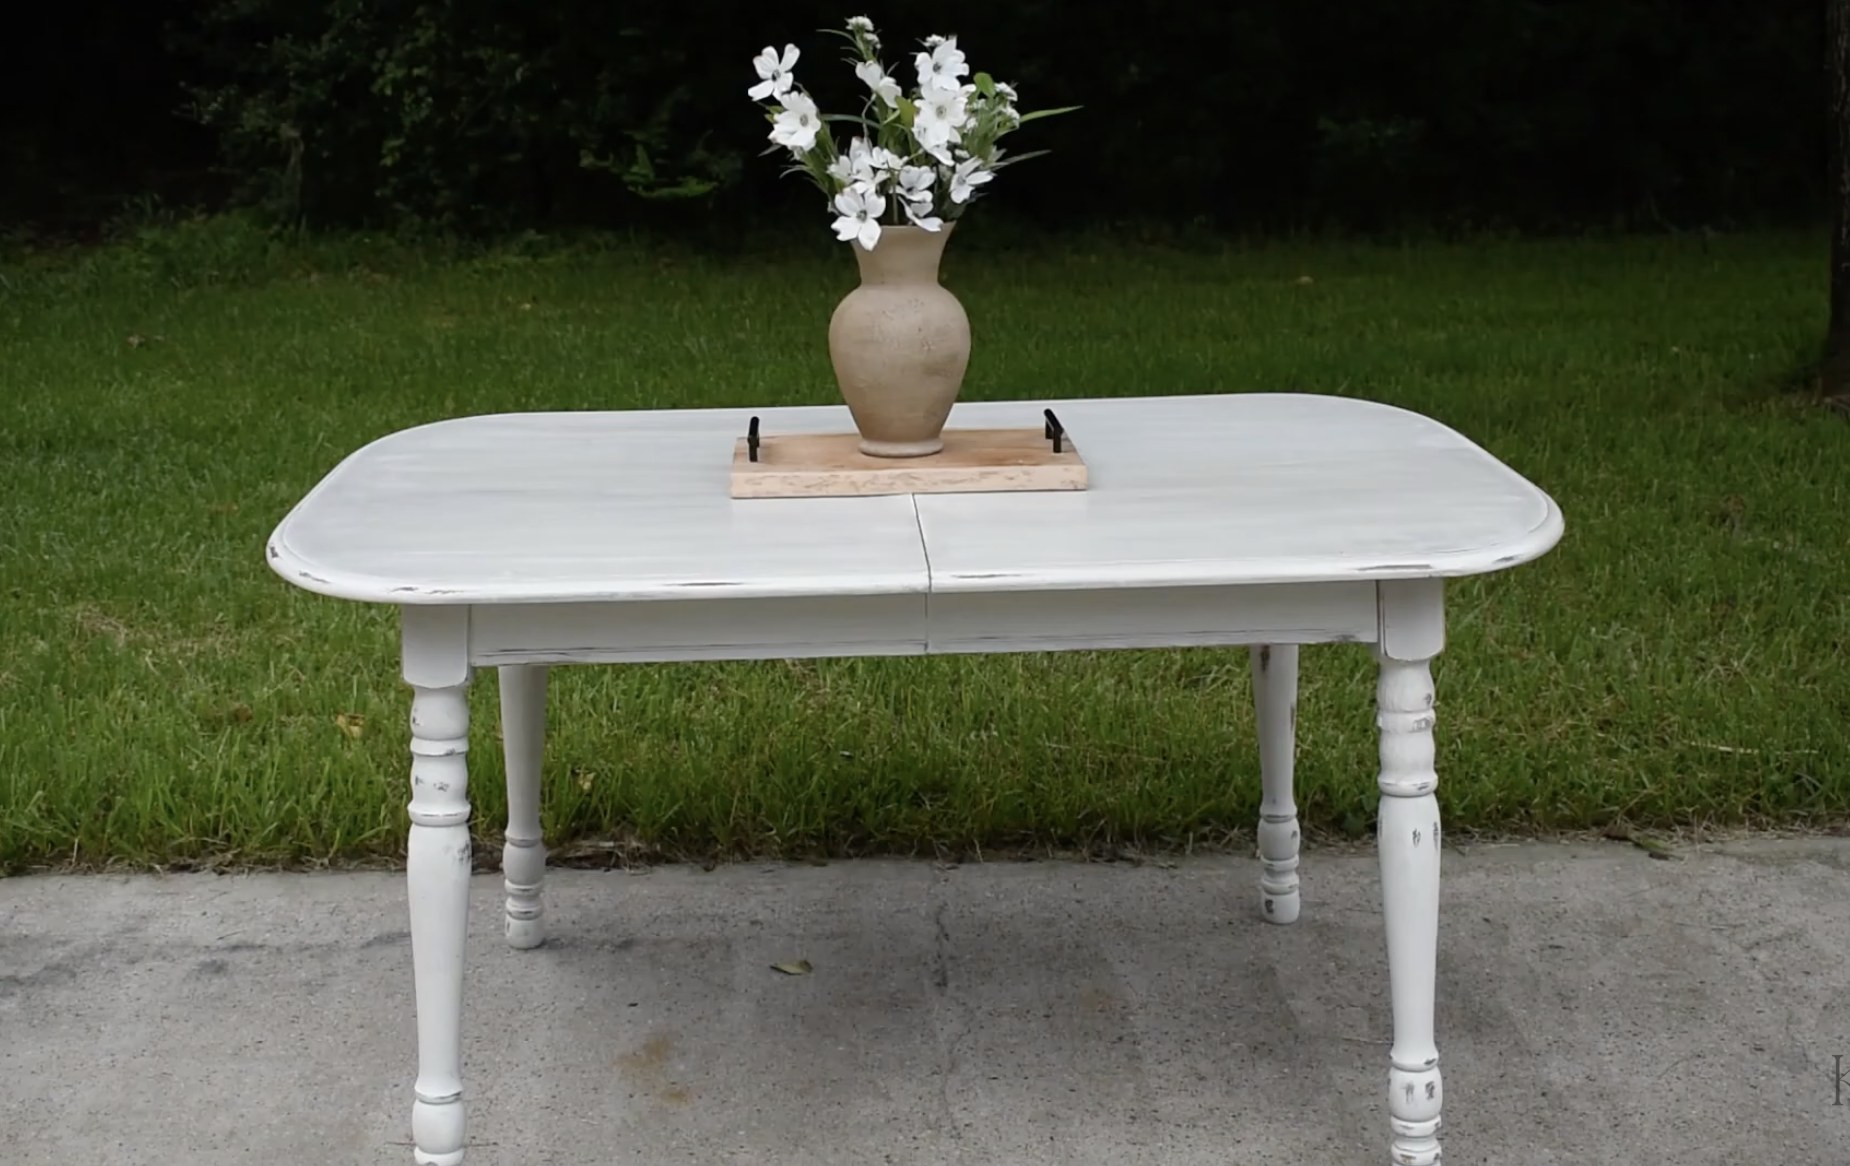
The Piece
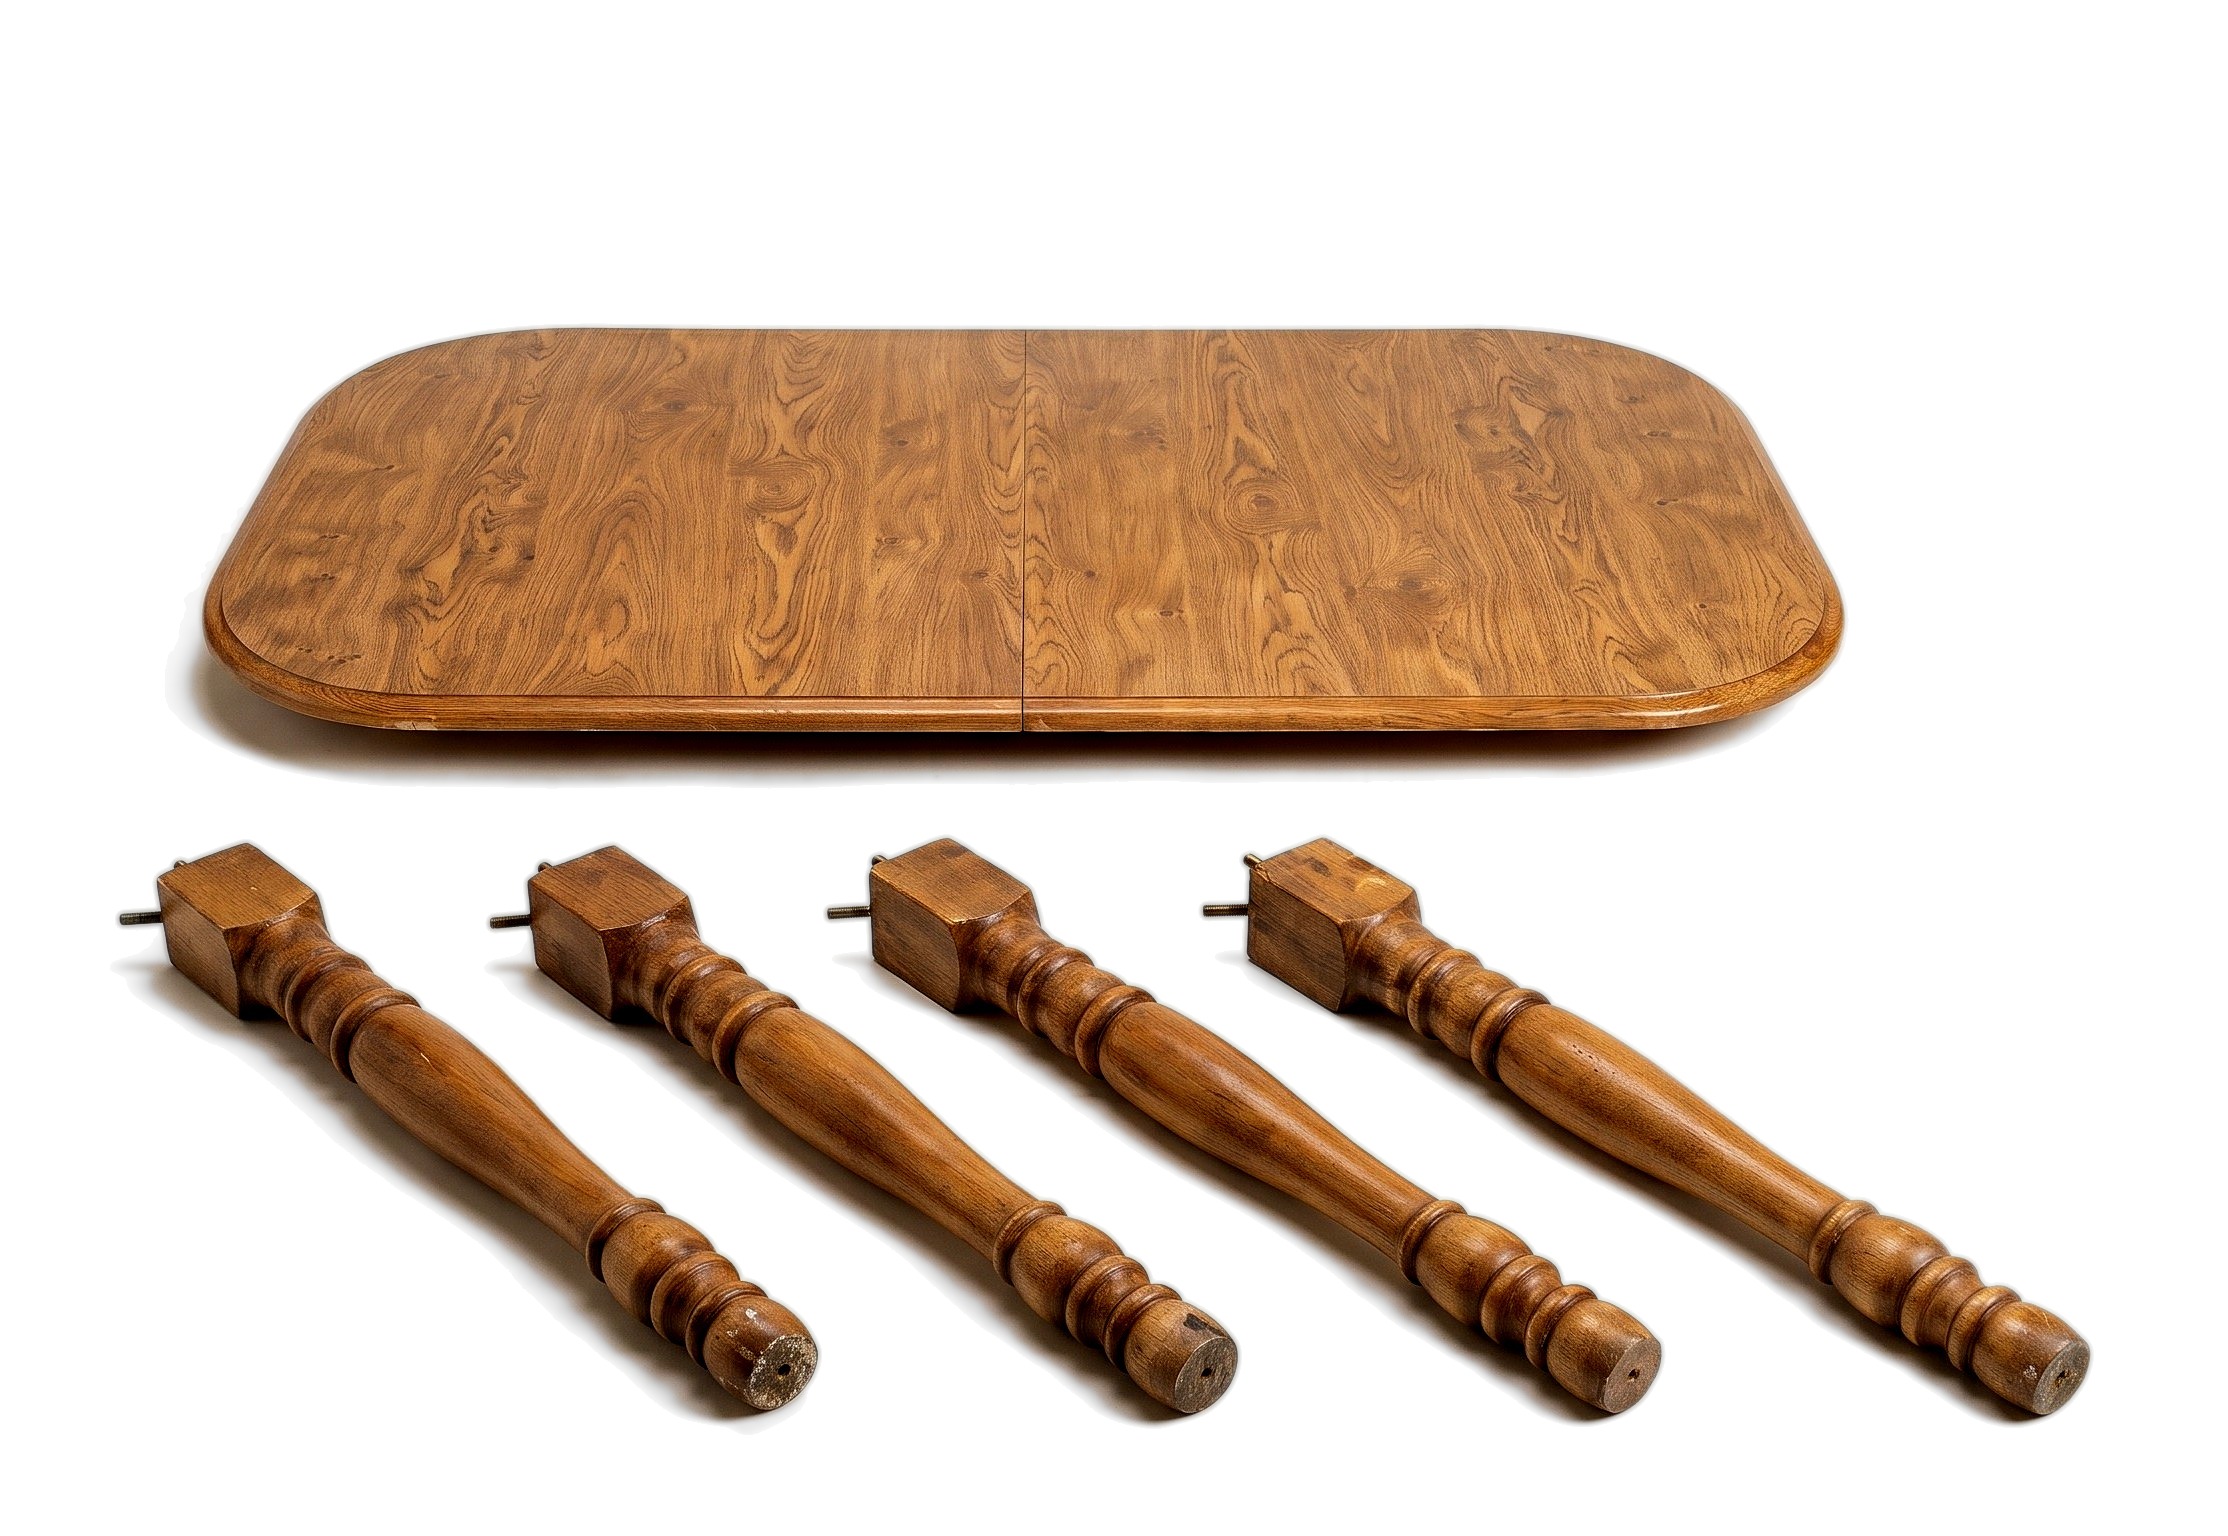
- Check construction: veneer tabletop, solid apron, turned legs.
- Spot veneer at the tabletop edge where thin sheet meets core.
- Paint fresh texture over worn veneer to rescue a scratched, gummy table.
The Target Look
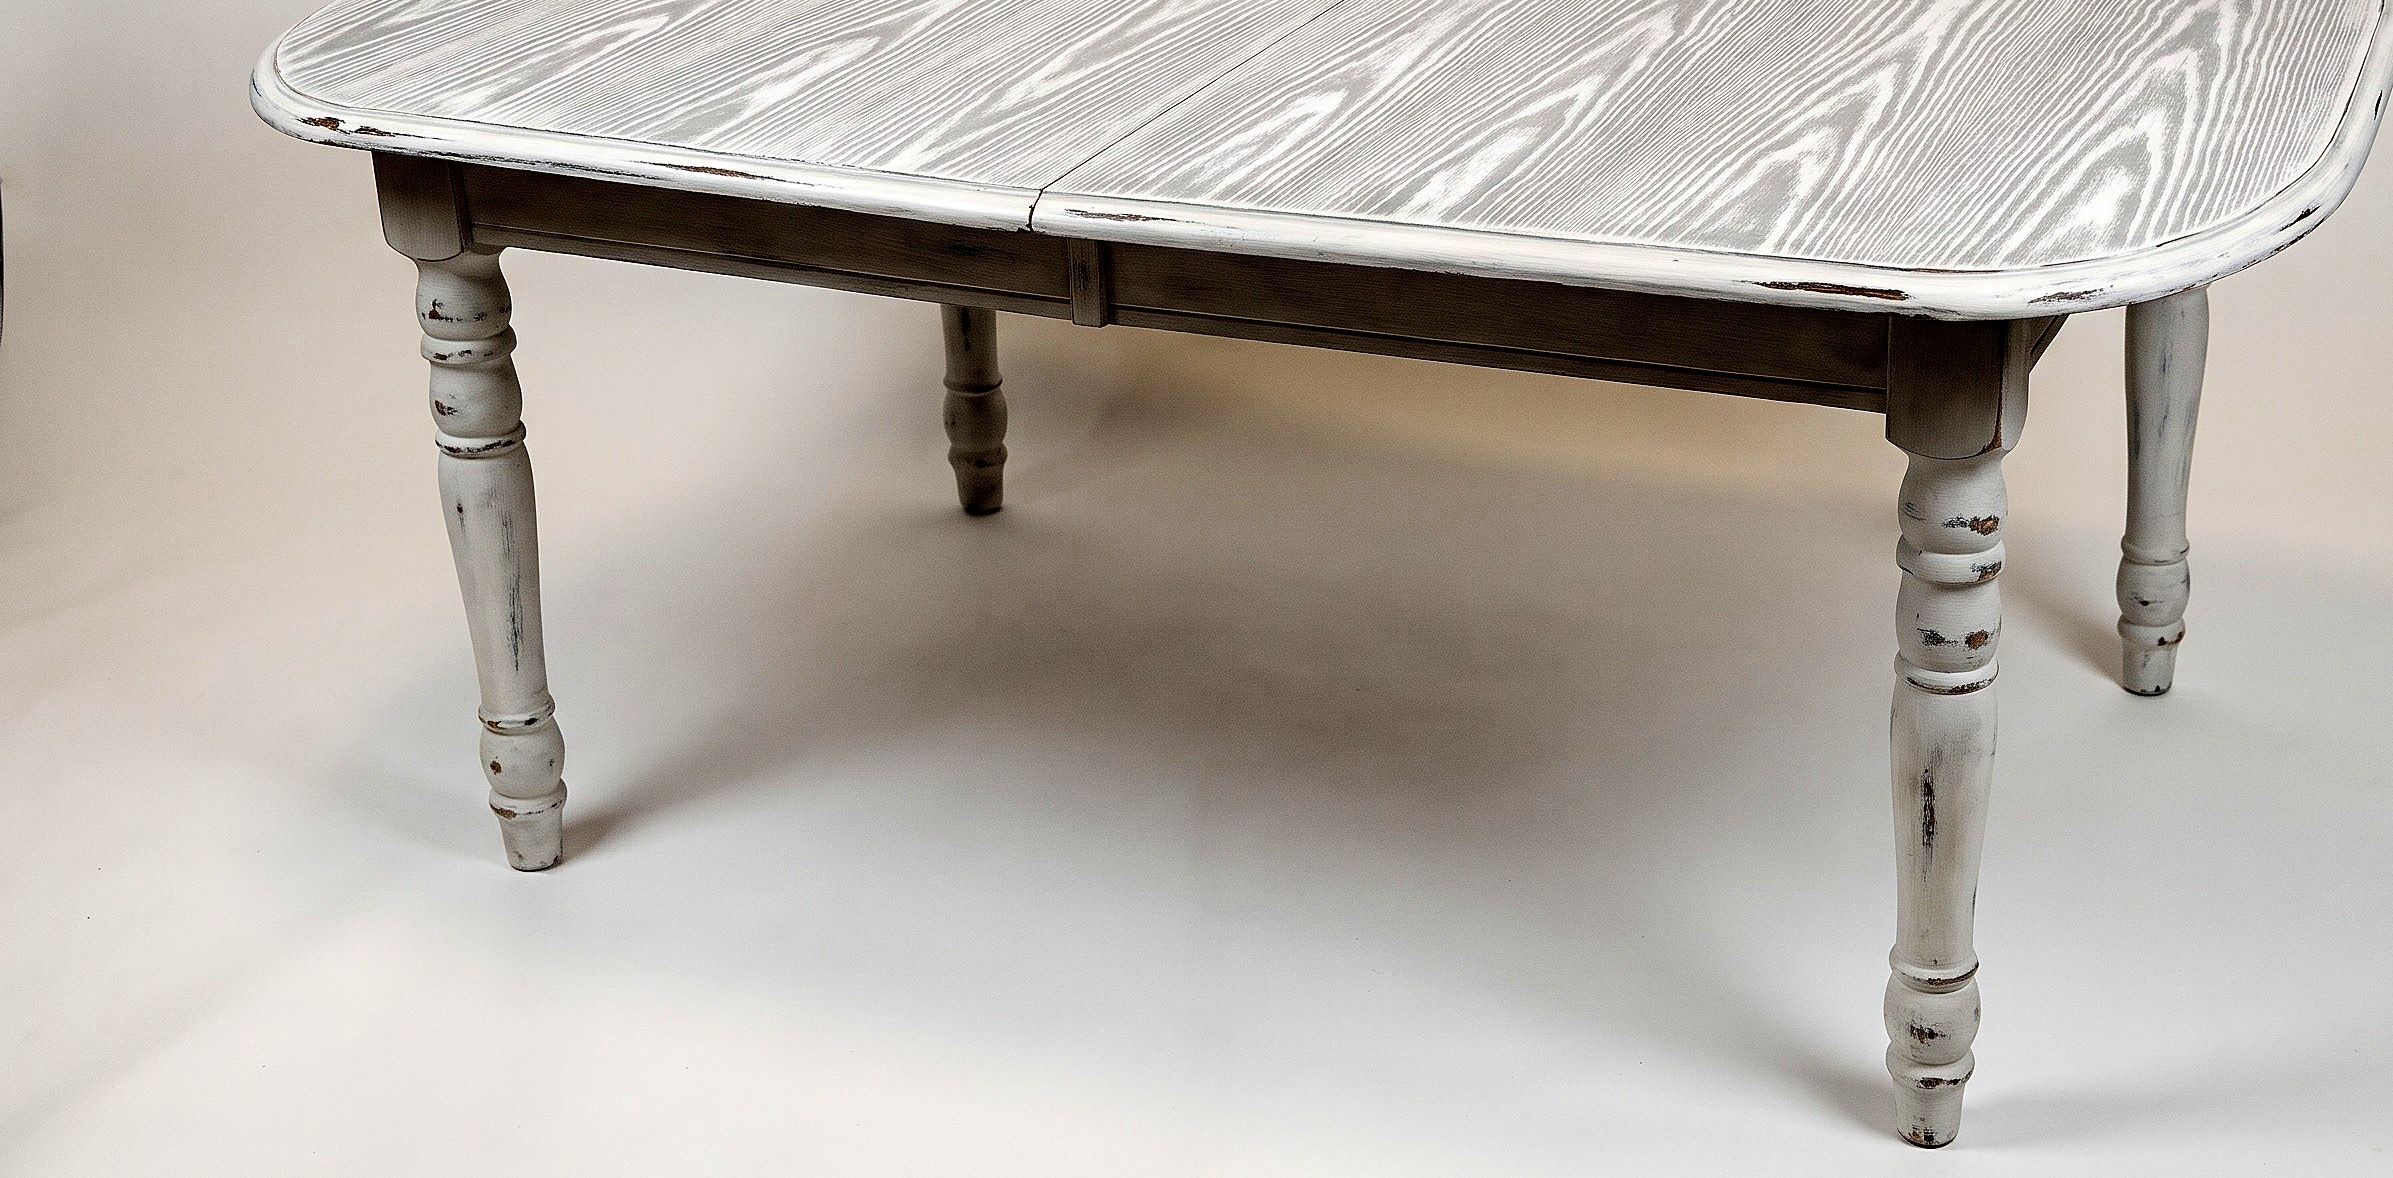
- White chalk paint and gray glaze give a weathered French-villa farmhouse look.
- Pull thick chalk paint lengthwise to fake grain and visually lengthen the top.
- Sand brush ridges and edges to expose bright white paint and raw wood.
What It Takes
- Gather hand paintbrushes, coarse steel brush, sanding sponge, and clean rags.
- Allow two days for prep, painting, glazing, and overnight drying.
- Expect dirty scrub water, fine sanding dust, and oil-stain fumes needing fresh air.
What Decides Success
- Rinse cleaner residue with hot water so chalk paint bonds.
- Work gray stain glaze in small sections, wiping before it dries blotchy.
Health and safety
Chemical and Skin Protection
- Wear chemical-resistant gloves when scrubbing with hot TSP alternative degreaser, painting, oil glazing, and sealing to prevent skin irritation.
- Wear safety glasses when scrubbing the table with the hot TSP alternative solution to protect your eyes from chemical splashes.
- Never mix the TSP alternative degreaser with other cleaners, and rinse skin immediately with water after any accidental contact.
Flammables and Oily Rags
- Lay rags and paper towels soaked with oil-based stain flat outdoors to dry completely, as bunched rags can self-ignite.
- Alternatively, submerge used oil-stained rags and disposable chip brushes in a sealed metal container filled with water before disposal.
- Keep the oil-based penetrating stain and clear finishing wax away from open flames, sparks, and heat sources while working.
Fumes and Dust Control
- Maintain strong cross-ventilation while applying the oil-based gray stain, clear finishing wax, and water-based polyurethane topcoat.
- Wear an organic vapor respirator if airflow is restricted while brushing and wiping the oil-based penetrating stain.
- Wear a dust mask when distressing the dried chalk paint with the sanding sponge to avoid inhaling fine paint dust.
Brush Hazards and Curing
- Keep your free hand out of the path of the coarse steel brush to prevent painful wire bristle punctures.
- Keep safety glasses on while scrubbing with the coarse steel brush in case stiff wire bristles snap or flick debris.
- Let the water-based polyurethane tabletop coat cure completely before setting food or dishes on the finished dining surface.
The piece & its condition
- Cheap, saggy veneer tabletop; crosswise grain makes the table look short.
- Heavy dirt and household grime on the tabletop, apron, and legs.
- Cat claw scratches gouged into two of four turned wood legs.
- Tacky, gum-like old wood putty from a failed leg repair.
Tools
- Gloves (Safety)
- Coarse Steel Brush (optional)
- Palm Pro Paintbrush (Rectangular Brush, Zibra, Palm Pro, 2-inch) (optional)
- Round Paintbrush (Zibra) (optional)
- Sanding Sponge
- Chip Brush (Disposable brush) (optional)
- Wax Brush (optional)
Materials
- TSP Alternative (Cleaner/Degreaser, Fusion, 250 mL)
- Chalk Paint (Jolie, Gesso White)
- Wood Finish Penetrating Stain (Oil-based stain, Minwax, Classic Gray)
- Triple Thick Polyurethane (Topcoat, Varathane, Water-Based, Satin)
- Finishing Wax (Topcoat, Jolie, Clear)
- Rags or Paper Towels
Finishes & supplies, in the order they go on
| Product | What it does | Mix & coats | Dry time | Applied with |
|---|---|---|---|---|
| TSP Alternative | Degrease and remove dirt from the tabletop, apron, and legs before painting | Mixed with hot water (exact ratio not stated in guide; follow bottle label), 1 coats | Until bone dry after clean hot water rinse | Sponge and clean rinse rag |
| Chalk Paint | Build an opaque Gesso White base coat with raised lengthwise faux-grain brush texture | Ready to use, 2 coats | About 2 hours between coats | 2-inch rectangular Palm Pro Paintbrush on top, Round Paintbrush on legs |
| Wood Finish Penetrating Stain | Glaze over white chalk paint in Classic Gray to settle into brush valleys and age the finish | Ready to use, 1 coats | Wiped back immediately; dried completely before sanding | Brush and clean rags or paper towels |
| Sanding Sponge | Highlight white faux-grain ridges on top and distress edges and legs down to bare wood | By hand (grit not stated; 120 to 150 grit is general practice) | ||
| Triple Thick Polyurethane | Seal the high-use tabletop with a clear, non-yellowing satin water-based protective coat | Ready to use, 1 coats | Overnight before light use | Disposable chip brush |
| Finishing Wax | Seal the table apron and turned legs with a soft clear matte or buffed sheen | Ready to use, 1 coats | Overnight to handle; several days to weeks for full cure | Dense natural-fiber wax brush and clean cloth |
Before you start
Workspace
- Work in a ventilated area with a drop cloth under all parts.
- Keep vehicles and clean items away from sanding dust and splatter.
Take It Apart
- Remove the four turned legs to paint them flat, then reattach them before glazing.
- Clean all wood surfaces before using paint or abrasives.
Test First
- Test stain glaze wipe-back timing on the hidden inner apron face.
Step by step
Step 1: Clean and Prep the Table
Tabletop, apron, and legs are degreased, stripped of tacky filler, rinsed of chemical residue, and dry.
You'll need: Gloves, Coarse Steel Brush, TSP Alternative, Rags or Paper Towels
- 1.1 Clean the Table and Legs
- Mix Fusion TSP Alternative in hot water per label; ratio is unstated.
- Scrub disassembled tabletop, apron, and legs to lift dirt and oil.
- 1.2 Remove Old Wood Filler
- Scrape tacky wood putty from cat-scratched legs with a coarse steel brush.
- Brush along wood contours until all gummy repair residue is gone.
- 1.3 Rinse the Piece
- Wipe tabletop and legs with a clean rag and plain hot water.
- Remove all cleaner film so it cannot block paint adhesion, then let dry completely.
Key measurements
- Cleaner container size: 250 mL bottle of TSP Alternative (dilution ratio not stated in guide; follow label)
- Tip: Always rinse TSP alternative with clean hot water so chemical residue does not peel paint.
- Heads up: Scrub with hot degreaser in gloves to prevent skin irritation.
Before you move on: Feel dry legs and tabletop bare-handed to check no gummy putty or soapy film remains.
Step 2: Apply White Chalk Paint
Tabletop, apron, and legs have two opaque white chalk paint coats, textured lengthwise on top.
You'll need: Gloves, Palm Pro Paintbrush, Round Paintbrush, Chalk Paint
- 2.1 Apply First Coat of Paint
- Load 2-inch rectangular Palm Pro Paintbrush with Jolie Gesso White Chalk Paint.
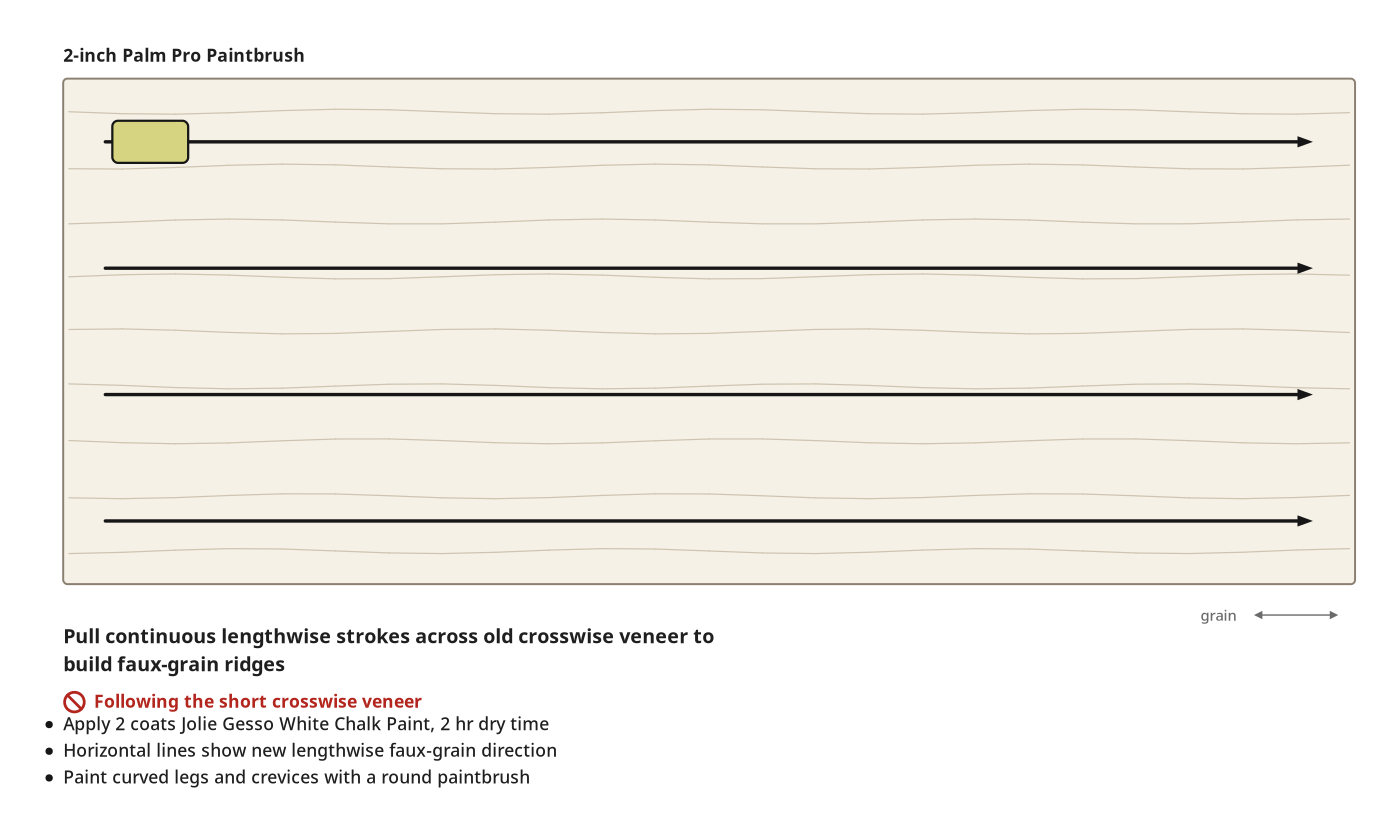
- Pull continuous straight lengthwise tabletop strokes to build raised faux grain.
- Stroke along the longest tabletop dimension, perpendicular to the veneer grain underneath.
- Evenly paint curved legs and crevices with a Zibra Round Paintbrush.
- 2.2 Apply Second Coat of Paint
- Dry the first coat about 2 hours before recoating.
- Brush a second coat lengthwise on the tabletop and on all four legs.
- Dry the second coat for about 2 hours before glazing.
Key measurements
- Flat surface brush width: 2-inch rectangular paintbrush
- Paint coverage: 2 coats Gesso White chalk paint
- Dry time between paint coats: about 2 hours
- Tip: Brush along the longest tabletop dimension to draw the eye lengthwise so the table looks longer.
- Tip: Let the thick chalk paint leave visible brush ridges to catch the glaze next.
Before you move on: Check dry paint in bright light for opaque coverage and distinct lengthwise brush ridges on top.
Step 3: Apply a Gray Glaze
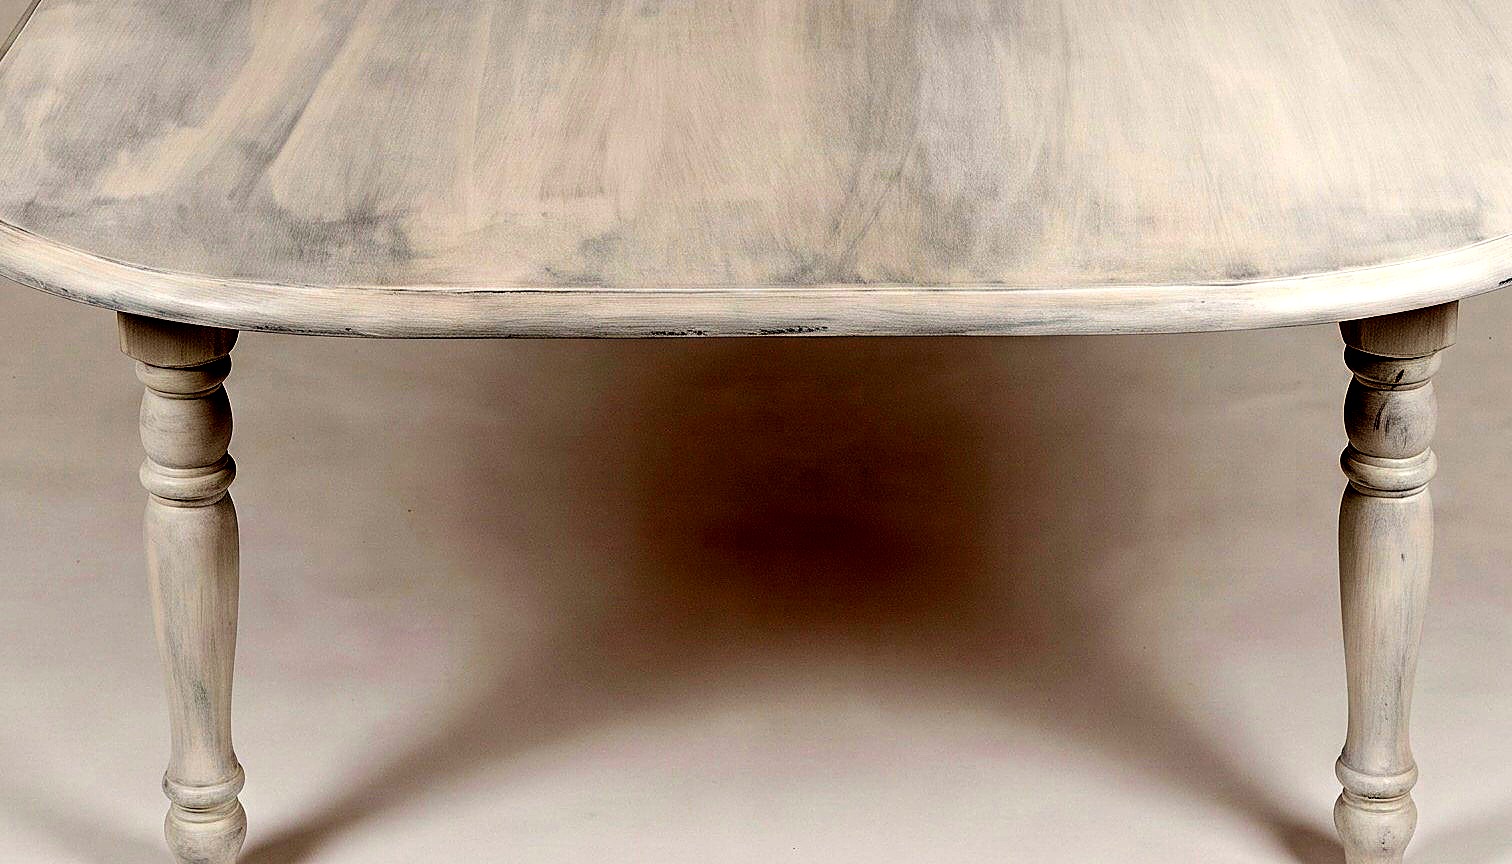
Classic Gray wood stain in the tabletop and leg brush valleys tones down the white paint.
You'll need: Gloves, Wood Finish Penetrating Stain, Rags or Paper Towels
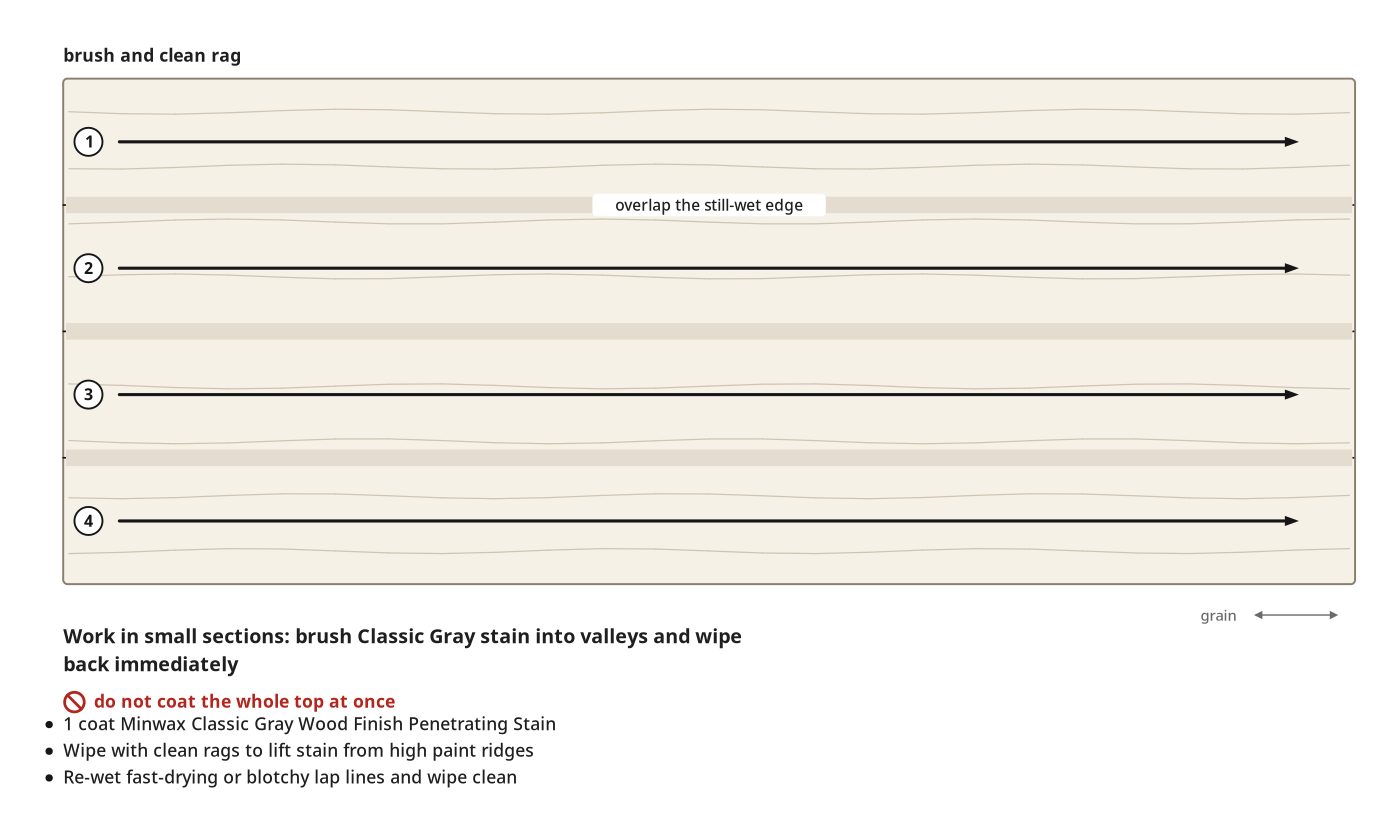
- 3.1 Brush Stain Over Painted Surface
- Work in small sections so oil stain never dries before wiping.
- Brush Minwax Classic Gray Wood Finish Penetrating Stain onto dry white paint.
- Push stain into the top's lengthwise brush ridges and leg crevices.
- 3.2 Wipe Back the Excess Stain
- Immediately wipe wet stain back with clean rags or paper towels.
- Lift stain off high ridges, leaving gray pigment in recessed valleys.
- Re-wet fast-drying or blotchy spots with fresh stain and wipe again.
- Repeat on all legs and let stain dry completely before sanding.
Key measurements
- Glaze coats: 1 coat, brushed and wiped in sections
- Tip: If a spot dries too dark or has a lap line, reactivate with fresh stain and wipe clean.
- Heads up: Do not coat the whole top at once, or stain dries tacky and blotchy before wiping.
- Heads up: Work in good ventilation and dry oil-soaked rags flat outdoors.
Before you move on: Touch glazed crevices to check oil stain is dry and does not transfer to a clean rag.
Step 4: Distress the Finish
Light sanding reveals white tabletop faux-grain ridges and raw-wood wear on edges and legs.
You'll need: Sanding Sponge, Rags or Paper Towels
- 4.1 Sand the Glazed Top
- Use a sanding sponge; grit is unstated, so 120 to 150 grit is safe.
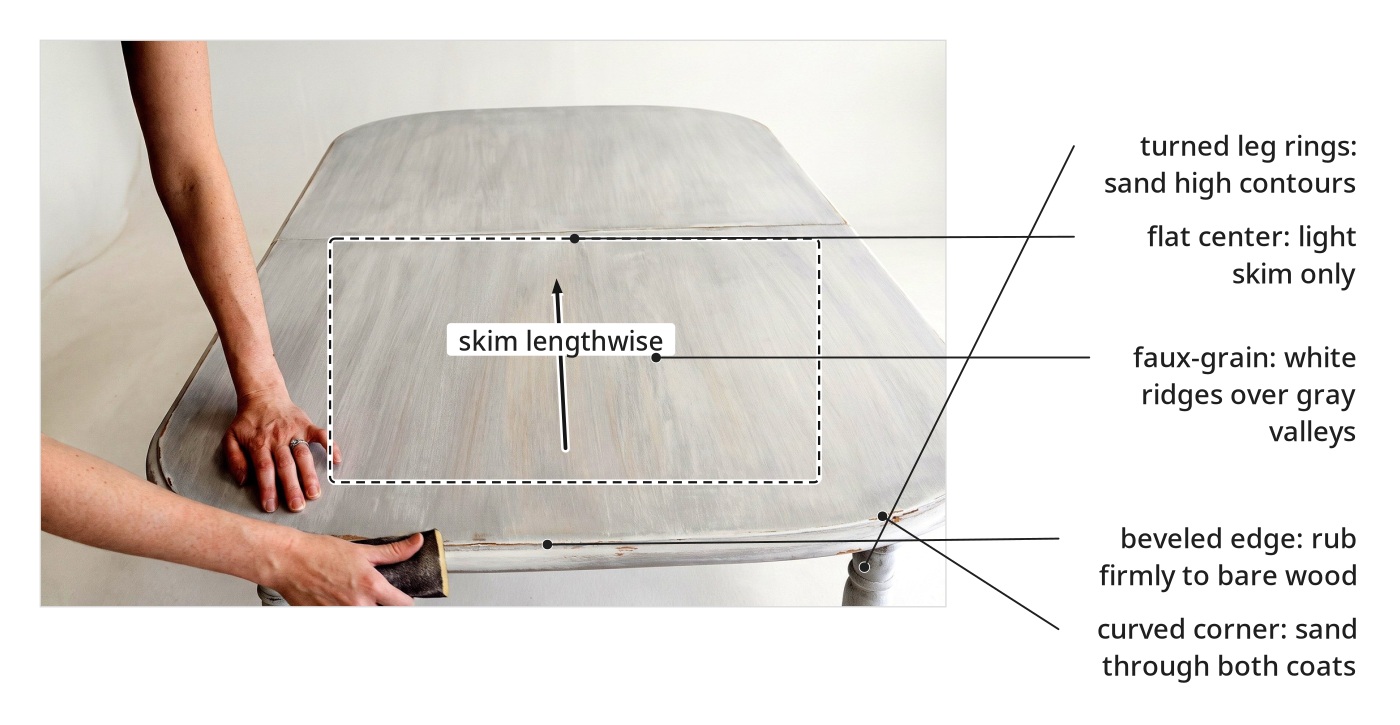
- Lightly skim the sponge lengthwise on the top to sand high ridges.
- Expose bright white paint on ridges against dark gray stain in valleys.
- 4.2 Distress Edges and Legs
- Firmly rub the sanding sponge on tabletop edges, apron corners, and turned leg rings.
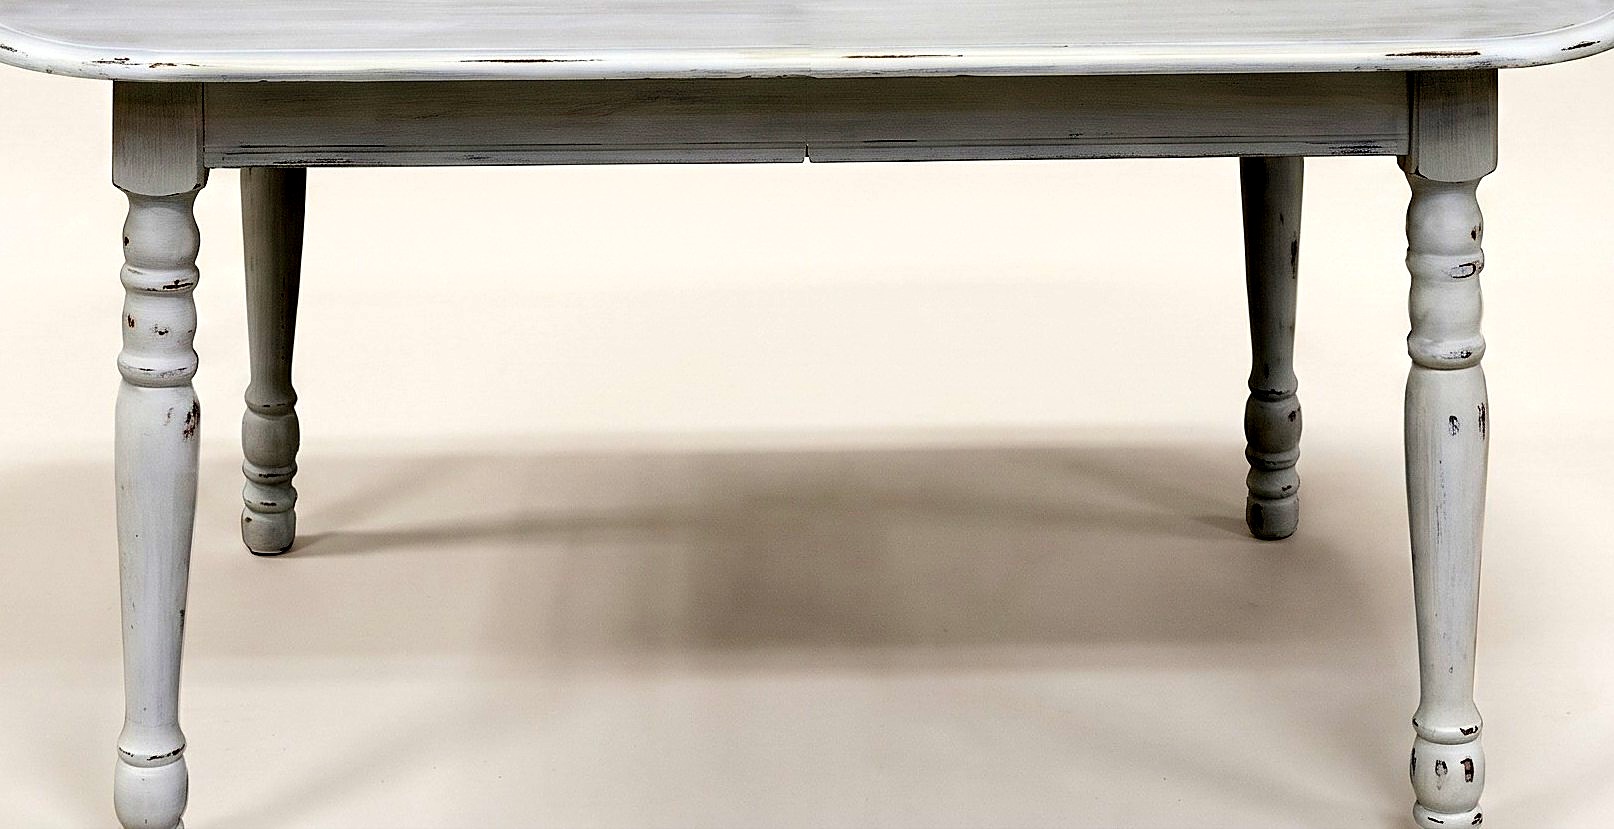
- Sand through both paint coats to bare wood at natural wear spots.
- Step back often to check balance; wipe off sanding dust with rags.
Key measurements
- Abrasive grit: not stated in guide (a medium 120 to 150 grit sanding sponge is safe general practice)
- Tip: Start distressing lightly; you can always sand more or touch up over-sanded spots with white paint.
- Heads up: Avoid hard sanding on the flat tabletop center so you never sand through the thin veneer.
Before you move on: Check the top and legs with a clean hand for zero chalky sanding dust before sealing.
Step 5: Seal the Table
Seal the high-wear tabletop with clear satin water-based polyurethane and the base with clear finishing wax.
You'll need: Gloves, Chip Brush, Wax Brush, Triple Thick Polyurethane, Finishing Wax, Rags or Paper Towels
- 5.1 Apply Polyurethane to Tabletop
- Brush Varathane Triple Thick Polyurethane onto the tabletop with a disposable chip brush.
- Work in small sections along the lengthwise faux grain, smoothing strokes quickly.
- Remove loose chip-brush bristles immediately before the poly turns tacky.
- Avoid over-brushing; let the coat dry undisturbed overnight.
- 5.2 Apply Finishing Wax to Legs and Apron
- Load a dense natural-fiber wax brush with Jolie Clear Finishing Wax.
- Work wax into the apron and turned-leg curves and crevices.
- Leave untouched for a matte look, or buff with a clean rag for sheen.
- Let the table dry overnight; allow several days to cure.
Key measurements
- Tabletop sealer: 1 coat Triple Thick water-based satin polyurethane
- Base sealer: 1 coat of clear finishing wax
- Dry time before reveal: overnight (several days to a few weeks for full wax cure)
- Tip: Use water-based polyurethane over white paint; oil-based polyurethane yellows over time.
- Tip: Waxing legs instead of using sticky polyurethane feels soft and simplifies future refinishing.
- Heads up: Do not over-work tacking water-based polyurethane, or brush marks freeze into the finish.
Before you move on: Inspect the wet polyurethane under angled light to catch and remove any shed chip-brush bristles before the surface sets.
Finishing
Cure
- Dry the sealed tabletop and waxed legs overnight before moving.
- Let finishing wax cure for several days to a few weeks.
Care
- Wipe daily spills with a soft damp cloth; avoid harsh chemical scrubbers.
- Water-based polyurethane topcoat stays crystal clear without yellowing over time.
Reassembly
- Check the leg bolts are tight once the finish has cured.
Alternatives
- Glaze legs in a contrasting stain shade, or buff wax for shine.
Test it before you call it done
| Check | What you should see | If not |
|---|---|---|
| Inspect the tabletop grain contrast under room lighting | Lengthwise white paint ridges pop cleanly against Classic Gray valleys with no blotchy lap marks | Brush fresh gray stain over uneven areas to re-wet the glaze, wipe back, let dry, and lightly re-sand the high ridges |
| Run a hand across the cured polyurethane tabletop | Smooth, dry satin surface with no embedded chip-brush bristles or sticky spots | Sand out any trapped bristle nibs lightly once dry and apply a thin fresh coat of water-based polyurethane |
| Check the finish on the turned legs and apron | Even matte or softly buffed wax feel with no dusty chalk residue in the crevices | Buff away excess wax buildup in the grooves using a clean lint-free rag |
These Specs are built from Kathartic Studios's video “Rustic Farmhouse Dining Table Refinish”. Open the Rustic Farmhouse Dining Table Refinish project page.
