Spetz Specs No. 4957: step-by-step surface & covering guide
DIY Vertical Shiplap Wall Paneling
The complete step-by-step guide made from Kathartic Studios's YouTube video, free on Spetz. For the video, a step-by-step player and answers to your questions, see the DIY Vertical Shiplap Wall Paneling project page.
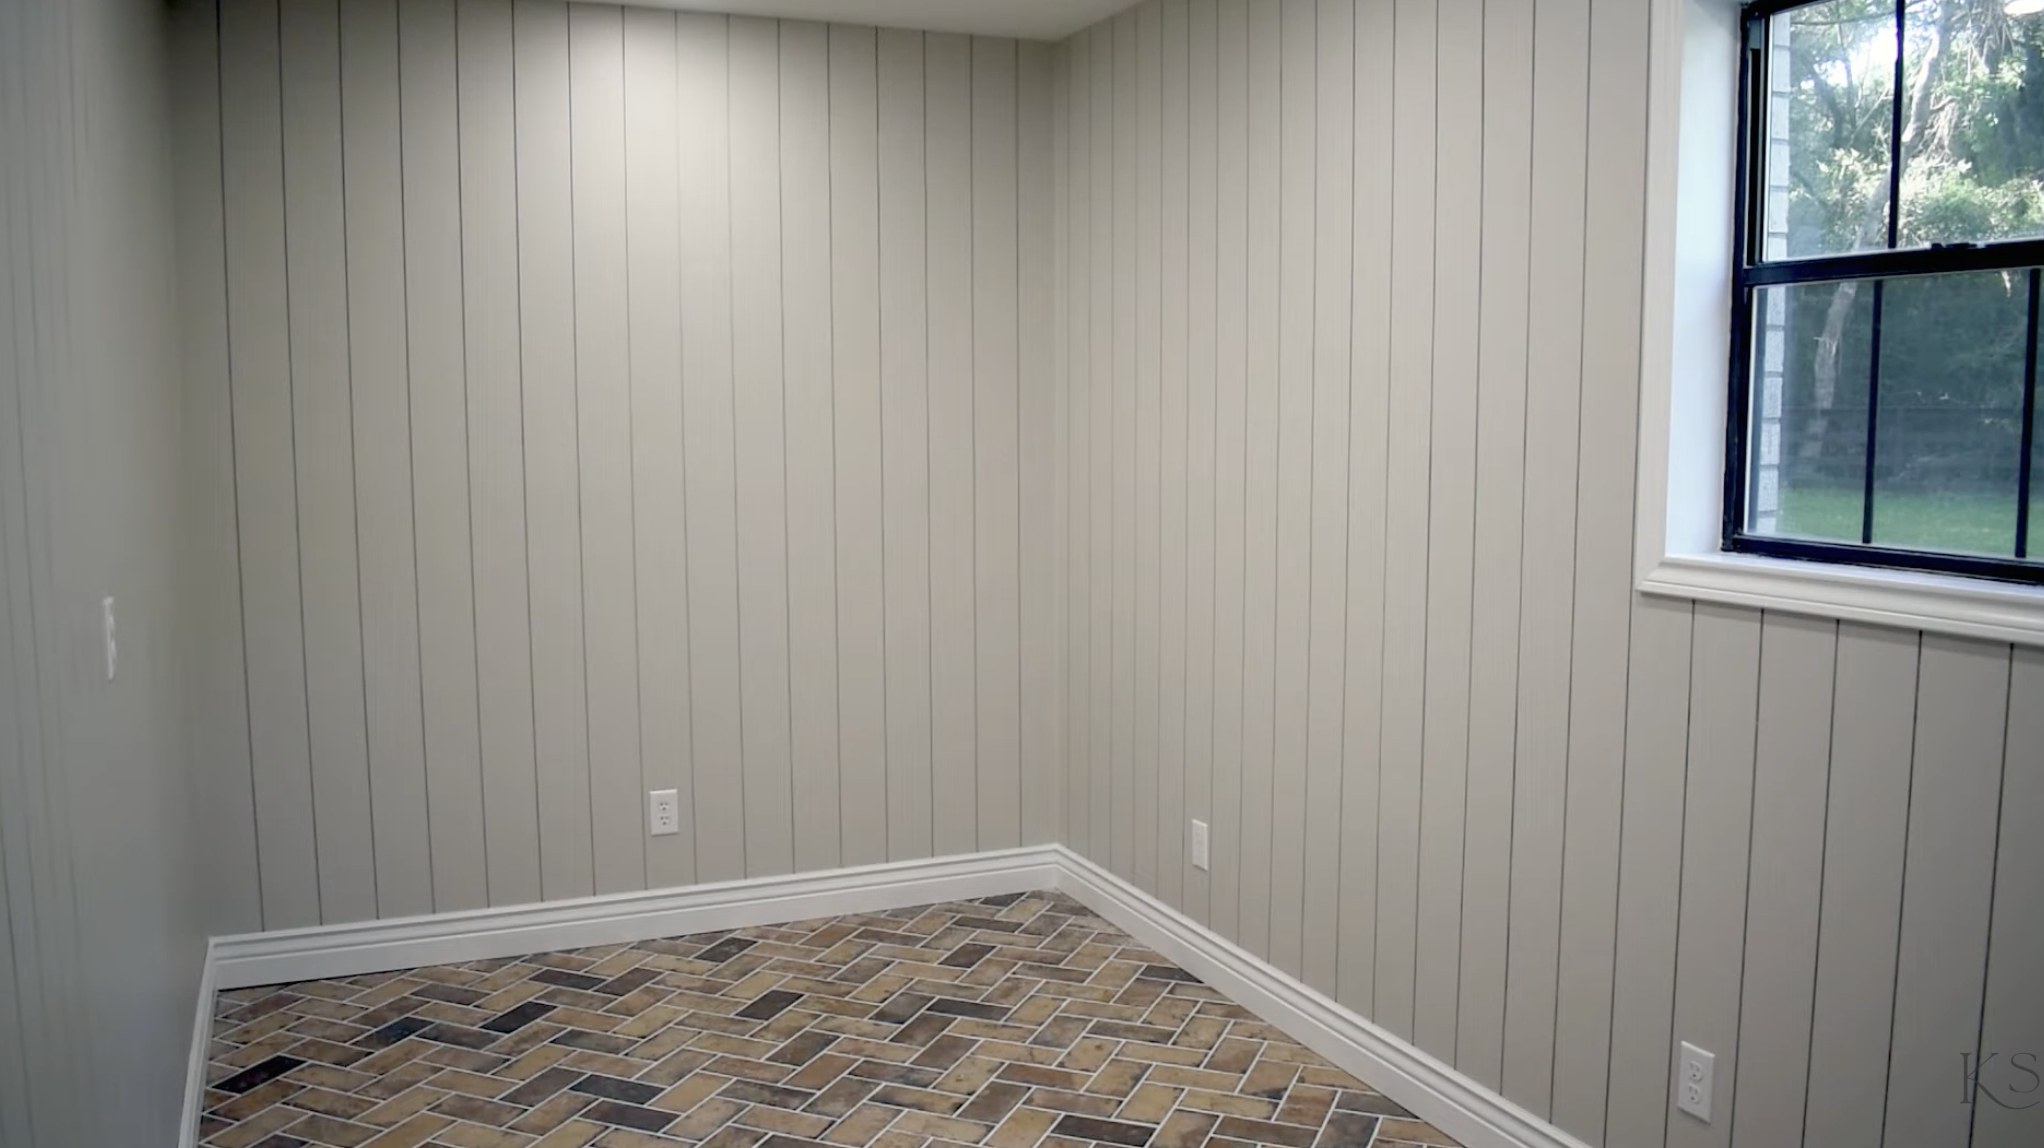
6 steps, 2 parts, 10 tools, 8 materials
Overview
Finished size: Covers the mudroom walls, floor to ceiling; wall area depends on room size
The Surface & Covering
- Transform walls with vertical shiplap ripped from cheap 5 mm poplar plywood sheets.
- Thin plywood strips mimic traditional shiplap cheaply: flat planks with a uniform gap, not tongue-and-groove.
- Vertical orientation gives a traditional, French-country farmhouse feel over modern horizontal layouts.
Why Do It Yourself
- A 4×8 sheet of 5 mm RevolutionPly yields nine planks, keeping costs below pre-milled shiplap or nickel-gap boards.
- Installation is repetitive: adhesive, press, nail, spacer, repeat.
- You do not need studs for every plank; construction adhesive bonds directly to finished drywall.
What It Takes
- Safely rip sheet goods on a table saw.
- Plan several sessions with dry time between for cutting, installing, spackling, priming, and two coats of paint.
- A second person helps feed 4×8 sheets through the table saw.
What Decides Success
- The first plank must be perfectly plumb; every plank references the last, so errors compound.
- Consistent spacer gaps between every plank keep the wall professional and even.
Layout at a glance
- Covering: plywood shiplap plank 5 1/4 in x 8 ft
- Laid on: finished drywall (mud, tape, and optionally primed)
- Pattern: vertical
- Start: a corner of the wall
- Reference line: Use a laser level to make each plank plumb.
- Gap: tile spacer width between planks
- Bond: Apply construction adhesive (DAP Dynagrip) on the back; brad nails hold it while glue dries.
- corner / first plank: Position first plank in the corner, check plumb with a laser level, then secure with adhesive and brad nails.
- last plank on the wall: Rip to width to fit the remaining space.
- floor line: Install new bright white baseboards after painting for a clean transition.
- outlets and switches: Clean up and fit new cover plates after installation.
Health and safety
Table Saw Safety
- Wear eye and hearing protection when ripping the poplar plywood sheets.
- Use a push stick and never reach over the spinning blade.
- Stand to the side of the blade path to avoid injury from kickback.
Pneumatic Brad Nailer
- Disconnect the air compressor before clearing jams or adjusting the nailer.
- Keep your fingers well away from the firing line when nailing the planks.
- Scan the wall for hidden electrical wires and plumbing before driving brad nails.
Dust and Fumes
- Wear a dust mask when sanding the dried spackling over the nail holes.
- Open windows and run a fan to ventilate the room while using construction adhesive.
- Keep the area well-ventilated when applying primer and paint with the paint sprayer.
Handling Plywood Sheets
- Ask a helper to assist when lifting full plywood sheets onto the sawhorses.
- Lift with your legs and keep the sheets close to your body to prevent back strain.
The surface & its prep
- Walls must be finished drywall: hung, taped, and mudded smooth; no exposed framing or unfinished seams.
- Optionally apply one or two coats of primer to bare drywall before installing planks; this makes final painting easier and ensures full coverage in
- Remove existing baseboards from the shiplap walls; they will be replaced after painting.
- Remove outlet covers and light-switch plates.
- Clear the room of furniture and obstructions to maneuver full 4×8 sheets and 8 ft planks.
- Set up a laser level on a tripod near the starting corner and check it projects a plumb (vertical) line.
- Dry-fit a few planks with spacers against the starting corner to check your plank width and gap work across the wall; plan the last plank's rip width if n
Tools
- Table Saw (jobsite table saw, DeWalt)
- Sawhorses (folding sawhorses, Klein Tools) (optional)
- Brad Nailer (Pneumatic, DeWalt)
- Air Compressor (Pancake, DeWalt)
- Laser Level (Bosch) (optional)
- Caulking Gun (manual)
- Putty Knife
- Paint Sprayer (airbrusher) (optional)
- Paint Roller
- Paint Brush
Materials
- Poplar Plywood (plywood, RevolutionPly, 5mm (3/16 in), 4 ft x 8 ft)
- Construction Adhesive (Heavy Duty Construction Adhesive, DAP, Dynagrip)
- Brad Nails
- Spackling (Drywall Patch, DAP, DryDex)
- Primer (Water-based, KILZ, 2 All-Purpose)
- Wall Paint (Latex, Sherwin Williams, Cashmere, Satin, SW7029 Agreeable Gray)
- Baseboards
- Tile Spacers
Hardware
| Hardware | Size | Count | Used in steps |
|---|---|---|---|
| Brad Nails | 3, 6 |
Finishes & supplies, in the order they go on
| Product | What it does | Mix & coats | Dry time | Applied with |
|---|---|---|---|---|
| Construction Adhesive | Bonds each plywood plank permanently to the drywall surface | Caulking gun, bead on the back of each plank | ||
| Spackling | Fill brad nail holes flush before priming. | 1 coats | Putty knife, press into each hole, scrape excess flush | |
| Primer | Seals raw plywood and provides a uniform base for topcoat. | 1 coats | Paint sprayer, or roller and brush | |
| Sherwin Williams Cashmere, Satin, SW7029 Agreeable Gray | Final wall color: two coats for full, even coverage. | 2 coats | Small brush for gaps between planks, then paint roller for flat faces |
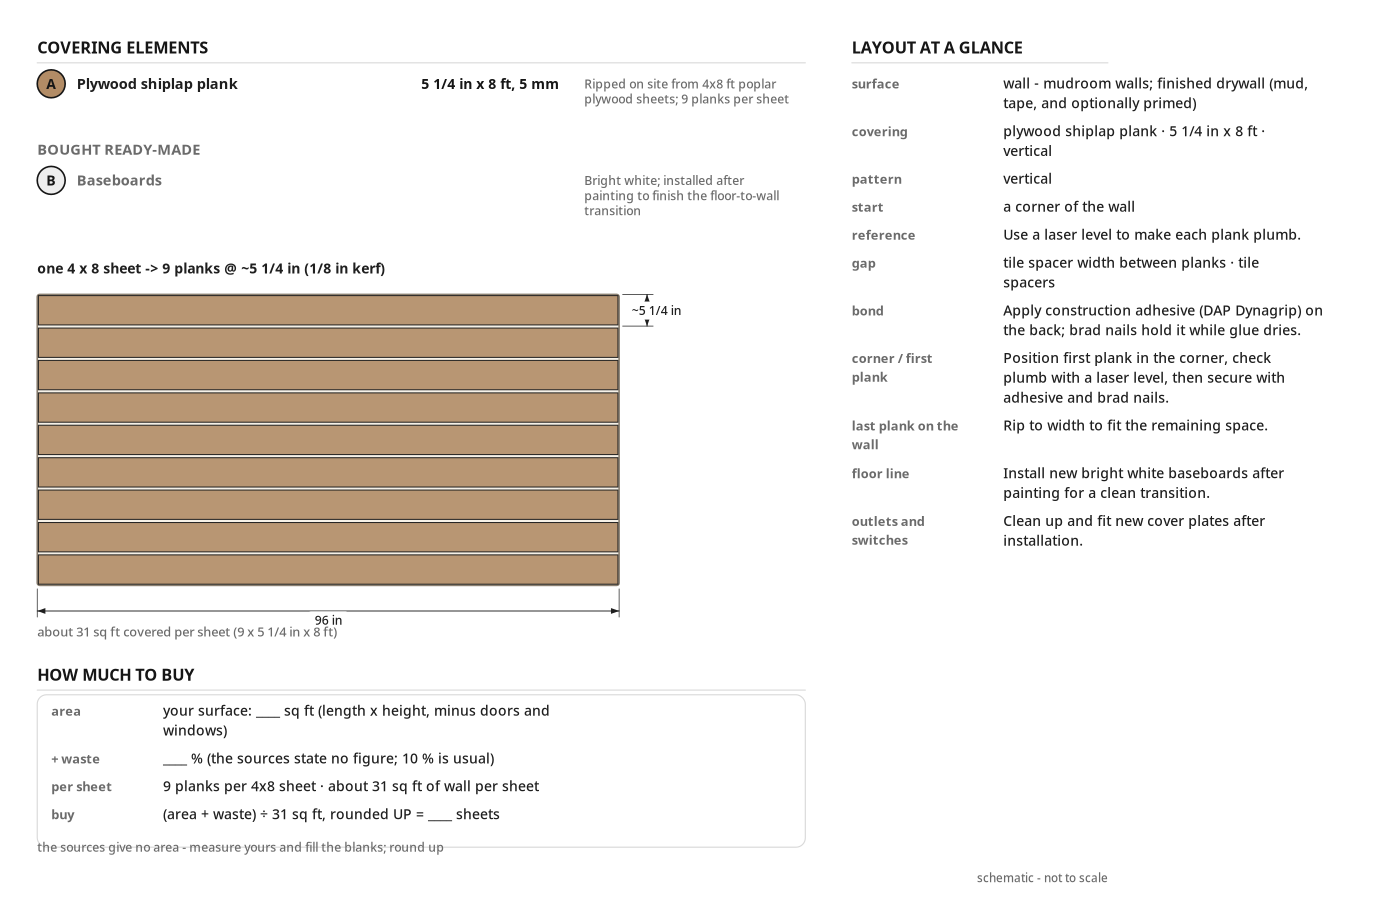
Covering elements
| Part | Name | Qty | Size | Notes |
|---|---|---|---|---|
| A | Plywood shiplap plank | x1 | 3/16" (T) × 5 1/4" (W) × 96" (L) | Ripped on site from 4x8 ft poplar plywood sheets; 9 planks per sheet |
| B | Baseboards | x1 | Bright white; installed after painting to finish the floor-to-wall transition |
Before you start
Protect & Clear
- Move furniture out or to the center and cover with drop cloths.
- Lay drop cloths along every shiplap wall base to catch adhesive drips and sawdust.
- Remove baseboards, outlet covers, and switch plates; bag and label the hardware.
Cut Station
- Set the table saw on a flat surface with sawhorses or outfeed support on both sides for 4×8 sheets.
- Lock the table saw fence at 5 1/4 in for every rip cut.
- Keep a push stick at the saw for the last narrow strip of each sheet.
Tool Set-Up
- Connect the brad nailer to the pancake air compressor and test-fire into scrap to check nail depth.
- Project a plumb vertical line with the laser level on a tripod near the starting corner.
- Load a tube of DAP Dynagrip into the caulking gun and cut the nozzle tip.
Step by step
Step 1: Prepare the Walls
The drywall is fully finished: taped, mudded, sanded smooth, and optionally primed, ready for planks.
You'll need: Primer
- 1.1 Finish the Drywall
- Check every seam is taped, has at least two coats of joint compound and is sanded smooth.
- Fill dents, screw pops or imperfections with joint compound; sand flush once dry.
- Apply one or two coats of primer to bare drywall if desired; this helps paint adhesion and seals gaps between planks.
- Let the primer dry fully before the planks.
- Tip: Priming now seals the visible wall inside gaps, saving effort during final painting.
Before you move on: Run a hand across the wall: it should feel smooth with no ridges, bumps or loose tape.
Step 2: Cut the Plywood Planks
Rip all plywood sheets into uniform 5 1/4 in wide × 8 ft long planks.
Parts in this step: (A) Plywood shiplap plank
You'll need: Table Saw, Sawhorses, Poplar Plywood
- 2.1 Set Up for Cutting
- Position the table saw with sawhorses or outfeed support so a full 4×8 sheet feeds without tipping.
- Set and lock the table saw fence to 5 1/4 in.
- Test-cut a scrap to check the width first.
- 2.2 Rip Plywood into Planks
- Steadily feed the 4×8 plywood sheet (A) through the table saw, factory edge against the fence.
- Repeat across the full sheet; each 4×8 sheet yields nine planks at 5 1/4 in wide, accounting for saw blade kerf.
- Stack planks flat or lean them against a wall; keep dry and out of direct sunlight.
- For 8 ft ceilings, the full 8 ft plank length works without cross-cuts.
Key measurements
- 5 1/4 in plank width
- 8 ft plank length
- 5 mm (3/16 in) plywood thickness
- 9 planks per 4×8 sheet
- Tip: Use a push stick for the final narrow strip to keep hands away from the blade.
- Tip: An outfeed helper makes handling full sheets easier and safer.
- Heads up: Always wear eye and hearing protection when operating the table saw.
Before you move on: Measure several planks from different sheets: all should be 5 1/4 in within 1/16 in.
Step 3: Install the Planks
Glue and nail every plank plumb, with even spacer gaps across the surface.
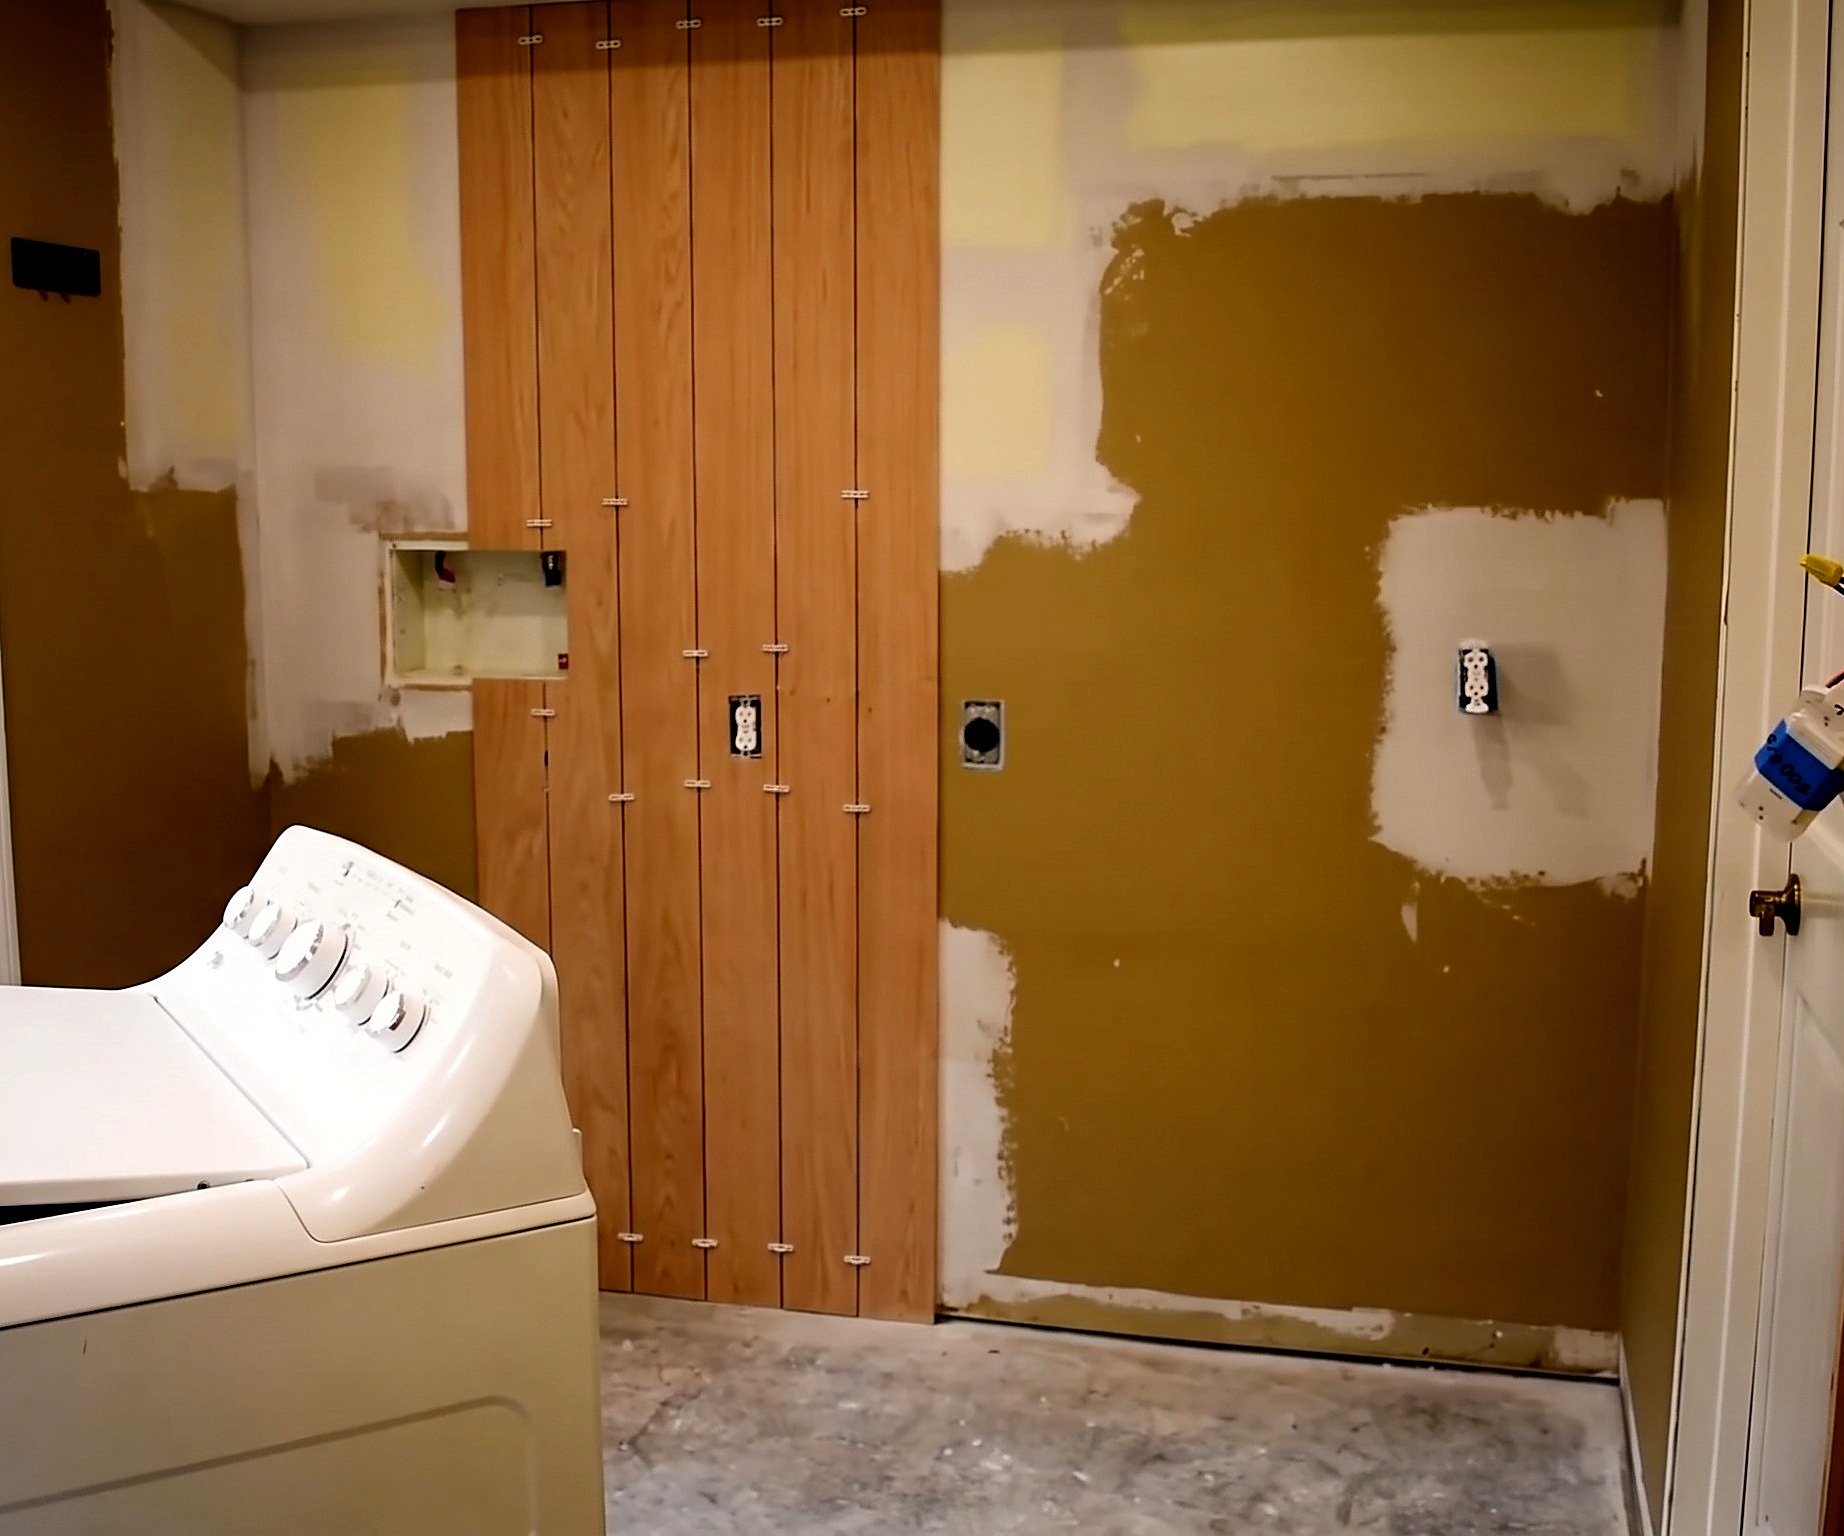
Parts in this step: (A) Plywood shiplap plank
You'll need: Brad Nailer, Air Compressor, Caulking Gun, Laser Level, Table Saw, Construction Adhesive, Brad Nails, Tile Spacers, Poplar Plywood
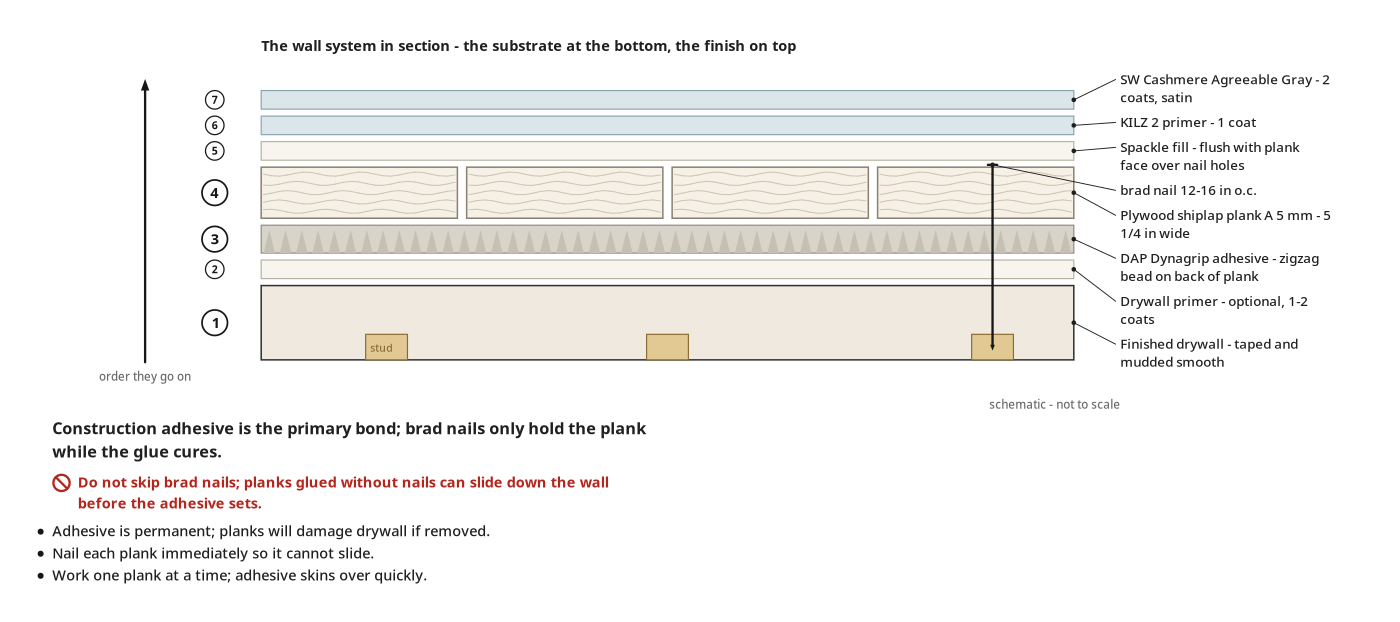
- 3.1 Apply Construction Adhesive
- Load the caulking gun with DAP Dynagrip construction adhesive.
- Apply a continuous zigzag or S-shaped adhesive bead down the back of the plank (A), staying about 1 in from edges to prevent squeeze-out.
- Glue one plank at a time; never pre-glue several, the adhesive skins over.
- 3.2 Position and Secure the First Plank
- Press the first plank (A) tight into the starting corner.
- Align the plank with the laser level's plumb line from floor to ceiling.
- Shoot brad nails through the face of the plank into the drywall, spacing them roughly every 12–16 in up the length; the nails hold the plank while the adhesive cures.
- Check plumb again after nailing; adjust immediately if needed before the adhesive grabs.
- 3.3 Continue Installing Planks with Spacers
- Apply adhesive to the next plank (A) as in sub-step 3.1.
- Place tile spacers along the installed plank to set the gap, then press the new plank against them.
- Secure the plank with brad nails through its face, spaced every 12–16 in.
- Remove tile spacers once nailed and move them to the next joint.
- Repeat for every remaining plank.
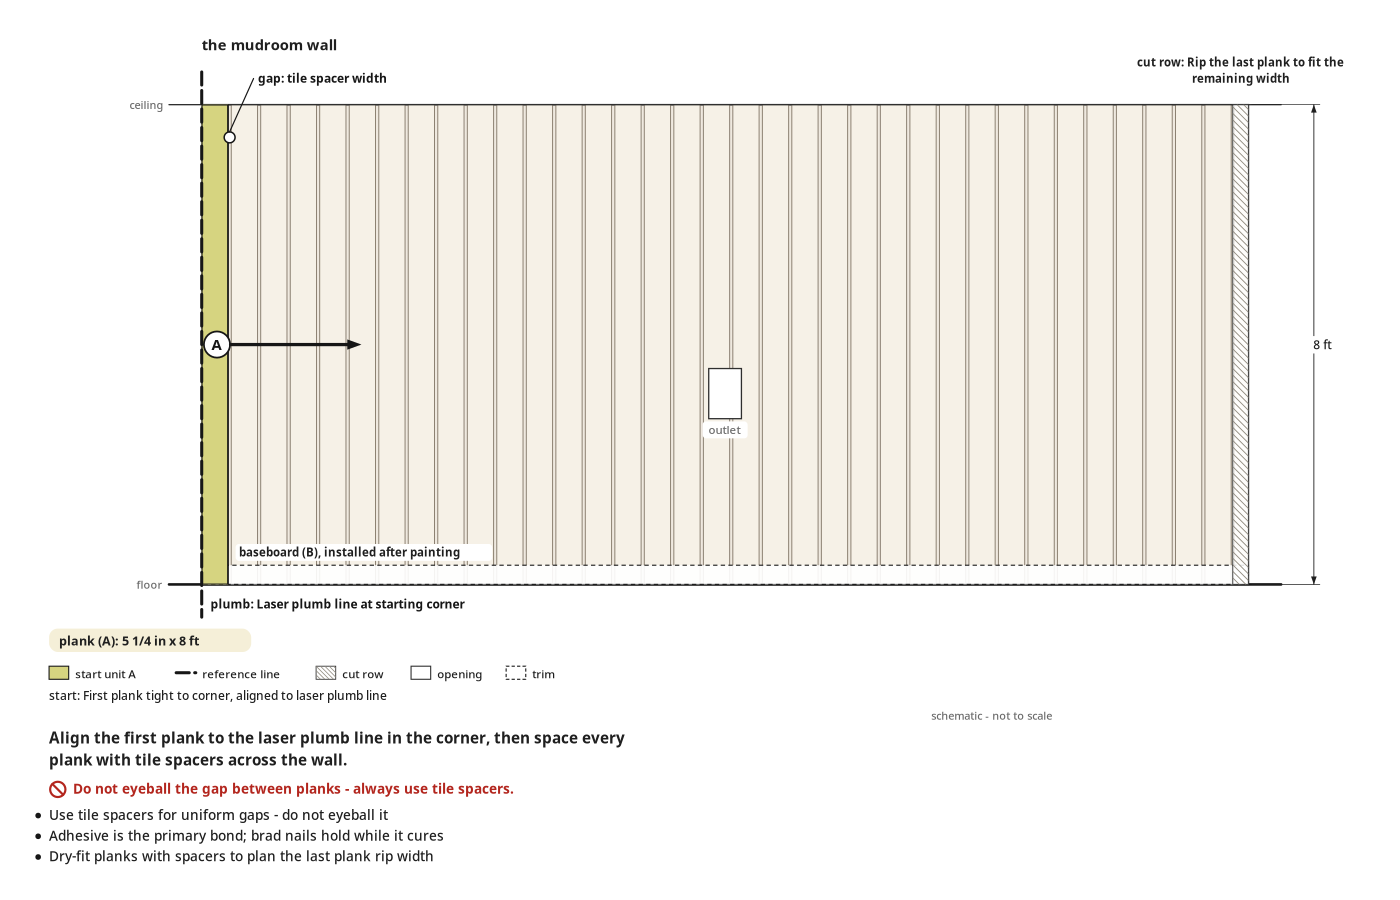
Key measurements
- 5 1/4 in plank width
- Tile spacer width gap between planks
- Tip: Tile spacers keep every gap uniform; do not eyeball it.
- Tip: Because planks run vertically, studs are not reliably behind every plank; the construction adhesive is the primary bond, and brad nails hold the plank while it cures.
- Tip: Alternatively, paint the wall the final color before the planks, so you only paint the plank faces afterward.
- Heads up: Construction adhesive creates a permanent bond: planks will be difficult to remove later and likely damage the drywall.
- Heads up: Planks glued without brad nails can slide before the adhesive sets; always nail each plank immediately.
Before you move on: Sight down the wall: every plank edge should be straight and parallel, gaps uniform, and no plank tilted or bowed.
Step 4: Prepare for Paint
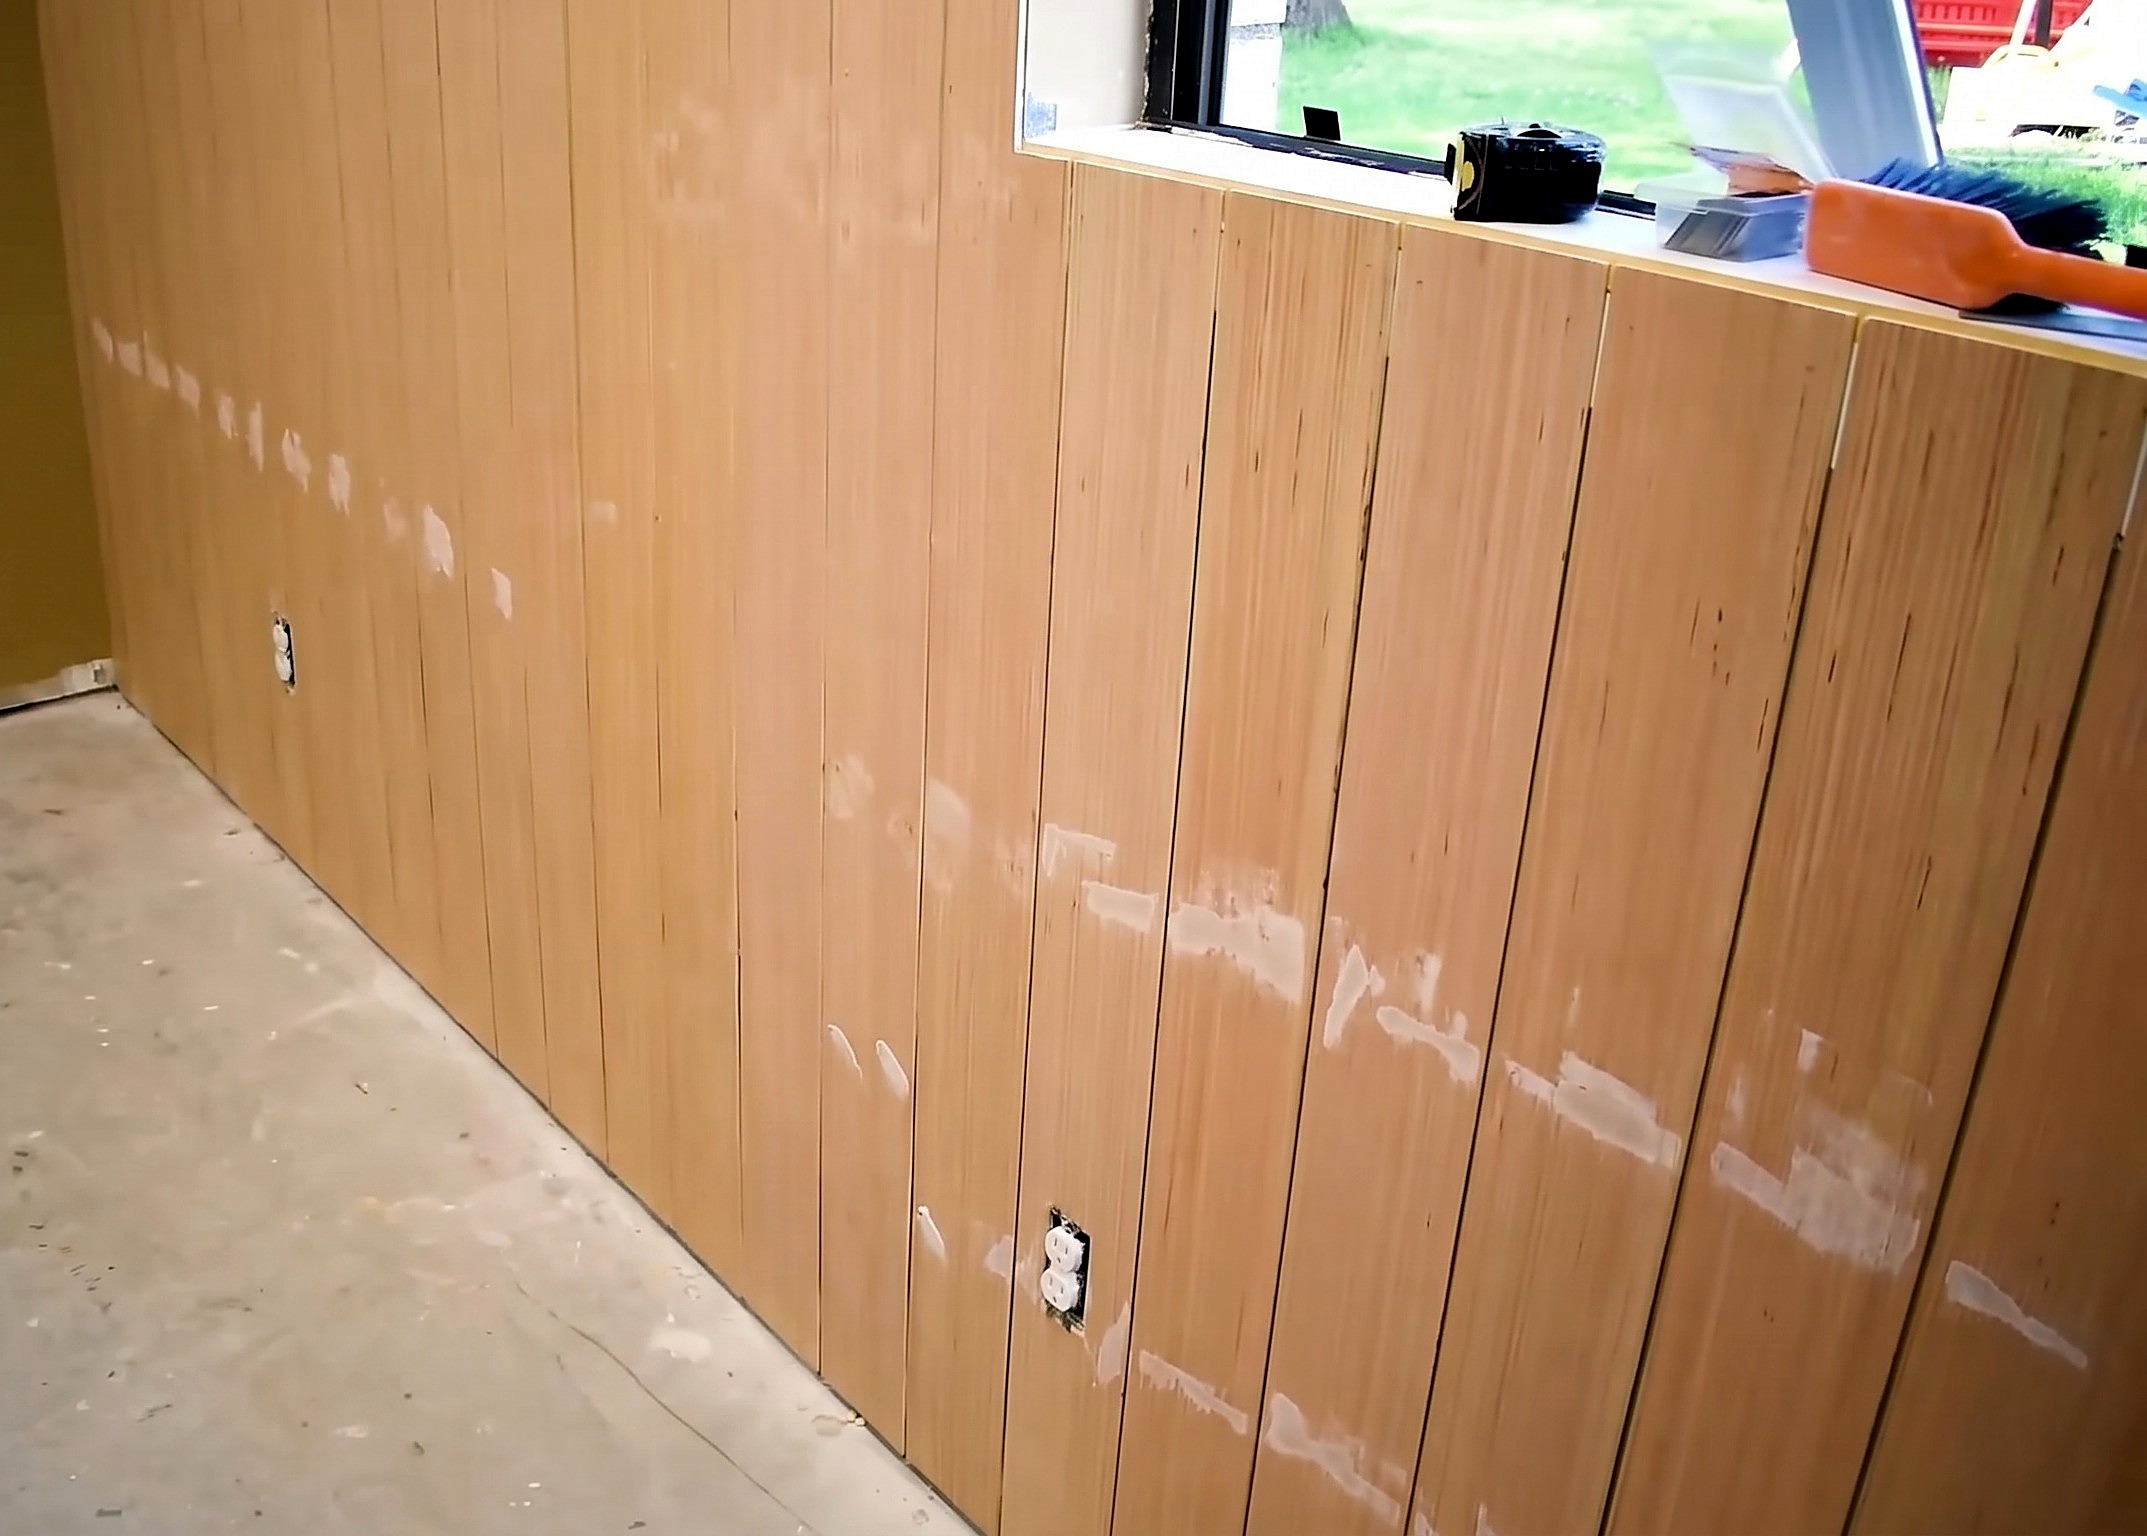
Fill, dry and sand flush every brad nail hole; the plank faces are smooth and ready for primer.
You'll need: Putty Knife, Spackling
- 4.1 Fill Nail Holes
- Press DAP DryDex spackle into each brad nail hole with the putty knife.
- Scrape the putty knife flat across the plank to remove excess spackle and leave the fill flush.
- Let the spackle dry completely; DryDex turns white when dry (it starts pink).
- Sand each filled spot with fine-grit sandpaper (150–220 grit) until smooth.
- Wipe dust off planks with a dry cloth or tack cloth before priming.
- Tip: Skipping this leaves visible dimples showing through the paint; fill every hole.
- Tip: Work from one end to the other so you do not miss holes.
Before you move on: Run a fingertip over each filled spot; it should feel flush with the plank.
Step 5: Prime and Paint the Shiplap
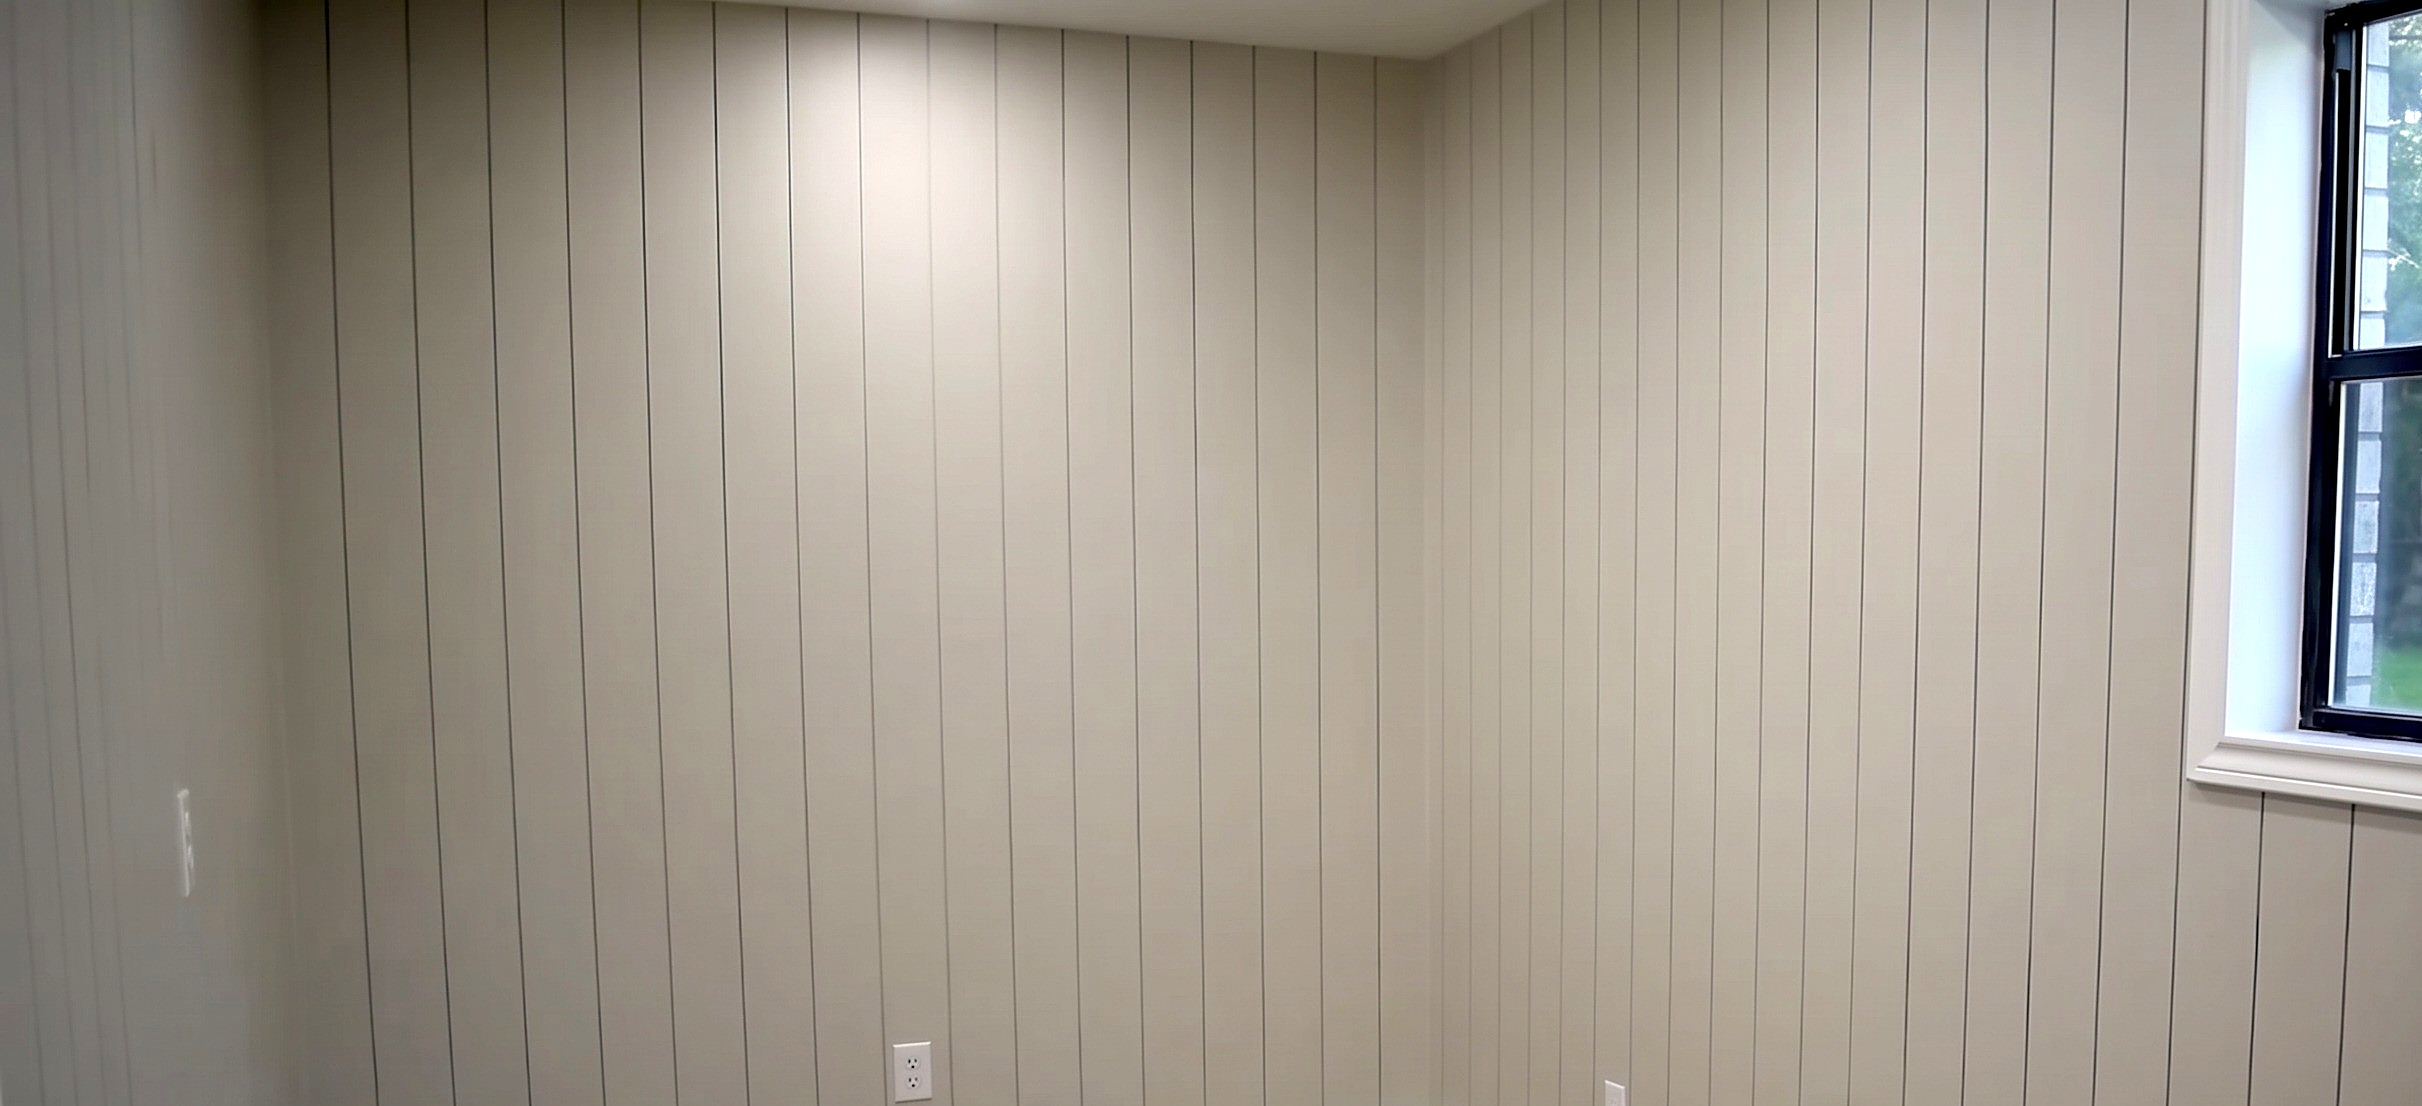
The entire shiplap surface, plank faces, edges, and gaps, is sealed with one coat of primer and two coats of wall paint in a smooth finish.
Parts in this step: (A) Plywood shiplap plank
You'll need: Paint Sprayer, Paint Roller, Paint Brush, Primer, Wall Paint
- 5.1 Apply Primer
- Apply one coat of KILZ 2 All-Purpose primer to the entire shiplap surface, including inside the gaps.
- A paint sprayer speeds this up, but a roller for faces and a brush for gaps works well.
- Check primer reaches exposed plywood edges inside the gaps; unsealed edges are vulnerable to moisture.
- Let the primer dry fully before painting (follow the primer can's dry-time instructions).
- 5.2 Paint the Gaps and Surface
- Use a small paint brush to work the first coat of Sherwin Williams Cashmere (Agreeable Gray, Satin) into every gap between planks.
- Immediately follow with a paint roller on the flat plank faces for a smooth, consistent finish.
- Let the first coat dry per the paint can's instructions, then apply a second coat using the same brush-then-roller method.
- Check plywood surfaces and edges are fully sealed with paint; this plywood is very water-sensitive and must be completely coated, especially in kitchens or bathrooms.
Key measurements
- 1 coat primer
- 2 coats wall paint
- Tip: If you painted the wall the final color before installing planks, you only need to paint the plank faces and touch up the gaps, saving time.
- Tip: Brush the gaps first, then roll the faces while the gap paint is wet for a seamless look.
- Heads up: The 5 mm poplar plywood is very sensitive to water; do not leave raw edges or surfaces unsealed, or it may warp or delaminate.
Before you move on: Inspect the wall in raking light (a flashlight held at a low angle); look for missed spots, thin coverage, or lap marks, especially inside gaps.
Step 6: Install Trim and Finishing Touches
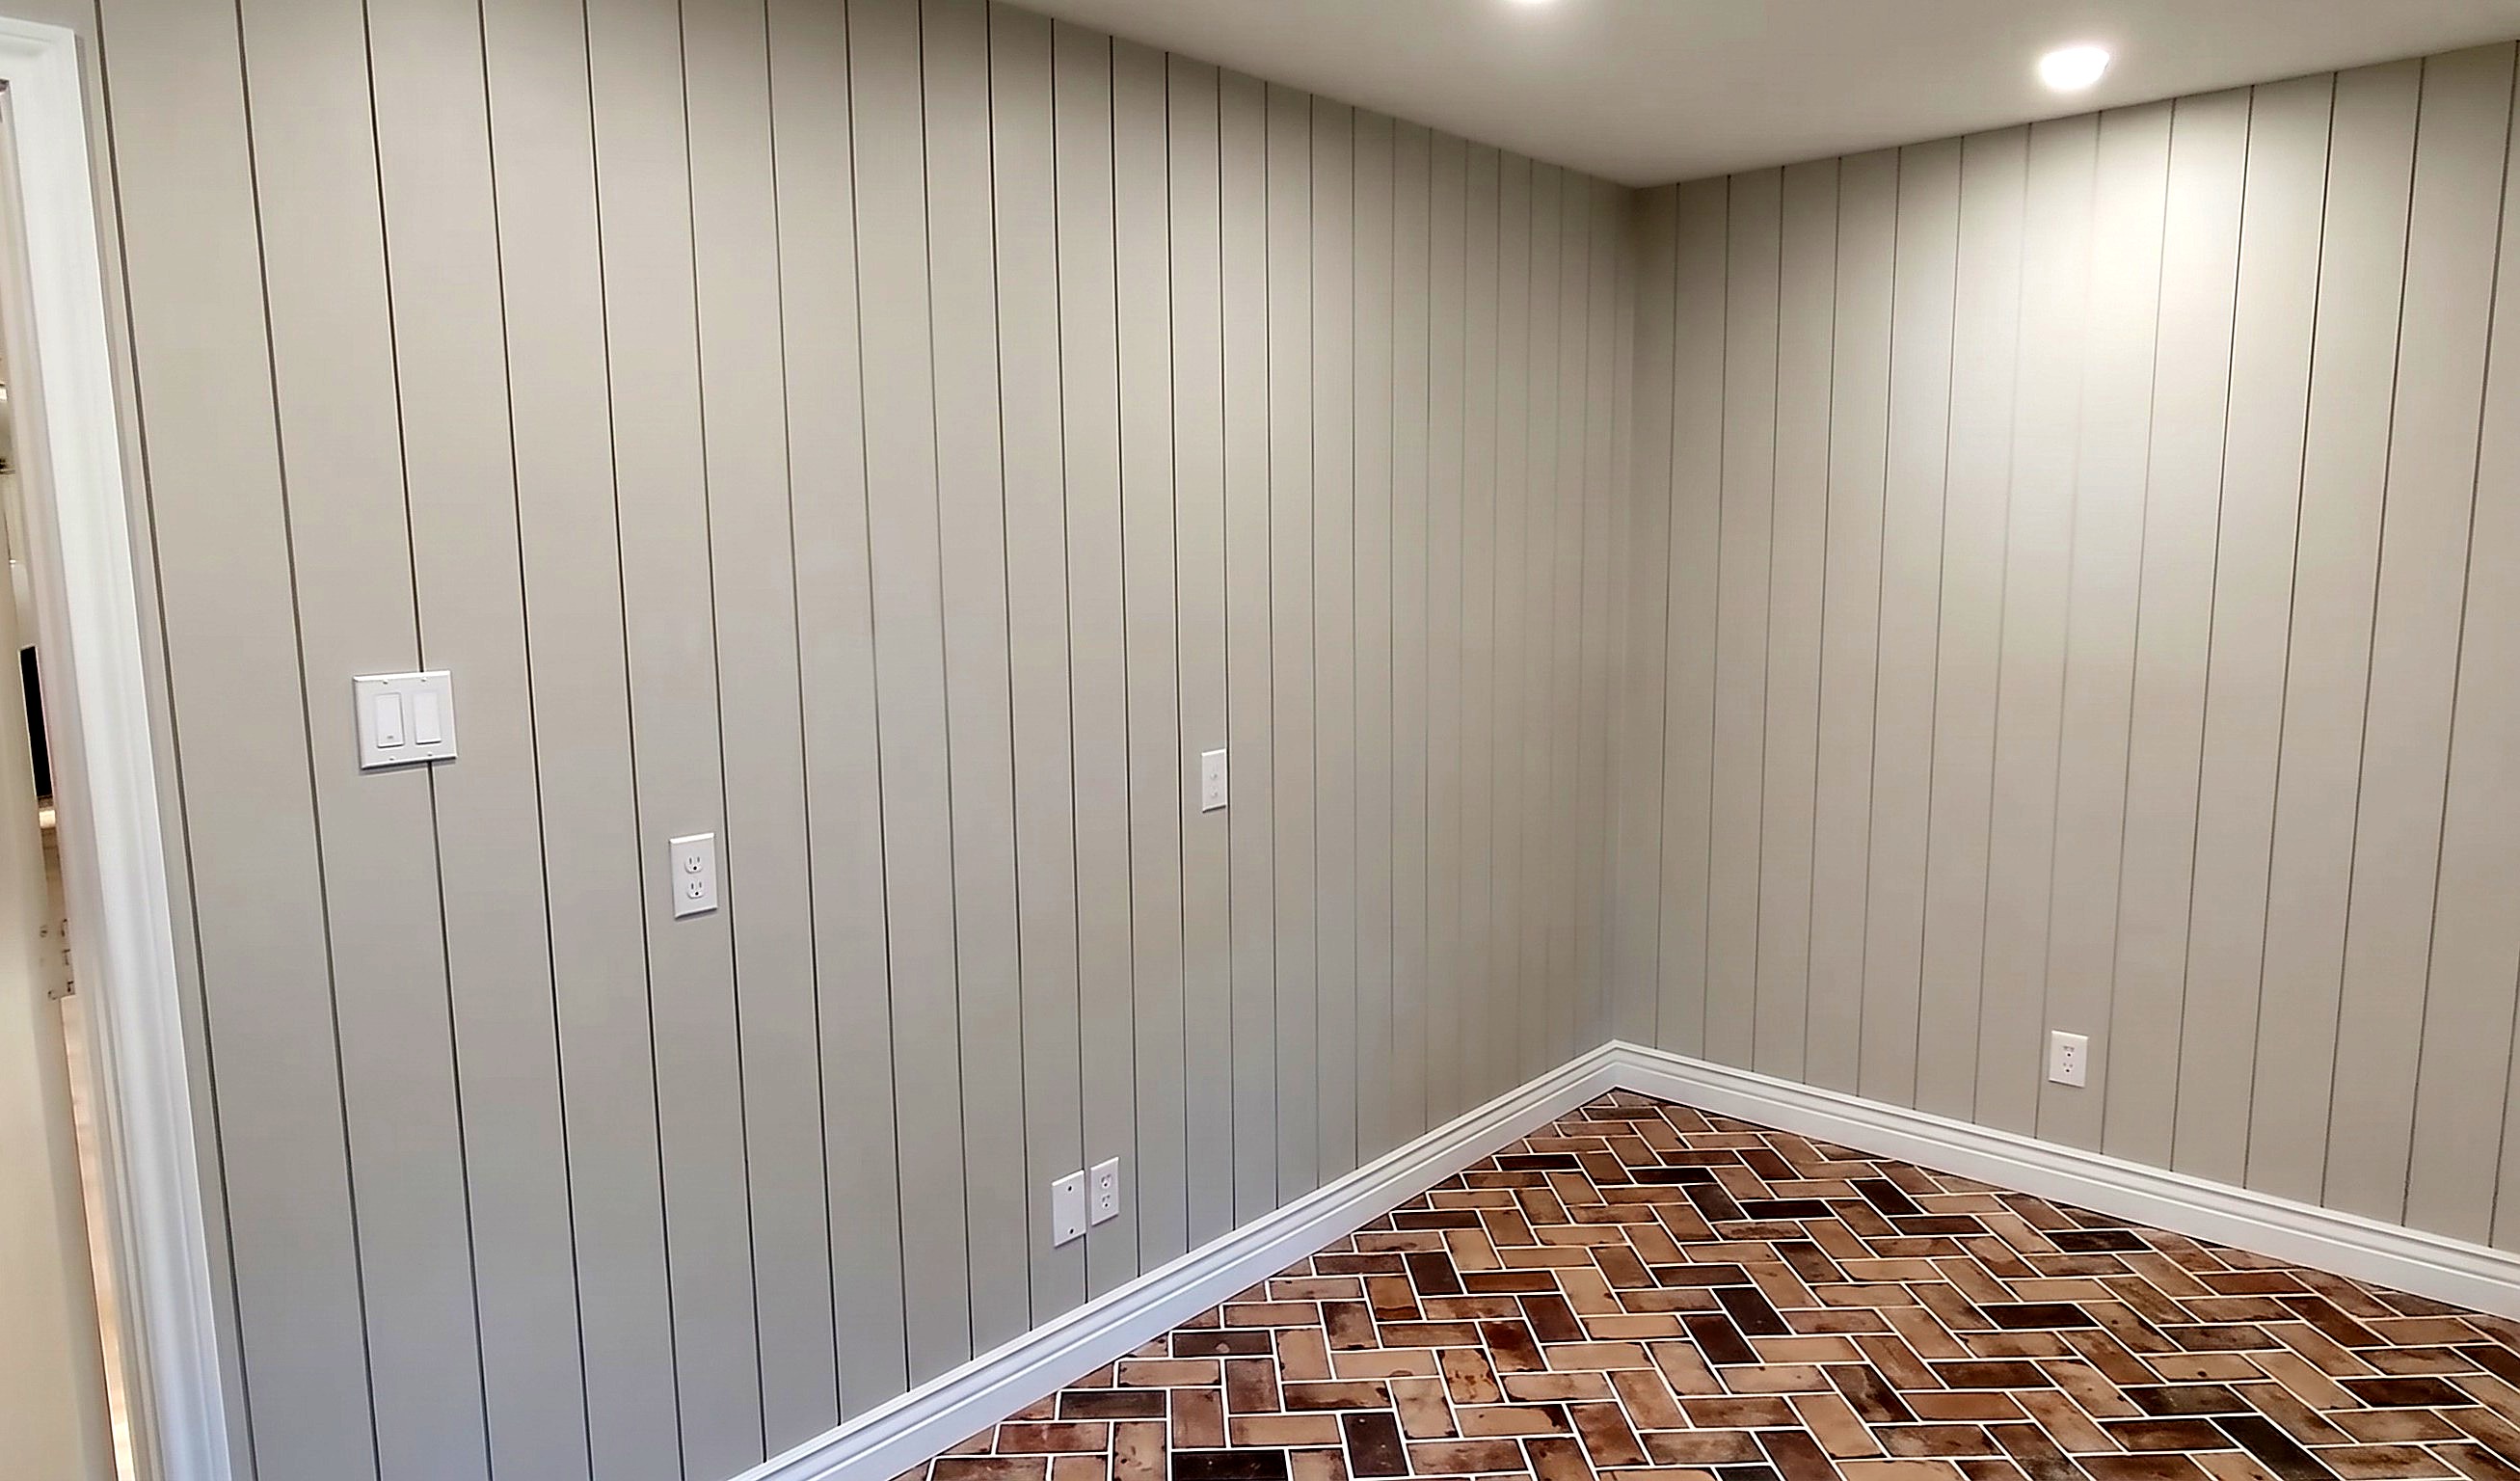
Baseboards are installed, outlets and switches have new cover plates, completing the wall.
Parts in this step: (B) Baseboards
You'll need: Brad Nailer, Air Compressor, Putty Knife, Baseboards, Spackling, Brad Nails
- 6.1 Install Baseboards
- Measure, cut, and install new bright white baseboards (B) along the bottom of every shiplap wall for a clean transition.
- Secure baseboards with brad nails or finish nails into the framing or drywall.
- Fill baseboard nail holes with spackle, let dry, sand smooth, and touch up with paint.
- Install new outlet covers and light-switch plates for a finished look.
- Tip: Updating outlet and switch covers to match the new wall color or style completes the look.
Finishing
Trim & Fill
- Caulk remaining gaps at inside corners, ceiling lines, or where shiplap meets adjacent surfaces for a seamless look.
- Touch up baseboard installation scuffs or dings with a small brush and the finish paint.
- Fill and paint baseboard nail holes to match.
Cure & Traffic
- Let the final coat of paint cure fully before hanging anything or pushing furniture against the walls; follow the paint can's cure-time guidance.
- Do not scrub or wash the walls for at least two weeks to let the paint fully harden.
Care & Maintenance
- Clean the shiplap walls with a soft damp cloth; do not soak the surface, especially near gaps where water could reach unsealed edges.
- Keep a small container of the finish paint for future touch-ups; the flat plank faces are easy to spot-repair with a mini roller.
Alternatives
- For a quicker but more expensive option, use pre-milled shiplap or nickel-gap boards instead of ripping plywood planks.
- Paint the wall the final color before installing planks; afterward you only paint the plank faces, skipping tedious gap work.
- Horizontal installation is another popular look (more modern); it allows nailing directly into studs, eliminating construction adhesive.
Check before you call it done
| Check | What you should see | If not |
|---|---|---|
| Sight down the wall and check plank edges are straight, parallel, and plumb. | No plank visibly tilted, bowed, or out of line with its neighbors. | A plank that is not plumb is very difficult to fix after the adhesive cures; prevention during installation is the only remedy. |
| Inspect the gaps between every pair of planks. | Gaps are uniform across the wall, the same width as the tile spacers used. | |
| Run a hand across the plank faces to feel for unfilled nail holes or rough spackle. | Every filled spot is flush and smooth, invisible under the paint. | Sand the spot smooth, touch up with primer, and apply another coat of paint. |
| Examine the painted surface in raking light for missed spots, thin areas, or lap marks. | Even, opaque coverage on all plank faces, edges, and inside every gap; no raw plywood visible. | Apply another coat of paint to thin or missed areas, brushing gaps first, then rolling faces. |
| Check baseboards sit tight against the shiplap and floor with no visible gaps. | A clean, continuous transition line at the base of every wall. | Caulk small gaps between the baseboard and the shiplap or floor for a finished look. |
These Specs are built from Kathartic Studios's video “DIY Vertical Shiplap Wall Paneling”. Open the DIY Vertical Shiplap Wall Paneling project page.
