Spetz Specs No. 6017: step-by-step surface & covering guide
How to Lay a Porcelain Tile Patio Over an Existing Base
The complete step-by-step guide made from Tidybricks patio restore's YouTube video, free on Spetz. For the video, a step-by-step player and answers to your questions, see the How to Lay a Porcelain Tile Patio Over an Existing Base project page.
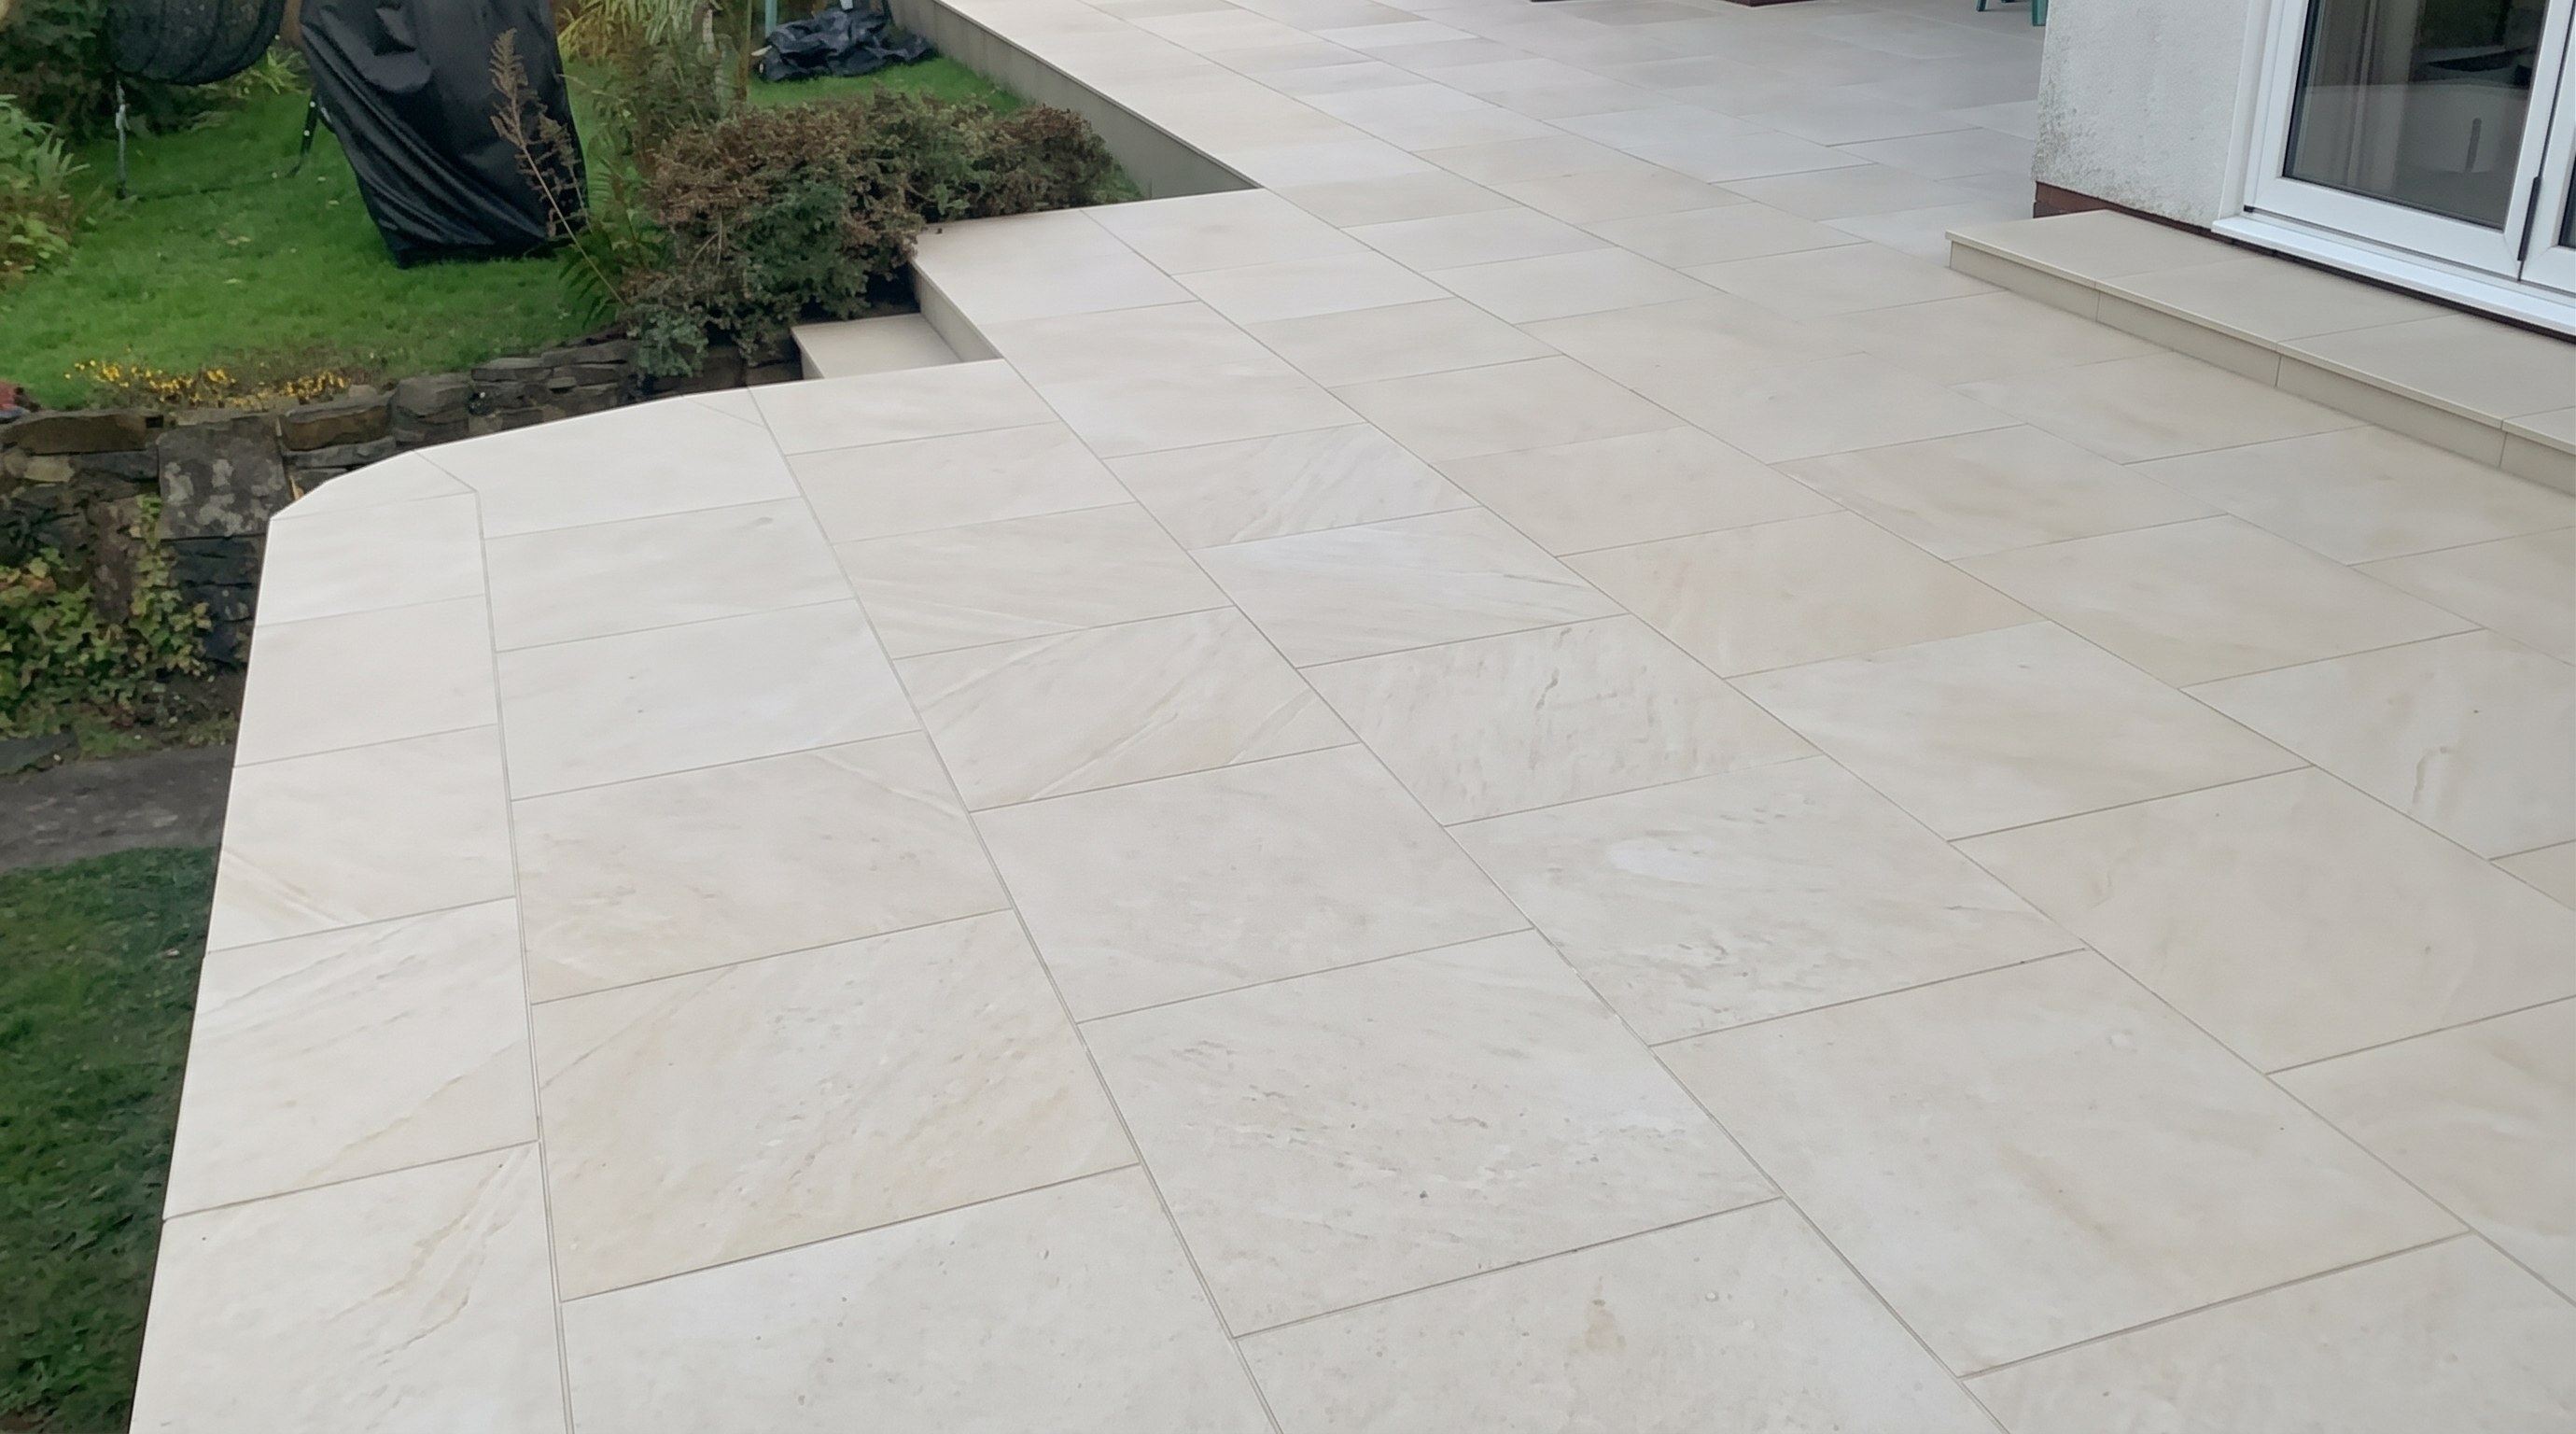
2 steps, 1 parts, 8 tools, 6 materials
Overview
The surface & covering
- Lay porcelain tiles (A) over an existing stable concrete base.
- Build up the base for a durable modern patio.
What it takes
- Requires basic mortar mixing, leveling skills and heavy lifting.
- Work over a couple of days to let the mortar set.
What decides success
- A solid, unyielding base that has not sunk.
- A consistent 10mm per meter drainage fall away from the house.
- Apply priming slurry to every tile for proper adhesion.
Layout at a glance
- Covering: Porcelain tile
- Laid on: existing 20-year-old concrete and hardcore base
- Pattern: running bond
- Offset: halves in between
- Start: flush with the edge of the step area to create one long, straight line
- Reference line: string lines set for the first course and height, dropping 10 mm per meter away from the house for drainage
- Expansion gap: a gap at the wall, spaced with a coin block
- Bond: 4:1 sharp sand and cement mortar bed, with priming slurry applied to the back of the tile
- step area: start the tiles flush with the edge
- wall: leave a gap using a coin block
Health and safety
Heavy Lifting and Posture
- Lift heavy porcelain tiles and bags of cement with your legs to prevent back injury.
- Avoid overloading the wheelbarrow with wet mortar to maintain control and prevent muscle strain.
Dust and Eye Protection
- Wear a dust mask and eye protection when mixing dry cement, sharp sand, and stone dust.
- Use a dust mask and safety glasses to avoid inhaling harmful particles when cutting porcelain tiles.
Chemical and Skin Safety
- Wear protective gloves when working with cement, mortar, and priming slurry to prevent skin irritation.
- Wash your skin immediately with clean water if it comes into contact with wet cement.
Pressure Washer Safety
- Wear eye protection when using the pressure washer to clean the existing concrete base.
- Never point the pressure washer nozzle at yourself or anyone else to avoid severe injury.
The surface & its prep
- The concrete and hardcore base is stable and has not sunk for at least 20 years.
- The surface is clear of debris.
- Build up and level the base with stone dust where necessary.
Tools
- String Line
- Spirit Level
- Wheelbarrow
- Shovel (Square-point shovel)
- Trowel (Pointing Trowel)
- Mallet (Rubber Mallet)
- Bucket
- Pressure Washer (optional)
Materials
- Porcelain Tiles (Khaki colored, London Stone)
- Cement (Blue Circle)
- Sharp Sand (four and one mix)
- Priming Slurry (Larsen)
- Stone Dust (2 tons, 210s)
- Tile Leveling System (Clips and caps, Tilers Tools)
Finishes & supplies, in the order they go on
| Product | What it does | Mix & coats | Dry time | Applied with |
|---|---|---|---|---|
| Priming Slurry | Bonds the non-porous porcelain to the mortar bed | 1 coats | Trowel | |
| Mortar | Beds the tiles and sets the drainage fall | 4:1 sharp sand to cement, 1 coats | Overnight | Trowel |
| Grout | Fills the joints between the porcelain tiles | 1 coats |
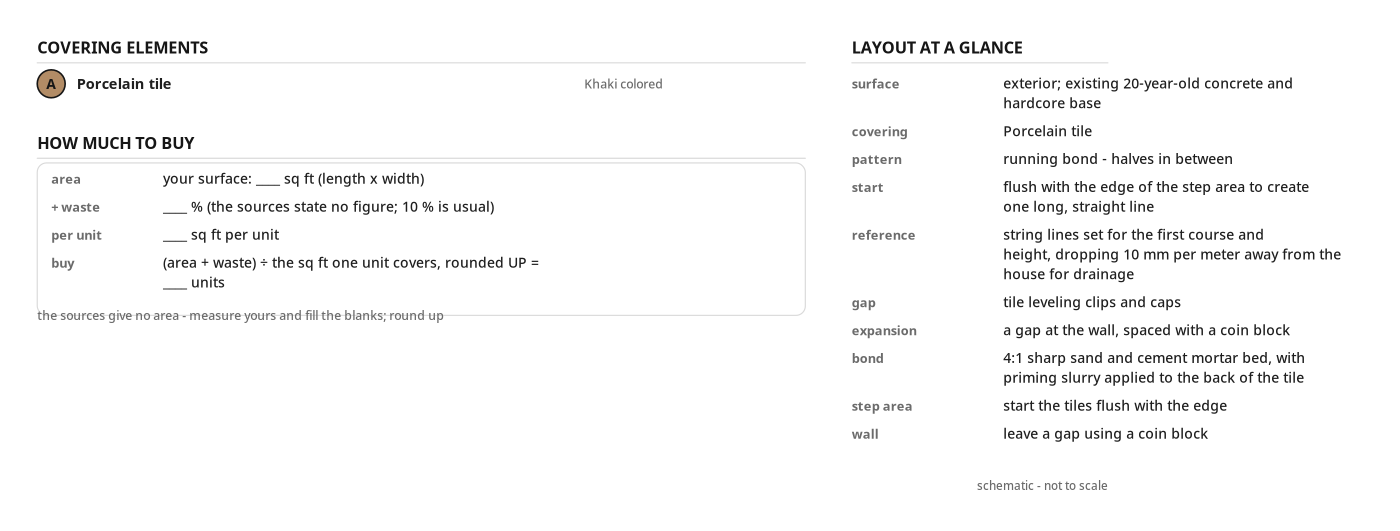
Covering elements
| Part | Name | Qty | Size | Notes |
|---|---|---|---|---|
| A | Porcelain tile | count yours | Khaki colored |
Before you start
Protect & clear
- Clear the patio of furniture and debris.
- Check the 20-year-old base is stable and has not sunk.
Tool set-up
- Set up the wheelbarrow and shovel to mix mortar.
- Ready the bucket to mix the priming slurry.
Step by step
Step 1: Prepare the Base and Set Layout Lines
Establish the layout grid with string lines, factoring a 10mm per meter drainage fall.
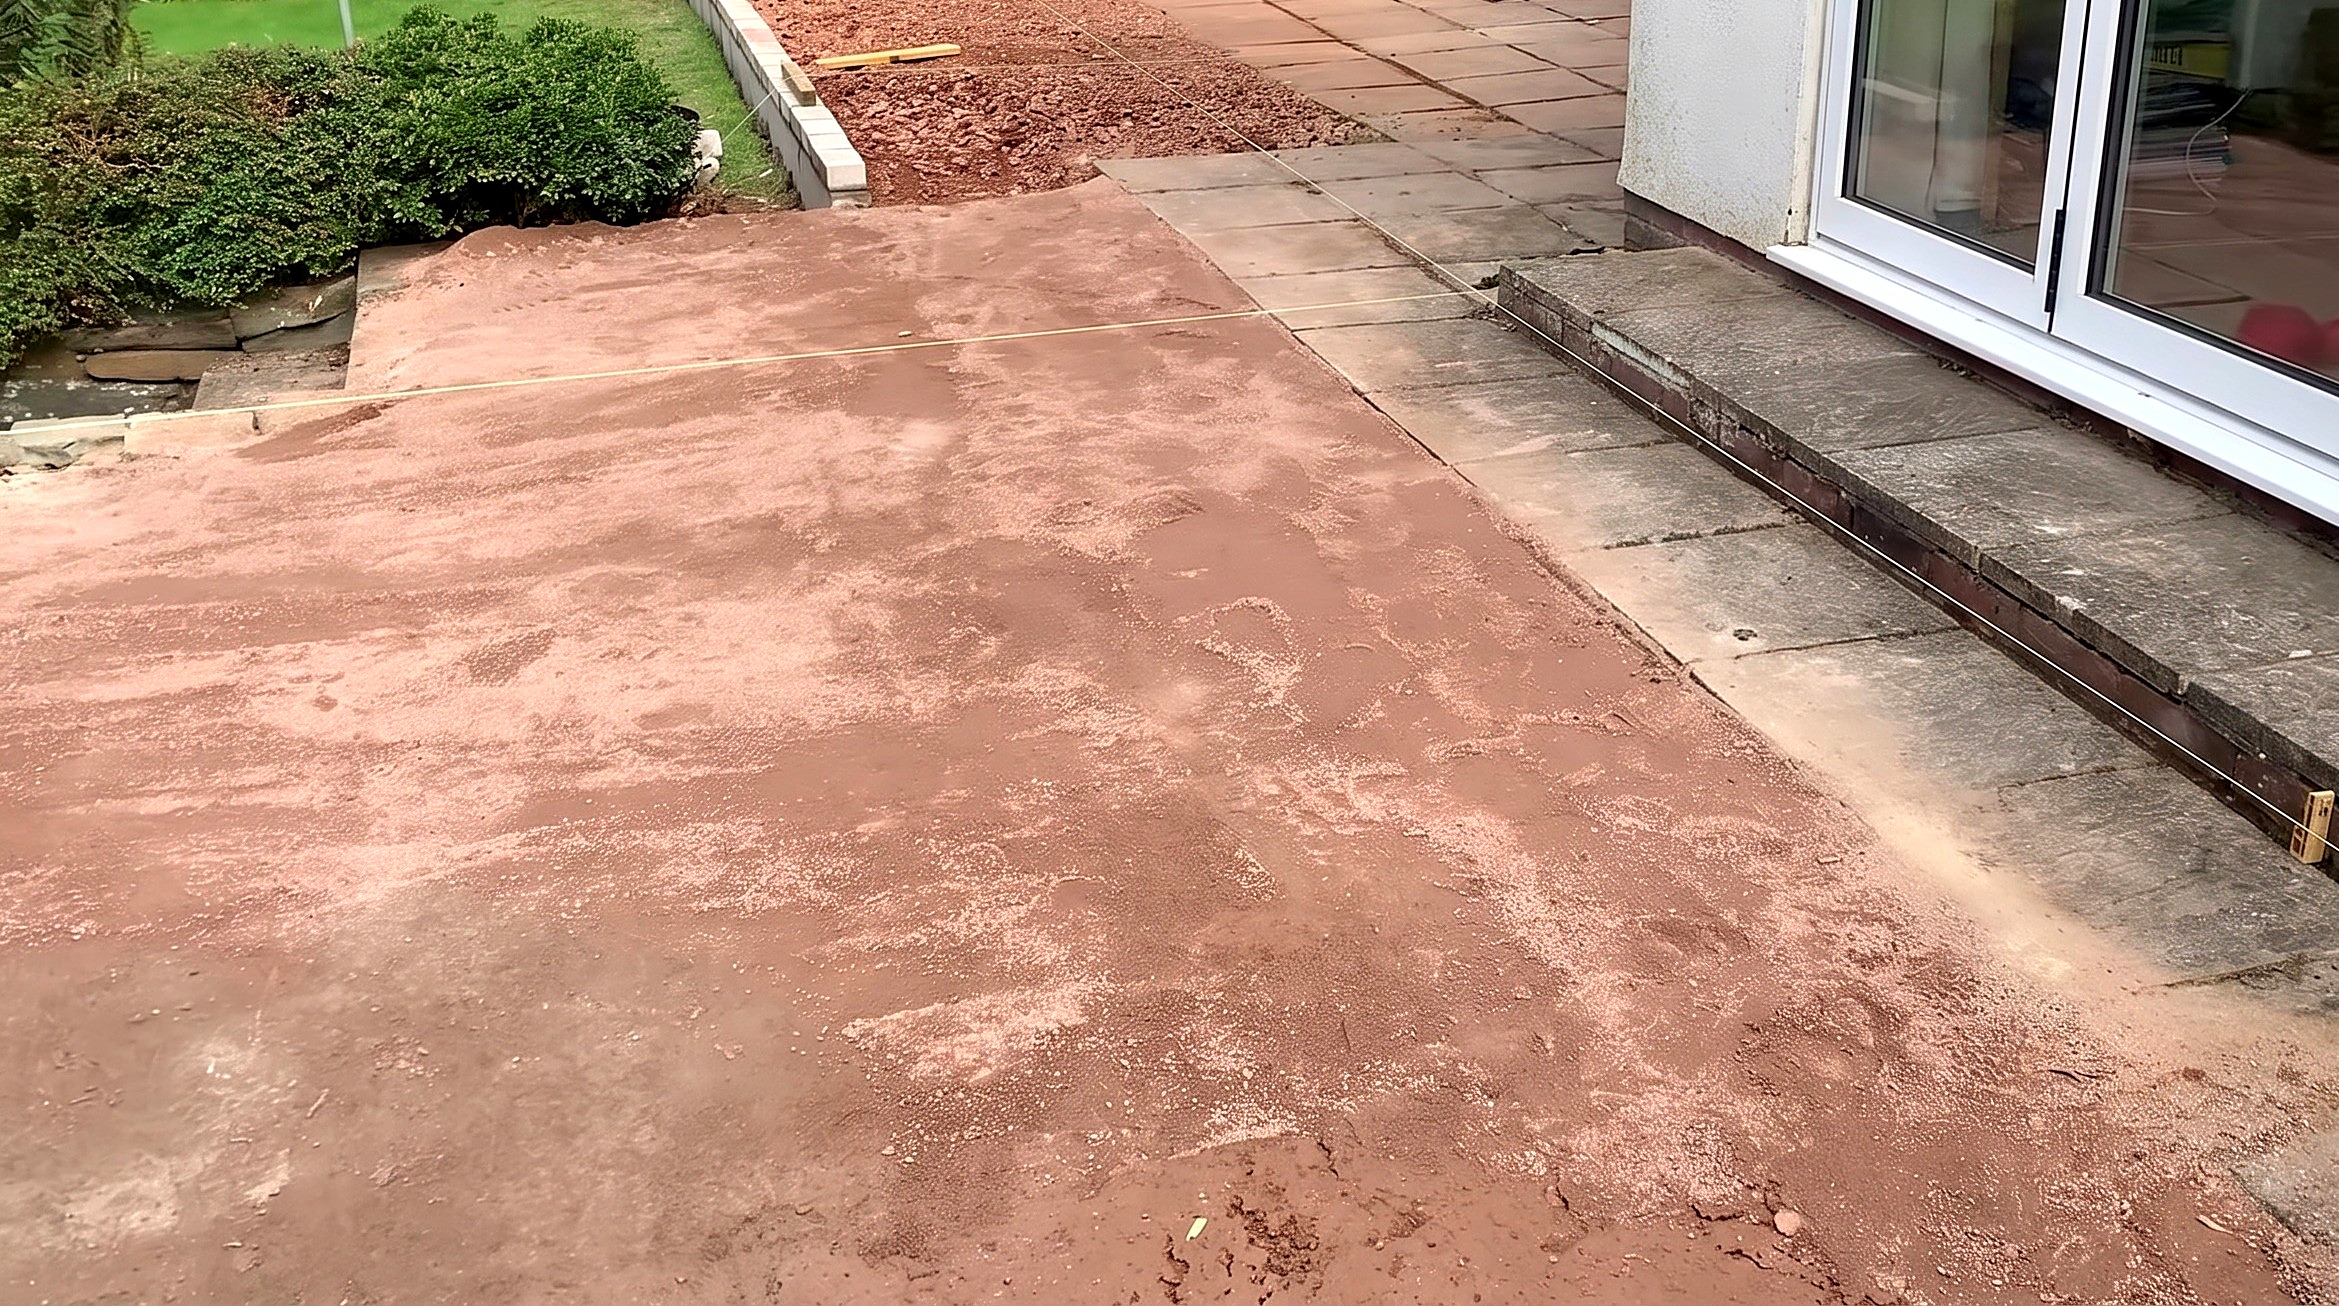
You'll need: String Line, Spirit Level
- 1.1 Establish the Starting Line
- Start flush with the existing step edge.
- Run a string line straight across the patio.
- Leave a gap at the house wall using a coin block spacer.
- 1.2 Set Height and Drainage Fall
- Set string lines to define the finished patio height.
- Drop the line level 10mm for every 1 meter away from the house.
- Check the lines with a spirit level to confirm the slope.
- 1.3 Set Remaining Layout Lines
- Run string lines to mark the outer edges and main courses.
- Use a tingle on long string lines to prevent sagging.
- Set the grid for a running bond pattern with halves between.
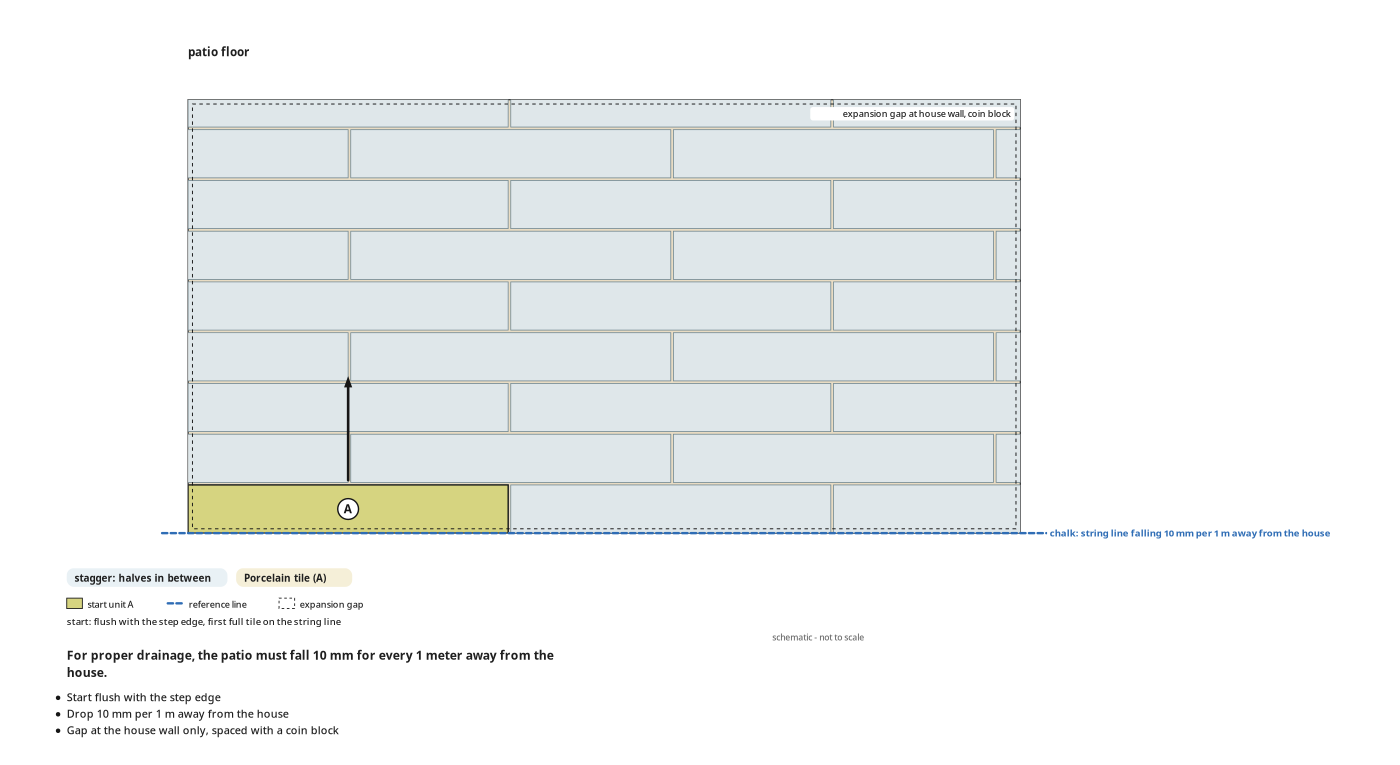
Key measurements
- Drainage fall: 10 mm for every 1 m away from the house
- Tip: For proper drainage, the patio must fall 10mm for every 1 meter away from the house.
Before you move on: Sight down the string lines to check they are straight, taut and slope consistently away from the house.
Step 2: Lay and Level the Porcelain Tiles
Set the porcelain tiles flush into the mortar bed with leveling clips, primed for adhesion.
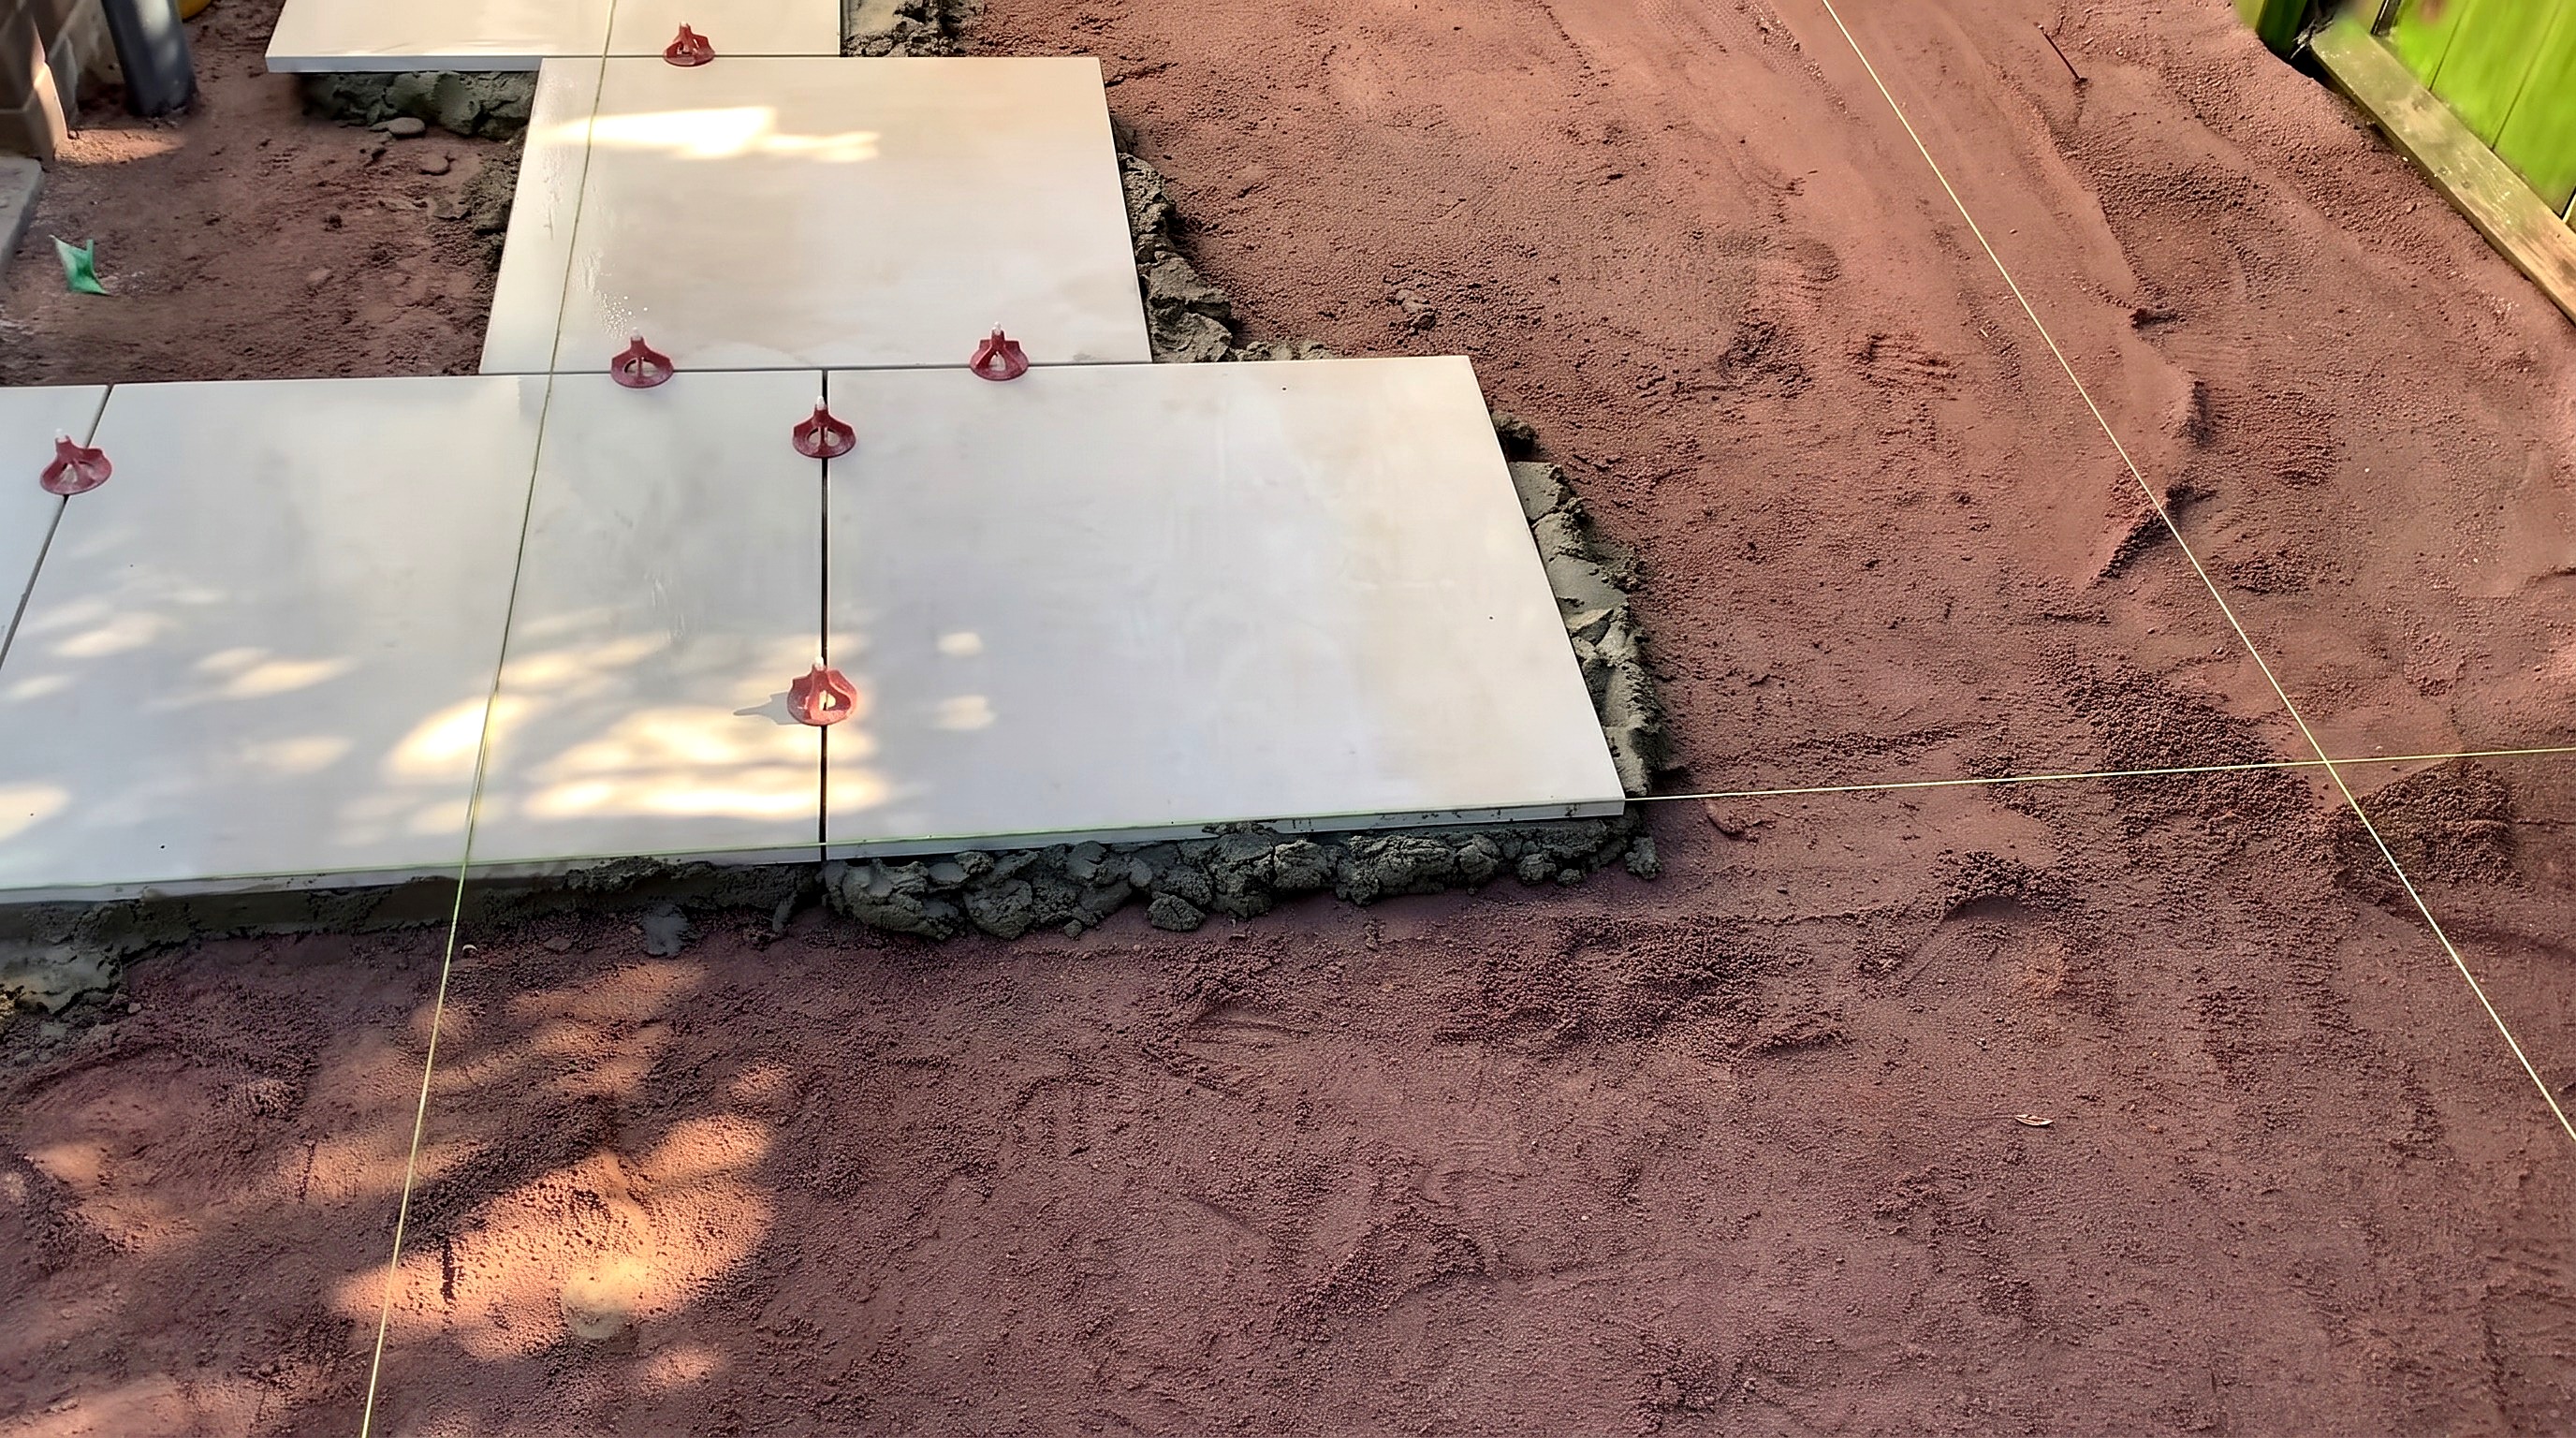
Parts in this step: (A) Porcelain tile
You'll need: Wheelbarrow, Shovel, Trowel, Mallet, Bucket, Porcelain Tiles, Cement, Sharp Sand, Priming Slurry, Tile Leveling System
- 2.1 Mix the Mortar
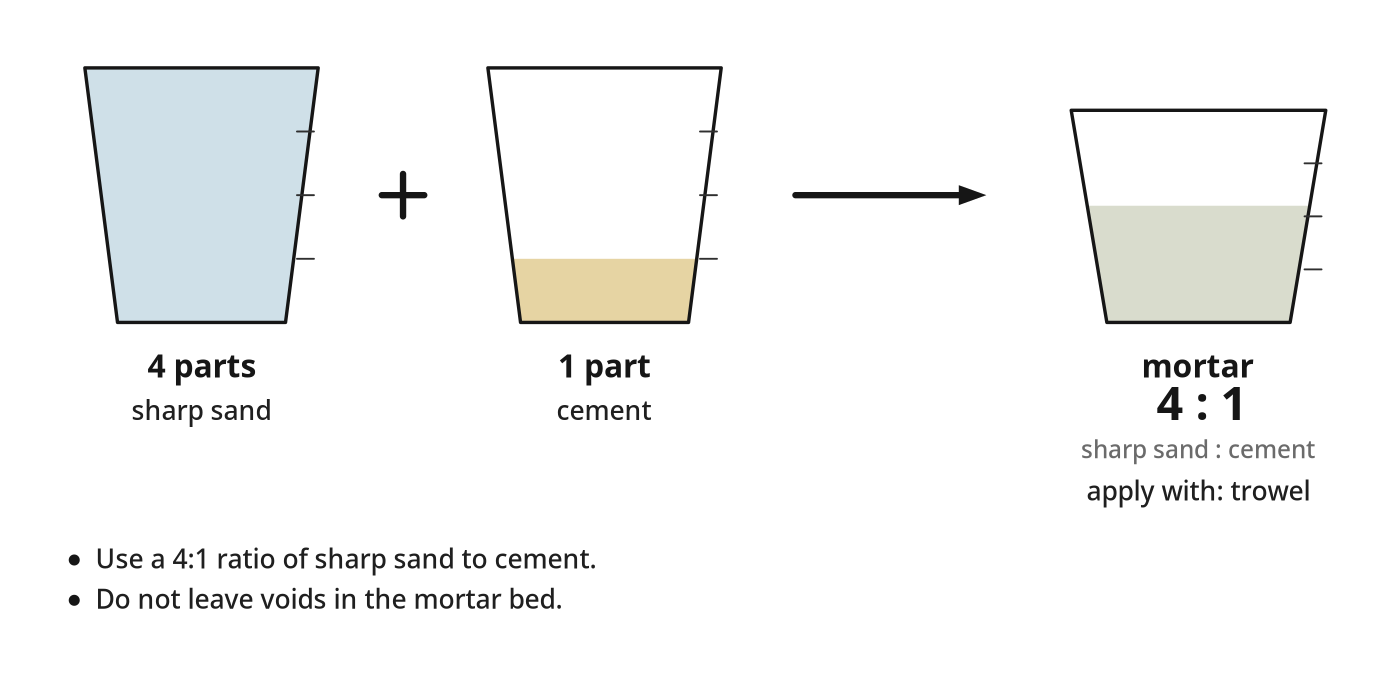
- Mix sharp sand and cement in a wheelbarrow with a shovel.
- Use a 4:1 ratio of sharp sand to cement.
- 2.2 Spread the Mortar Bed
- Trowel a generous dollop of mortar onto the base.
- Spread the mortar slightly higher than the final tile level.
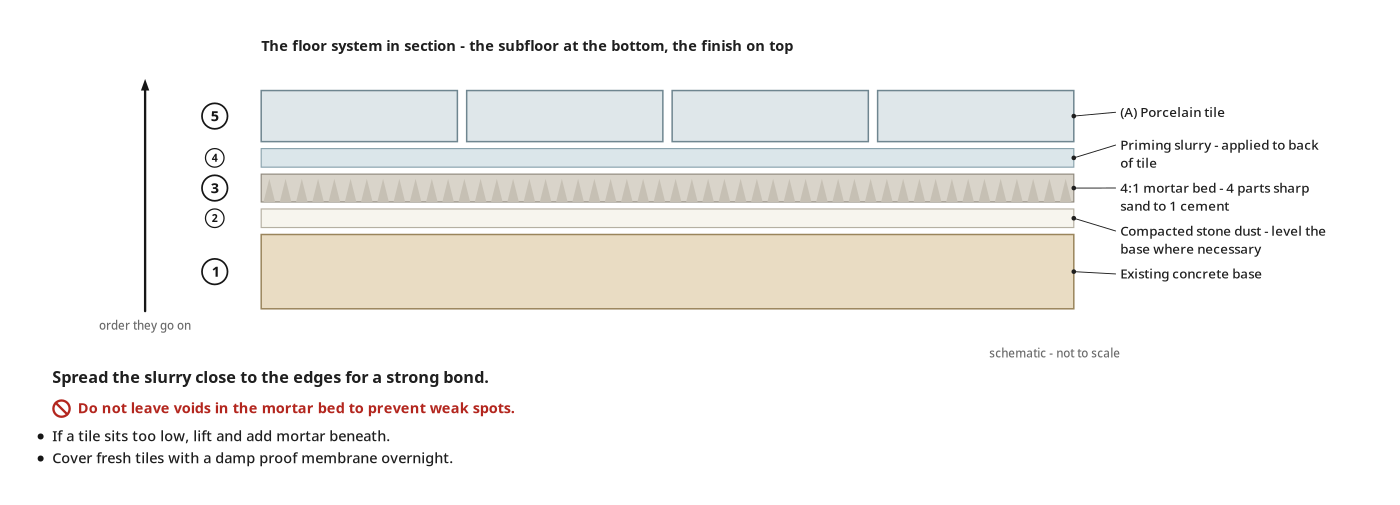
- Do not leave voids in the mortar bed to prevent weak spots.
- 2.3 Apply Priming Slurry to the Tile
- Mix the priming slurry in a bucket.
- Trowel the slurry onto the entire back of the porcelain tile (A).
- Spread the slurry close to the edges for a strong bond.
- 2.4 Lay and Level the Tile
- Set primed tile (A) onto the mortar bed against the string lines.
- Tap gently with a rubber mallet until level with the line.
- If too low, lift and add mortar underneath.
- 2.5 Use the Tile Leveling System
- Slide tile leveling clips under the exposed edges.
- Never insert clips against set edges laid the previous day.
- Spin leveling caps onto the clips to pull adjacent tiles flush.
- 2.6 Continue Laying Tiles
- Repeat spreading, priming, laying and leveling along the string lines.
- Cover fresh tiles with a damp proof membrane overnight to prevent footprints.
- Kick off the leveling caps the next morning once mortar sets.
Key measurements
- Mortar mix: 4 parts sharp sand to 1 part cement
- Tip: If a tile sits too low, lift and add mortar beneath.
- Tip: Use a tile leveling system for a perfectly flat finish.
- Heads up: Light tiles show footprints easily; cover them as you work.
Before you move on: Check the first tile with a spirit level to match the string line fall.
Finishing
Clean & cure
- Kick off the leveling caps the next morning.
- Clean the surface to avoid staining the light tiles.
Grout & edge
- Grout the tile joints across the patio.
- Cement the exposed edges the next day once the water dries.
Care
- Use a pressure washer for final cleanup and ongoing maintenance.
- Porcelain tiles are slippery when wet or icy.
Check before you call it done
| Check | What you should see | If not |
|---|---|---|
| Sight down the tile rows | Tiles follow straight string lines with no lippage between edges. | |
| Measure the slope | A consistent fall of 10mm per 1 meter away from the house | |
| Tap the tiles | A solid sound with no hollow spots indicating mortar voids. |
These Specs are built from Tidybricks patio restore's video “How to Lay a Porcelain Tile Patio Over an Existing Base”. Open the How to Lay a Porcelain Tile Patio Over an Existing Base project page.
