Spetz Specs No. 5719: step-by-step surface & covering guide
DIY Polished Concrete Outdoor Countertop and Base
The complete step-by-step guide made from Tidybricks patio restore's YouTube video, free on Spetz. For the video, a step-by-step player and answers to your questions, see the DIY Polished Concrete Outdoor Countertop and Base project page.
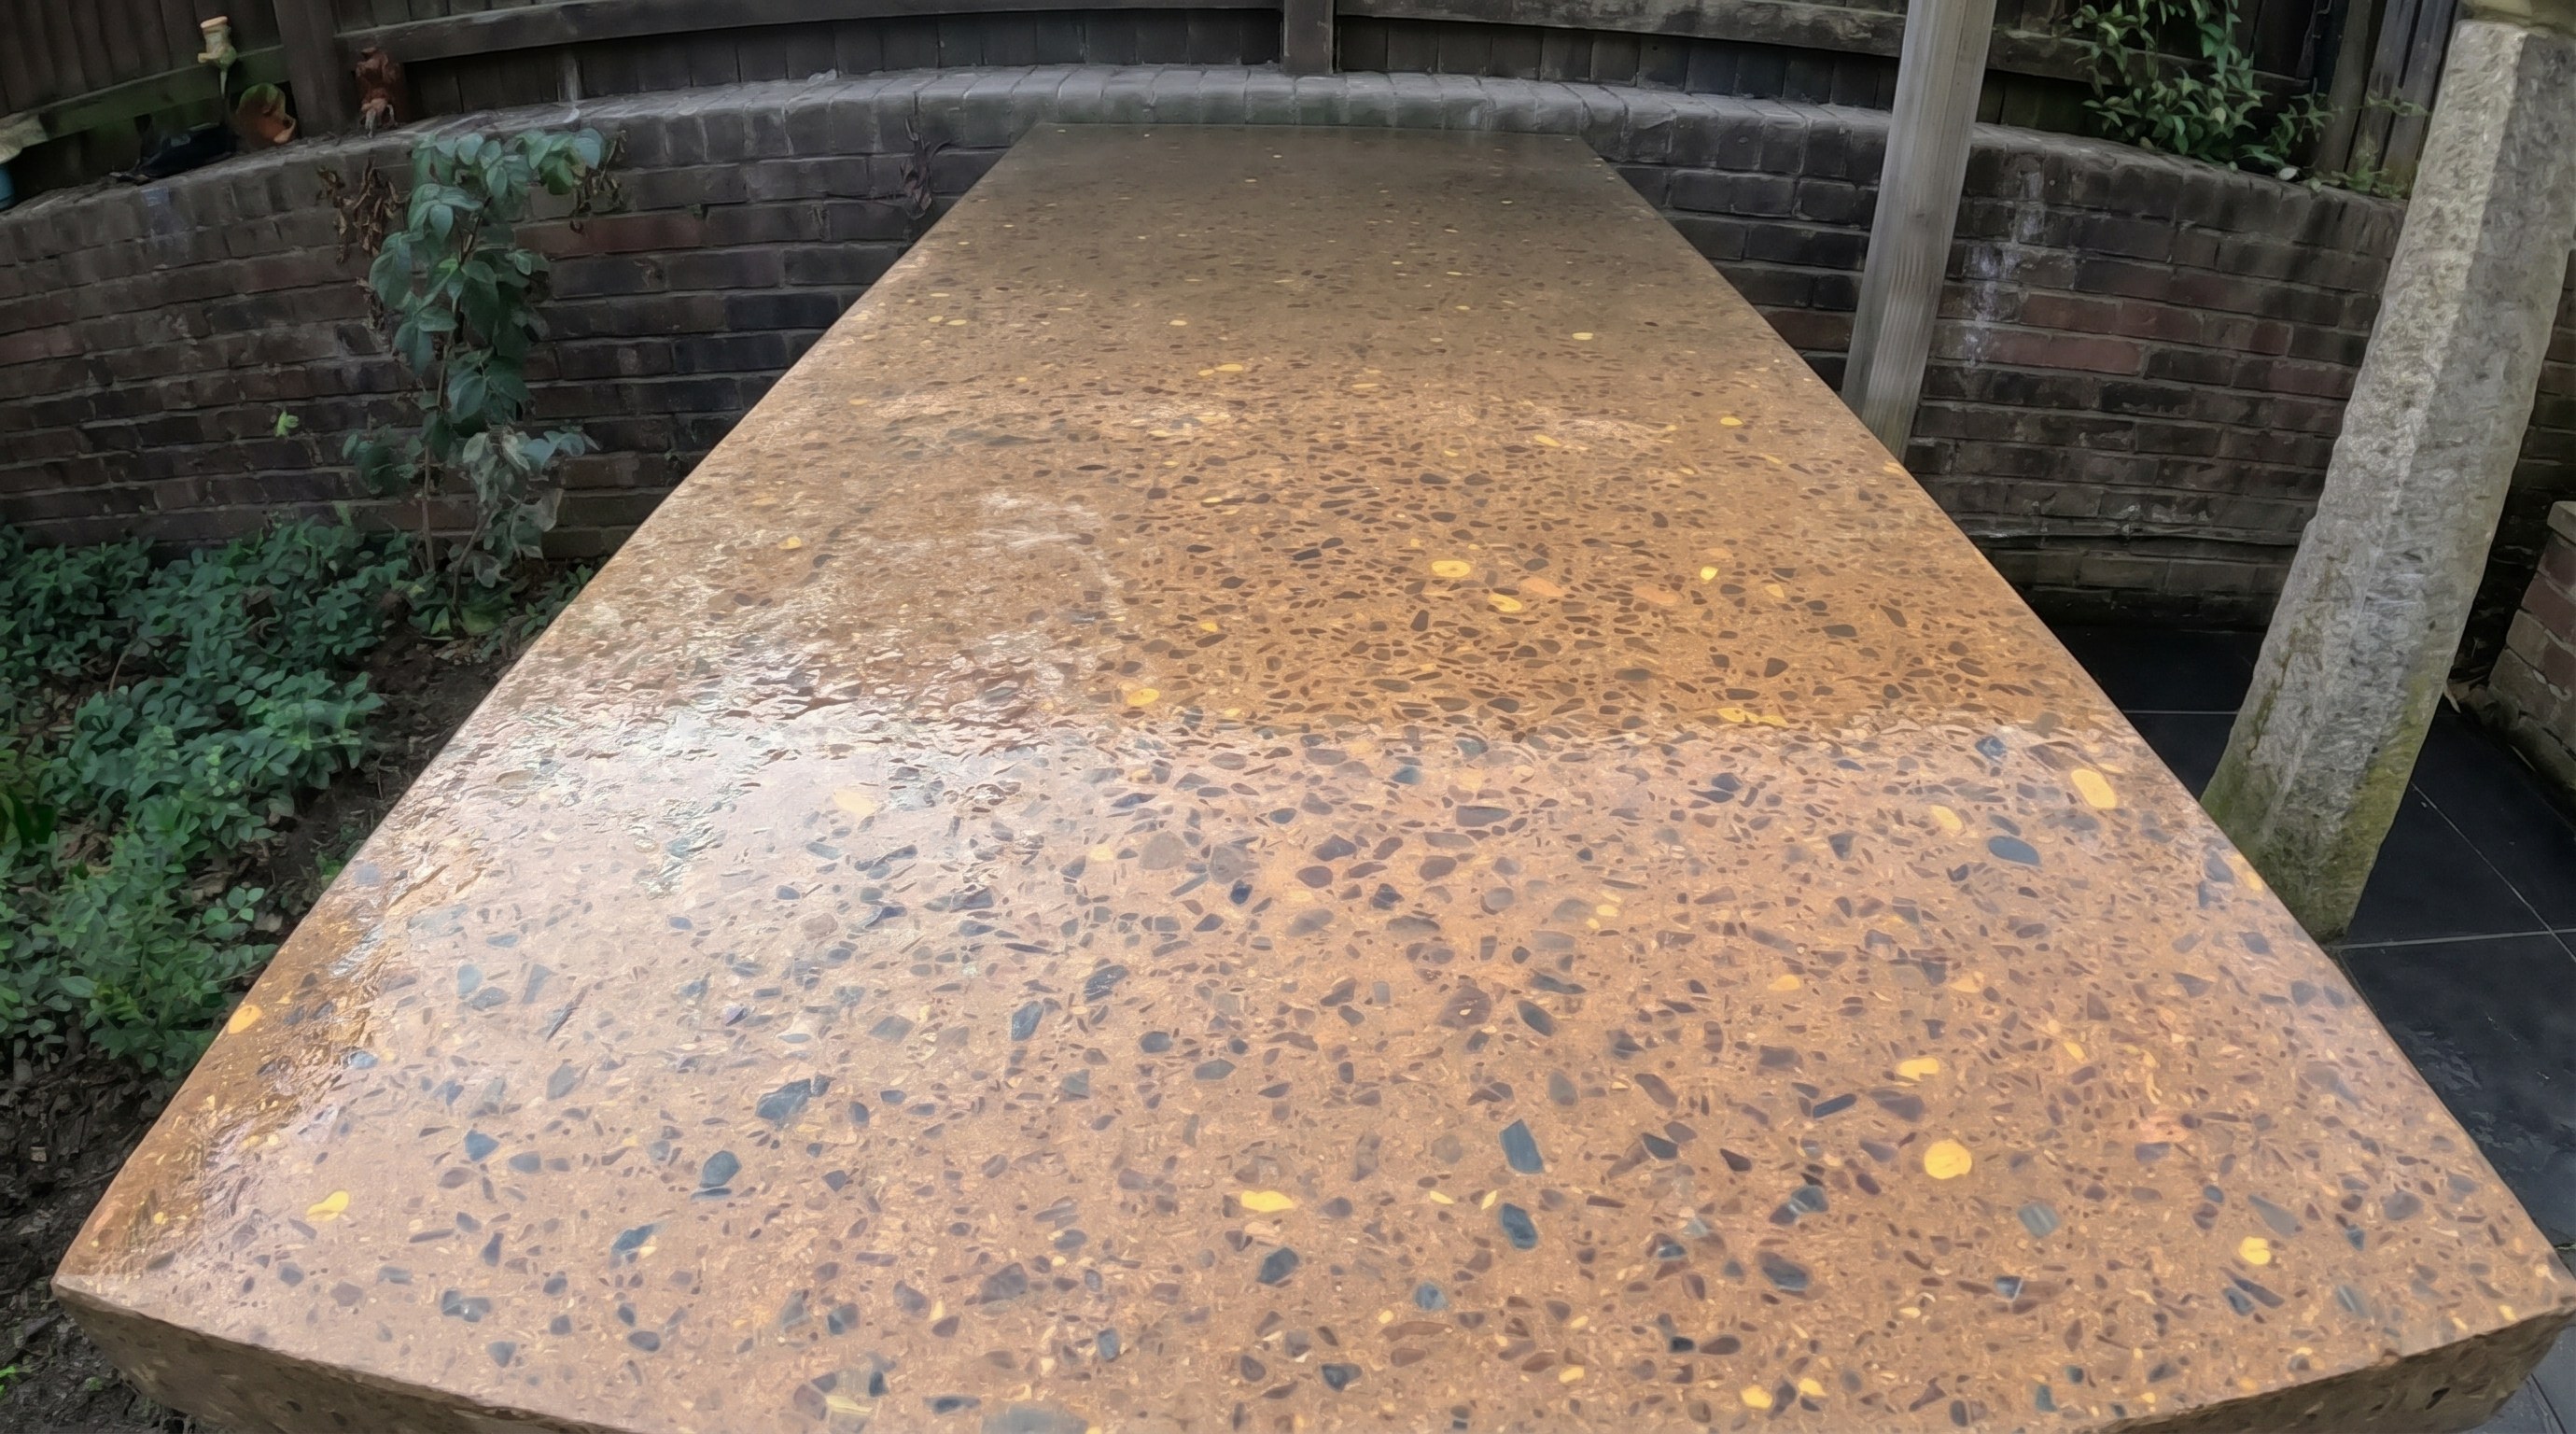
9 steps, 6 parts, 13 tools, 13 materials
Overview
Finished size: 1.67 m long countertop on a 900 mm high base
Surface & Covering
- Build a U-shaped block base with a cast-in-place polished concrete slab.
- Grind concrete to expose stone aggregate for a smooth terrazzo look.
- Clad the blockwork in horizontal grey tongue and groove boards.
Why Do It Yourself
- Build a solid outdoor barbecue station for around £250 in materials.
- Chemical hardener locks ground concrete so fine pads polish it like glass.
What It Takes
- Uses block laying, concrete casting, carpentry formwork, and dry diamond grinding.
- Expect a 1-week concrete cure, overnight hardener soak, and heavy silica dust.
What Decides Success
- Space formwork off blocks for cladding thickness and overhang.
- Run a variable speed grinder on low so polishing pads never fly off.
Layout at a glance
- Covering: Tongue and groove cladding
- Laid on: U-shaped concrete block base clad over vertical timber battens, with insulation board under the cast countertop.
- Pattern: horizontal
- Reference line: Level the blockwork courses and screed the concrete top flat using a spirit level
- Bond: Cast concrete reinforced with steel mesh over an insulation board base, ground with 50 to 1500 grit diamond pads, hardened, and sealed with two brushed coats of paving seal.
- Countertop overhang above base cladding: Pack the timber side formwork out from the block wall with two strips: one as thick as the batten plus the cladding, one as wide as the overhang; unscrew the inner strip before pouring.
- Base front and side spans: Fix 900 mm vertical battens to the blockwork with masonry screws: one at each end and two in the middle on the front, three on the side, to carry the cladding.
- Outside corners of the clad base: Cover the meeting ends of the horizontal tongue and groove cladding with vertical corner trim pieces.
- Exposed concrete slab perimeter: Grind and polish the vertical concrete edges along with the top surface using diamond pads, then brush on concrete hardener and two coats of paving sealer.
Health and safety
Angle Grinders and Power Tools
- Never run porcelain or diamond polishing pads on a fixed 11,000 RPM grinder, as high speeds fling pads off violently.
- Use a variable speed angle grinder at low speeds for polishing, and press each diamond pad firmly onto the backing plate.
- Hold the SDS hammer drill and paddle mixer with both hands to brace against sudden torque if the bit binds.
- Keep fingers clear of the oscillating multi-tool blade when trimming formwork, and let the tool stop before setting it down.
Silica Dust and Respirators
- Wear protective equipment when grinding concrete: a respirator mask rated for fine silica dust, safety glasses, and hearing protection.
- Grind the countertop and mix dry cement and building sand outdoors so hazardous silica dust does not accumulate around you.
- Stand upwind while pouring dry cement into the mixing bucket to avoid inhaling caustic dust clouds.
Wet Cement and Chemical Finishes
- Wear waterproof gloves and long sleeves when mixing or troweling mortar and concrete to prevent alkaline wet cement burns.
- Wash your skin immediately with clean water if wet cement, concrete hardener, or paving seal splashes onto you.
- Apply the concrete hardener, dustproofer, and paving seal in open outdoor air, and avoid breathing vapours while brushing.
Heavy Masonry, Mesh, and Formwork
- Clamp the timber and plywood shuttering tightly so the formwork cannot burst open under the weight of wet concrete.
- Lift heavy concrete blocks and full mixing buckets with your legs and a straight back, never by twisting your waist.
- Wear thick work gloves when handling the steel reinforcement mesh to protect your hands from sharp wire ends.
- Embed the steel reinforcement mesh inside the slab so the heavy concrete countertop cannot crack and collapse under load.
The surface & its prep
- Clear a solid, level outdoor area for the U-shaped block base, a little shorter than the 1.67 m countertop.
- Pre-paint tongue and groove cladding (A) grey and let dry first.
- Cut two timber gauge strips: batten plus cladding thickness, and overhang.
- Pour and diamond grind in dry weather so rain does not pit the surface.
- Check block courses and formwork horizontally with a spirit level.
Tools
- Variable Speed Angle Grinder (Angle Grinder, Bosch, GWS 9-125 S, 900W)
- Angle Grinder (Makita, GA5030, 720W)
- Diamond Polishing Pads (Various grits (50, 100, 200, 400, 800, 1500))
- Drill with Paddle Mixer (Power Mixer, Titan)
- Mixing Bucket
- Trowel (Pointing Trowel)
- Spirit Level
- Oscillating Multi-Tool (Makita) (optional)
- Hammer Drill (SDS Drill)
- Hammer
- Clamps
- Shovel
- Paintbrush
Materials
- Concrete Blocks
- Cement
- Building Sand (Multiple bags, Travis Perkins)
- Washing-up Liquid (A few drops, Fairy)
- Timber/Plywood
- Insulation Board (Celotex)
- Steel Reinforcement Mesh (1 piece)
- Masonry Screws
- Wooden Battens
- Tongue and Groove Cladding
- Grey Paint
- Concrete Hardener & Dustproofer (5 Litre, Alphachem)
- Paving Seal (Thompson's, One Coat)
Hardware
| Hardware | Size | Count | Used in steps |
|---|---|---|---|
| Masonry Screws | 2, 8 |
Finishes & supplies, in the order they go on
| Product | What it does | Mix & coats | Dry time | Applied with |
|---|---|---|---|---|
| Grey Paint | Pre-coat tongue and groove cladding boards before fixing to the base | Dry completely before cutting and fixing cladding | Paintbrush | |
| Cement | Mix with building sand, water and washing-up liquid for block mortar and slab concrete | A few drops of washing-up liquid per bucket; sand-to-cement ratio not stated in sources | 1 week cure before removing countertop formwork | Trowel |
| Concrete Hardener & Dustproofer | Penetrate, harden and dustproof the ground concrete slab before and during fine polishing | Ready to use (5 L container), 2 coats | Soak overnight after initial grind; let top-up coat dry before final polishing | Paintbrush |
| Paving Seal | Weatherproof the polished concrete and deepen the stone finish | Ready to use, 2 coats | Apply second coat while first coat is tacky; 2 days for full cure | Paintbrush |
Covering elements
| Part | Name | Qty | Size | Notes |
|---|---|---|---|---|
| A | Tongue and groove cladding | x1 | Pre-painted grey before installing horizontally across the battened blockwork base. | |
| B | Insulation board (Kingspan / Celotex ) | x1 | Placed atop the U-shaped block base to form the underside of the cast concrete countertop. | |
| C | Timber formwork strips | count yours | 1.67 m long | Spaced off the blockwork by the batten and cladding thickness plus the concrete overhang. |
| D | Steel reinforcement mesh | x1 | 1 piece · Embedded into the concrete countertop pour for structural reinforcement. | |
| E | Wooden battens | x7 | 900 mm long | 4 on front, 3 on side · Cut to 900 mm and fixed vertically to the concrete block base with masonry screws. |
| F | Corner pieces | count yours | Trim pieces installed over the outside corners of the tongue and groove cladding. |
Before you start
Protect & Clear
- Clear a flat outdoor spot for the U-shaped block base and the 1.67 m countertop above it.
- Keep covers ready to shield fresh concrete and power tools from rain.
Cut & Paint Station
- Pre-paint tongue and groove cladding (A) grey and let dry.
- Cut wooden battens (E) to 900 mm for the base frame.
Tool Set-Up
- Chuck the paddle mixer attachment in the drill for bucket mixing.
- Set the variable speed angle grinder to speed 3, around 5,000 RPM.
Step by step
Step 1: Build the Blockwork Base
Level, plumb U-shaped concrete block base ready for the countertop mold.
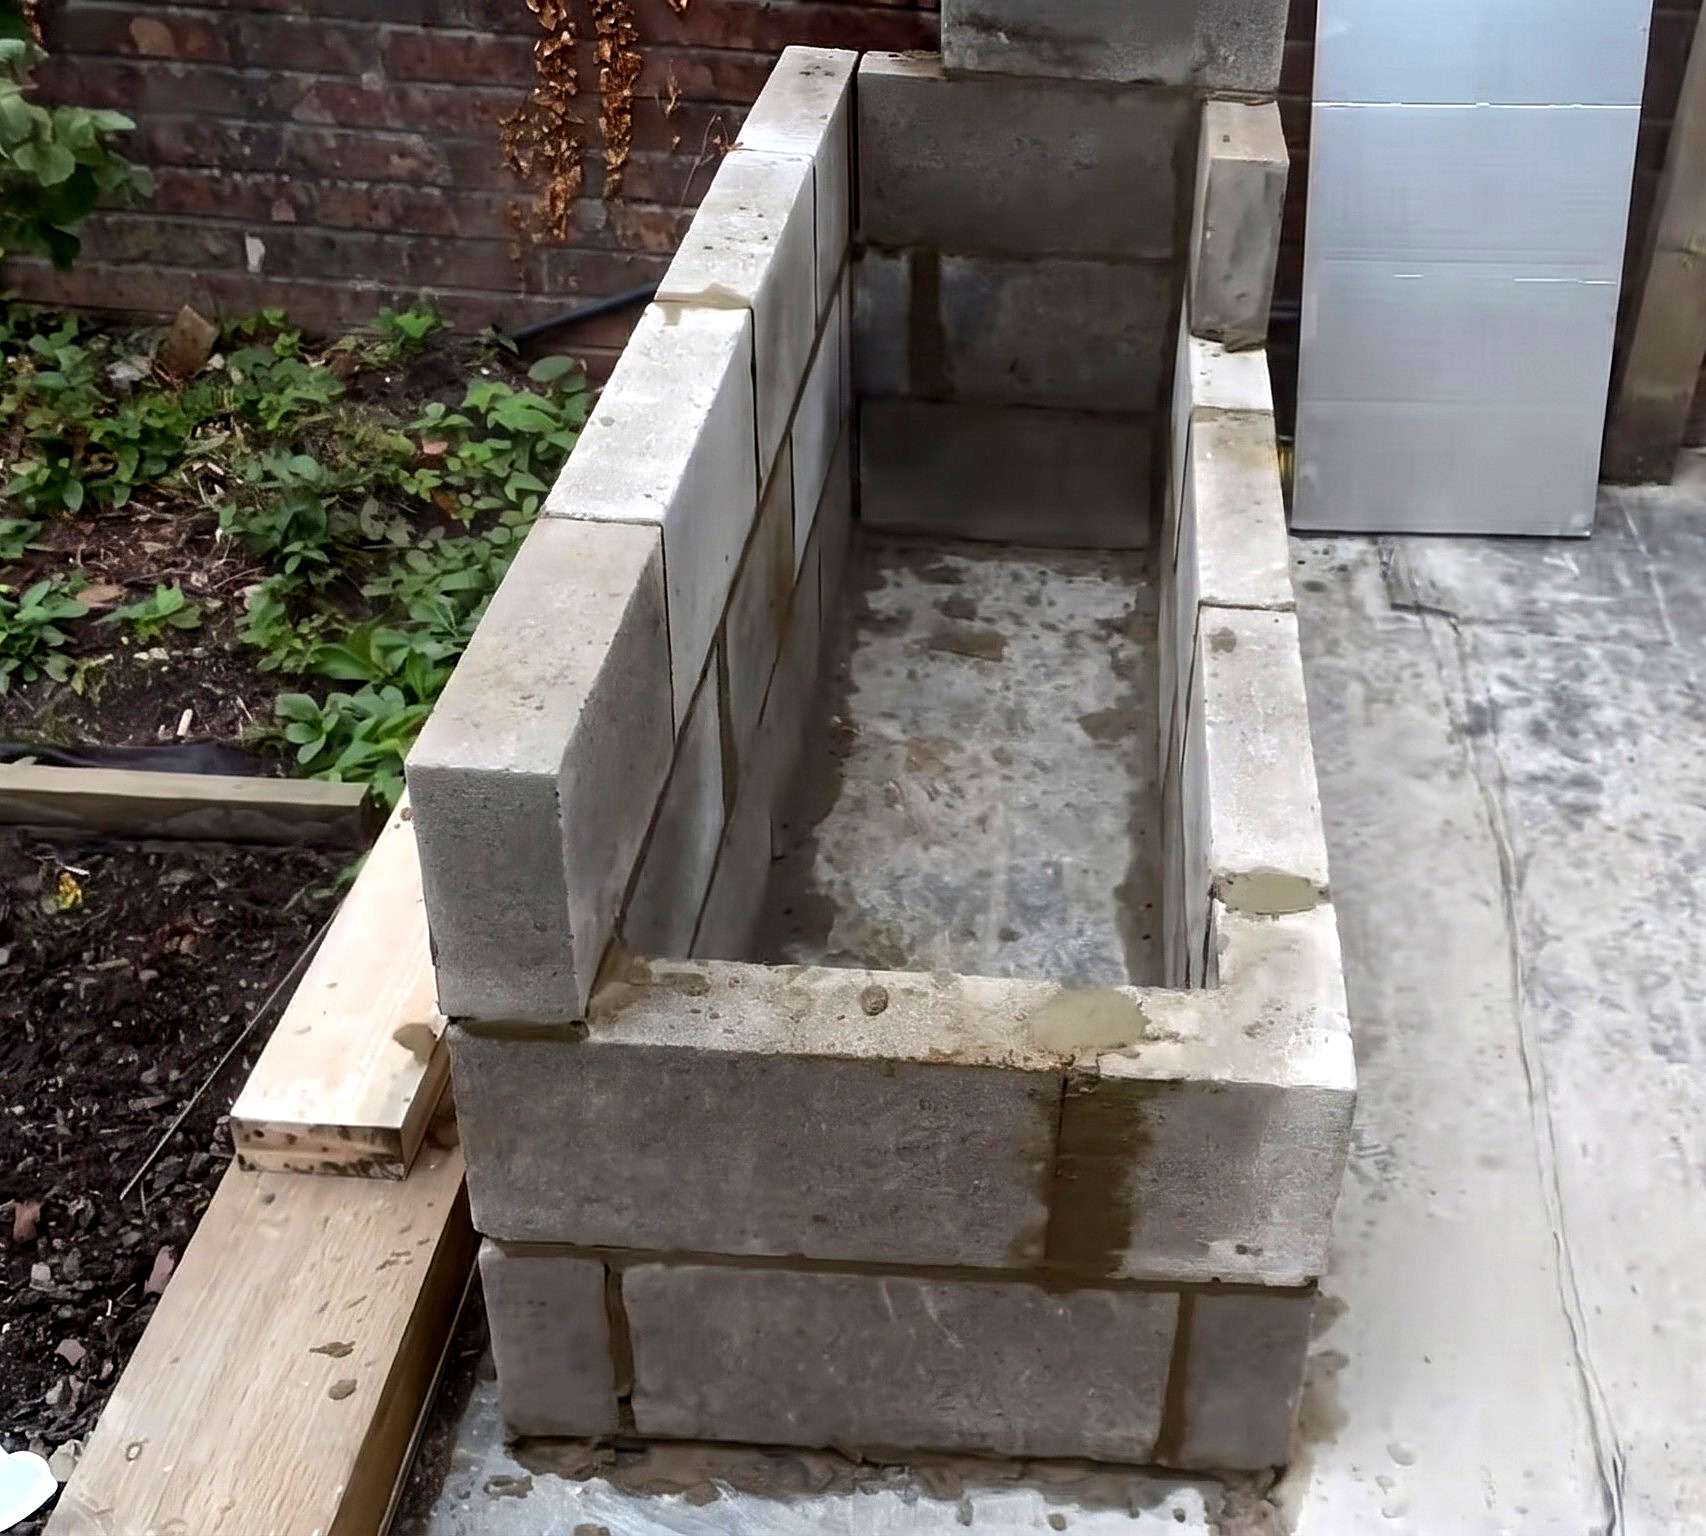
You'll need: Drill with Paddle Mixer, Mixing Bucket, Trowel, Spirit Level, Concrete Blocks, Cement, Building Sand, Washing-up Liquid
- 1.1 Mix the Mortar
- Put building sand, cement, and water in the mixing bucket.
- This guide does not state the mix ratio; general practice is 4:1 sand to cement.
- Add a few drops of washing-up liquid as a mortar plasticizer.
- Blend the batch to a workable consistency using the drill with paddle mixer.
- 1.2 Lay the Concrete Blocks
- Lay concrete blocks in a U-shaped footprint shorter than the 1.67 m countertop, leaving room at each end for the batten, the cladding and the overhang.
- Trowel mortar onto horizontal and vertical joints.
- Check every course is plumb and level with the spirit level.
Key measurements
- Countertop and formwork length: 1.67 m; build the block base shorter by batten + cladding + overhang at each end
- Barbecue side clearance: about 150 mm of countertop each side of the grill
- Tip: A few drops of washing-up liquid make mortar smoother and easier to spread.
Before you move on: Level the top block course both ways with the spirit level before formwork.
Step 2: Construct the Countertop Formwork
Insulation base and outer timber side forms clamped tight with even overhang.
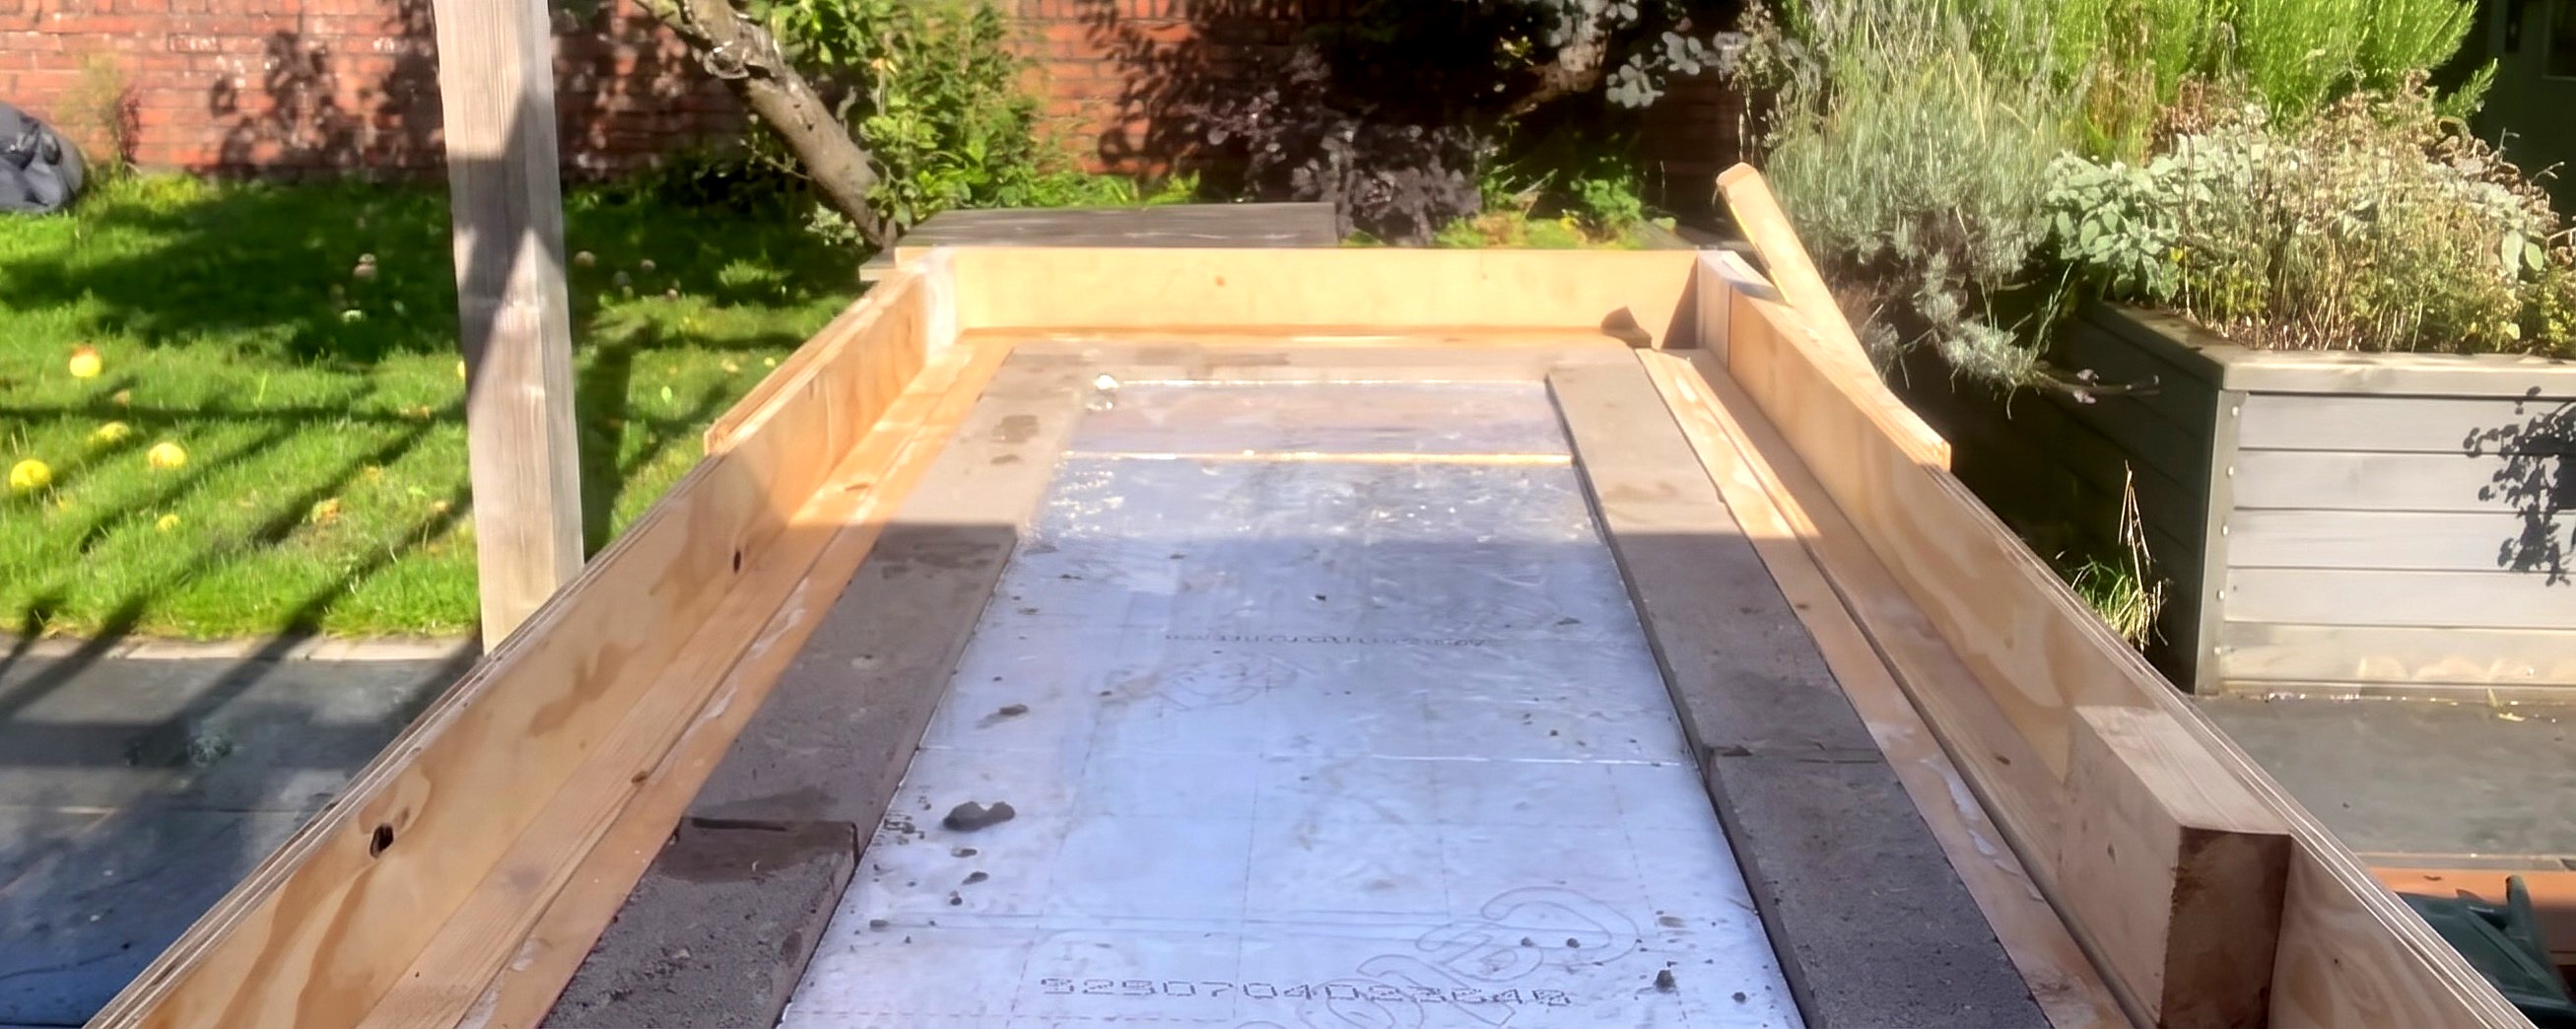
Parts in this step: (B) Insulation board (Kingspan / Celotex ), (C) Timber formwork strips
You'll need: Hammer Drill, Hammer, Clamps, Spirit Level, Insulation Board, Timber/Plywood, Masonry Screws
- 2.1 Create the Form Base
- Cut insulation board (B) to fit the U-shaped block opening.
- Set the board flush with the block tops as the mold floor.
- 2.2 Build and Attach the Side Forms
- Pre-drill and screw a spacer strip of batten plus cladding thickness to the blocks.
- Add a second spacer strip outside the first to set the concrete overhang.
- Fix the 1.67 m timber formwork strips (C) against the outer spacer with clamps.
- Unscrew the inner spacer strips so the formwork overhangs the future cladding.
- Patch timber joint gaps so wet concrete cannot leak.
Key measurements
- Formwork length: 1.67 m along the front face
- Overhang offset: batten plus tongue and groove thickness plus desired slab overhang
- Tip: Tap masonry screws in with a hammer before tightening the last threads.
- Heads up: Unsealed gaps or weak clamps let shuttering give way under wet concrete weight.
Before you move on: Check inner spacer strips are unscrewed and formwork joints sealed tight.
Step 3: Pour and Level the Concrete Countertop
Formwork filled with reinforced, vibrated concrete screeded flat to the top edge.
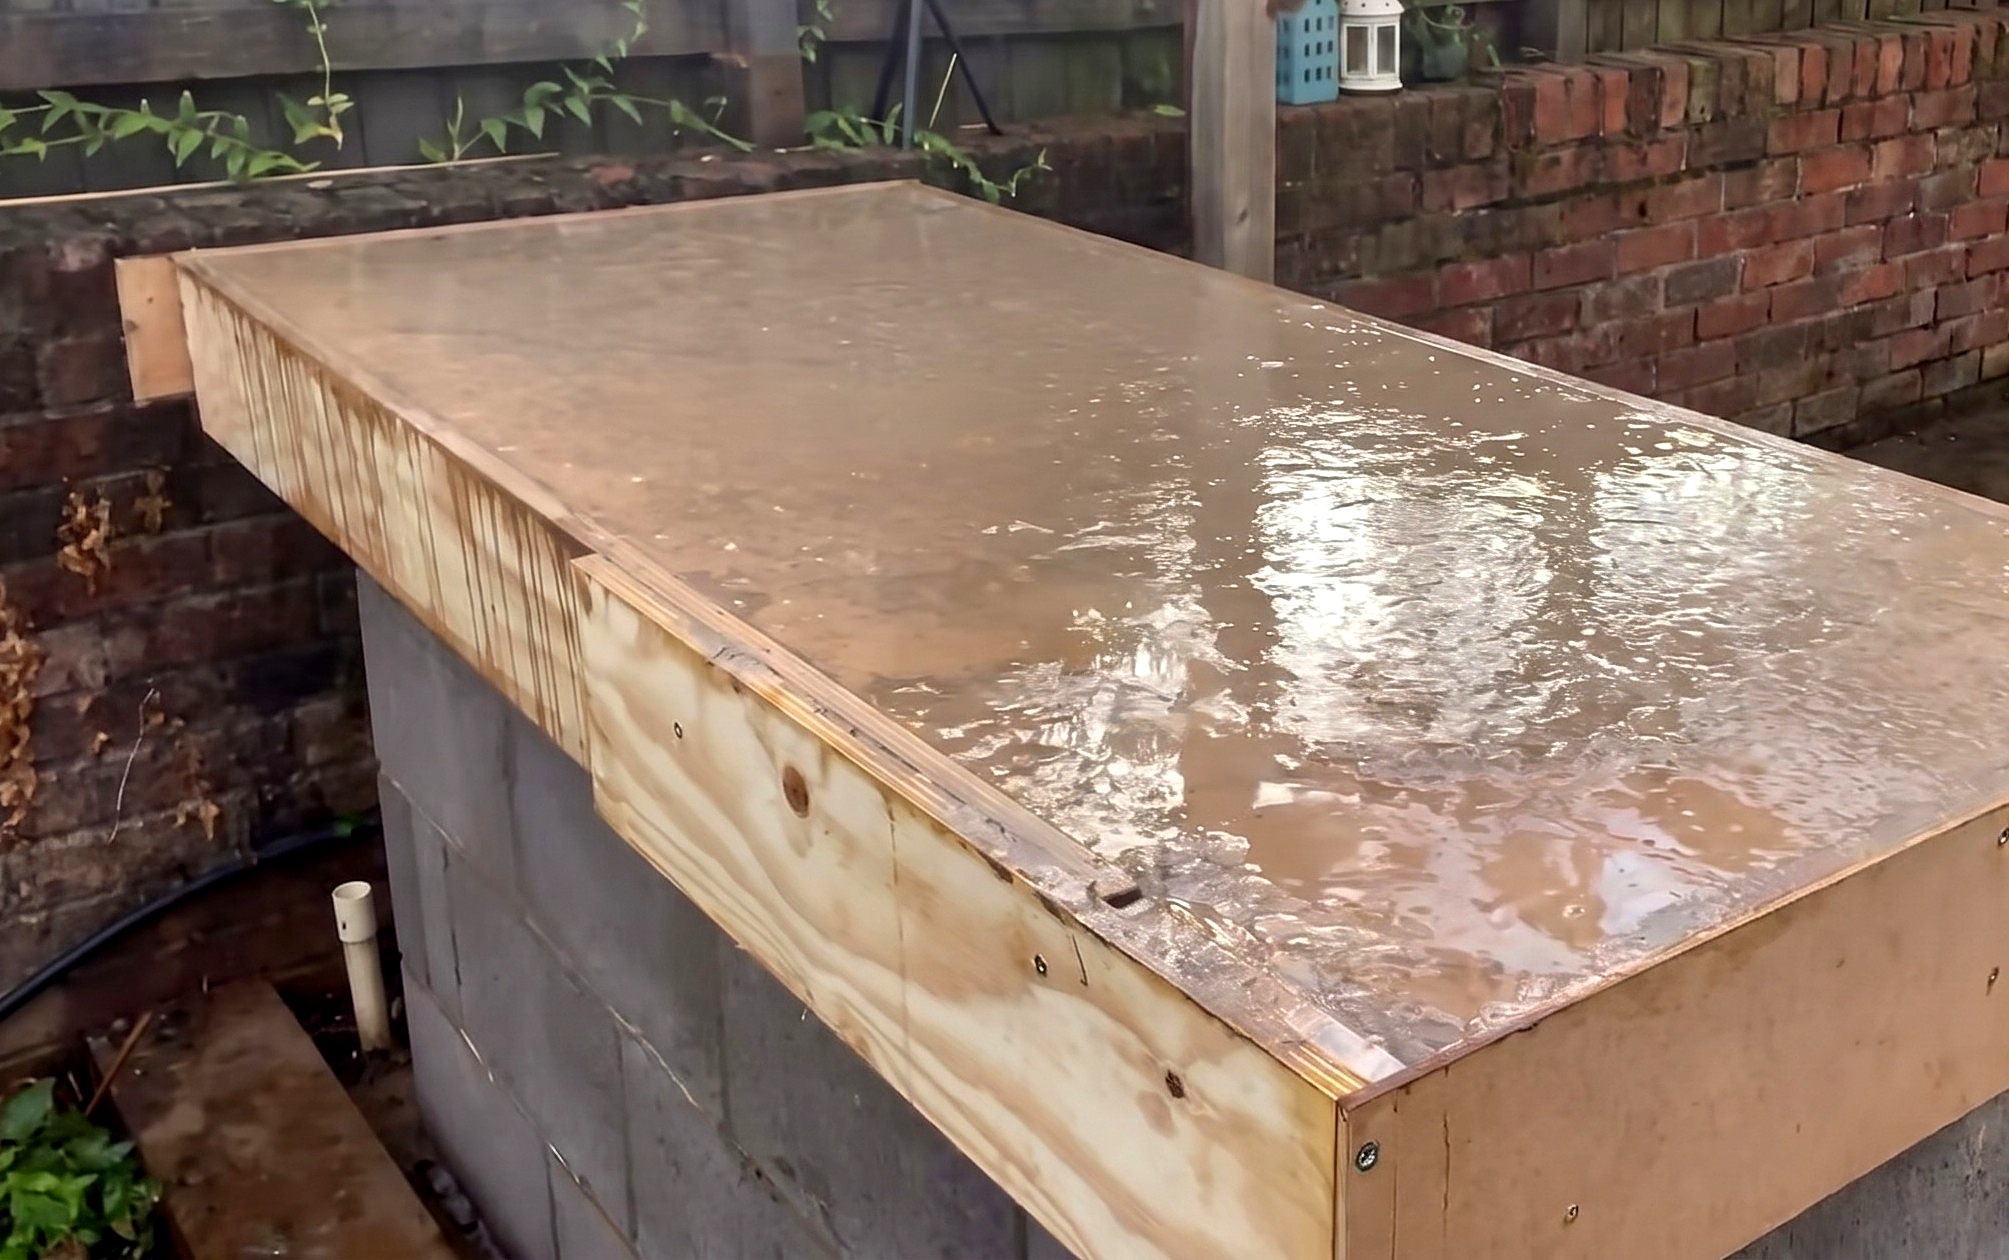
Parts in this step: (D) Steel reinforcement mesh
You'll need: Drill with Paddle Mixer, Mixing Bucket, Shovel, Hammer, Oscillating Multi-Tool, Trowel, Spirit Level, Cement, Building Sand, Washing-up Liquid, Steel Reinforcement Mesh
- 3.1 Mix and Pour Concrete
- Mix building sand, cement, water and a few drops of washing-up liquid.
- Shovel wet concrete into the formwork until the mold is half full.
- 3.2 Add Reinforcement and Vibrate
- Lay steel reinforcement mesh (D) flat on the half-filled concrete.
- Tap around the outer formwork with a hammer to release air bubbles.
- Or press an oscillating multi-tool to the timber sides to vibrate the mix.
- 3.3 Top Off and Level the Concrete
- Fill the formwork to the top rim with a final concrete skim.
- Draw the spirit level across the forms to screed the surface flat.
- Trowel the wet top smooth and cover if rain starts.
Key measurements
- First concrete lift: 50% of formwork depth before placing steel mesh
- Tip: Vibrating the outer formwork settles the mix and prevents edge air pockets.
- Heads up: Omitting the steel reinforcement mesh lets the concrete slab crack over time.
Before you move on: Check the screeded surface is level and flush with the formwork top.
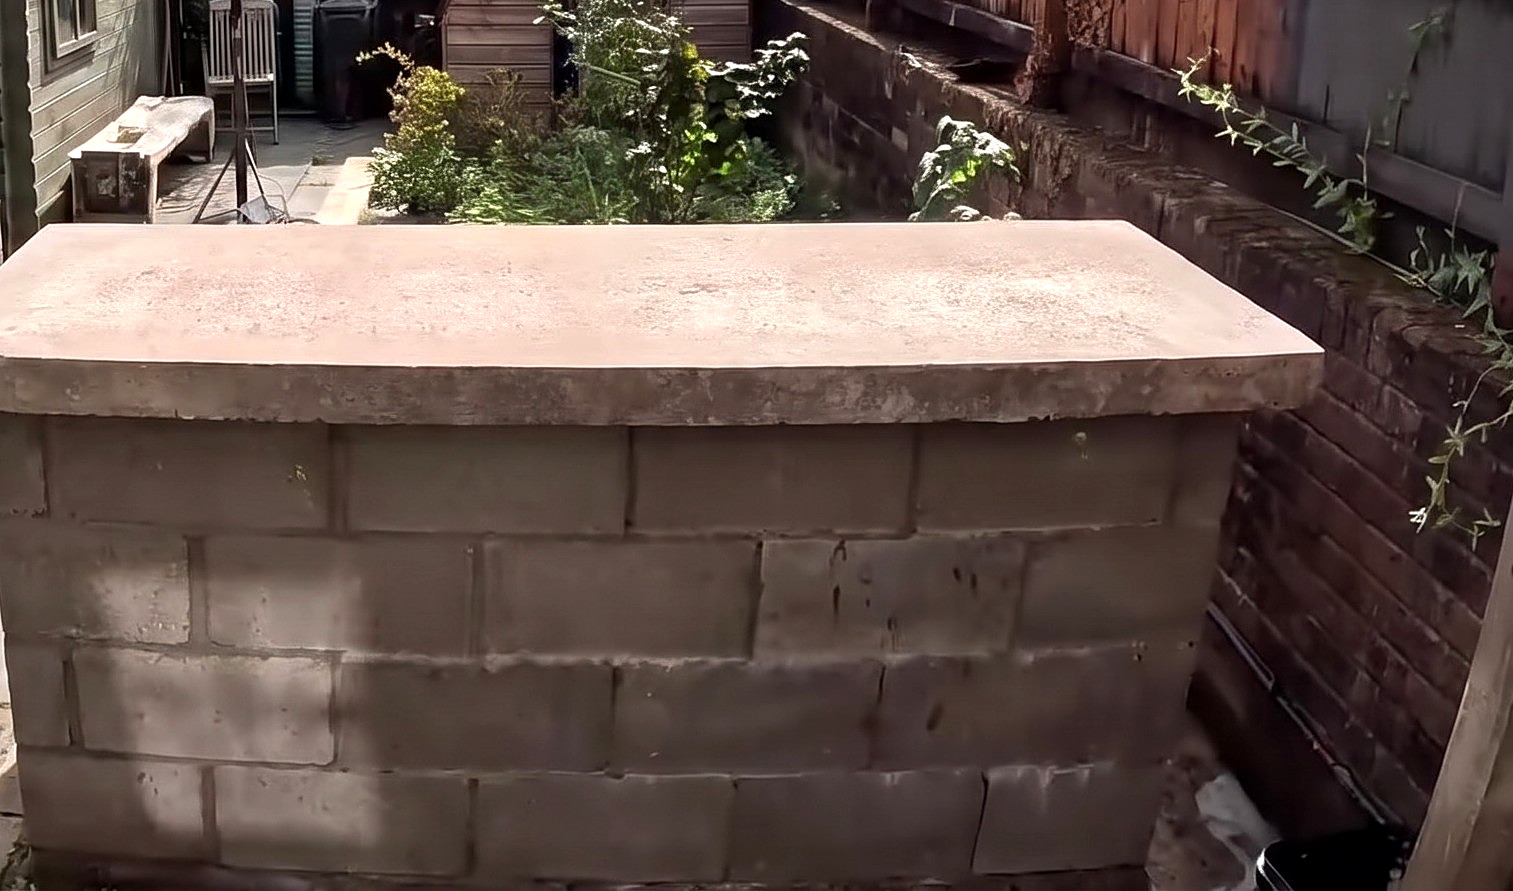
Step 4: Remove the Formwork (Demold)
Cured concrete slab stripped of its wooden mold with clean perimeter edges.
You'll need: Hammer, Clamps
- 4.1 Unscrew and Remove Forms
- Wait 1 week for the slab to cure before touching the mold.
- Remove clamps and unscrew the fasteners holding the timber formwork strips (C).
- Pry the timber sides off the concrete edges without chipping the corners.
Key measurements
- Concrete cure time: 1 week minimum before removing formwork
- Heads up: Stripping formwork before 1 week risks cracking or chipping green concrete edges.
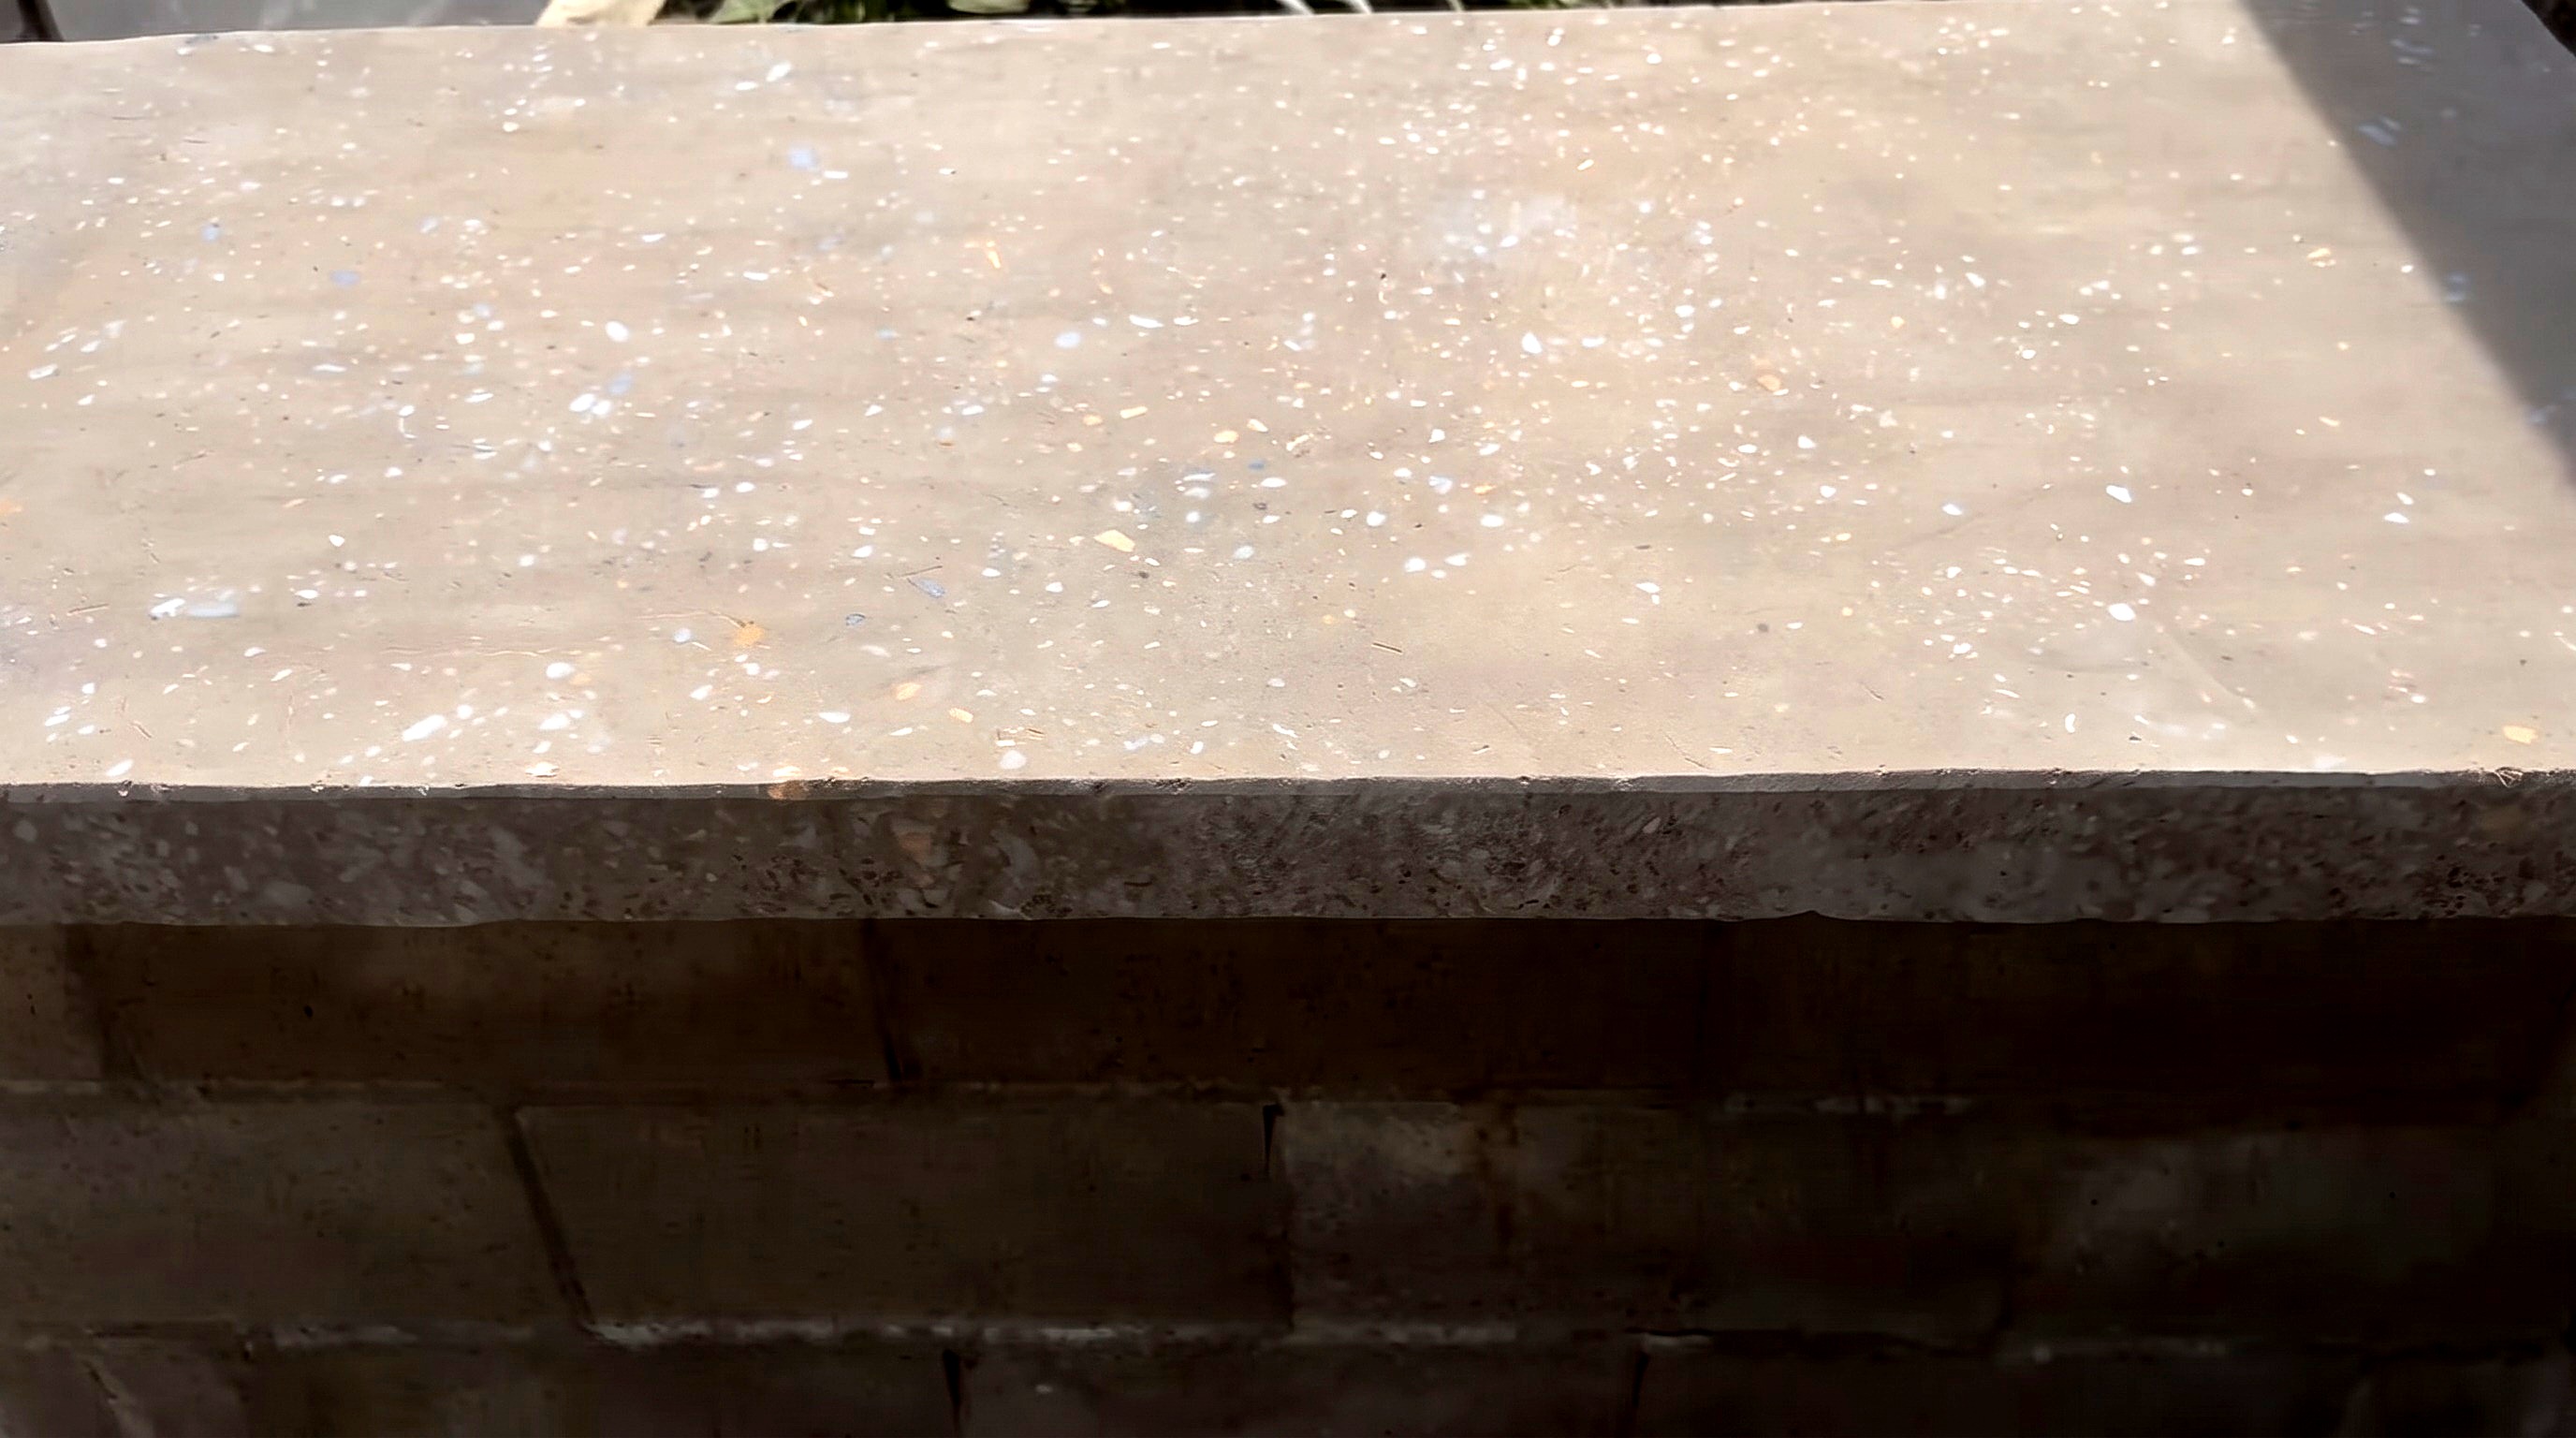
Step 5: Initial Grinding and Polishing
Top cement paste ground off to expose stone aggregate and smoothed to 200 grit.
You'll need: Angle Grinder, Variable Speed Angle Grinder, Diamond Polishing Pads
- 5.1 Grind the Surface
- Fit a coarse grinding pad to the angle grinder.
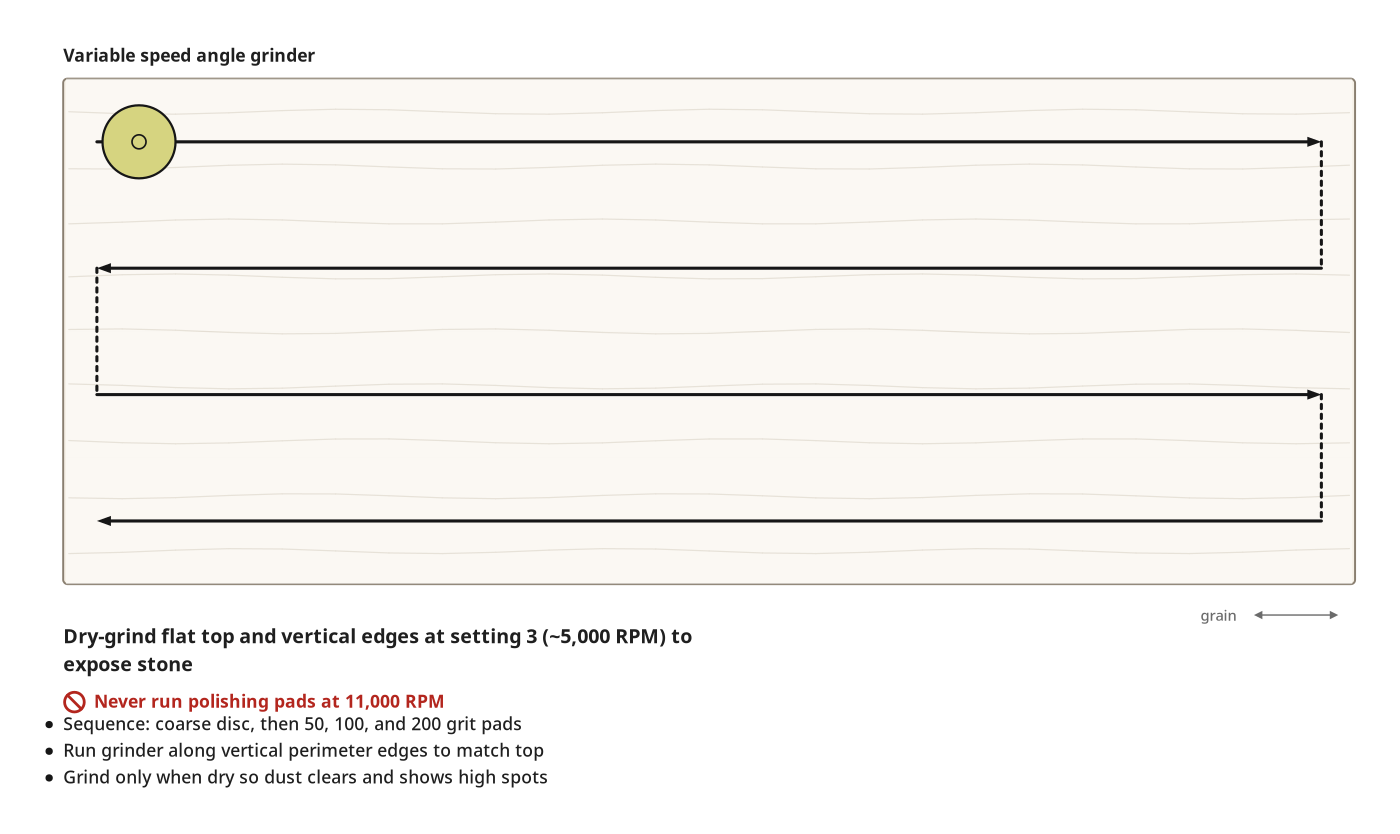
- Dry-grind the top to strip surface paste and expose stone aggregate.
- Run the grinder along the vertical perimeter edges to match the top.
- 5.2 Polish with Coarse Diamond Pads
- Fit the 50 grit diamond polishing pad to the variable speed angle grinder.
- Set speed to setting 3, around 5,000 RPM, and smooth the slab.
- Repeat on the top and vertical edges with the 100 and 200 grit pads.
Key measurements
- Grinder speed setting: setting 3 (around 5,000 RPM out of 11,000 RPM)
- Initial pad progression: coarse grinding disc, then 50, 100, and 200 grit diamond pads
- Tip: Grind only when dry so dust clears and reveals high spots.
- Heads up: Running polishing pads at 11,000 RPM flings pads off the backing plate at high speed.
Before you move on: Check for even aggregate exposure on the top and vertical edges before hardening.
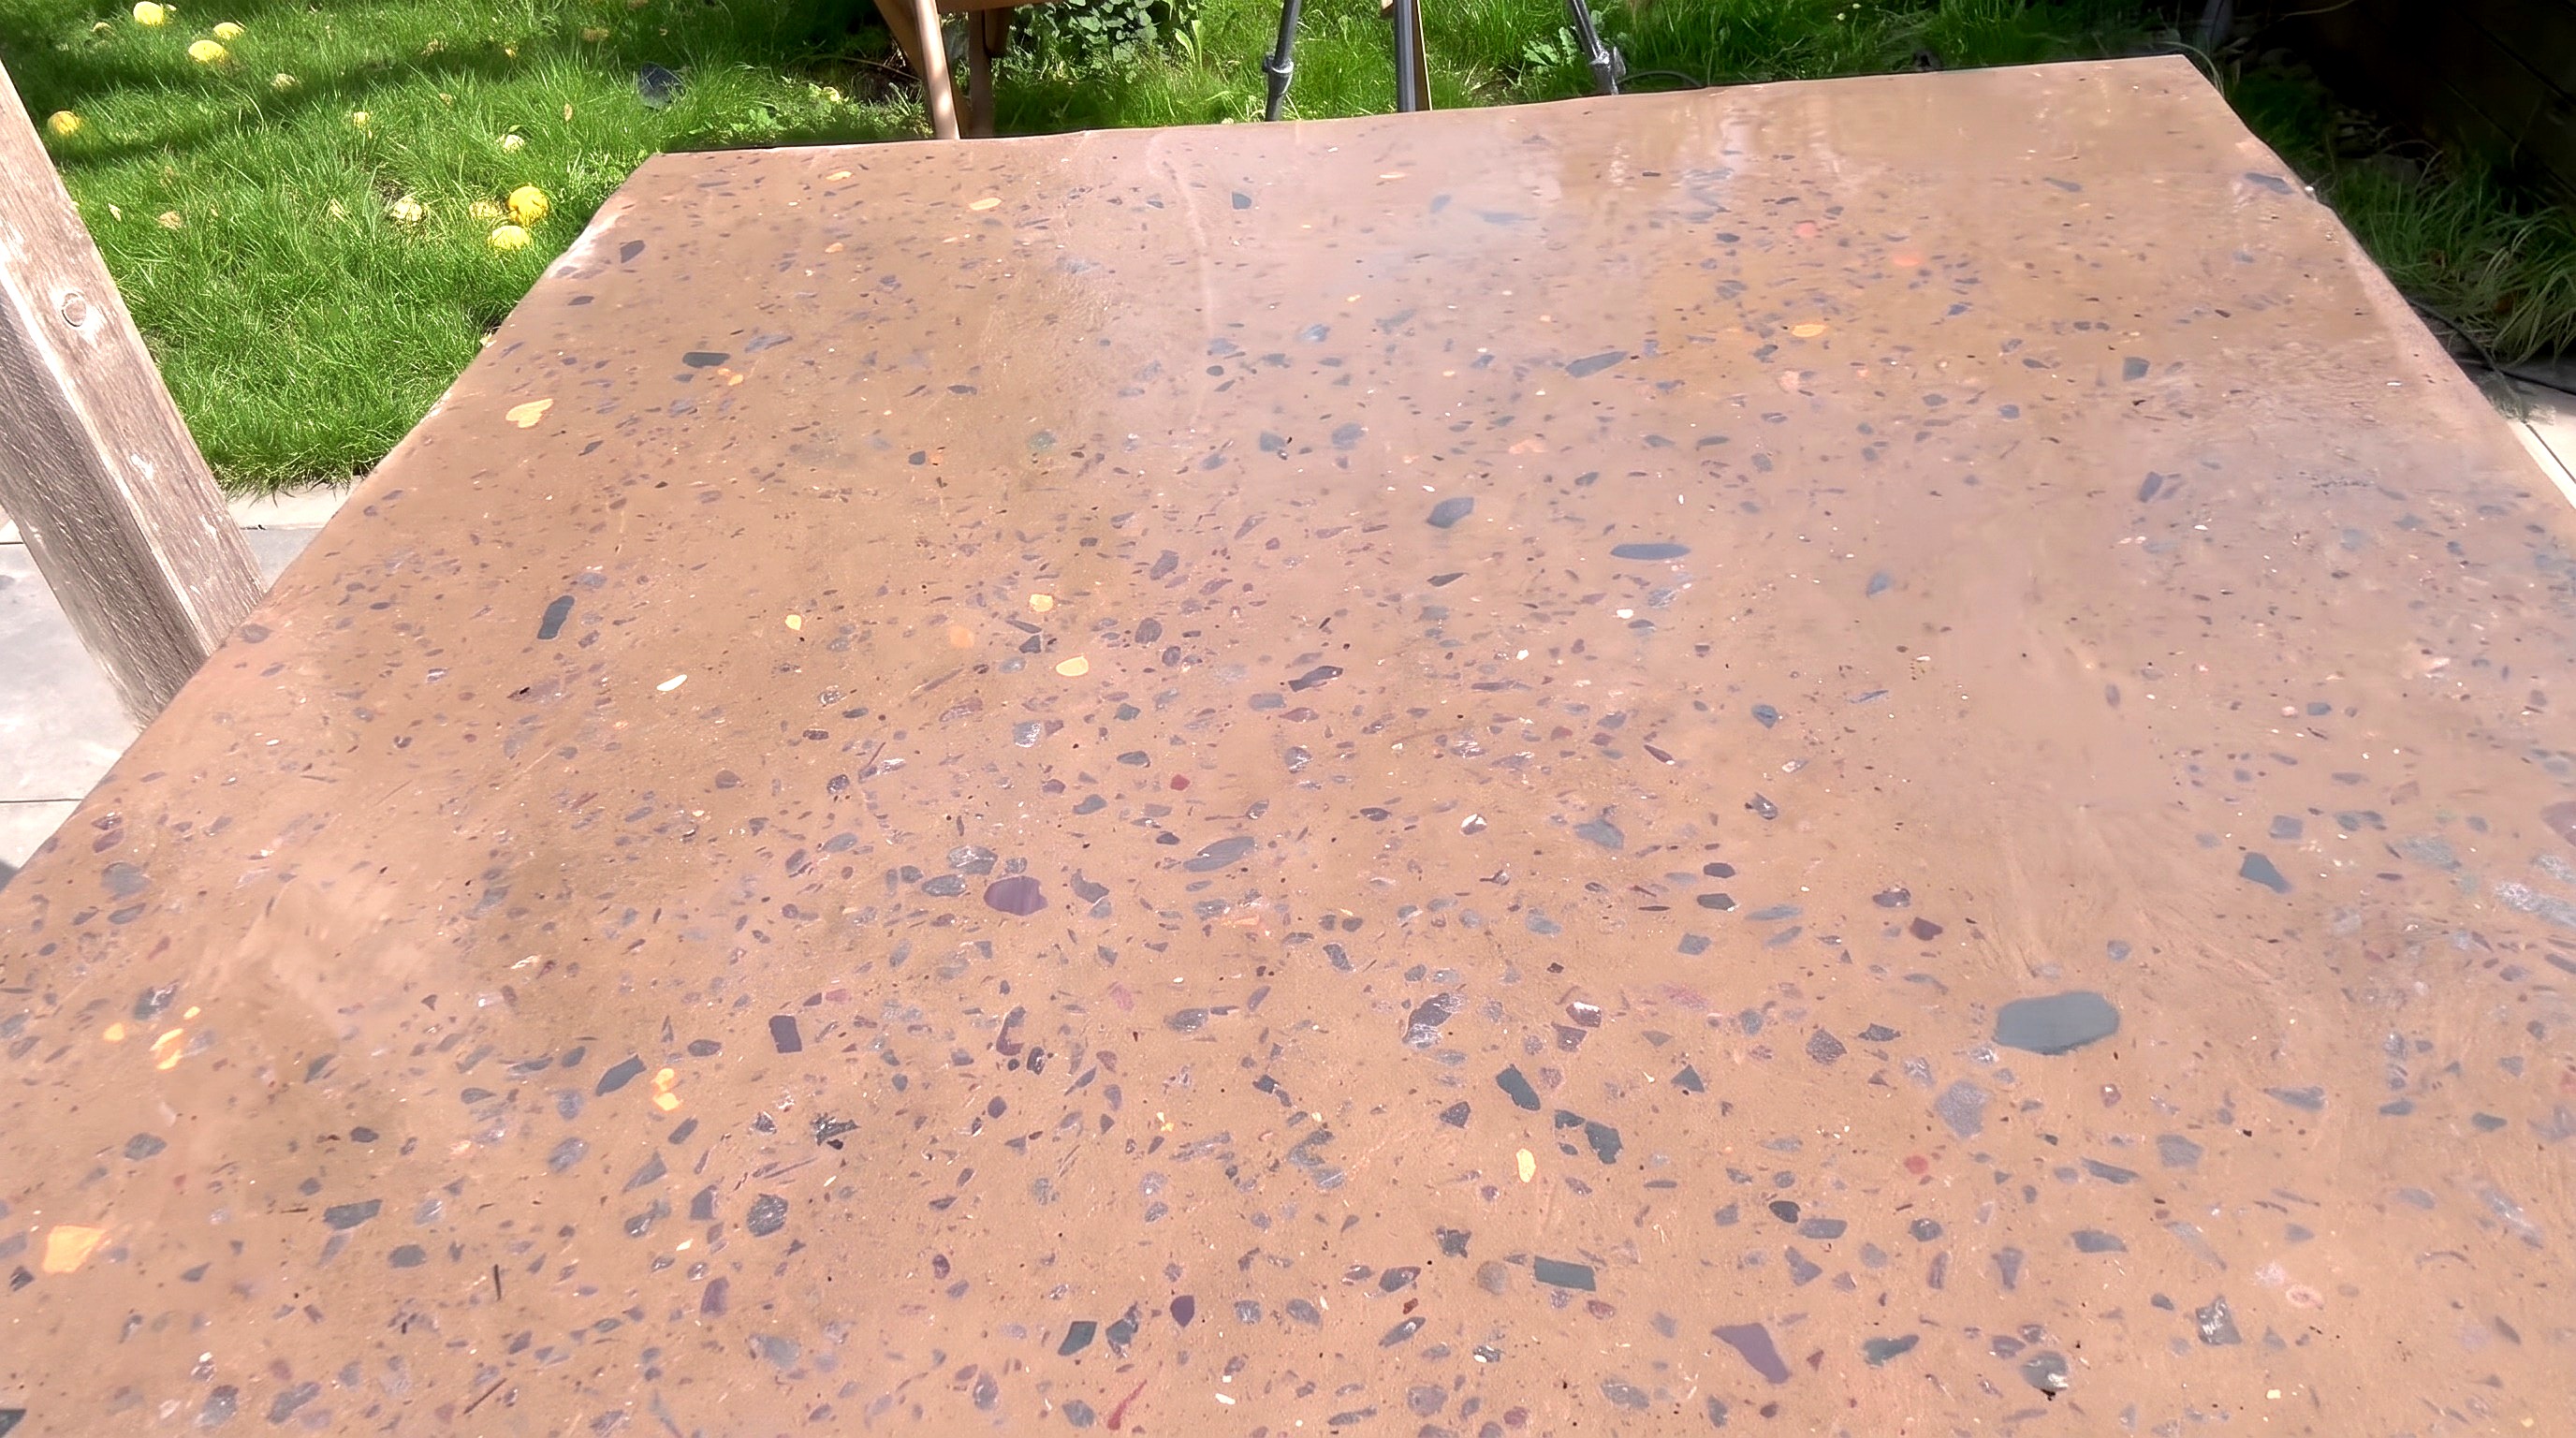
Step 6: Apply Concrete Hardener
Saturate ground concrete pores with chemical hardener and cure overnight.
You'll need: Paintbrush, Concrete Hardener & Dustproofer
- 6.1 Brush on the Hardener
- Liberally pour concrete hardener and dustproofer on the dry ground slab.
- Coat the top and vertical edges with the paintbrush.
- Add a second liberal splash once the first sinks in.
- Let hardener soak in and cure overnight to harden the concrete matrix.
Key measurements
- Hardener cure time: overnight soak before final polishing
- Tip: Saturating with hardener stops surface dusting during finer polishing.
Before you move on: Test that water or tea beads up without soaking into the concrete.
Step 7: Final Polishing Stages
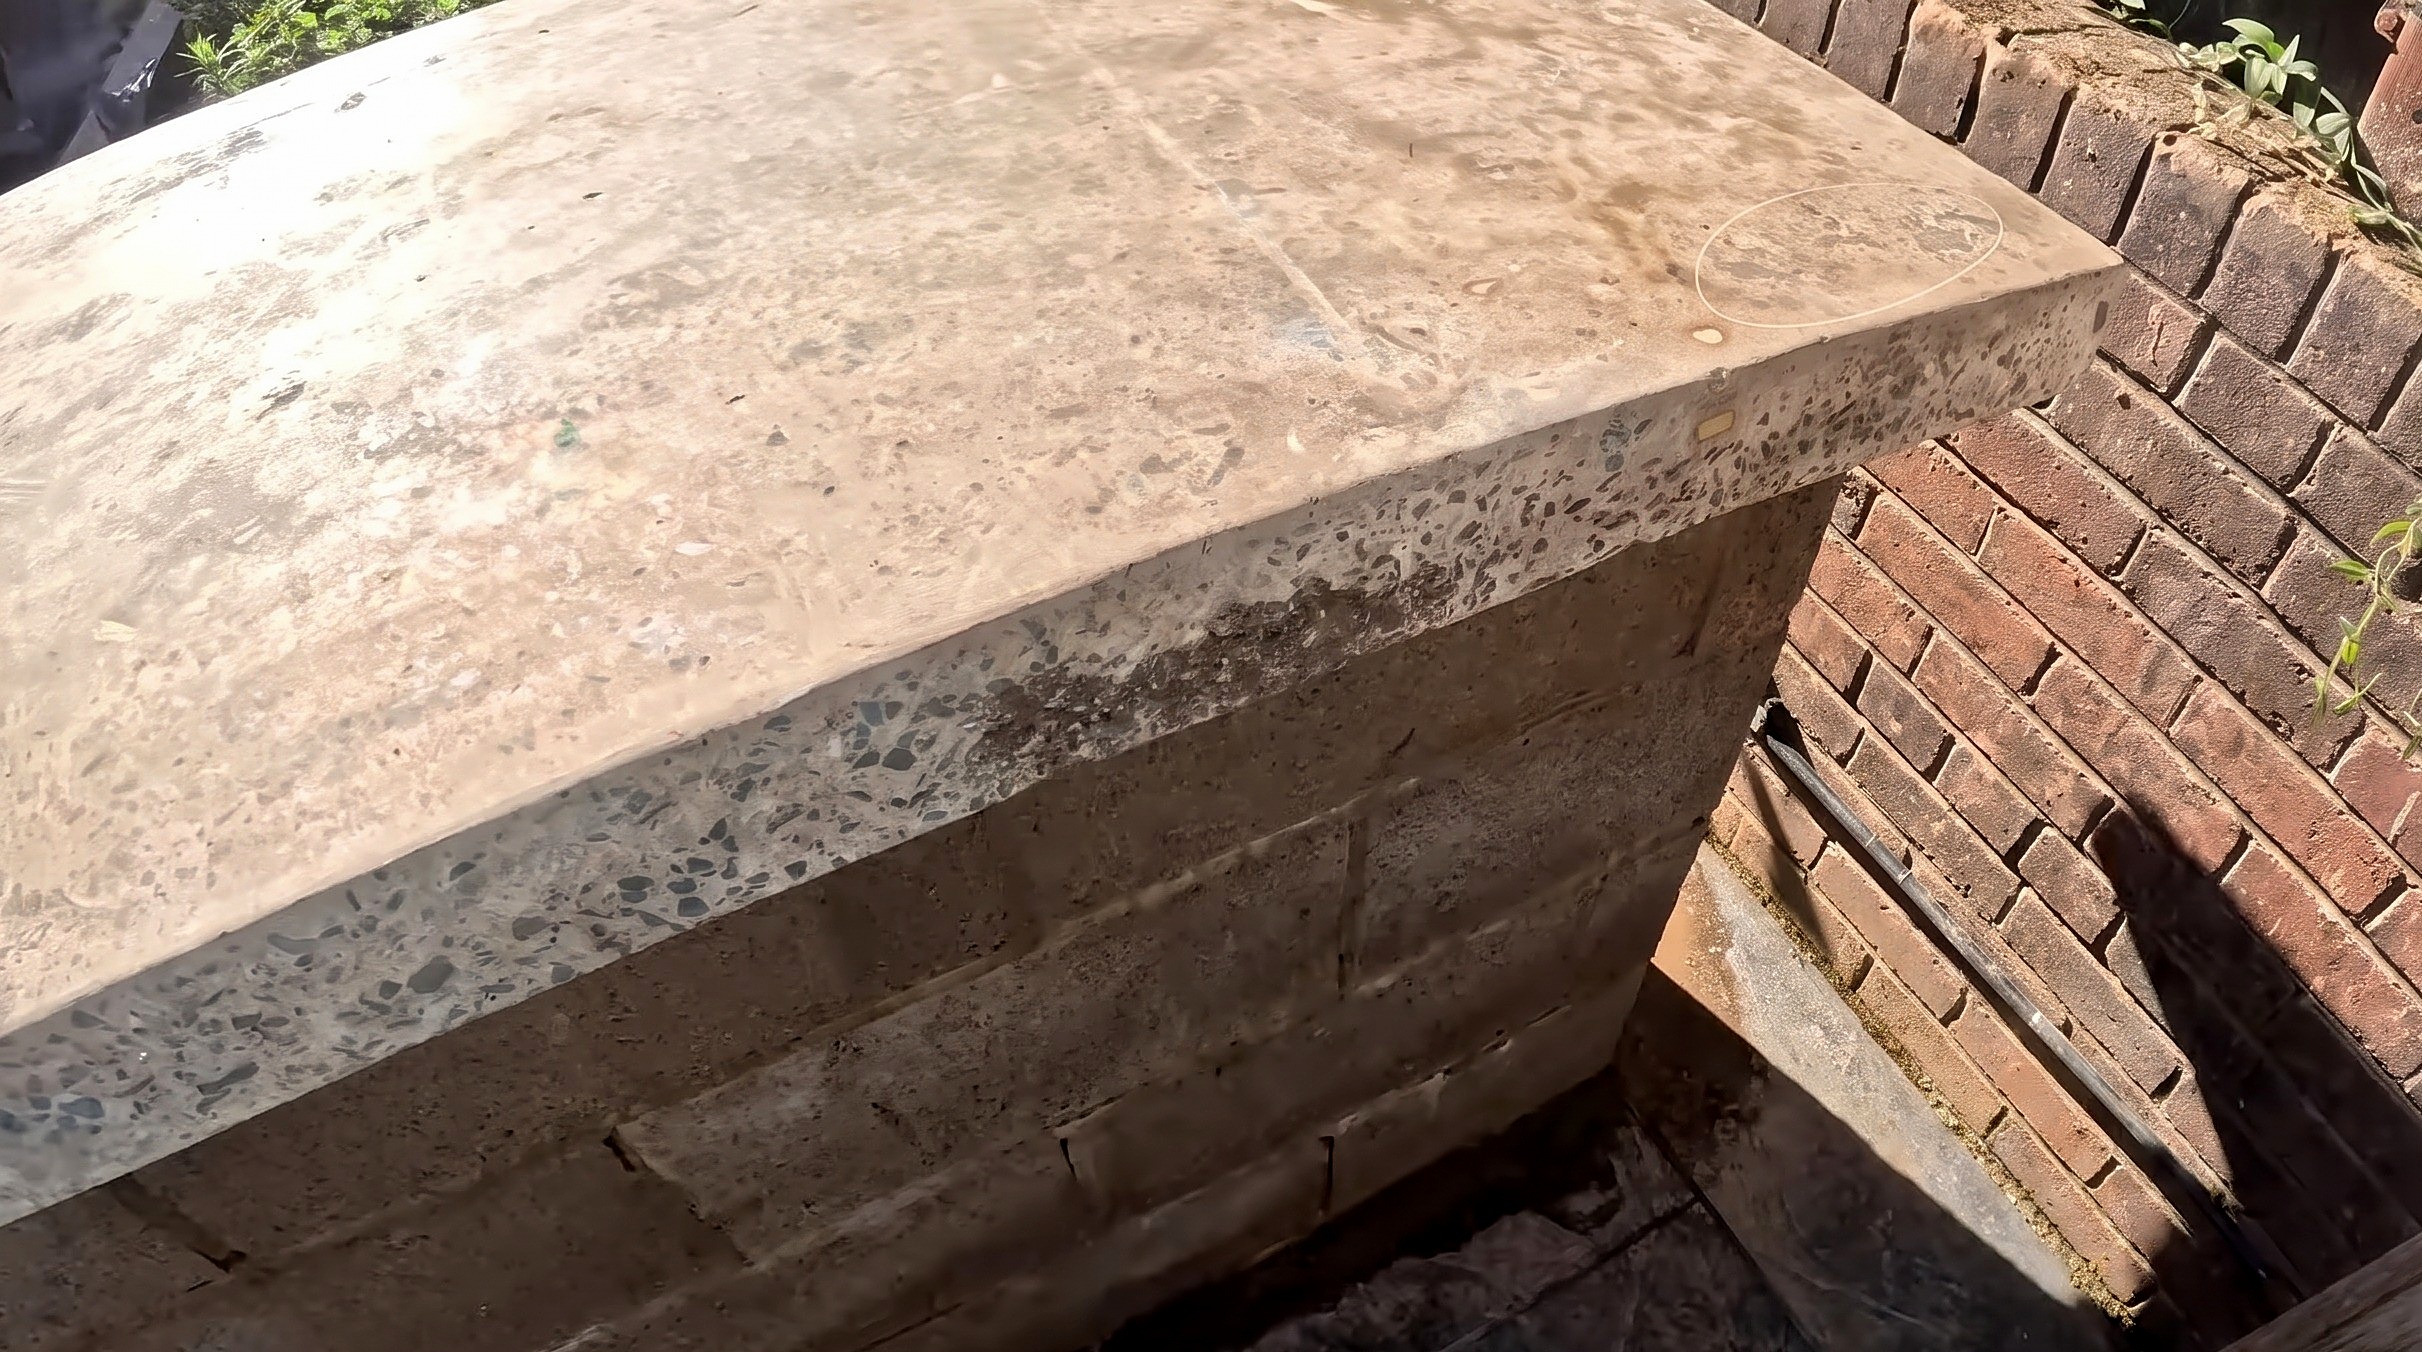
Level and polish the hardened countertop to a glass-like sheen.
You'll need: Variable Speed Angle Grinder, Diamond Polishing Pads, Paintbrush, Concrete Hardener & Dustproofer
- 7.1 Polish with Mid-Grit Pads
- Circle high spots on the dry top with a crayon.
- Brush on a fresh splash of concrete hardener and let dry.
- Grind down the marked high spots until flat.
- Polish top and vertical edges at low speed with 400 and 800 grit pads.
- 7.2 Final Polish with Fine-Grit Pads
- Stop at 800 grit if dark brown spots appear.
- Otherwise, make a final pass on top and edges with the 1500 grit pad.
- Grind out dark patches with the 800 grit pad for a uniform sheen.
Key measurements
- Final pad progression: 400, 800, and 1500 grit diamond polishing pads
- Stopping grit to avoid dark spots: 800 grit
- Tip: Over-polishing with a 1500 grit pad can bring up dark brown patches.
Before you move on: Sight the dry slab against the light for a uniform, glass-smooth glare.
Step 8: Clad the Base
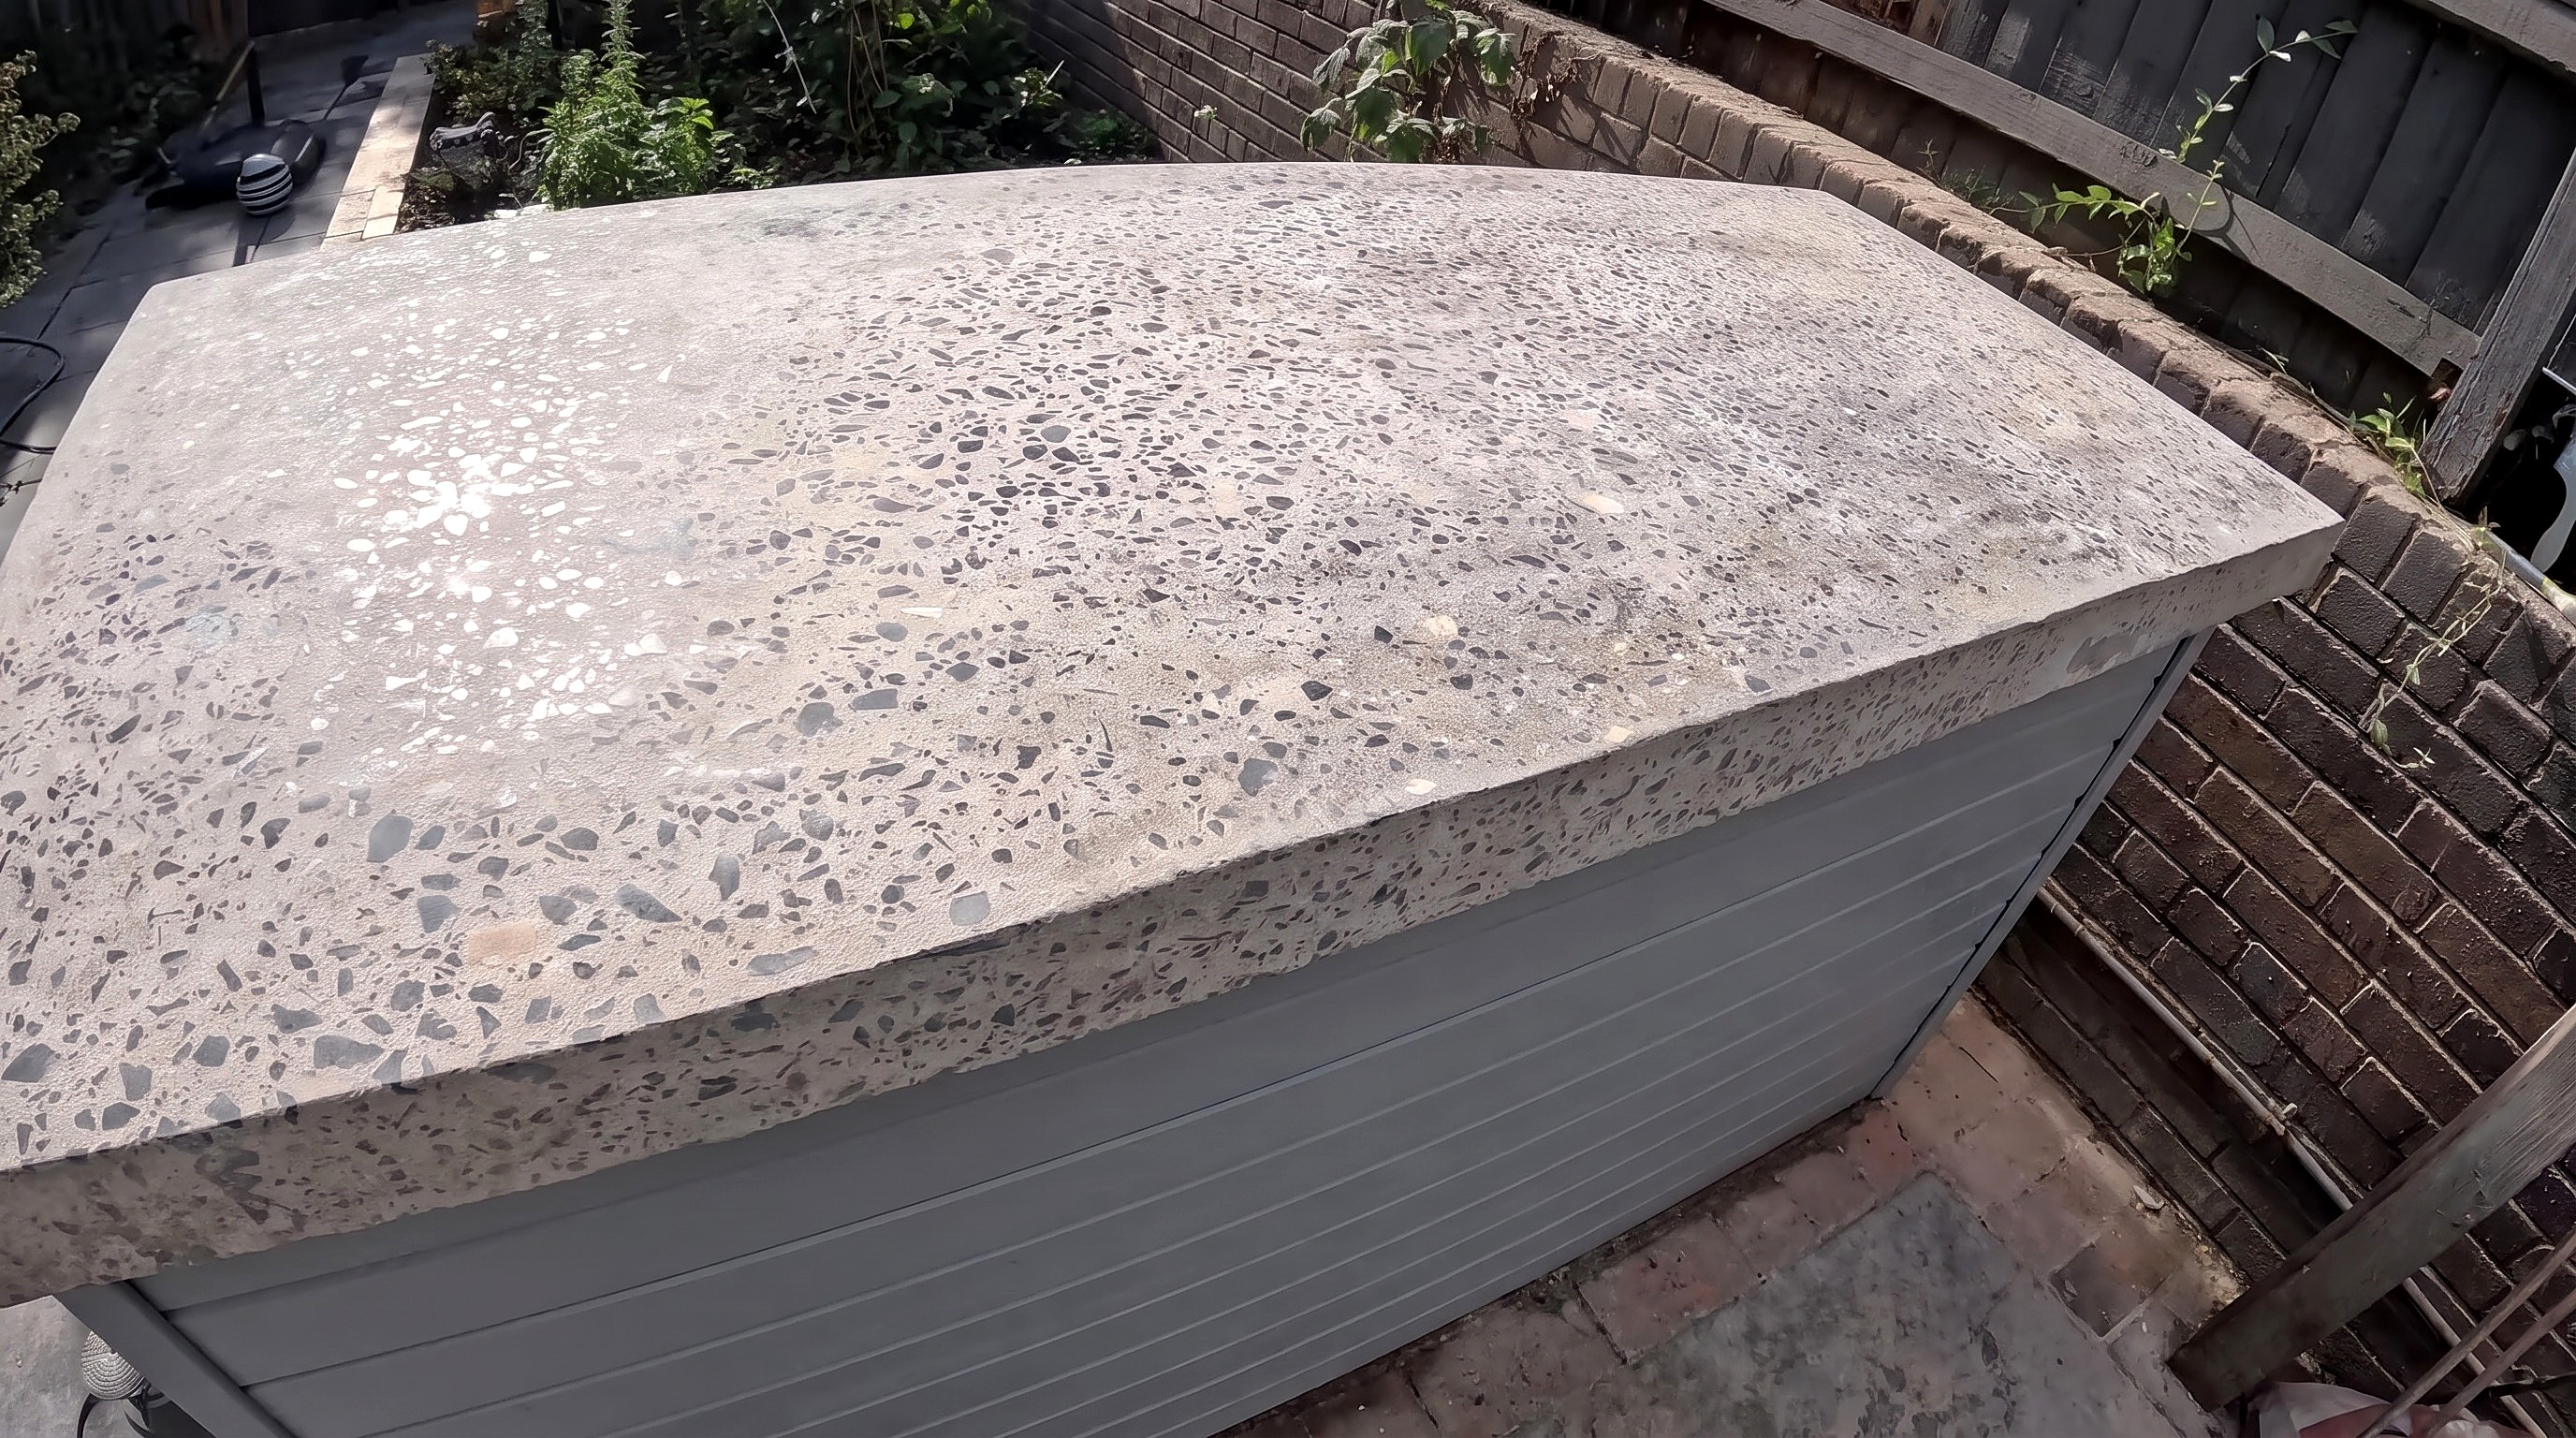
Wrap the concrete block base in horizontal grey tongue and groove cladding with corner trim.
Parts in this step: (E) Wooden battens, (A) Tongue and groove cladding, (F) Corner pieces
You'll need: Hammer Drill, Hammer, Paintbrush, Wooden Battens, Masonry Screws, Tongue and Groove Cladding, Grey Paint
- 8.1 Attach Wooden Battens
- Set four vertical 900 mm wooden battens (E) across the front block wall.
- Set one batten at each end and two across the middle to stop flexing.
- Set three vertical battens across the side wall the same way.
- Drill through battens into blocks with the hammer drill; fix with masonry screws.
- 8.2 Install Cladding
- Cut pre-painted grey tongue and groove cladding (A) to span the walls.
- Fix boards horizontally to the vertical battens from bottom to top.
- Fit vertical corner pieces (F) over outside corners to cover board ends.
Key measurements
- Vertical batten length: 900 mm
- Front wall batten count: 4 battens (1 at each end, 2 in the middle)
- Side wall batten count: 3 battens
- Tip: Two front middle battens keep the cladding from bending or snapping.
Step 9: Seal the Countertop
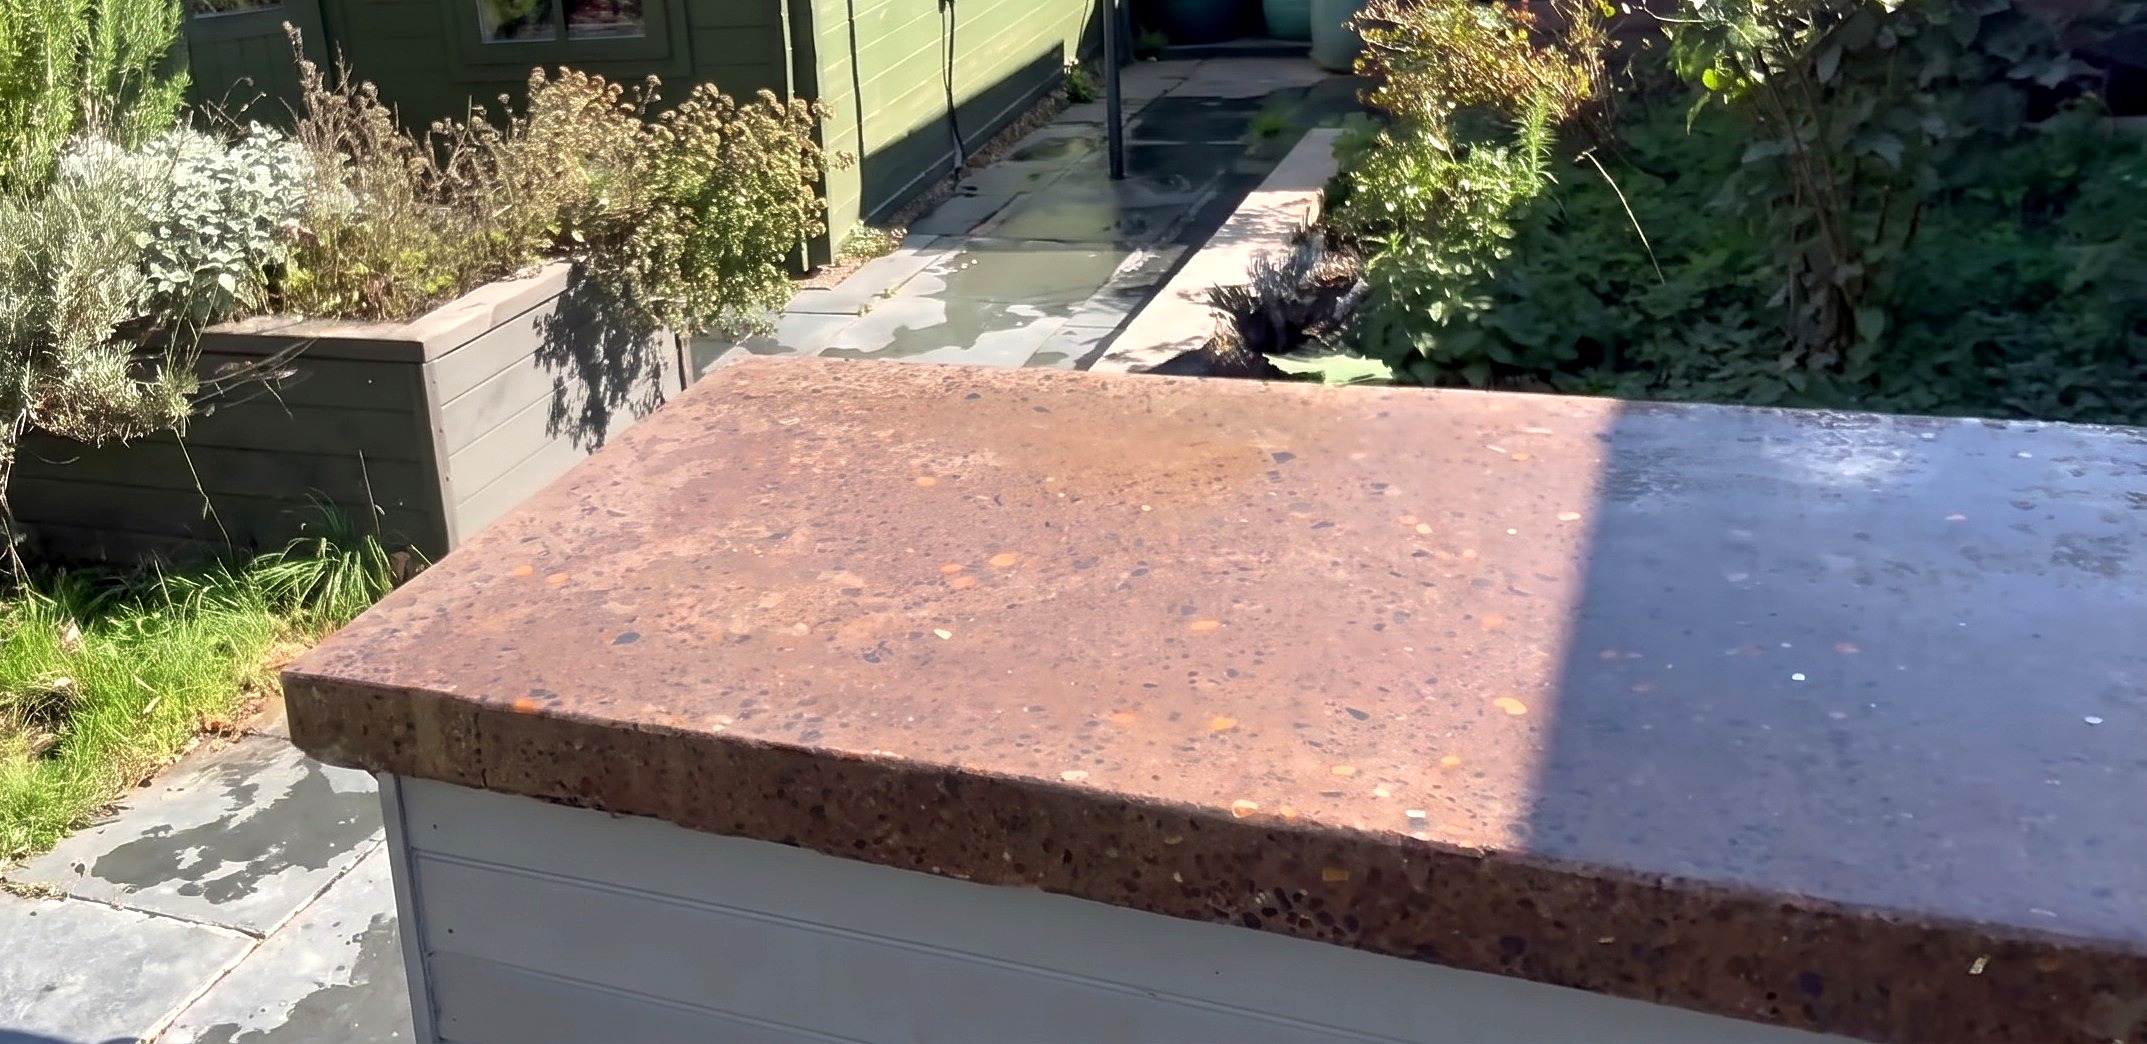
Two brushed coats of paving seal lock and weatherproof the polished top.
You'll need: Paintbrush, Paving Seal
- 9.1 Apply First Coat of Sealer
- Pour paving seal onto the clean, dry polished concrete top.
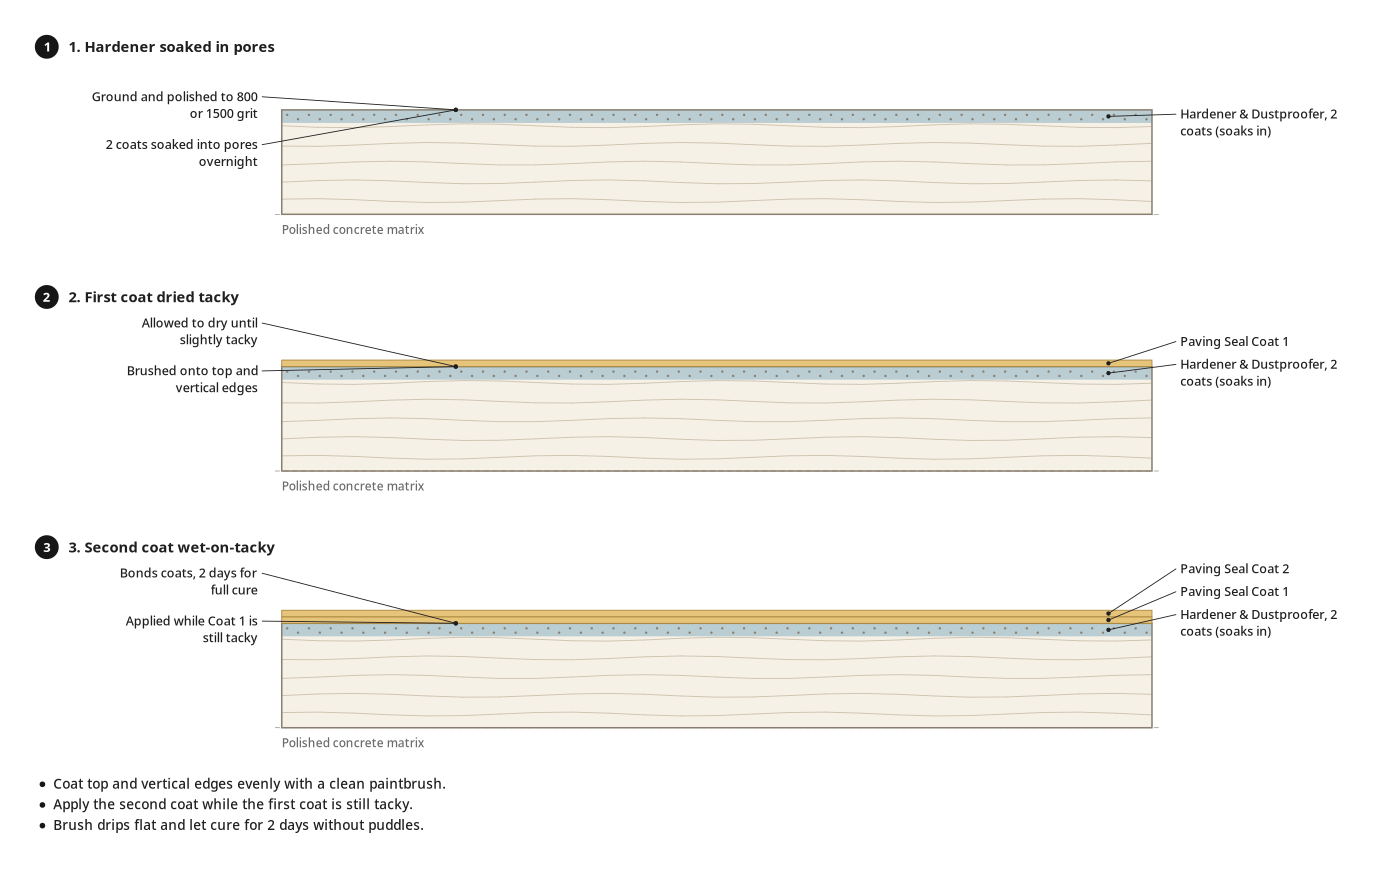
- Coat the top and vertical edges evenly with a clean paintbrush.
- Let the first coat dry until slightly tacky.
- 9.2 Apply Second Coat of Sealer
- Brush on a second coat of paving seal while the first is still tacky.
- Cover the top and vertical edges without leaving puddles.
- Let the sealed top dry and cure for a couple of days.
Key measurements
- Sealer application count: 2 brushed coats
- Recoat window: first coat slightly tacky
- Final color cure time: 2 days
- Tip: Applying the second coat while the first is tacky bonds the two coats.
Before you move on: Inspect wet edges; brush drips flat before the second coat sets.
Finishing
Trim & Details
- Fit vertical corner trim pieces over outside cladding joints.
- Finish horizontal cladding across the base rear.
Cure & Use
- Leave the sealed countertop for 2 days to cure to its final color.
- Center the barbecue on the slab with about 150 mm clearance each side.
Alternatives
- Stop diamond polishing at 800 grit, not 1500 grit, to limit brown discoloration.
Check before you call it done
| Check | What you should see | If not |
|---|---|---|
| Run hand and spirit level over the polished concrete top and edges. | Slab sits flat, feels glass-smooth, with even stone exposure. | Circle high spots or dark patches; grind out with the 800 grit pad. |
| Splash liquid onto the hardened concrete. | Liquid beads in a bubble on top without soaking into the concrete. | Brush on another liberal coat of concrete hardener; let dry. |
| Press firmly on horizontal tongue and groove cladding between corners. | Boards sit solid against the four front and three side battens without flexing. |
These Specs are built from Tidybricks patio restore's video “DIY Polished Concrete Outdoor Countertop and Base”. Open the DIY Polished Concrete Outdoor Countertop and Base project page.
