Spetz Specs No. 4474: step-by-step surface & covering guide
Tile Grout Refinishing: Cleaning, Painting, and Sealing
The complete step-by-step guide made from Kathartic Studios's YouTube video, free on Spetz. For the video, a step-by-step player and answers to your questions, see the Tile Grout Refinishing: Cleaning, Painting, and Sealing project page.
4 steps, 9 tools, 4 materials
Overview
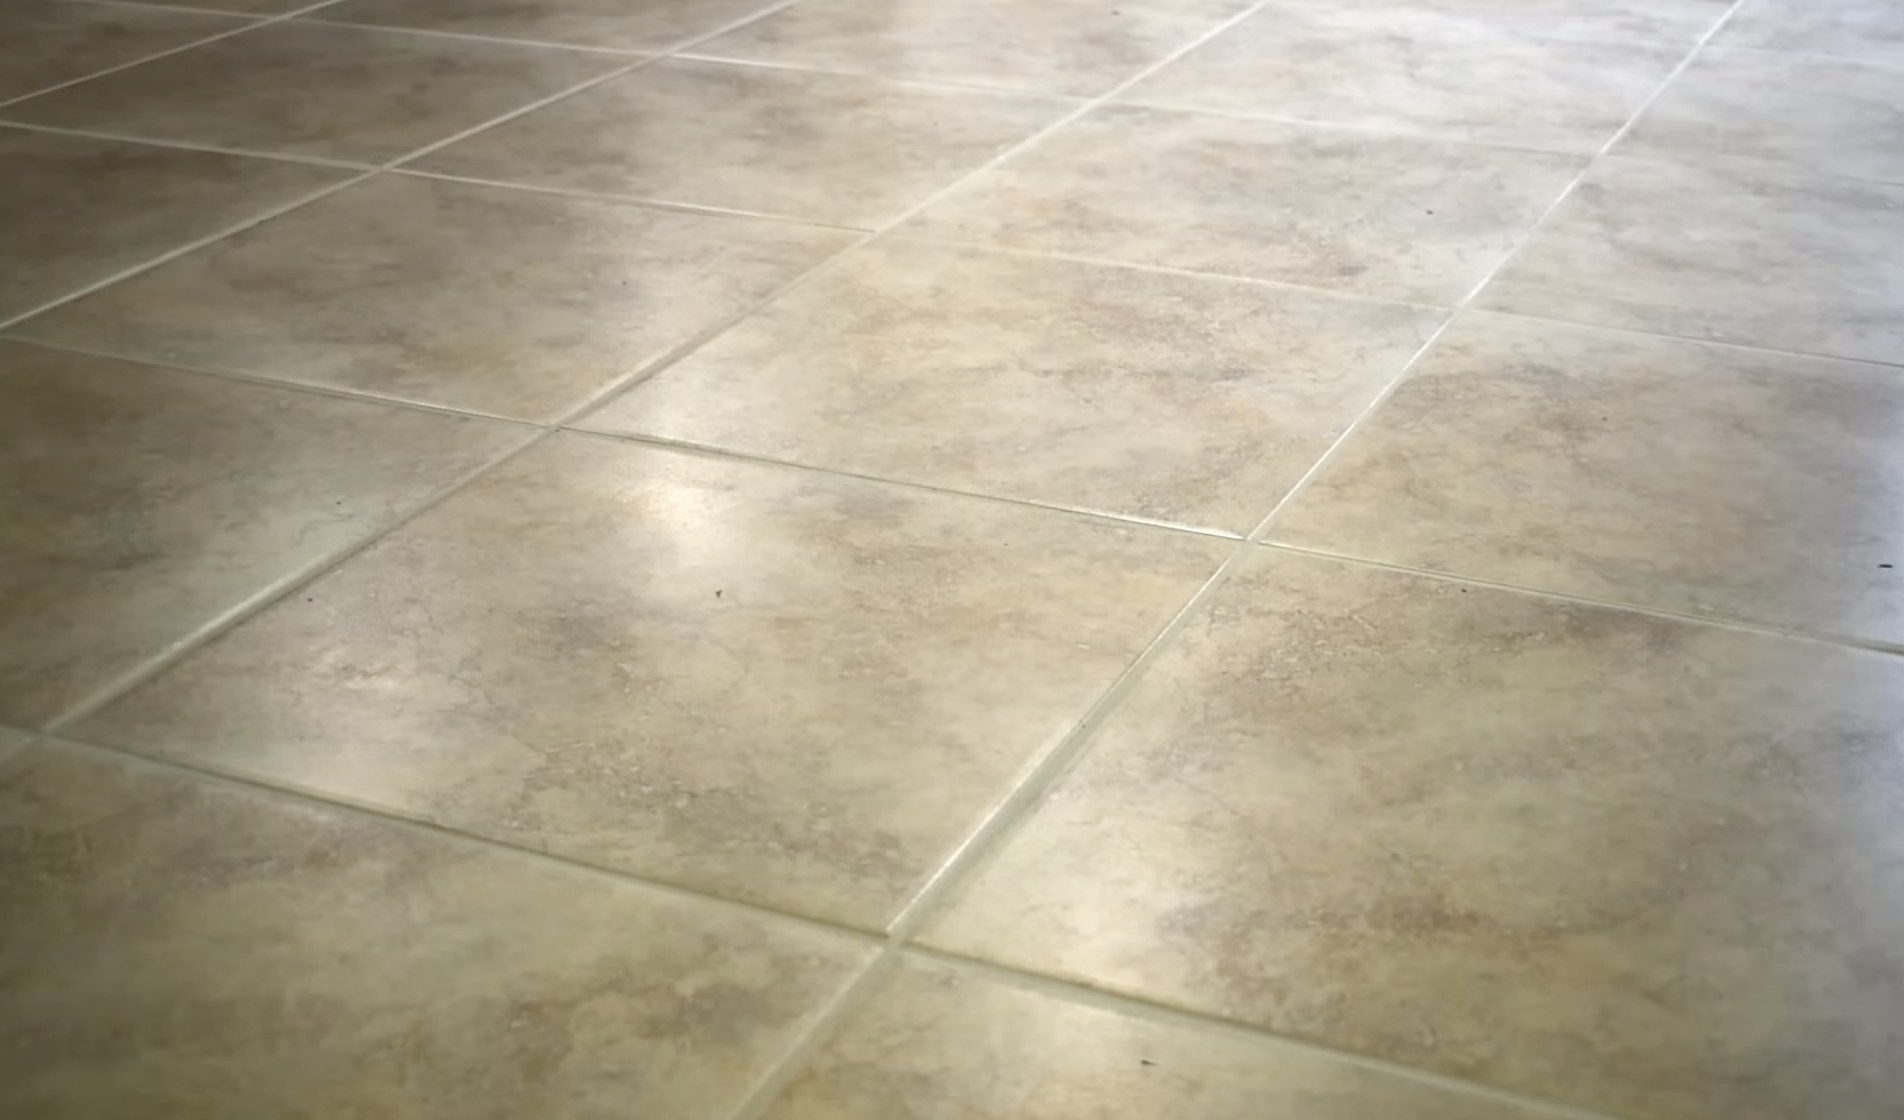
Finished size: Main floor mudroom, kitchen, and dining room
The surface and covering
- Restore stained sand-and-cement floor grout between smooth printed tiles.
- Deep-clean joints, brush on two coats of grout colorant, and seal.
- Colorant locks in an even shade, hiding permanent dark stains.
Why do it yourself
- Squeeze-bottle colorant and a toothbrush replace messy grout removal.
- Dried sections blend without a wet edge for short work sessions.
- Excess colorant shears off smooth tiles with a rubber caulking tool.
What it takes
- Plan on multi-day, hands-and-knees scrubbing, brushing, and scraping.
- Let rinse water dry several hours; wait 24 hours before scraping.
- Wear a respirator and open windows when spraying aerosol topcoat.
What decides success
- Strip grease and cleaner residue so colorant bonds to bare grout.
- Brush on thin, even coats; keep colorant off porous or textured tiles.
Layout at a glance
- Laid on: 30-year-old sand and cement grout between large-format smooth printed tiles
- Start: Test the colorant in an inconspicuous spot first, then work in small sections across the floor; a wet edge is not required between sessions
- Bond: Two thin coats of grout colorant squeezed from the bottle nozzle and brushed into deep-cleaned grout lines with a toothbrush, cured 24 hours, and finished with one coat of spray-on grout sealer.
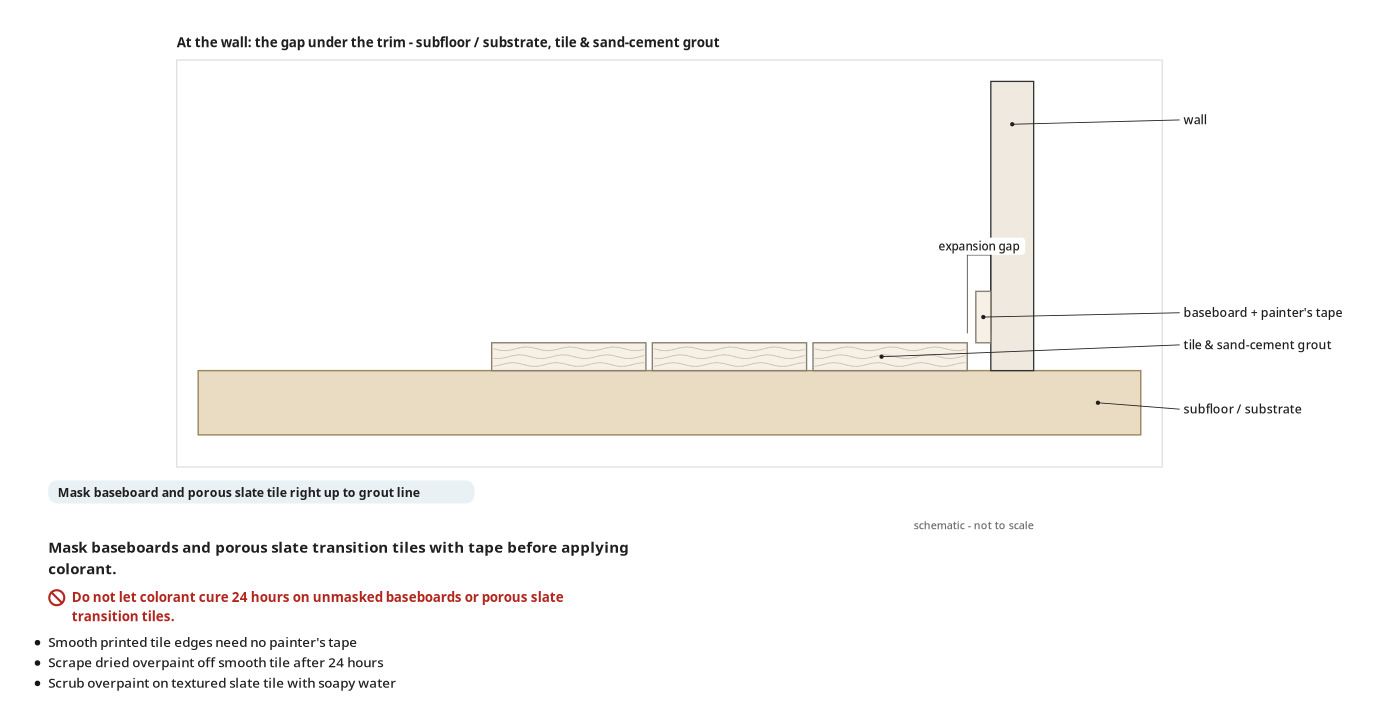
- Baseboards: Mask baseboards with painter's tape before applying grout colorant, as dried colorant is harder to remove from trim than from smooth tile.
- Smooth tile edges along grout lines: Let the colorant dry for at least 24 hours, then pull a rubber caulking tool along both sides of the grout line to cleanly shear and flake excess paint off the tile.
- Textured slate-like transition tiles between rooms: Keep colorant strictly inside the grout joint or mask tile edges with painter's tape; if overpaint occurs, scrub the tile with soapy water and touch up the grout line.
- Tile chips and cracks: Dab matching grout colorant directly into small chips or cracks on the tile surface to conceal damage.
Health and safety
Bleach Cleaner Handling
- Wear rubber gloves and eye protection when applying and scrubbing the clinging bleach gel to prevent chemical burns and splashes.
- Never mix the bleach toilet bowl cleaner with ammonia or acid products, as this releases toxic gas.
- Scrub carefully with the brush and toothbrush so bleach gel does not splatter onto your skin or eyes.
Aerosol Sealer and Fumes
- Wear a respirator when applying the 511 spray-on aerosol grout sealer so you never inhale strong fumes.
- Open windows and doors to establish cross-ventilation before applying the bleach cleaner or spraying the aerosol sealer.
- Keep the aerosol grout sealer away from open flames and heat sources during application and storage.
Safe Cleanup and Wet Floors
- Never rinse chemical-soaked cloths, scrub brushes, or buckets in a kitchen sink to prevent food contamination.
- Step carefully on wet tiles while rinsing bleach gel and mopping with water to avoid slipping.
- Wash your hands thoroughly with water after removing your rubber gloves and handling the grout colorant.
The surface & its prep
- Substrate: 30-year-old porous sand-and-cement grout between smooth printed tiles.
- Deep-clean grout lines and rinse twice with clean water to remove all bleach.
- Let cleaned grout dry several hours until trapped moisture evaporates.
- Test colorant on a hidden grout line first; bottle labels do not match dried color.
- Mask baseboards and porous slate transition tiles with tape before applying colorant.
Tools
- Scrub Brush
- Bucket (optional)
- Cloth
- Toothbrush
- Caulking Tool (Rubber scraper)
- Broom and Dustpan (optional)
- Flat Mop (Swiffer-style, Swiffer) (optional)
- Respirator (optional)
- Gloves (Rubber)
Materials
- Toilet Bowl Cleaner (Clinging Bleach Gel, Clorox)
- Grout Refresh Colorant and Sealer (Grout Refresh, Mapei, Straw)
- Spray-On Grout Sealer (Aerosol, Miracle Sealants, 511)
- Water
Finishes & supplies, in the order they go on
| Product | What it does | Mix & coats | Dry time | Applied with |
|---|---|---|---|---|
| Toilet Bowl Cleaner | One-time deep bleach clean to lift embedded porous-grout stains | Ready to use, 1 coats | 1 to 3 hours dwell time; several hours to dry after rinsing | Bottle nozzle, Scrub Brush, and wet Cloth |
| Grout Refresh Colorant and Sealer | Recolor stained grout, fill small tile chips, and seal joints | Ready to use, 2 coats | At least 24 hours before dry scraping | Squeeze bottle nozzle and Toothbrush |
| Spray-On Grout Sealer | Optional protective topcoat over painted grout lines | Ready to use, 1 coats | At least 1 hour | Aerosol spray can and dry Flat Mop |
Before you start
Protect and clear
- Clear furniture and rugs from mudroom, kitchen, and dining floors.
- Vacuum or sweep loose grit from grout joints.
- Mask baseboards and textured transition tiles along grout edges.
Tool set-up
- Fill a bucket with clean rinse water; keep it out of the kitchen sink.
- Get a stiff scrub brush, cloths, old toothbrush, and rubber caulking tool.
- Test grout colorant in a hidden corner to check the dried shade.
Step by step
Step 1: Deep Clean the Grout
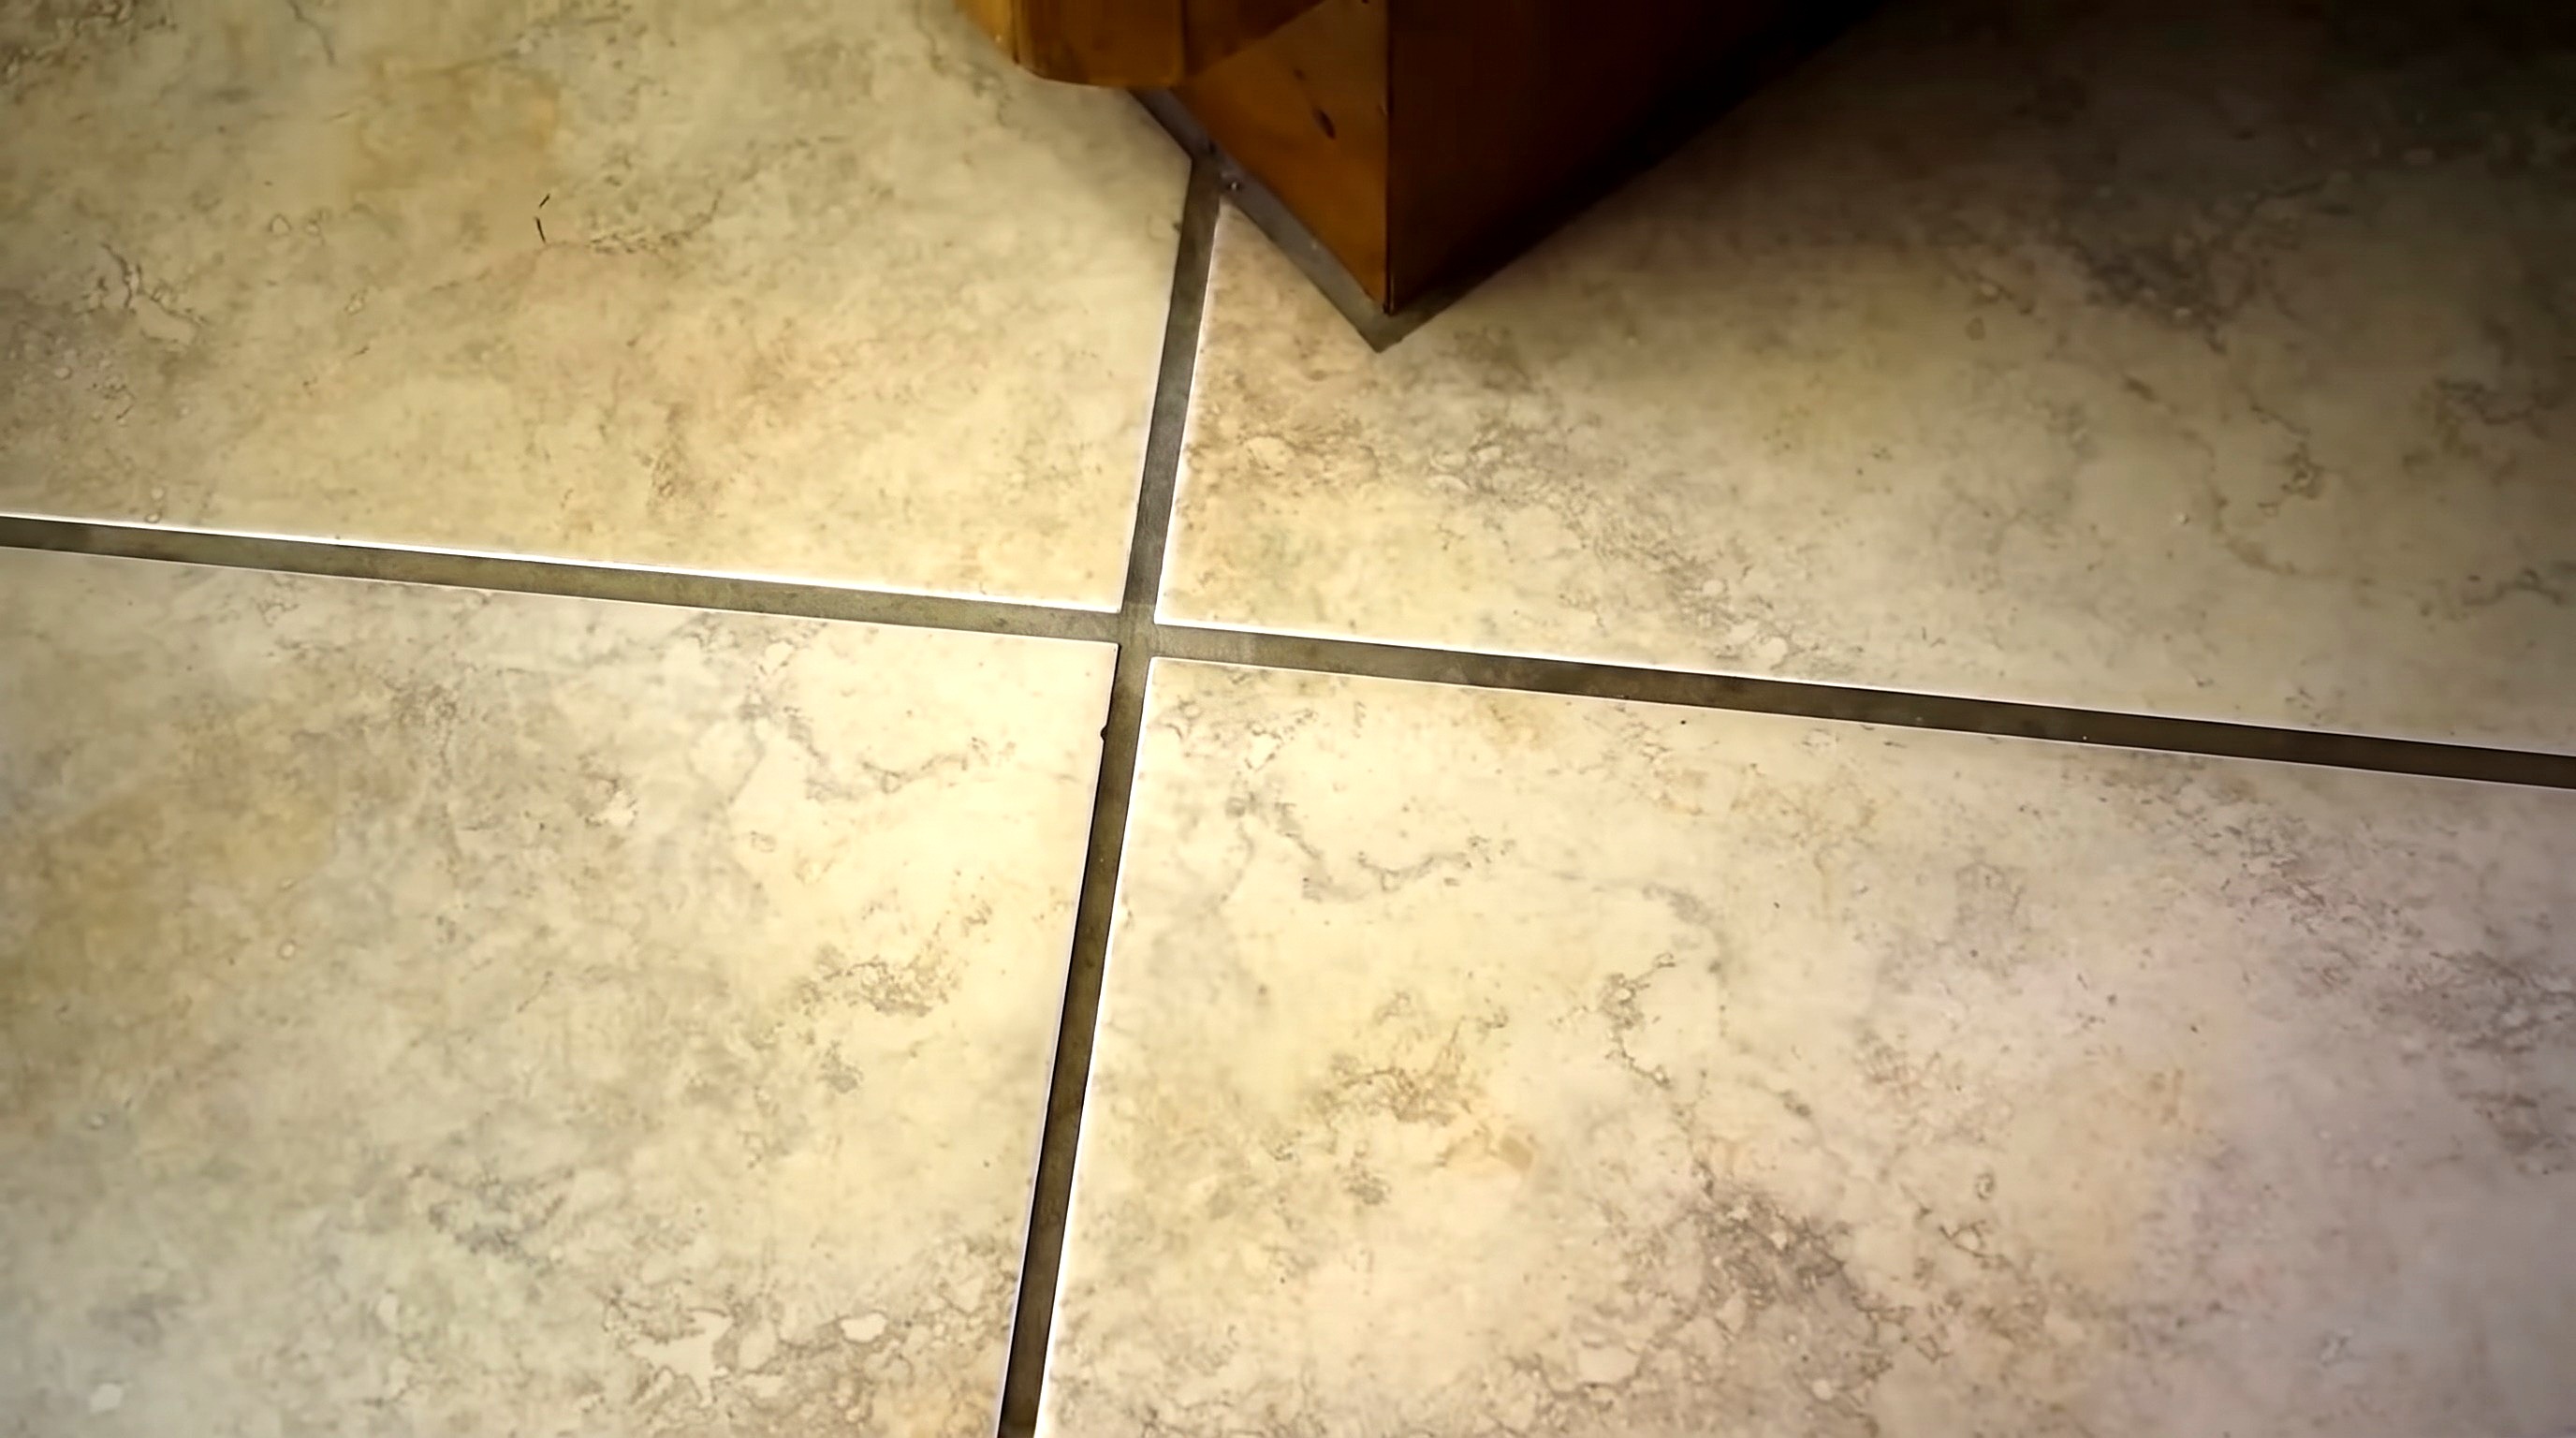
Grout joints are deep-cleaned, rinsed free of chemical residue, and dry.
You'll need: Scrub Brush, Bucket, Cloth, Gloves, Toilet Bowl Cleaner, Water
- 1.1 Apply Cleaner and Wait
- Wear rubber gloves before opening the toilet bowl cleaner.
- Squeeze a continuous bead of clinging bleach gel along each grout line.
- Let gel sit 1 to 3 hours to break down embedded stains.
- 1.2 Scrub the Grout Lines
- Run a stiff scrub brush back and forth along each grout joint.
- Scrub dark patches until loosened grime lifts into the gel.
- 1.3 Wipe and Rinse the Floor
- Wipe up dirty gel with a damp cloth, wringing it into a bucket.
- Change bucket water every 10 sq ft so you do not spread residue.
- Mop again with plain water to remove bleach.
- Wait several hours until porous grout dries completely before painting.
Key measurements
- Cleaner dwell time on heavy stains: 1 to 3 hours
- Change rinse water: every 10 sq ft of floor
- Tip: Clean large floors in daily sections, not all at once.
- Tip: Use a steam cleaner, dedicated grout cleaner, or peroxide and baking soda if preferred.
- Heads up: Harsh toilet bowl cleaner wears cement grout over time: use it once for prep and never leave it on longer than 3 hours.
- Heads up: Avoid dyed toilet bowl cleaners; they stain light grout.
- Heads up: Never rinse chemical-soaked cloths in a kitchen sink.
Before you move on: Feel several lines: grout must be bone dry with no soapy or slick bleach residue.
Step 2: Paint the Grout
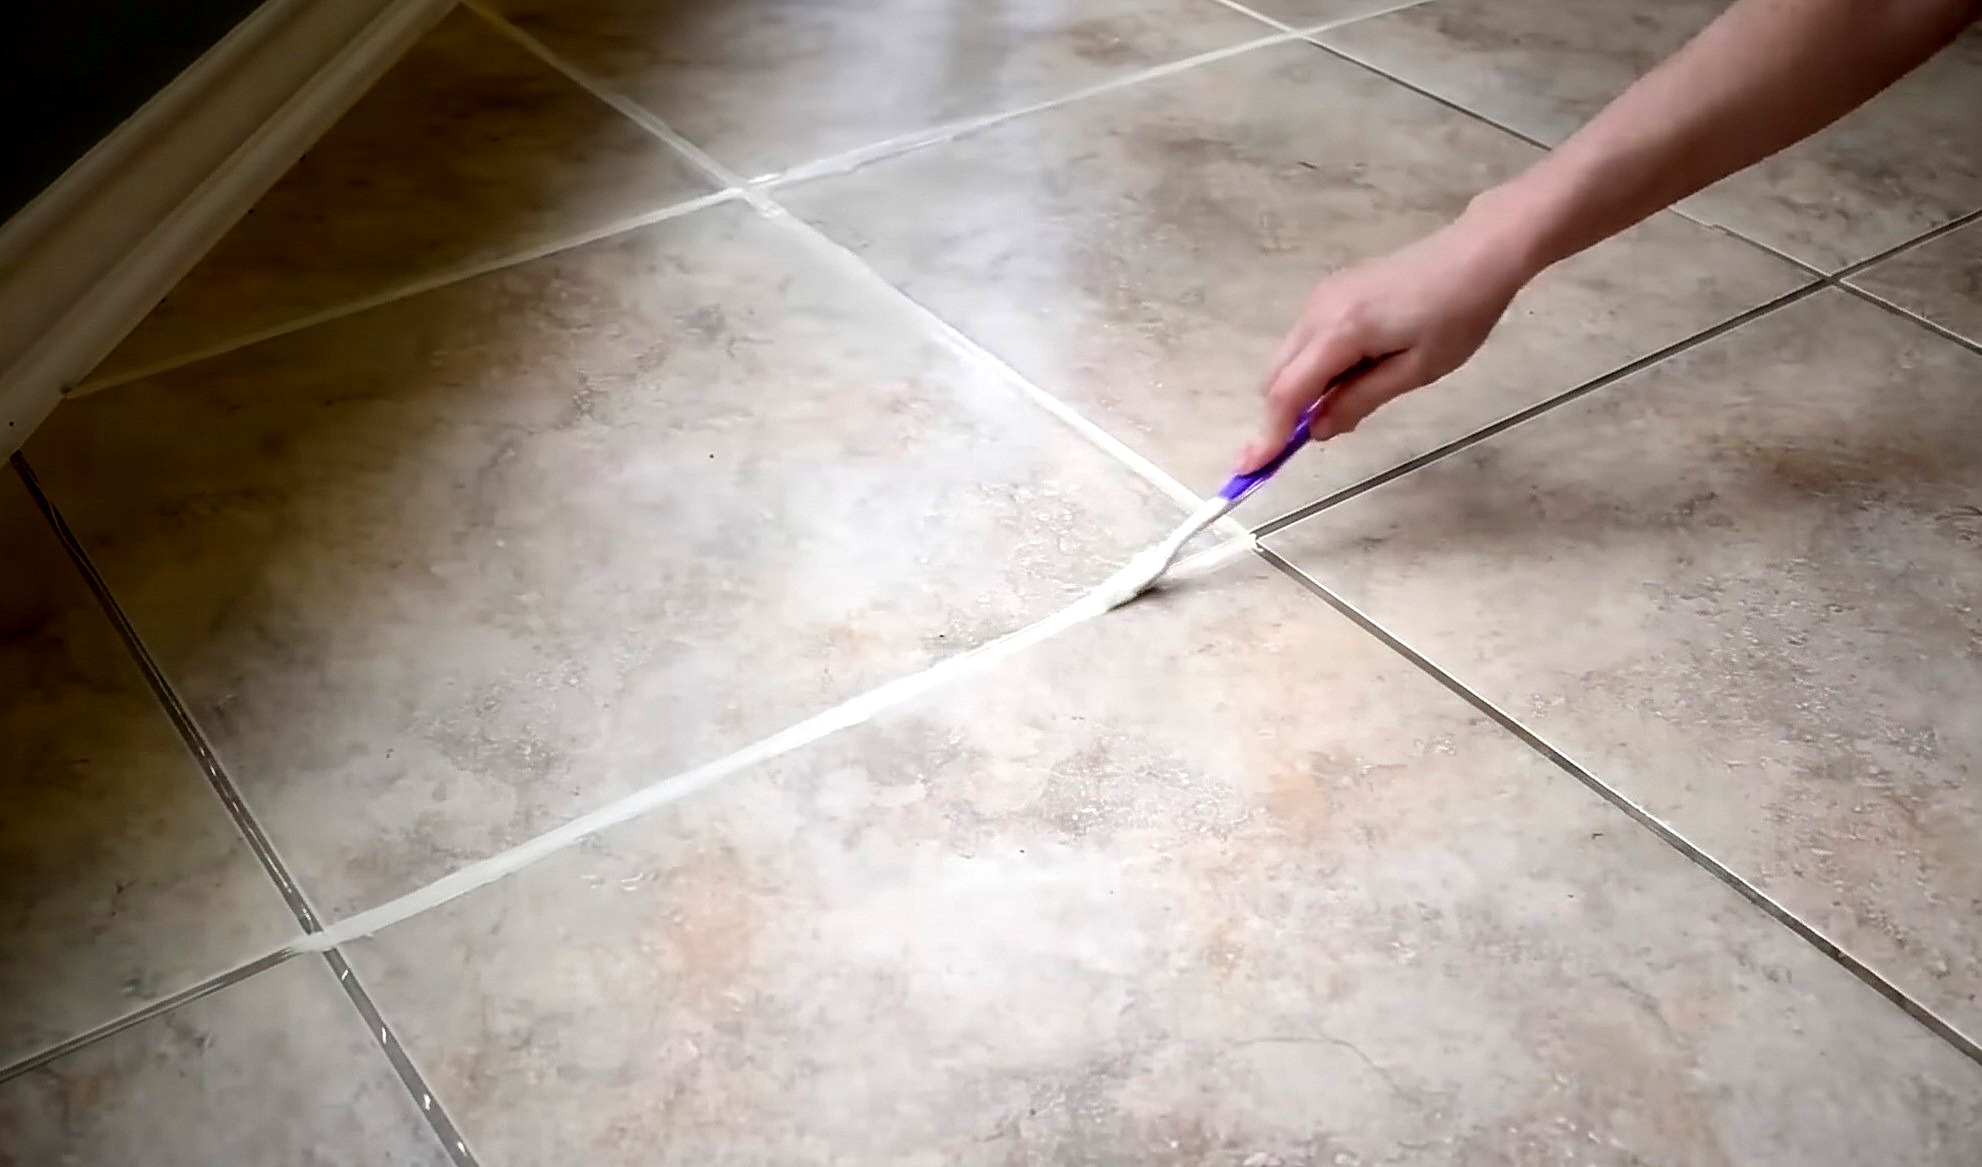
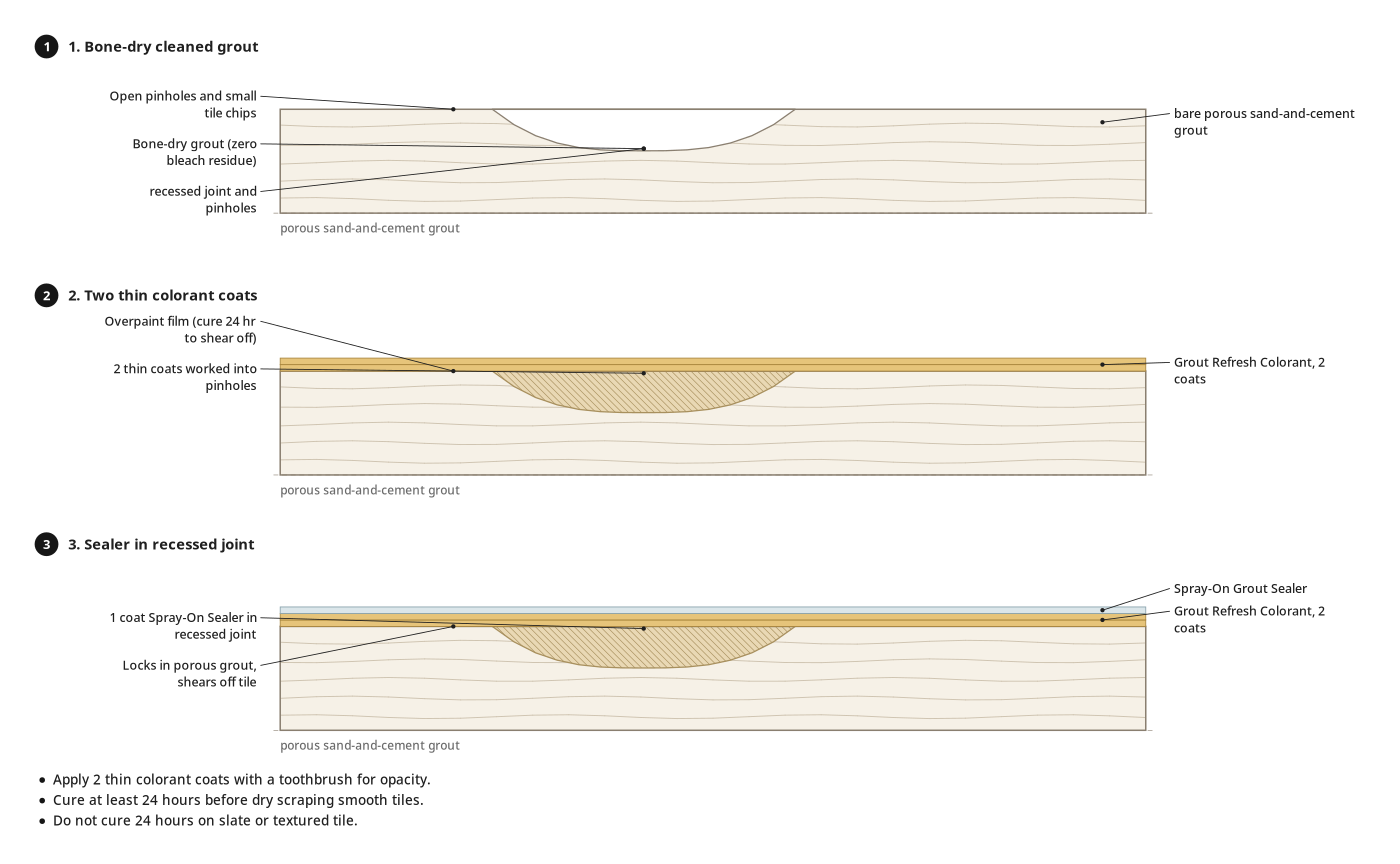
Two thin, opaque grout colorant coats cover every joint and surface chip.
You'll need: Toothbrush, Grout Refresh Colorant and Sealer
- 2.1 Apply Paint to Grout Lines
- Shake the bottle; squeeze a narrow colorant bead onto the grout line.
- Apply sparingly; a small bead stretches far.
- 2.2 Spread Paint with a Toothbrush
- Work the bead into the joint with short toothbrush strokes.
- Spread a thin layer that fills every pinhole without pooling.
- Dab colorant on small tile chips or cracks to hide damage.
- Stop and restart anywhere; dried edges blend seamlessly.
- 2.3 Apply a Second Coat
- Check the dry first coat for translucent spots or dark bleed-through.
- Squeeze and brush on a second thin coat for solid opacity.
- Cure the final coat at least 24 hours before scraping smooth tiles.
Key measurements
- Colorant coats: 2 thin coats for full opacity
- Cure time before dry scraping: at least 24 hours
- Textured-tile working time: wipe excess within 20 to 30 minutes
- Tip: Use an angled chisel-point brush instead of a toothbrush on narrow lines.
- Tip: Try Haystack or Driftwood if Straw dries lighter than your tile.
- Heads up: Do not cure colorant 24 hours on slate or textured tile, or it locks into the pores.
Before you move on: After the second coat dries, check for uniform, opaque color with no bare grey patches.
Step 3: Scrape Excess Paint
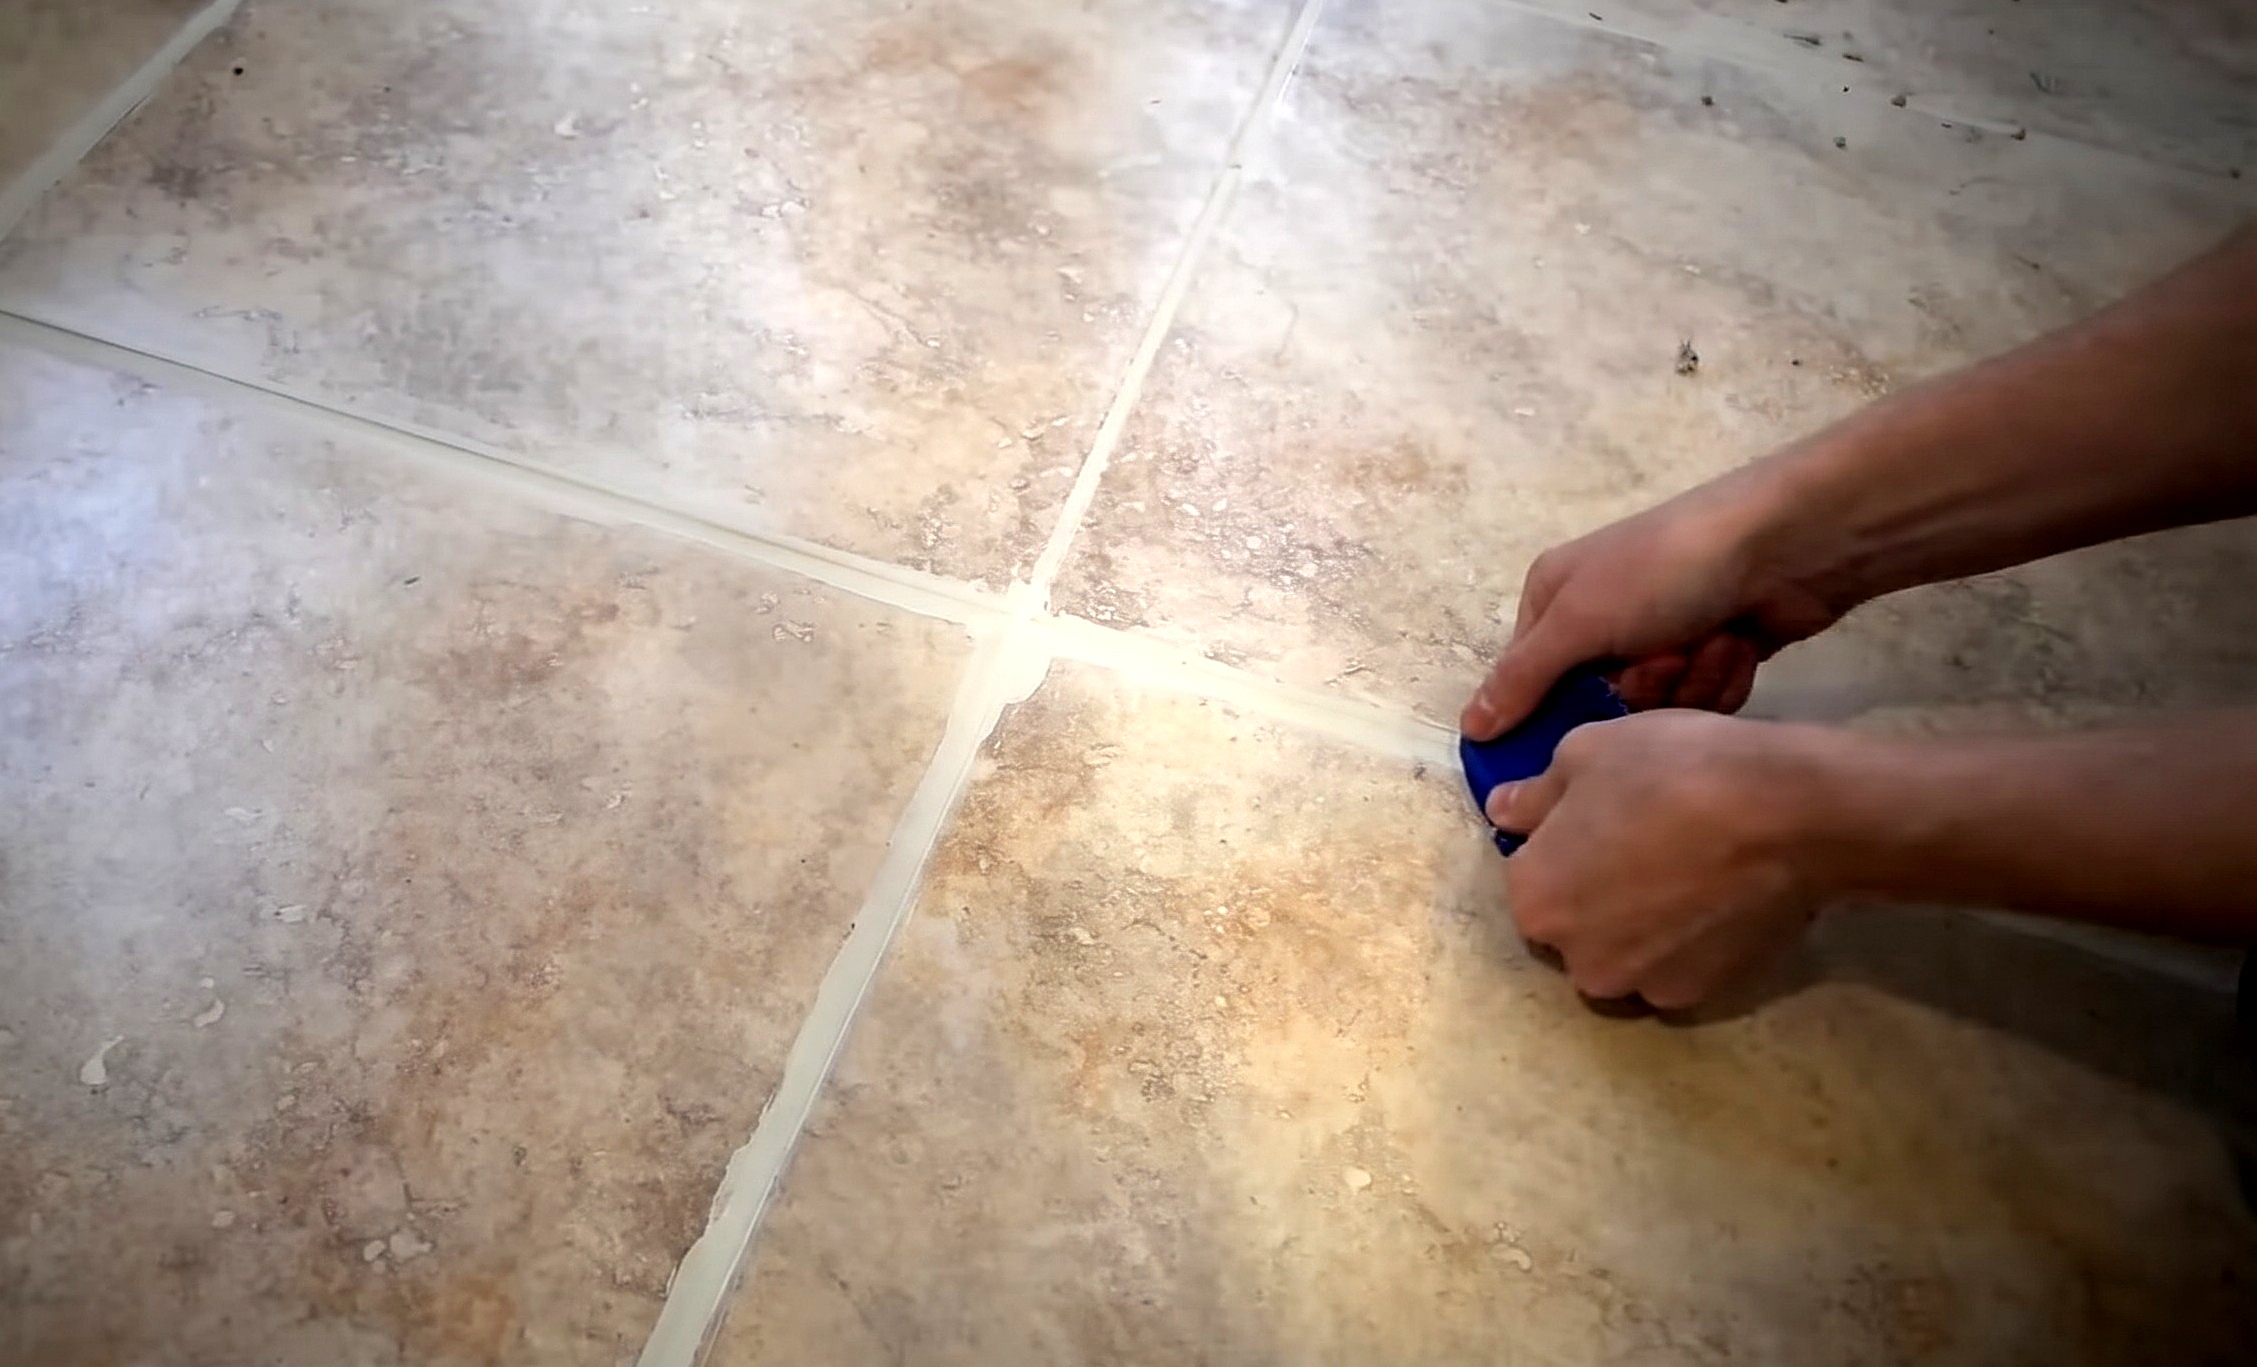
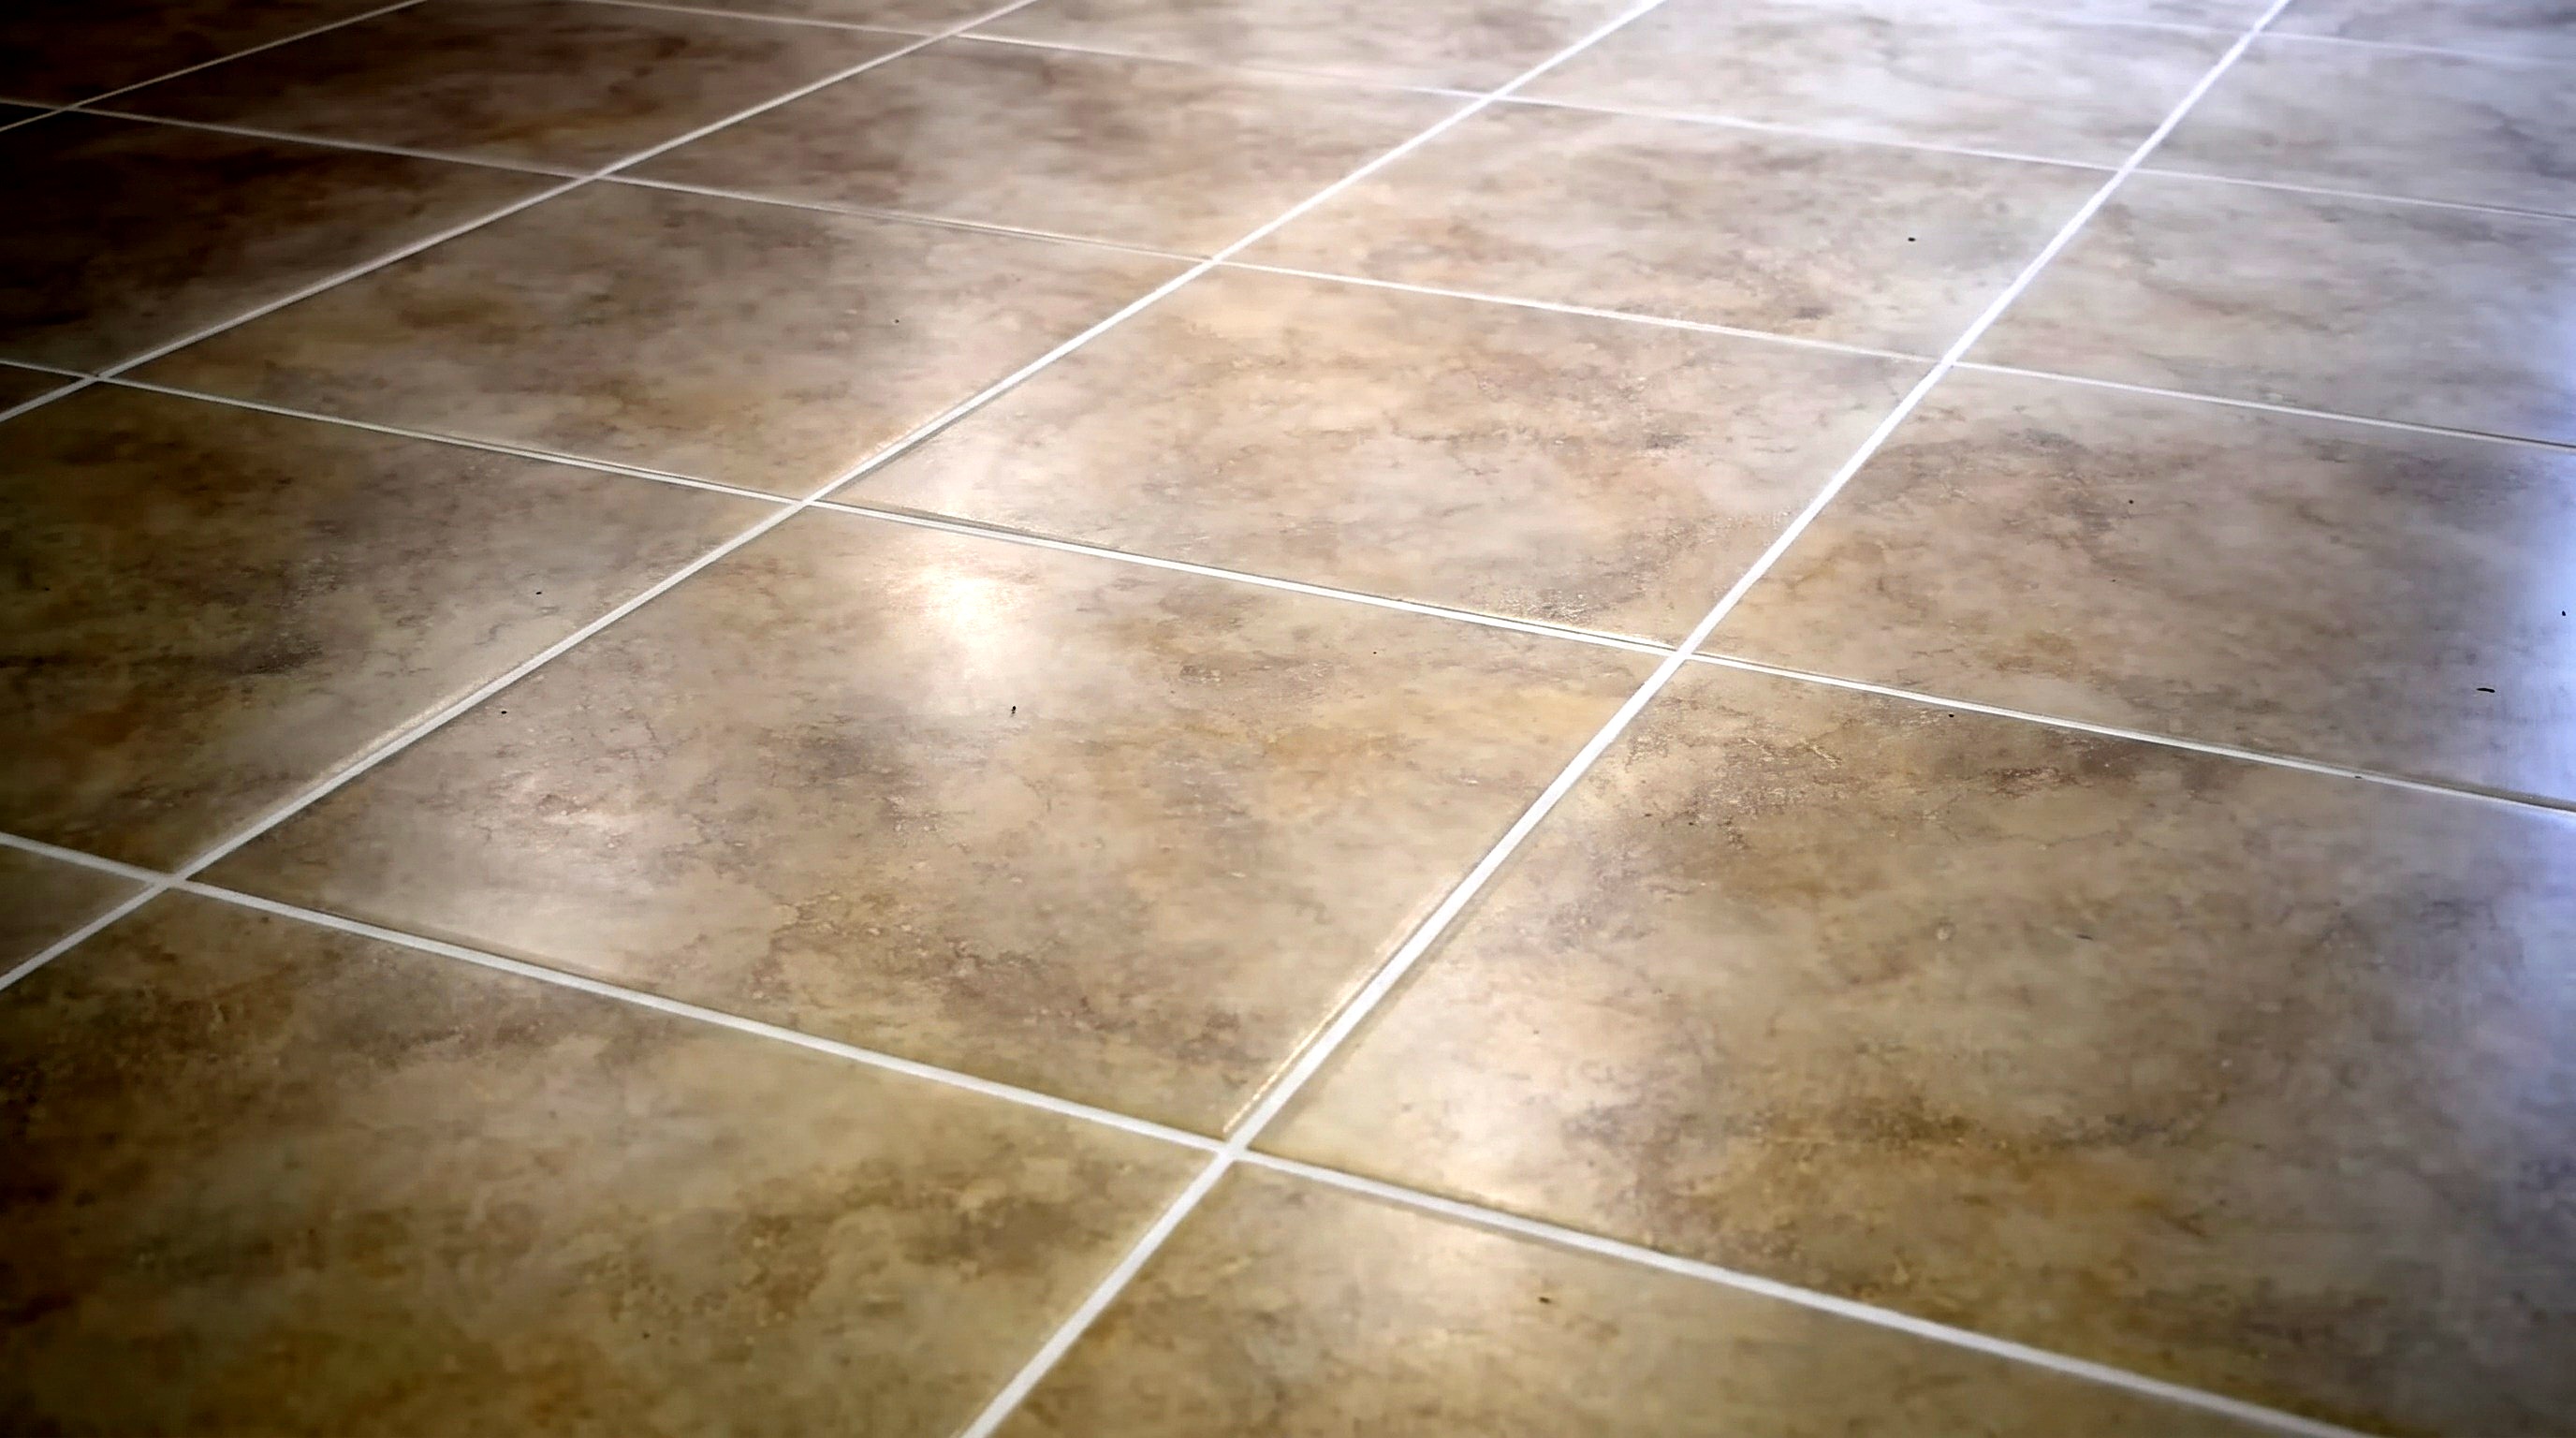
Overpaint is sheared clean from tile faces, leaving crisp grout lines.
You'll need: Caulking Tool, Broom and Dustpan, Scrub Brush, Grout Refresh Colorant and Sealer, Water
- 3.1 Scrape Paint from Tiles
- Wait at least 24 hours until the colorant cures.
- Press a rubber caulking tool edge against the tile beside the joint.
- Pull the tool along both sides of the line to shear off overpaint.
- Scrub textured transition tiles with soapy water and a brush if overpaint stuck.
- Fingertip-dab fresh colorant onto joints where paint lifted.
- 3.2 Clean Up Paint Flakes
- Sweep up dried paint flakes with a broom and dustpan.
- Check every intersection and scrape off remaining paint specks.
Key measurements
- Dry time before scraping smooth tile: minimum 24 hours
- Tip: On textured non-glass tile, wipe overpaint after 20 to 30 minutes with a damp sponge and diagonal 80-grit sanded sponge strokes, then buff with microfiber.
- Heads up: Scrubbing textured tile after paint cures can peel colorant from the joint.
Before you move on: Run a finger along the tile edges to verify no dried paint ridges remain on the tile surface and no bare spots show in the grout.
Step 4: Seal the Floor
An even, puddle-free protective sealer coat covers the refinished grout.
You'll need: Flat Mop, Respirator, Spray-On Grout Sealer
- 4.1 Spray the Sealer
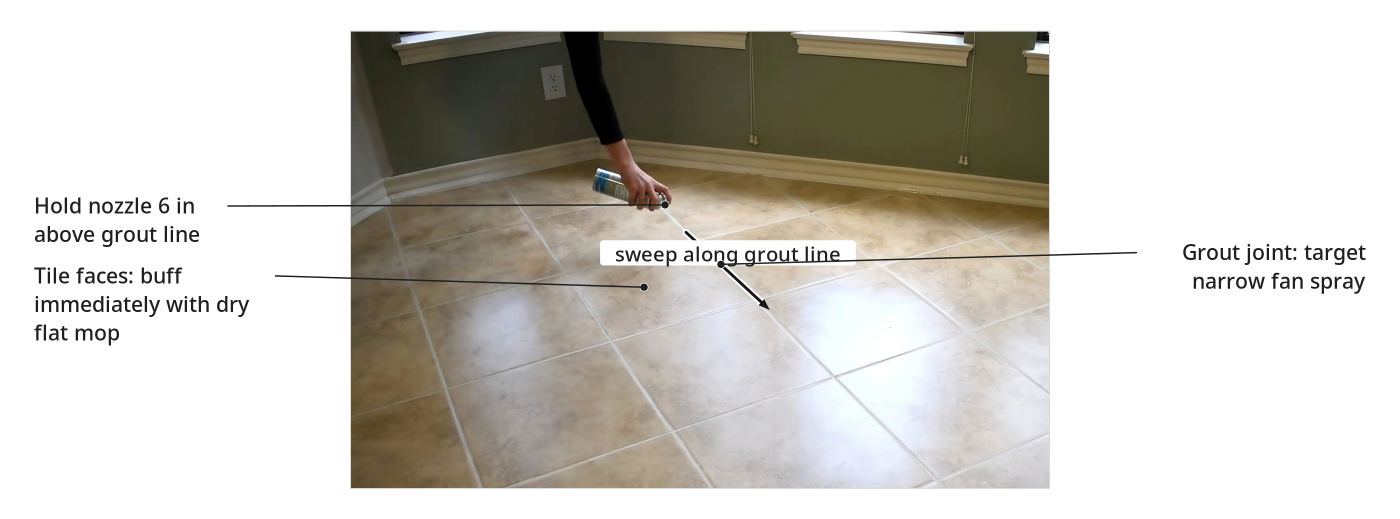
- Open windows; wear a respirator before spraying.
- Hold the aerosol sealer can 6 inches above the floor.
- Sweep narrow fan spray along grout lines in small sections.
- 4.2 Spread the Sealer Evenly
- Run a clean, dry flat mop over it immediately.
- Buff excess off tile faces, leaving sealer in recessed joints.
- Let the floor dry undisturbed for at least 1 hour.
Key measurements
- Spray distance: 6 inches above the floor
- Sealer dry time: at least 1 hour before foot traffic
- Tip: Skip if desired; the grout colorant has a built-in sealer.
- Heads up: Never inhale aerosol sealer fumes: cross-ventilate and wear a respirator.
- Heads up: Wipe excess aerosol sealer off painted grout immediately so it does not cure into a sticky surface residue.
Before you move on: Under angled light, check tile faces have no puddles or hazy sealer streaks.
Finishing
Touch-ups and trim
- Peel painter's tape off baseboards and transition strips after scraping.
- Scrape stray colorant drops off baseboards before they harden.
Cure and traffic
- Keep pets and foot traffic off the floor at least 1 hour after sealing.
Care
- Vacuum tile regularly instead of wet-mopping with harsh chemicals.
- Spot-clean spills with a damp grout sponge and cold water, then towel dry.
- Mist hard-surface cleaner on a microfiber pad instead of flooding the floor.
Alternatives
- Leave low-traffic floors unsealed, relying on the colorant's built-in sealer.
- Wipe smooth tiles with paper towels as you paint to skip dry scraping.
Check before you call it done
| Check | What you should see | If not |
|---|---|---|
| Check all dried grout color under daylight. | Opaque, uniform shade with no dark stains bleeding through. | Brush another thin colorant coat over translucent spots. |
| Check smooth and textured tile edges along every grout line. | Crisp edges; tile faces free of overpaint. | Scrape smooth tiles with the rubber caulking tool; scrub textured ones with soapy water. |
| Inspect grout joints after scraping or scrubbing. | No colorant peeled or lifted from recessed joints. | Dab matching colorant into bare spots with your fingertip; let dry. |
| Sight across the sealed tile floor against light. | No wet pools or sticky sealer haze on tiles. | Buff immediately with a clean, dry flat mop. |
These Specs are built from Kathartic Studios's video “Tile Grout Refinishing: Cleaning, Painting, and Sealing”. Open the Tile Grout Refinishing: Cleaning, Painting, and Sealing project page.
