Spetz Specs No. 1328: step-by-step surface & covering guide
Large-Format Porcelain Tile Patio and Garden Pathways with Contrasting Border
The complete step-by-step guide made from Tidybricks patio restore's YouTube video, free on Spetz. For the video, a step-by-step player and answers to your questions, see the Large-Format Porcelain Tile Patio and Garden Pathways with Contrasting Border project page.
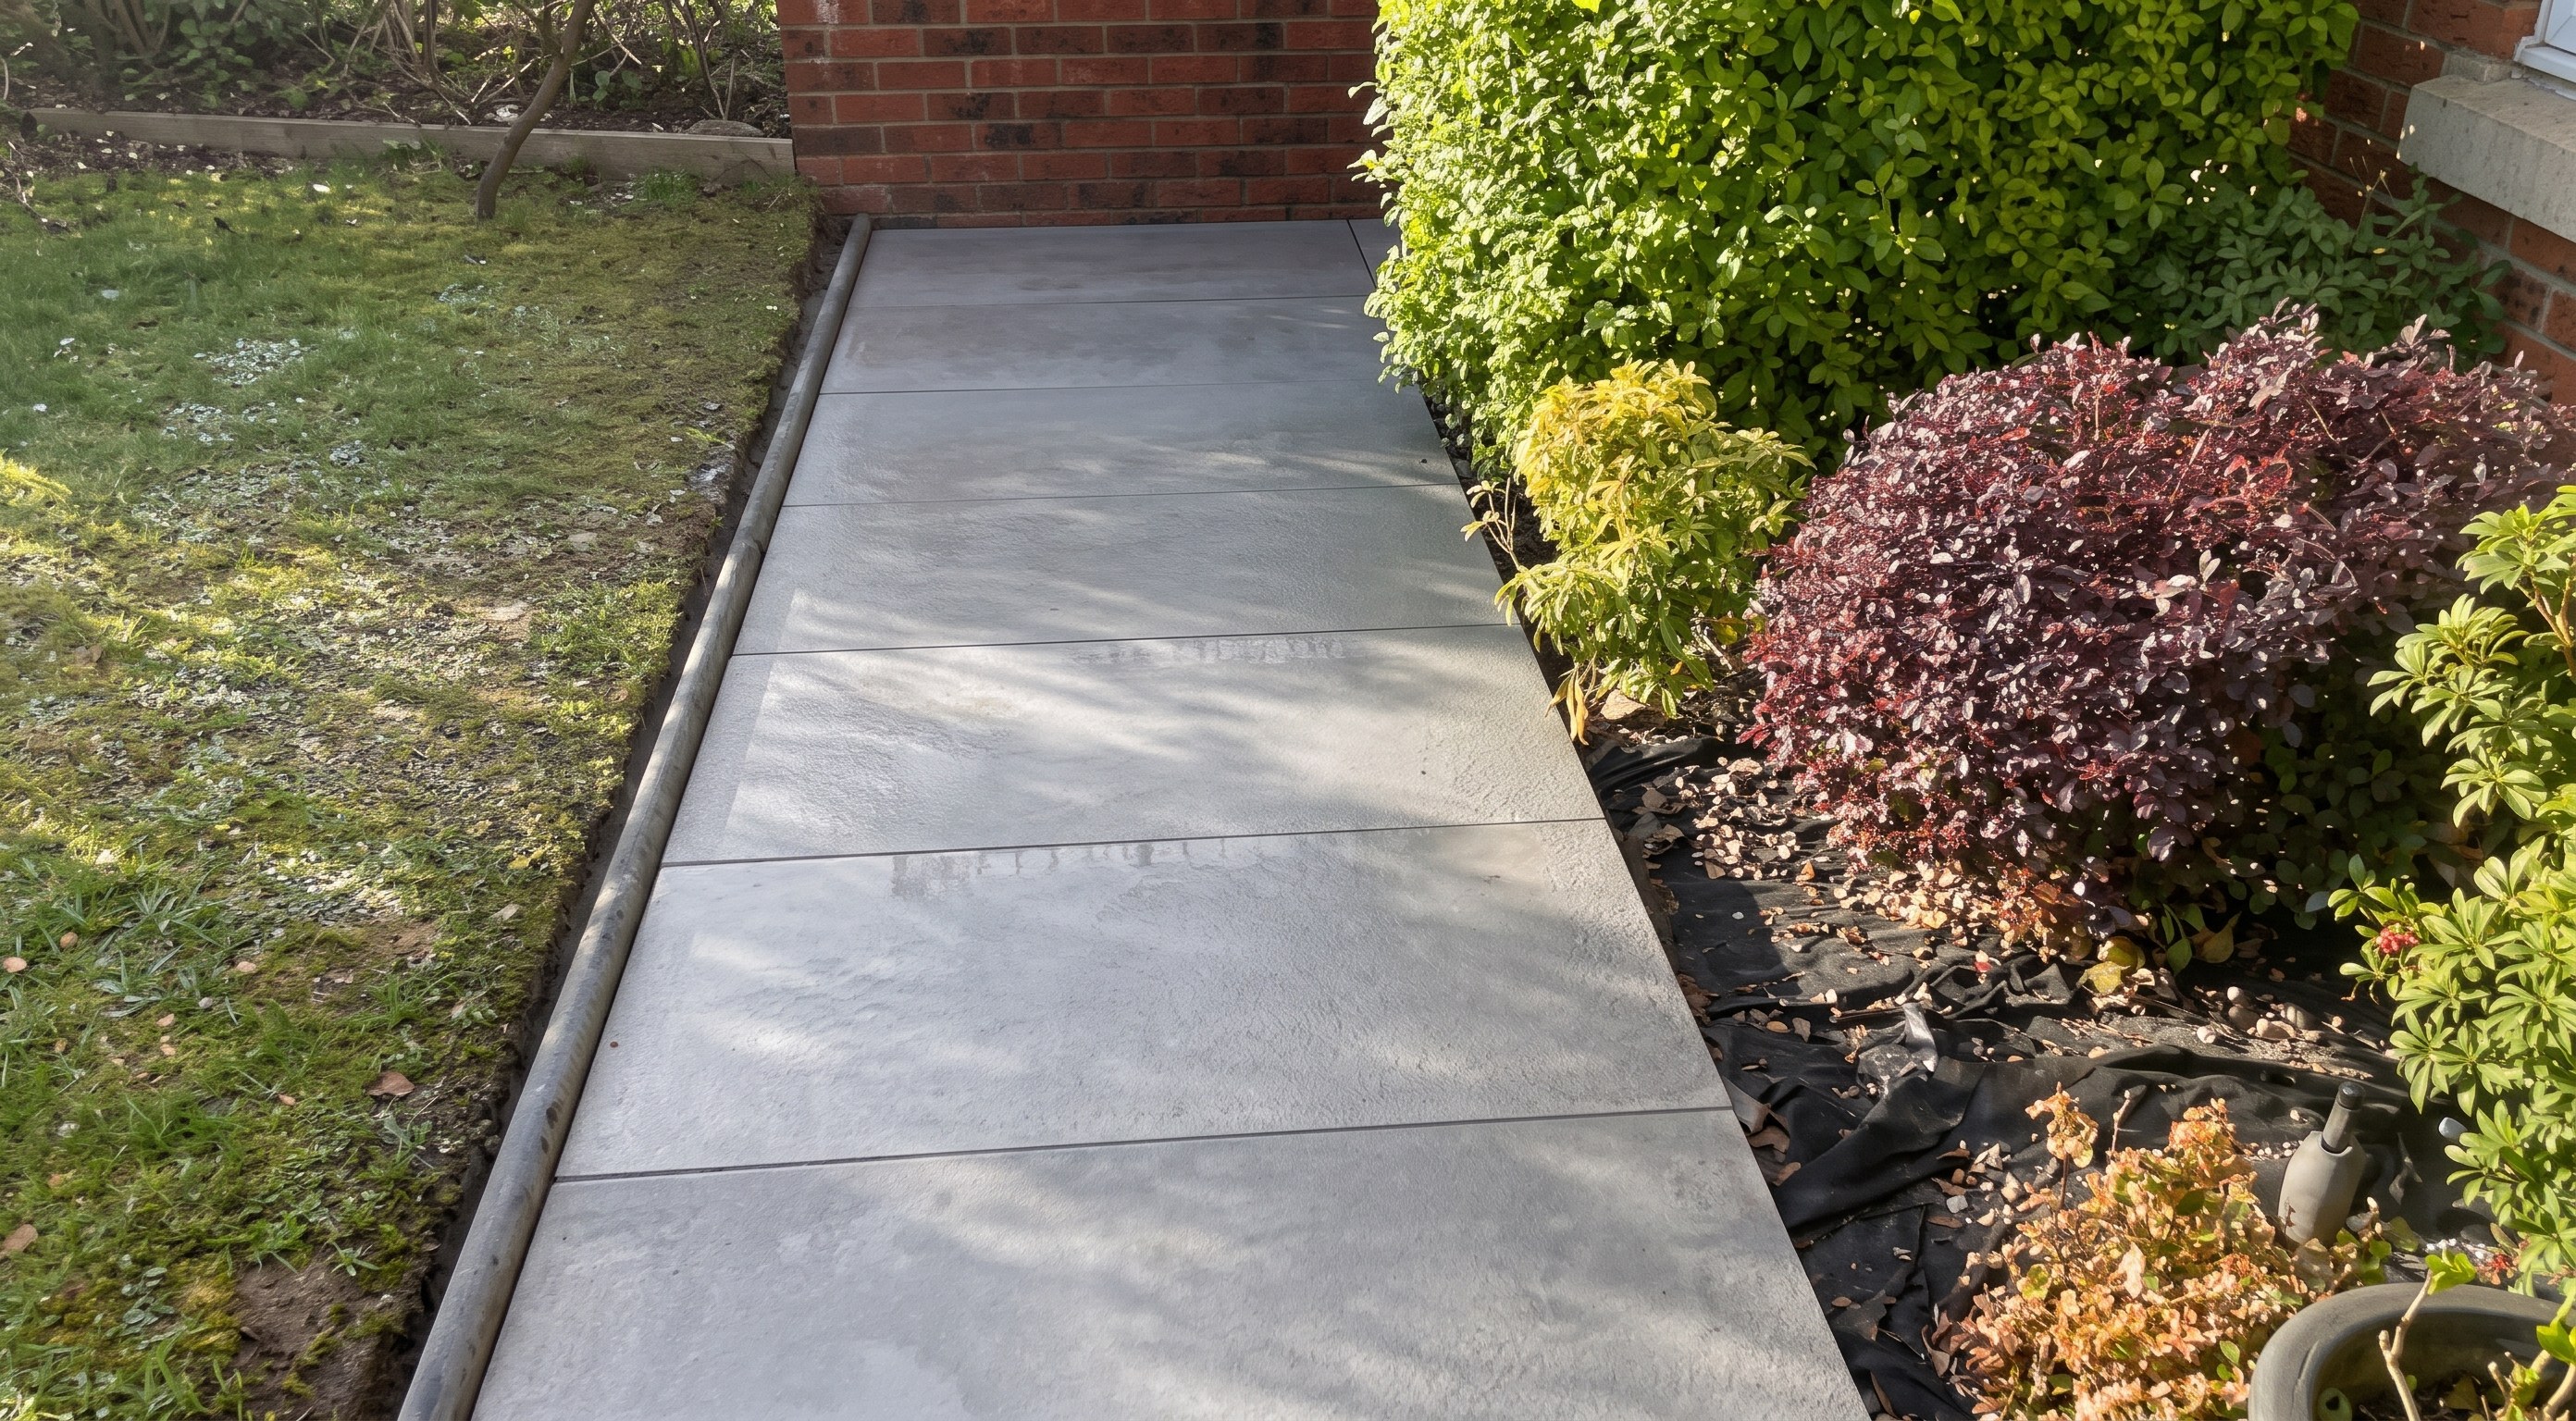
11 steps, 4 parts, 15 tools, 8 materials
Overview
Finished size: 140 sq m total area; 600 x 1200 mm main slabs; 200 x 800 mm border tiles
Surface and Covering
- Cover 140 sq m of patio and garden paths with 600 x 1200 mm grey porcelain slabs.
- Frame patio perimeter and drains with rip-cut 200 x 800 mm black porcelain border tiles.
- Finish front lawn edges with mitered dark grey bullnose concrete edging kerbs.
What It Takes
- Plan eight working days with two to three people on saw, mixer, and trowel.
- Mix 9 to 11 tons sharp sand and one cement pallet at a 4:1 ratio.
- Use paired vacuum suction cup lifters to handle heavy 600 x 1200 mm porcelain slabs.
What Decides Success
- Roll paving slurry primer onto each non-porous porcelain slab back right before bedding.
- Keep taut string lines and a slight drainage fall consistent across every course.
Layout at a glance
- Covering: Grey porcelain paving slab 600 x 1200 mm
- Laid on: Prepared outdoor sub-base and existing concrete front pathway base
- Pattern: running bond
- Offset: Half-bond (1/2 offset) staggered courses on the main patio using 600 x 600 mm half-slab cuts at the ends; single-file courses on pathways
- Start: Start in the rear patio corner with a test-bedded reference slab braced by concrete blocks so tight string lines cannot pull it out of alignment. At the front entrance landing, center the middle slab on the doorway with one full slab on each side for symmetry, placing cuts in the far corner.
- Reference line: Tight mason's string lines on steel line pins stretched from the braced starting corner slab to a temporary reference slab three tile widths away, checked with a spirit level set so the bubble sits just past the line for drainage fall.
- Bond: Full 4:1 sharp sand and cement mortar bed, flattened with a steel float and scored with wavy trowel ridges, with paving slurry primer rolled onto the underside of each porcelain slab.
- Patio perimeter and ACO drain channel: Frame the main grey slabs with 200 x 800 mm black porcelain border tiles rip-cut in half from 400 x 800 mm tiles, mitering the corner joints at 45 degrees.
- Right-hand brick boundary wall: Leave the half-slab perimeter spaces open while laying full field tiles, then infill with 600 x 600 mm half-slabs and individually cut black border tiles numbered in sequence to follow the slight taper of the wall.
- Inspection chamber cover: Bed a recessed metal tray and frame flush with the patio fall, notch L-shaped slabs around the outer frame, and inlay the removable tray with cut grey and black border tiles aligned with the main joints.
- Front entrance landing junction: Cut angled transition slabs on the wet saw to meet the diagonal edge of the symmetrical three-slab front door landing cleanly.
- Front garden pathway lawn edges: Bed dark grey bullnose concrete edging kerbs in mortar along both sides of the front walkways, mitering the kerbs at angled corners.
Health and safety
Masonry Saws and Mixer Safety
- Wear eye, ear, and respiratory protective equipment when cutting porcelain tiles and concrete kerbs with the wet saw or angle grinder.
- Keep the guard on the angle grinder, hold it with both hands, and let the diamond blade stop before setting it down.
- Keep hands, trowels, and loose clothing out of the rotating electric cement mixer drum while loading sharp sand and cement.
- Keep power cords for the wet bridge saw, angle grinder, and cement mixer out of puddles and washboy water.
Cement, Slurry, and Silica Hazards
- Wear waterproof gloves and knee pads when working with wet cement mortar and SBR slurry primer to prevent alkaline skin burns.
- Wear a particulate respirator when tipping dry Portland cement into the mixer or dry-cutting kerbs and porcelain with the grinder.
- Rinse skin immediately with clean water if wet 4:1 mortar or polymer bonding slurry splashes onto your hands or face.
Heavy Slabs and Ergonomic Lifting
- Use two people and paired vacuum suction cup lifters to lower 600x1200mm porcelain slabs and avoid back strain or crushed fingers.
- Wipe the porcelain face clean and test the suction cup grip before lifting so heavy slabs do not drop on your feet.
- Use a wheelbarrow as a waist-high stand to roll slurry primer on slab backs and reduce repetitive bending.
- Lift the inlaid recessed inspection chamber cover with a helper; the metal tray filled with mortar and porcelain is very heavy.
Sharp Edges and Site Hazards
- Handle rip-cut 200x800mm border tiles and mitered pieces carefully because freshly cut porcelain edges are razor-sharp.
- Keep the inspection chamber opening covered or blocked off while building the recessed tray so nobody steps into the open pit.
- Mark taut mason's string lines and steel line pins along the patio and pathways to prevent trips and puncture injuries.
The surface & its prep
- Prepare and compact the outdoor patio sub-base and clear the existing concrete front pathway base.
- Install perimeter ACO drain channels at finished paving height before tile layout.
- Check the weather forecast and never lay outdoor porcelain slabs in heavy rain.
- Brace the starting corner reference slab with heavy concrete blocks before pulling string lines tight.
- Stretch mason's string lines on steel line pins across the patio for row alignment and height.
- Set the spirit level bubble touching or slightly past the level line on each slab for drainage fall.
Tools
- Cement mixer (electric drum concrete mixer)
- Wheelbarrow (builder's wheelbarrow)
- Spirit level (box-section spirit level, Stabila)
- Paint roller (mini emulsion/slurry roller)
- Wet bridge tile saw (electric rail/bridge masonry saw, Battipav, Prime)
- Angle grinder (corded angle grinder with diamond blade)
- String line and line pins (mason's string line and steel line pins, Big Foot)
- Pointing and bricklaying trowels (steel masonry trowels)
- Rubber mallet (non-marking rubber paving mallet)
- Tape measure (retractable pocket tape measure)
- Kneeling pad and knee pads (foam kneeling board and strap-on knee pads, Screwfix) (optional)
- Suction cup tile lifters (vacuum suction cup lifters)
- Concrete finishing float (long flat steel float / pool trowel) (optional)
- Adjustable set square (large folding/adjustable layout square) (optional)
- Washboy (wheeled grout wash bucket with rollers and sponge float) (optional)
Materials
- Sharp sand (11 tons, sharp concreting sand, 4:1 mix ratio with cement)
- Cement (1 pallet, Portland cement, Rugby, Premium)
- Grey porcelain paving slabs (large-format outdoor porcelain tile, Panaria, Grey, 600 x 1200 mm)
- Black porcelain border tiles (outdoor porcelain tile, Castelvetro, Black, 400 x 800 mm (cut lengthwise to 200 x 800 mm))
- Paving slurry primer (SBR/polymer bonding slurry primer)
- Tile spacers (plastic paving joint spacers)
- Recessed inspection chamber cover (1, galvanized/metal recessed manhole tray and frame)
- Bullnose edging kerbs (round-top concrete path edging, Dark grey / charcoal)
Finishes & supplies, in the order they go on
| Product | What it does | Mix & coats | Dry time | Applied with |
|---|---|---|---|---|
| Sharp sand | Full-contact mortar for 140 sq m paving (9 to 11 tons sharp sand, 1 pallet cement). | 4 parts sharp sand to 1 part cement, 1 coats | Cure overnight before walking, kneeling, or barrowing over laid slabs | Pointing and bricklaying trowels, concrete finishing float |
| Paving slurry primer | Permanently bonds non-porous porcelain slabs to the wet 4:1 sand and cement mortar. | 1 coats | Apply immediately before lowering each slab onto the ridged mortar bed | Paint roller |
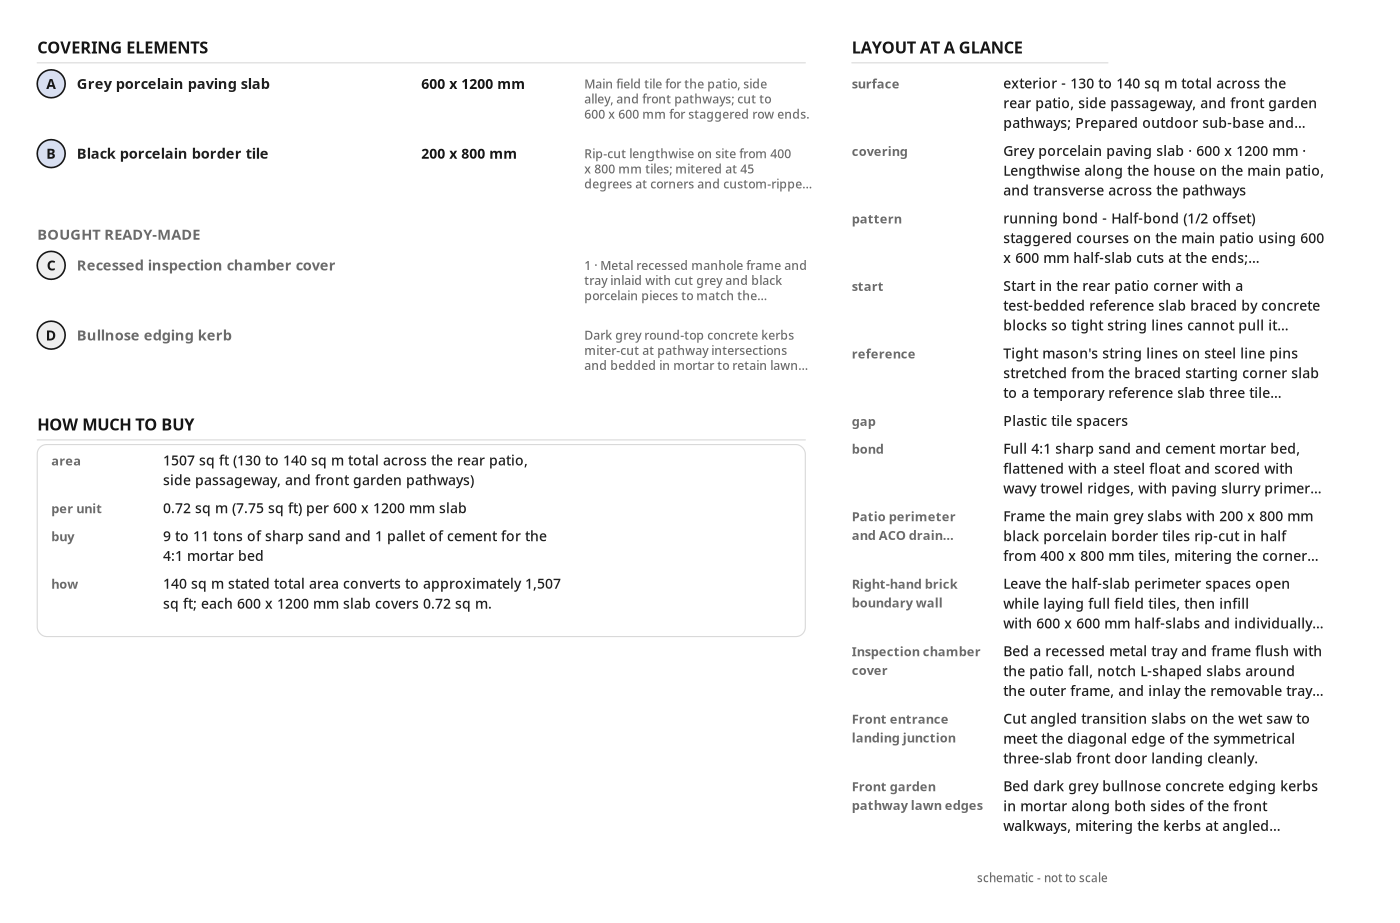
Covering elements
| Part | Name | Qty | Size | Notes |
|---|---|---|---|---|
| A | Grey porcelain paving slab | count yours | 3/4" (T) × 23 5/8" (W) × 47 1/4" (L) | Main field tile for the patio, side alley, and front pathways; cut to 600 x 600 mm for staggered row ends. |
| B | Black porcelain border tile | count yours | 3/4" (T) × 7 7/8" (W) × 31 1/2" (L) | Rip-cut lengthwise on site from 400 x 800 mm tiles; mitered at 45 degrees at corners and custom-ripped along walls. |
| C | Recessed inspection chamber cover | x1 | 1 · Metal recessed manhole frame and tray inlaid with cut grey and black porcelain pieces to match the surrounding paving. | |
| D | Bullnose edging kerb | count yours | Dark grey round-top concrete kerbs miter-cut at pathway intersections and bedded in mortar to retain lawn edges. |
Before you start
Protect and Clear
- Clear the sub-base and existing concrete pathways before staging sand, cement, and tile pallets.
- Cover cured patio sections with heavy plastic sheeting before kneeling or wheeling mortar across.
- Check the forecast; pause in heavy rain so primer and mortar do not wash out.
Cut and Mix Stations
- Set the electric cement mixer near sharp sand and cement pallets for continuous 4:1 mixing.
- Stage the wet bridge tile saw with water nearby for rip and miter cuts.
- Move the wet saw to the front garden before tiling narrow side alleys.
Step by step
Step 1: Set out the patio corners, string lines, and reference slabs
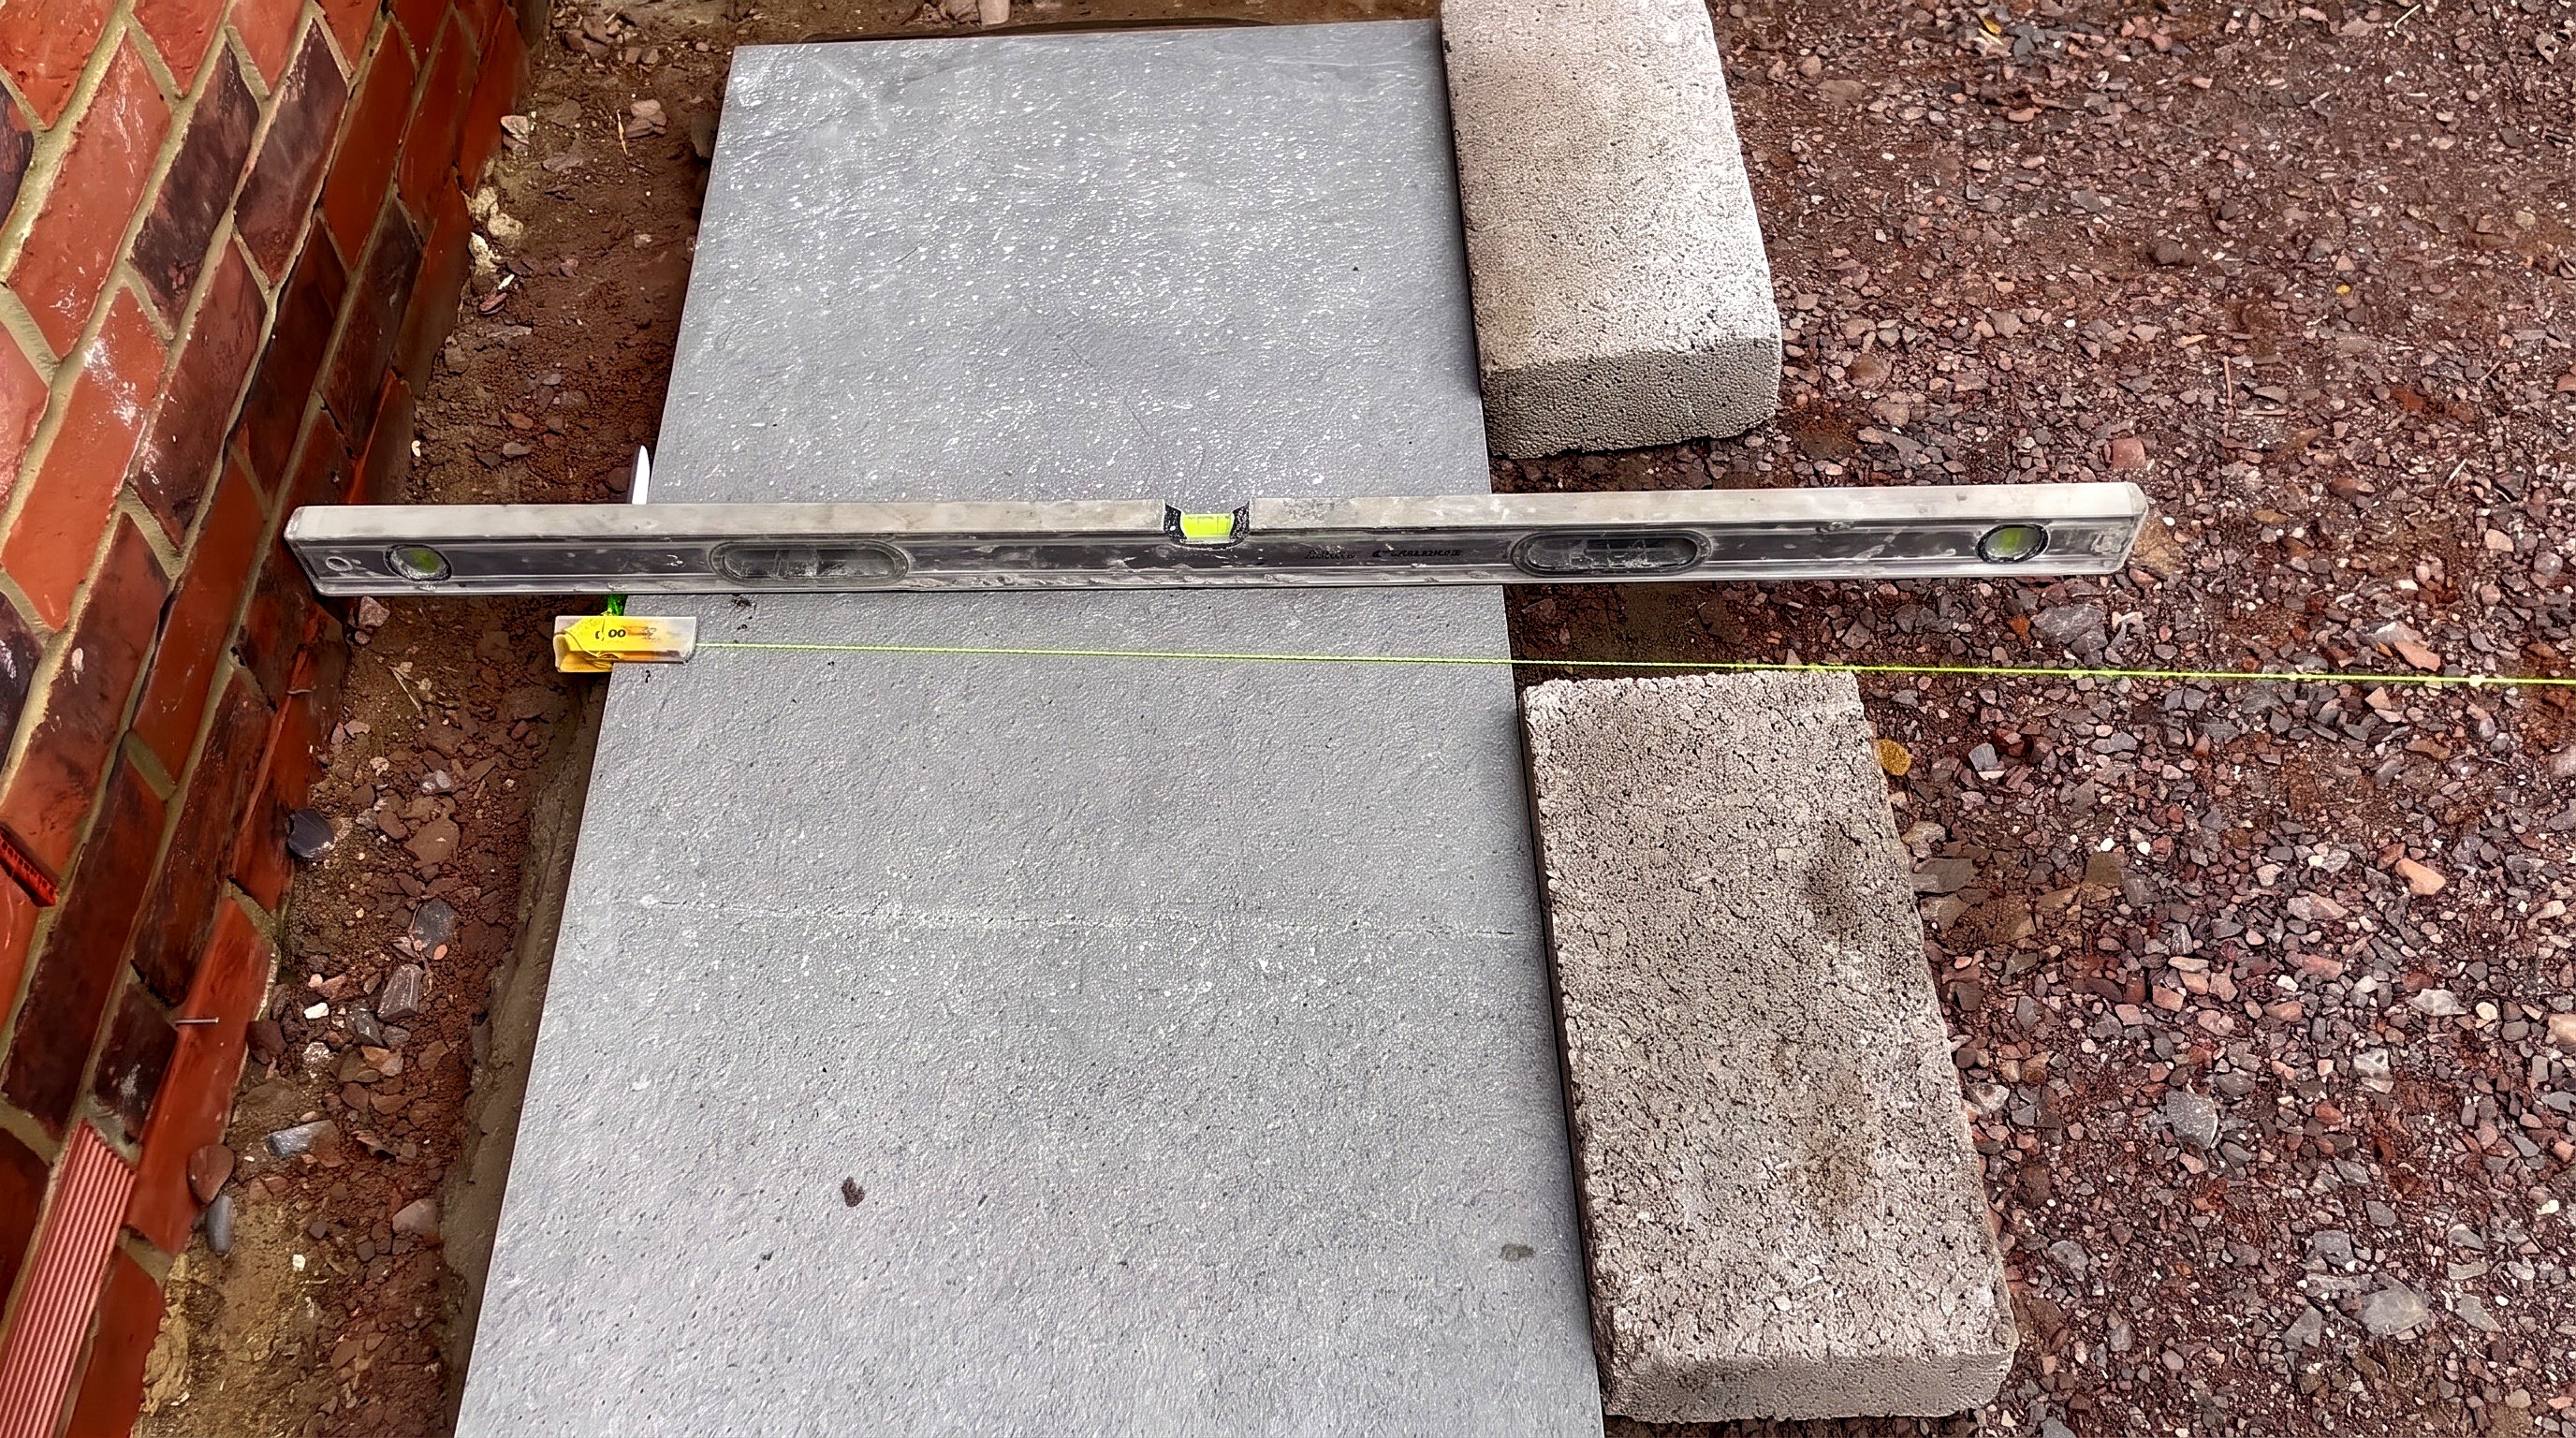
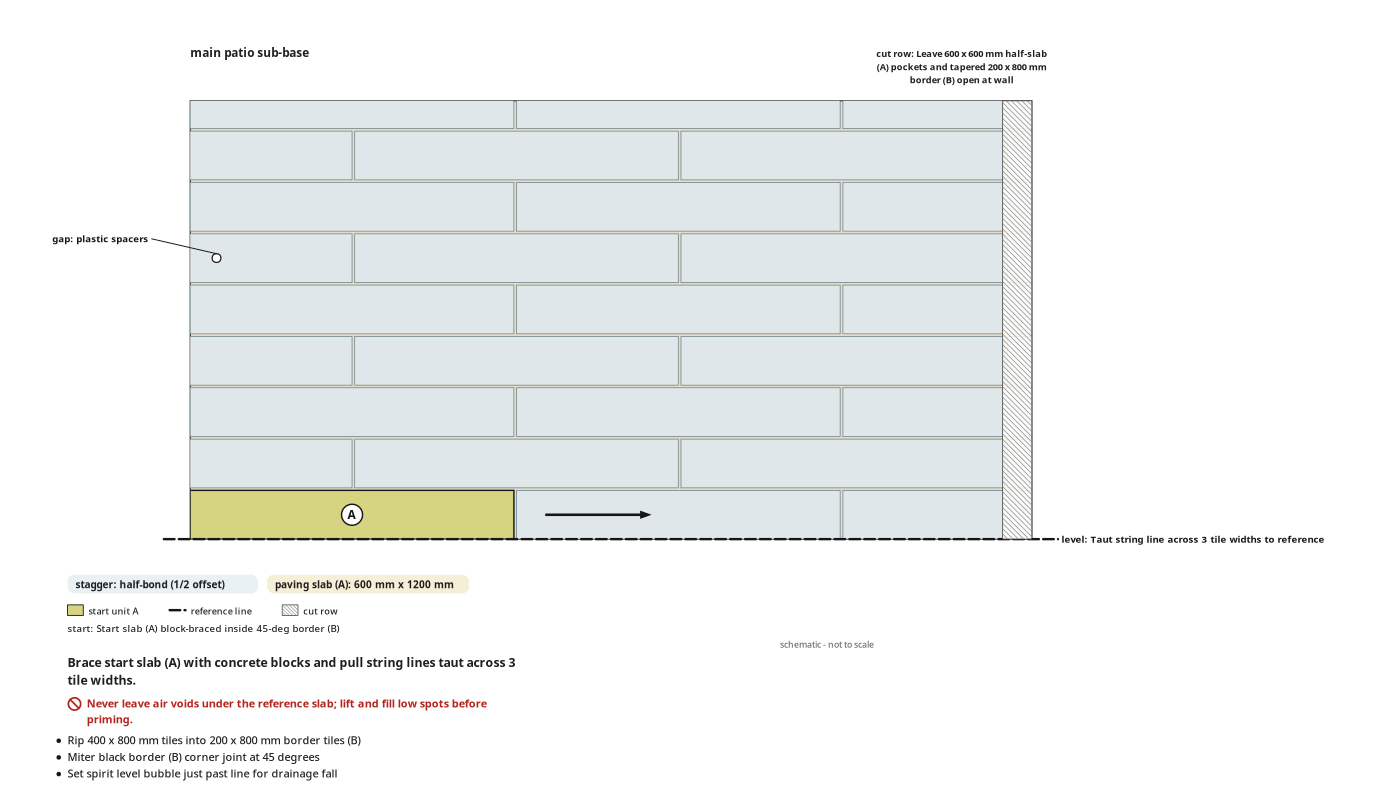
The mitered border corner is dry-fitted, reference slabs are braced, and taut string lines set the patio fall.
Parts in this step: (A) Grey porcelain paving slab, (B) Black porcelain border tile
You'll need: Cement mixer, Wheelbarrow, Spirit level, Paint roller, Wet bridge tile saw, String line and line pins, Pointing and bricklaying trowels, Rubber mallet, Tape measure, Sharp sand, Cement, Grey porcelain paving slabs, Black porcelain border tiles, Paving slurry primer
- 1.1 Cut and dry-fit the 45-degree mitered border corner
- Rip-cut 400 x 800 mm tiles lengthwise on the wet saw into 200 x 800 mm black porcelain border tiles (B).
- Miter the corner border joint at 45 degrees on the wet bridge tile saw.
- Dry-fit the mitered border corner against a grey porcelain paving slab (A) to check layout.
- 1.2 Test-bed, lift, prime, and set the first corner reference slab
- Trowel a 4:1 sharp sand and cement mortar bed in the starting corner.
- Lay the first 600 x 1200 mm slab unprimed to test heights and drainage levels.
- Lift the slab, fill mortar voids, and roll slurry primer onto the underside.
- Tap the slab down so the spirit level bubble sits just past the line for drainage fall.
- Brace the outer edge with concrete blocks so tight string lines cannot shift the slab.
- 1.3 Set the opposite temporary reference slab and gauge mortar bed depth
- Measure three full tile widths across the patio and bed a temporary reference slab opposite.
- Pull mason's string lines taut on steel line pins between reference slabs.
- Weight one end of a long spirit level on the laid slab with a brick.
- Check the gap under the level across the mortar bed matches slab thickness.
Key measurements
- Mortar mix: 4 parts sharp sand to 1 part cement
- Main field slab size: 600 x 1200 mm
- Rip-cut border tile width: 200 mm from 400 x 800 mm tile
- Border corner miter angle: 45 degrees
- Transverse reference span: 3 full tile widths
- Tip: Test-bed the unprimed first corner slab to set levels before priming and setting it.
- Tip: Gauge bed height with a brick-weighted spirit level so you only tap the slab lightly.
- Heads up: Never leave air voids under the reference slab; lift and fill low spots before priming.
Before you move on: Check the starting slab is block-braced, the bubble sits past the line for fall, and strings are taut.
Step 2: Lay the first rows of main patio slabs and border tiles
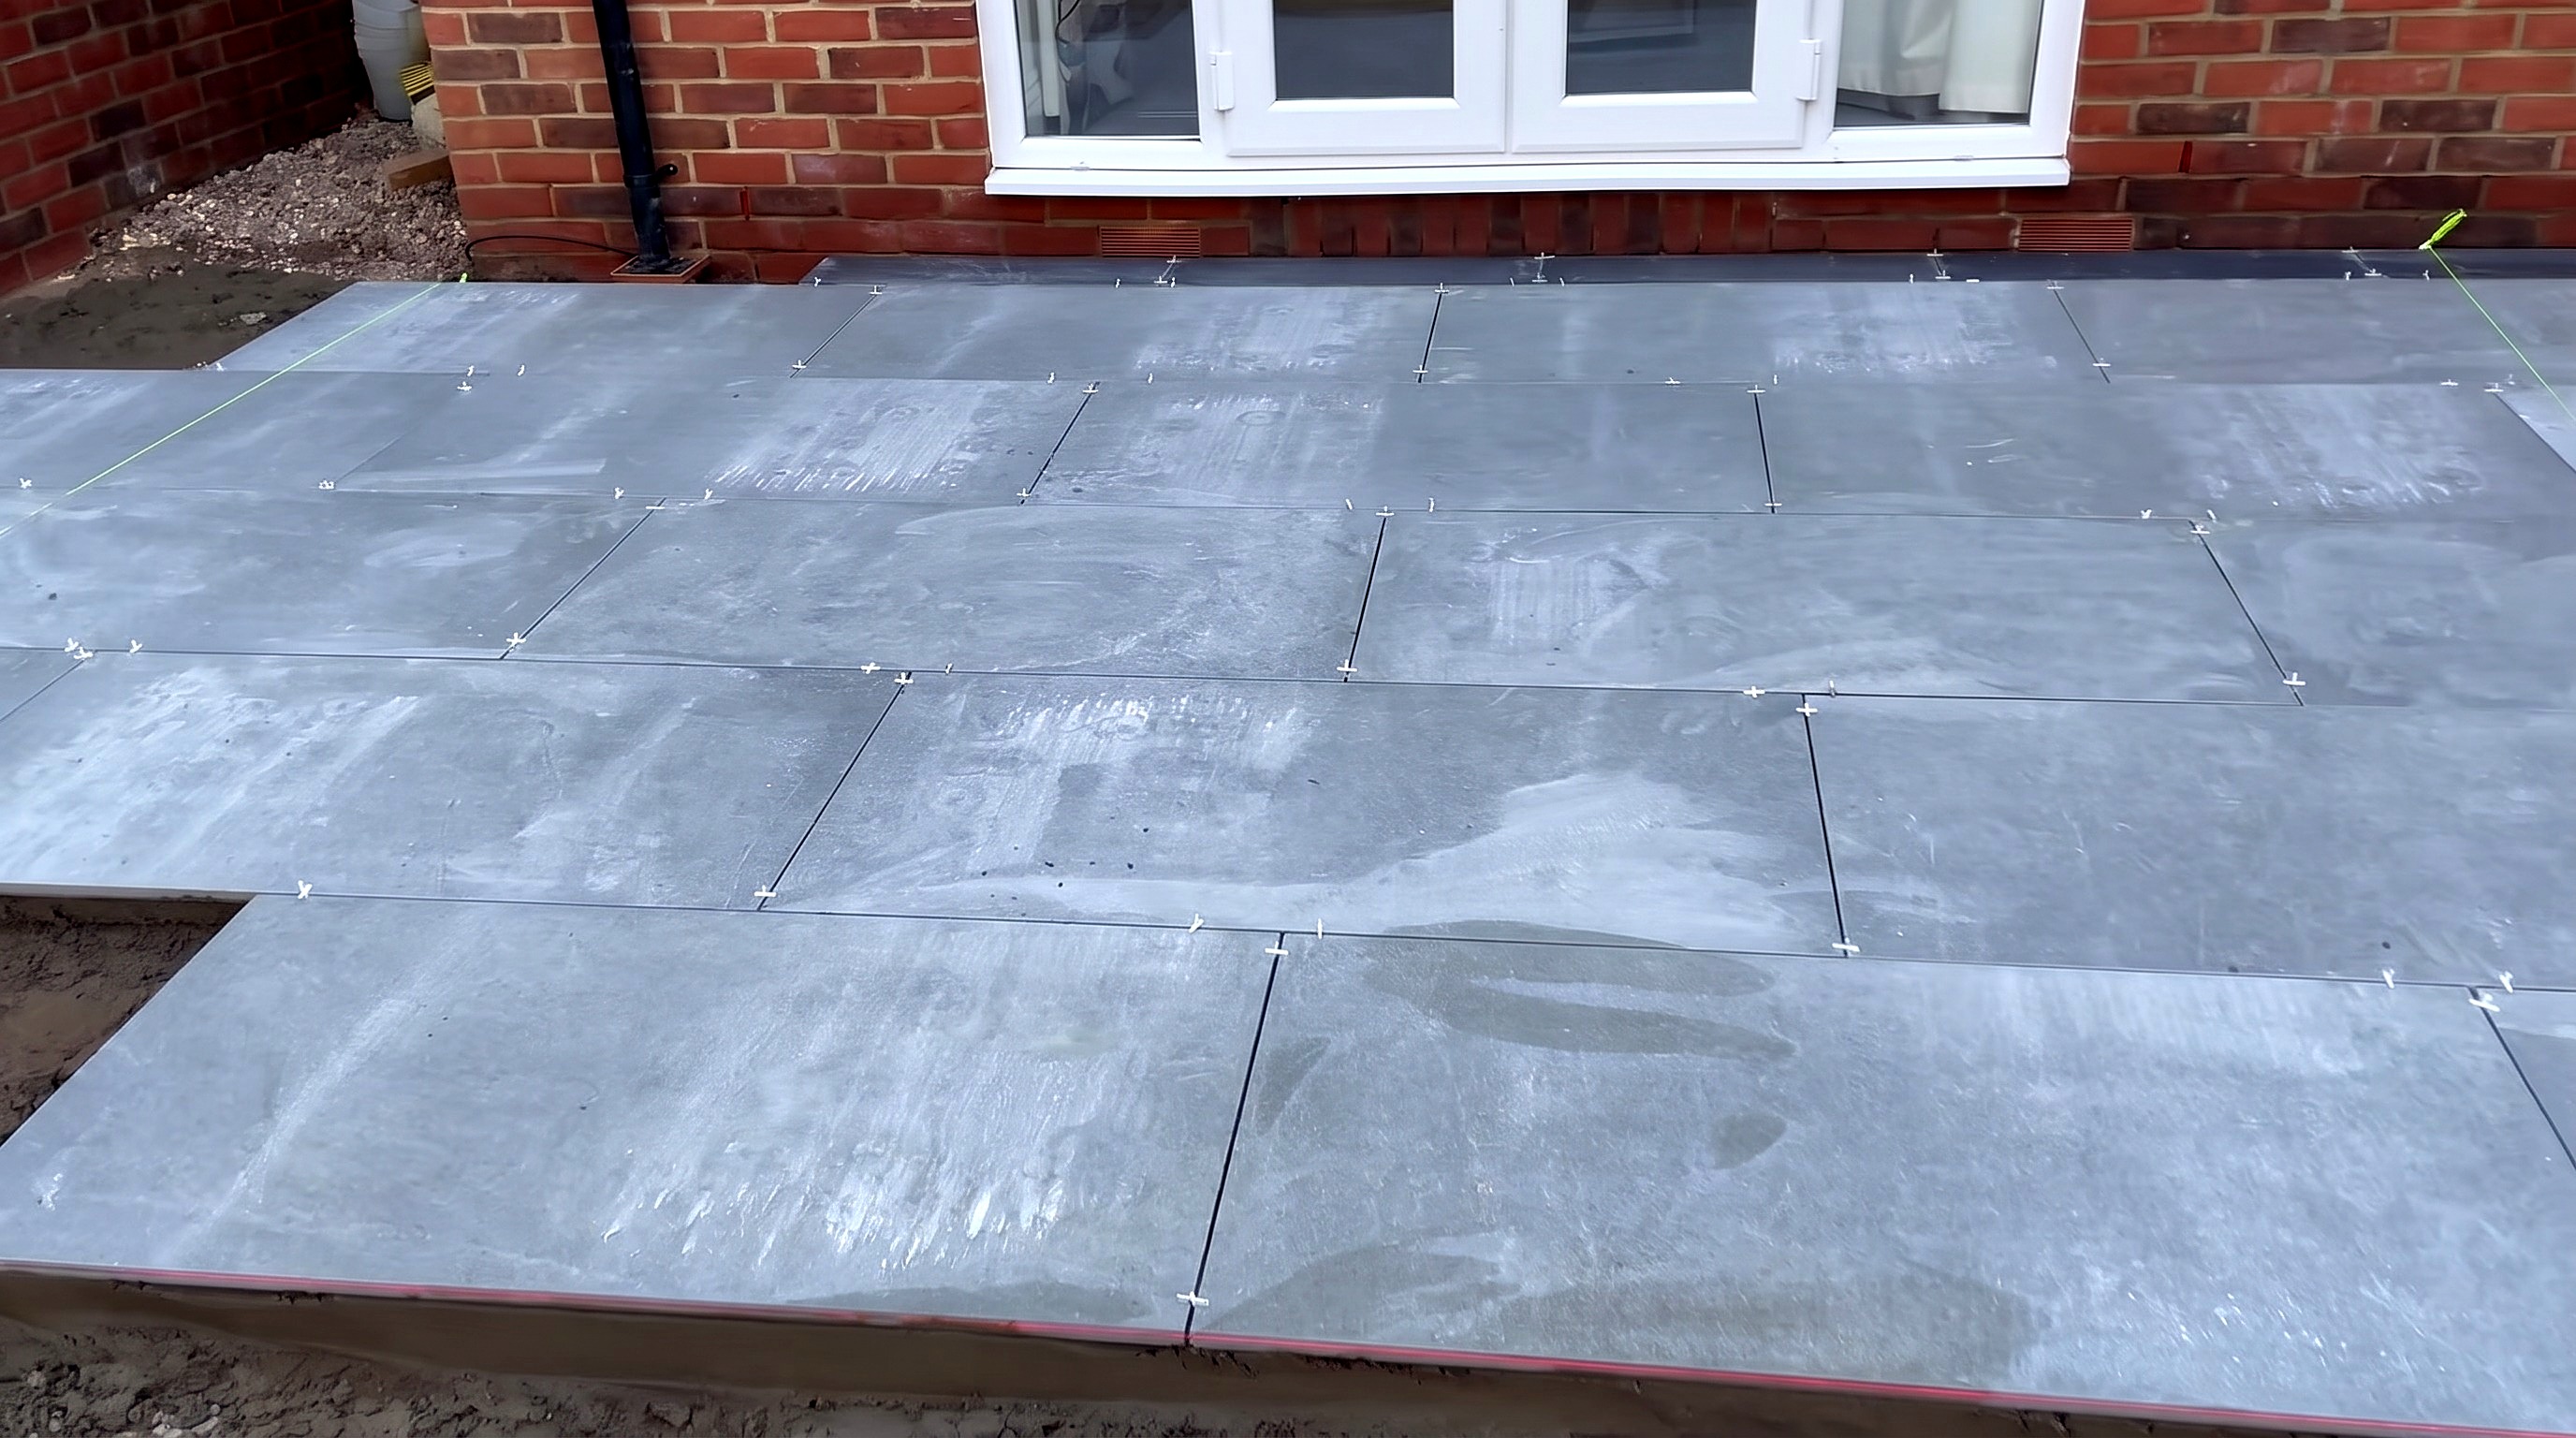
House-wall black border and first three staggered grey slab rows bedded flat to the string line.
Parts in this step: (A) Grey porcelain paving slab, (B) Black porcelain border tile
You'll need: Cement mixer, Wheelbarrow, Spirit level, Paint roller, Pointing and bricklaying trowels, Rubber mallet, Kneeling pad and knee pads, Suction cup tile lifters, Concrete finishing float, Sharp sand, Cement, Grey porcelain paving slabs, Black porcelain border tiles, Paving slurry primer, Tile spacers
- 2.1 Complete the first course of grey slabs and black border along the house wall
- Spread 4:1 mortar at the French doors; bed 200 mm black porcelain border tiles (B) against the brickwork.
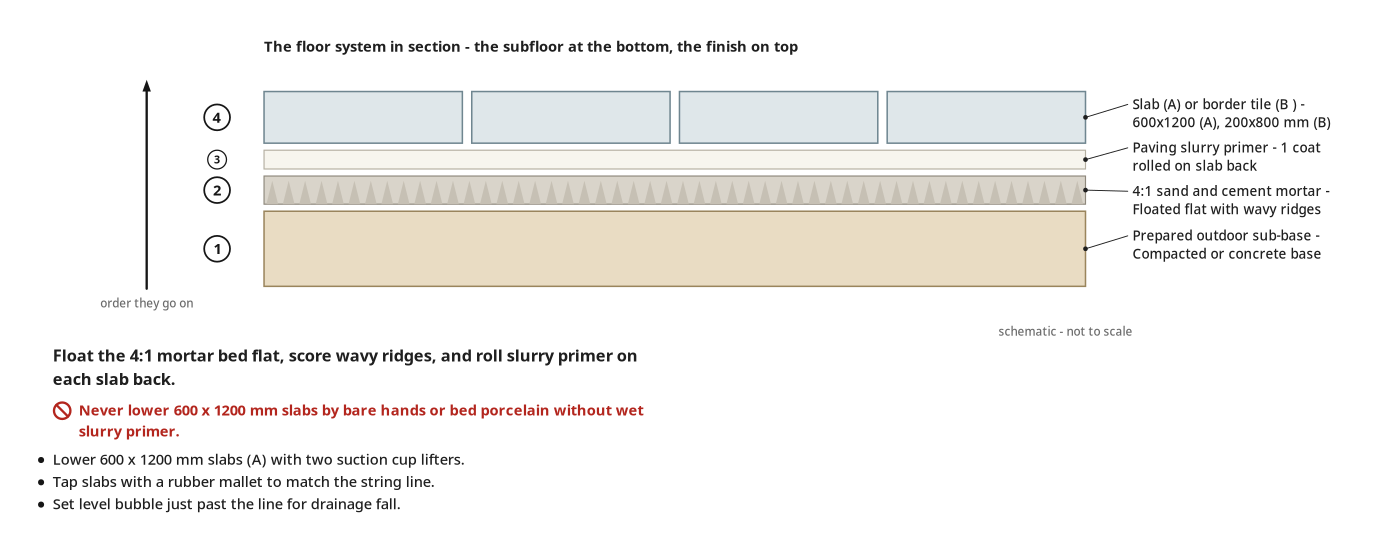
- Lay grey porcelain paving slabs (A) face-down on the wheelbarrow; roll slurry primer on the back.
- Lower primed 600 x 1200 mm slabs onto the mortar bed with two suction cup lifters.
- Tap slabs down with a rubber mallet to match the string line and border.
- 2.2 Float the mortar bed and lay the second and third staggered rows
- Flatten the mortar bed with a long steel concrete finishing float.
- Score wavy ridges in the mortar with the trowel tip so trapped air escapes.
- Lay courses two and three of primed 600 x 1200 mm slabs in a half-bond stagger.
- Put plastic tile spacers at all joints; check fall and lippage with a spirit level.
Key measurements
- Field stagger offset: half-bond (1/2 slab length) between rows
- Tip: Prime slabs at waist height on a wheelbarrow to save your back and keep primer off faces.
- Tip: Float the bed flat before scoring wavy trowel ridges so slabs compress evenly.
- Heads up: Lower 600 x 1200 mm slabs with paired suction cup lifters to avoid crushed fingers.
Before you move on: Sight the string line and check all joints with a spirit level for zero lippage and even fall.
Step 3: Extend the main patio field and ACO drain border
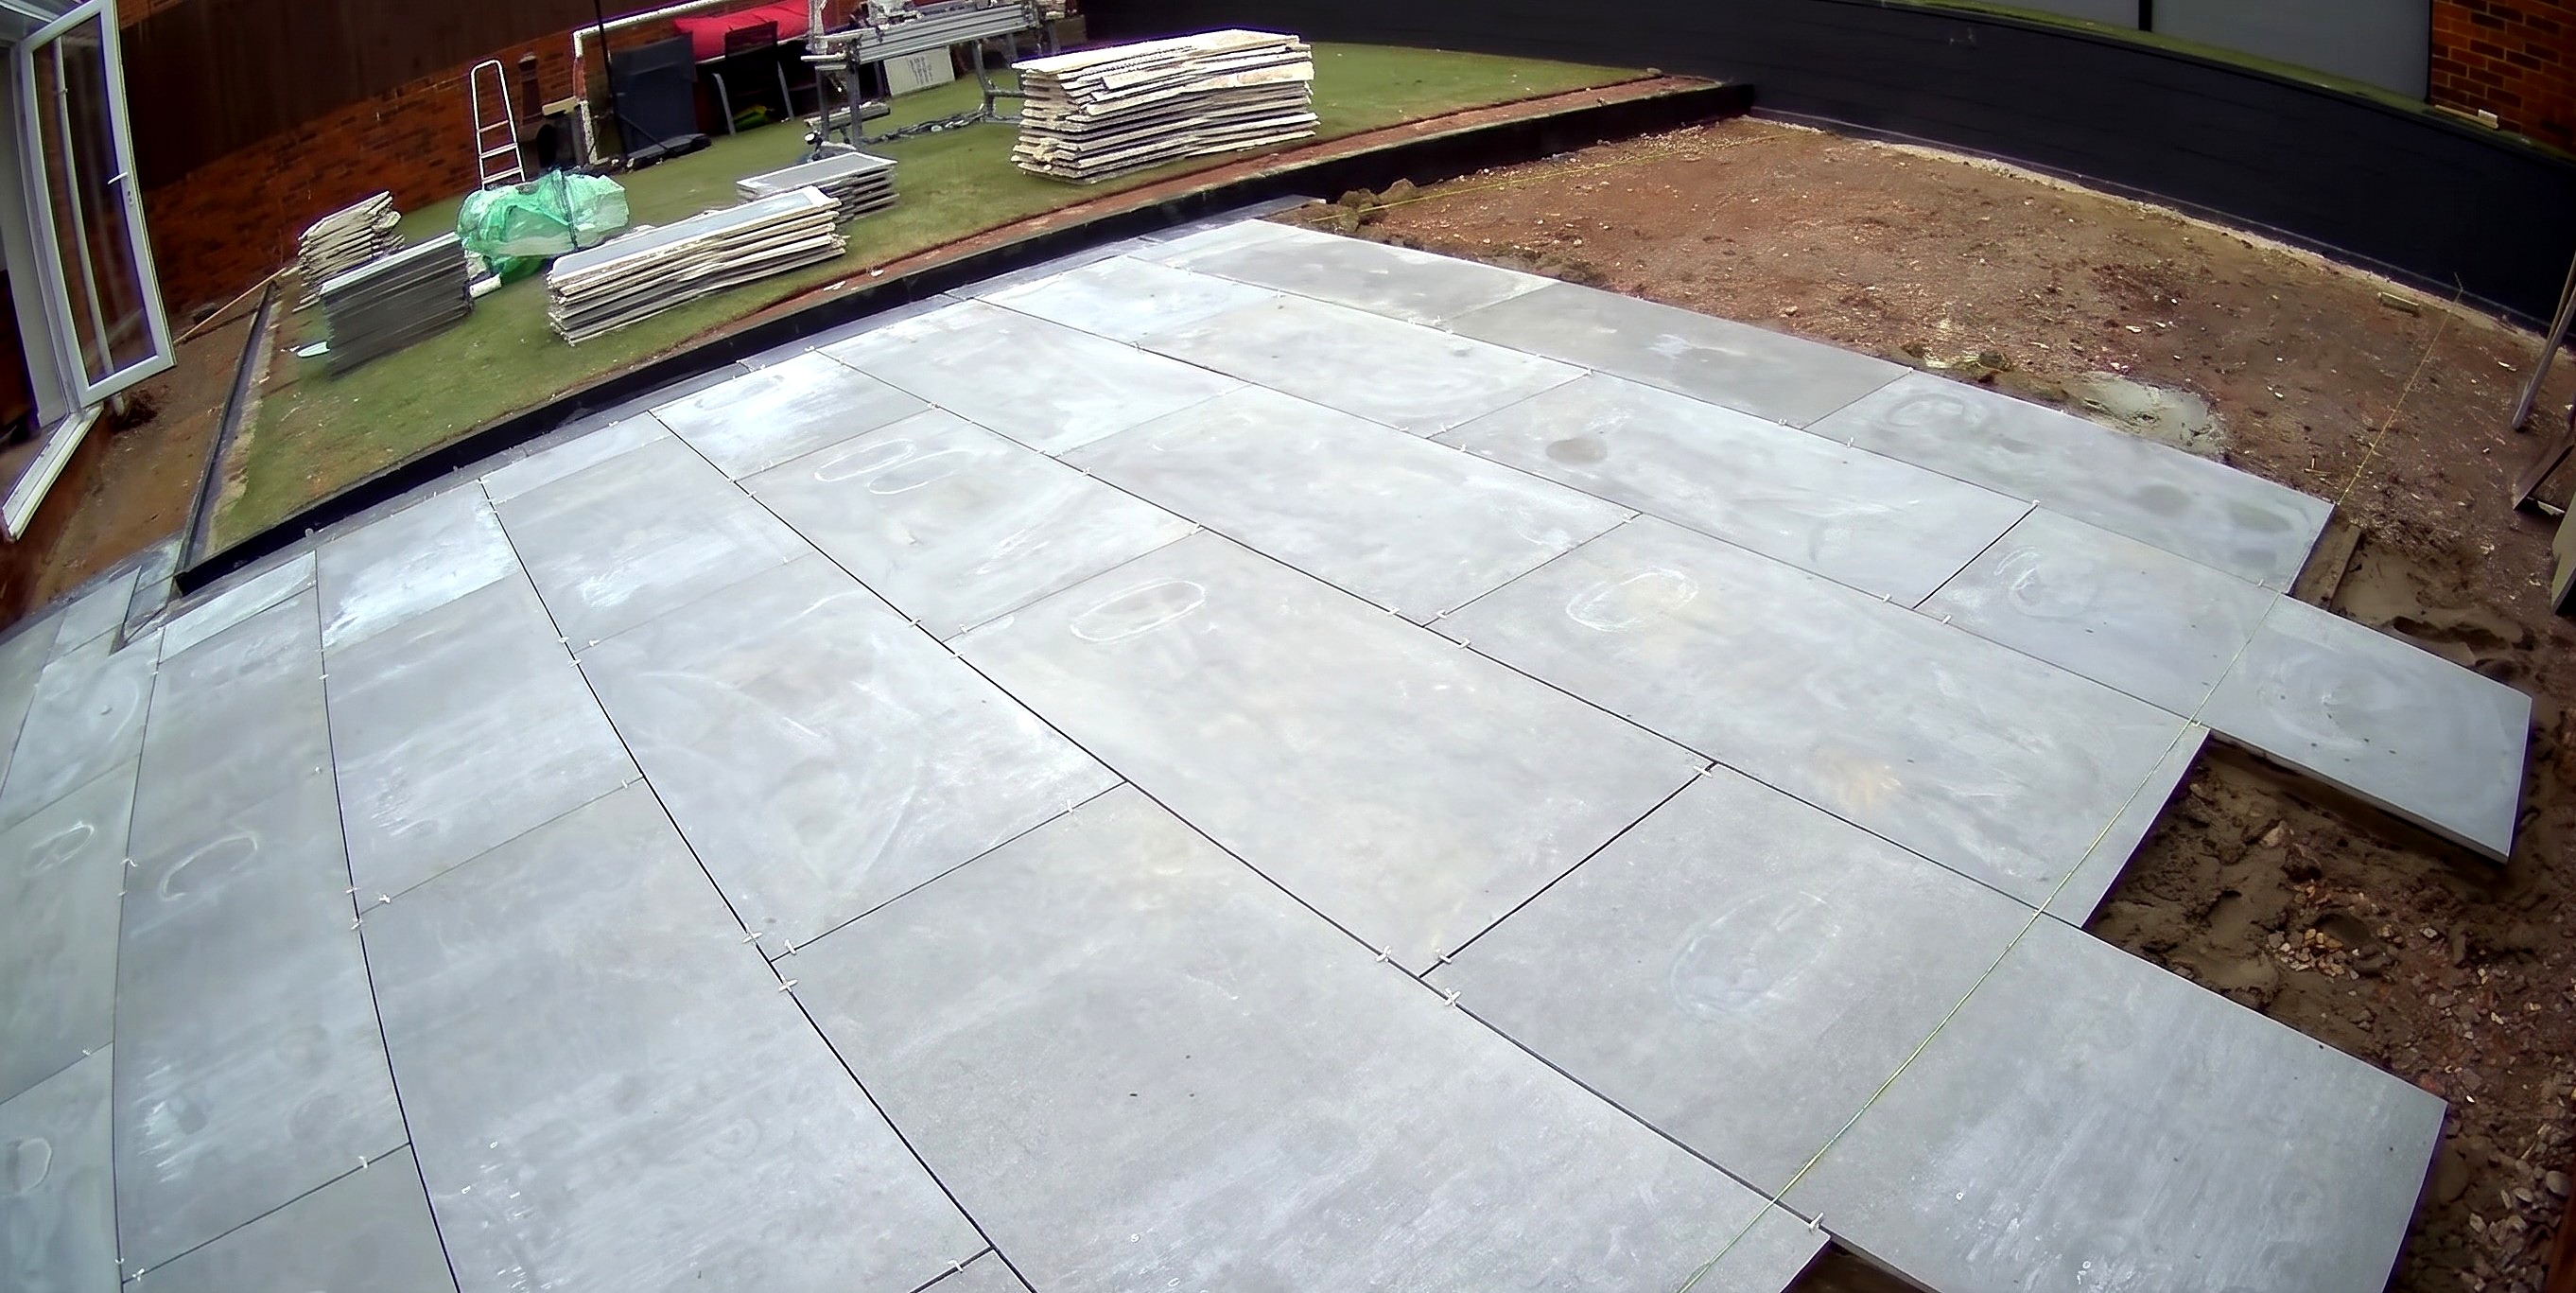
Eight staggered courses of full grey slabs and the ACO drain black border across the main patio.
Parts in this step: (A) Grey porcelain paving slab, (B) Black porcelain border tile
You'll need: Cement mixer, Wheelbarrow, Spirit level, Paint roller, String line and line pins, Pointing and bricklaying trowels, Rubber mallet, Suction cup tile lifters, Concrete finishing float, Sharp sand, Cement, Grey porcelain paving slabs, Black porcelain border tiles, Paving slurry primer, Tile spacers
- 3.1 Bed the black border along the ACO drain and lay the fourth and fifth patio rows
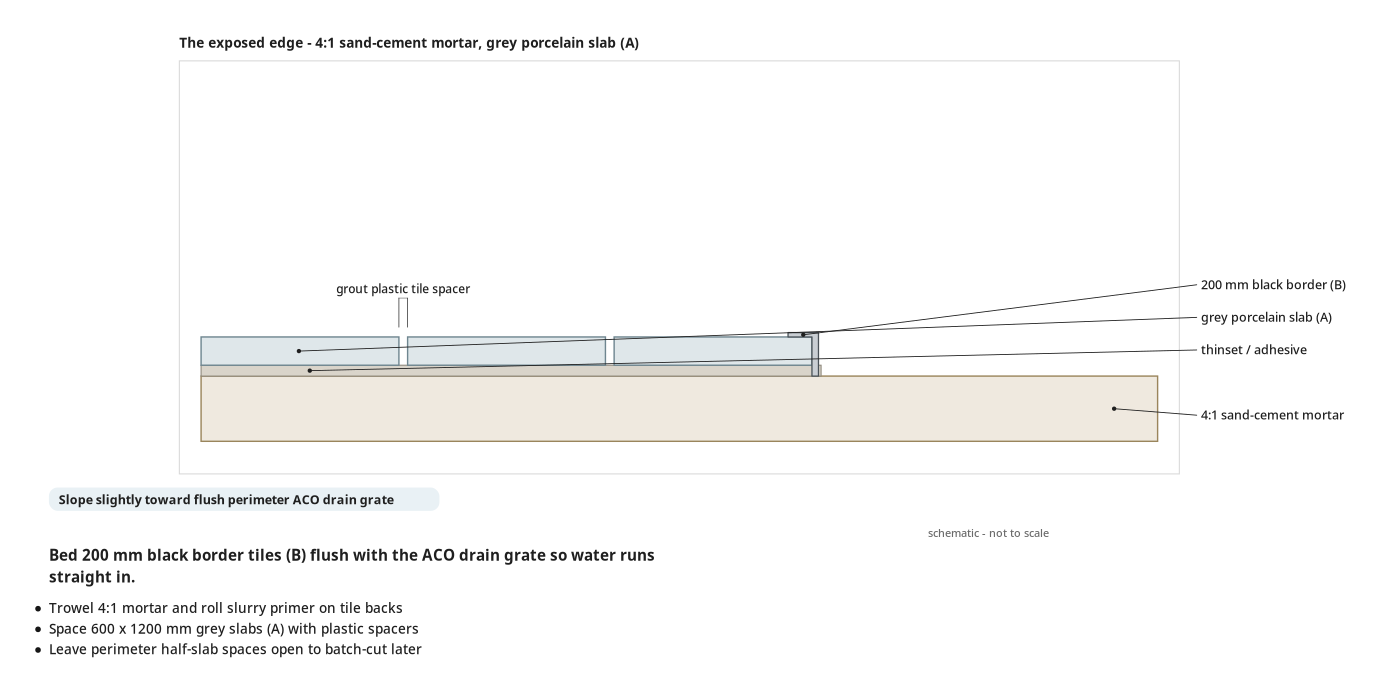
- Trowel 4:1 mortar along the ACO drain; bed primed black porcelain border tiles (B) flush with the edge.
- Spread, float, and score the mortar bed across the main patio.
- Prime and lower staggered rows four and five of grey porcelain paving slabs (A) with suction lifters.
- 3.2 Continue the staggered grey field slabs and drain border toward the retaining wall
- Move the transverse string line forward for the next courses.
- Lay three more half-bond rows of 600 x 1200 mm grey slabs and 200 mm black drain border tiles.
- Leave half-slab end spaces at the right brick wall open to batch-cut later.
Key measurements
- Main field slab dimensions: 600 x 1200 mm
- ACO drain border width: 200 mm
- Tip: Leave perimeter half-slab spaces open while laying full tiles to batch-cut edges later.
Before you move on: Check black border tiles sit flush with the ACO drain grate so water runs straight in.
Step 4: Complete the lower patio field and mitered border corner
Full-size grey field slabs and the lower 45-degree mitered border corner laid to the retaining wall.
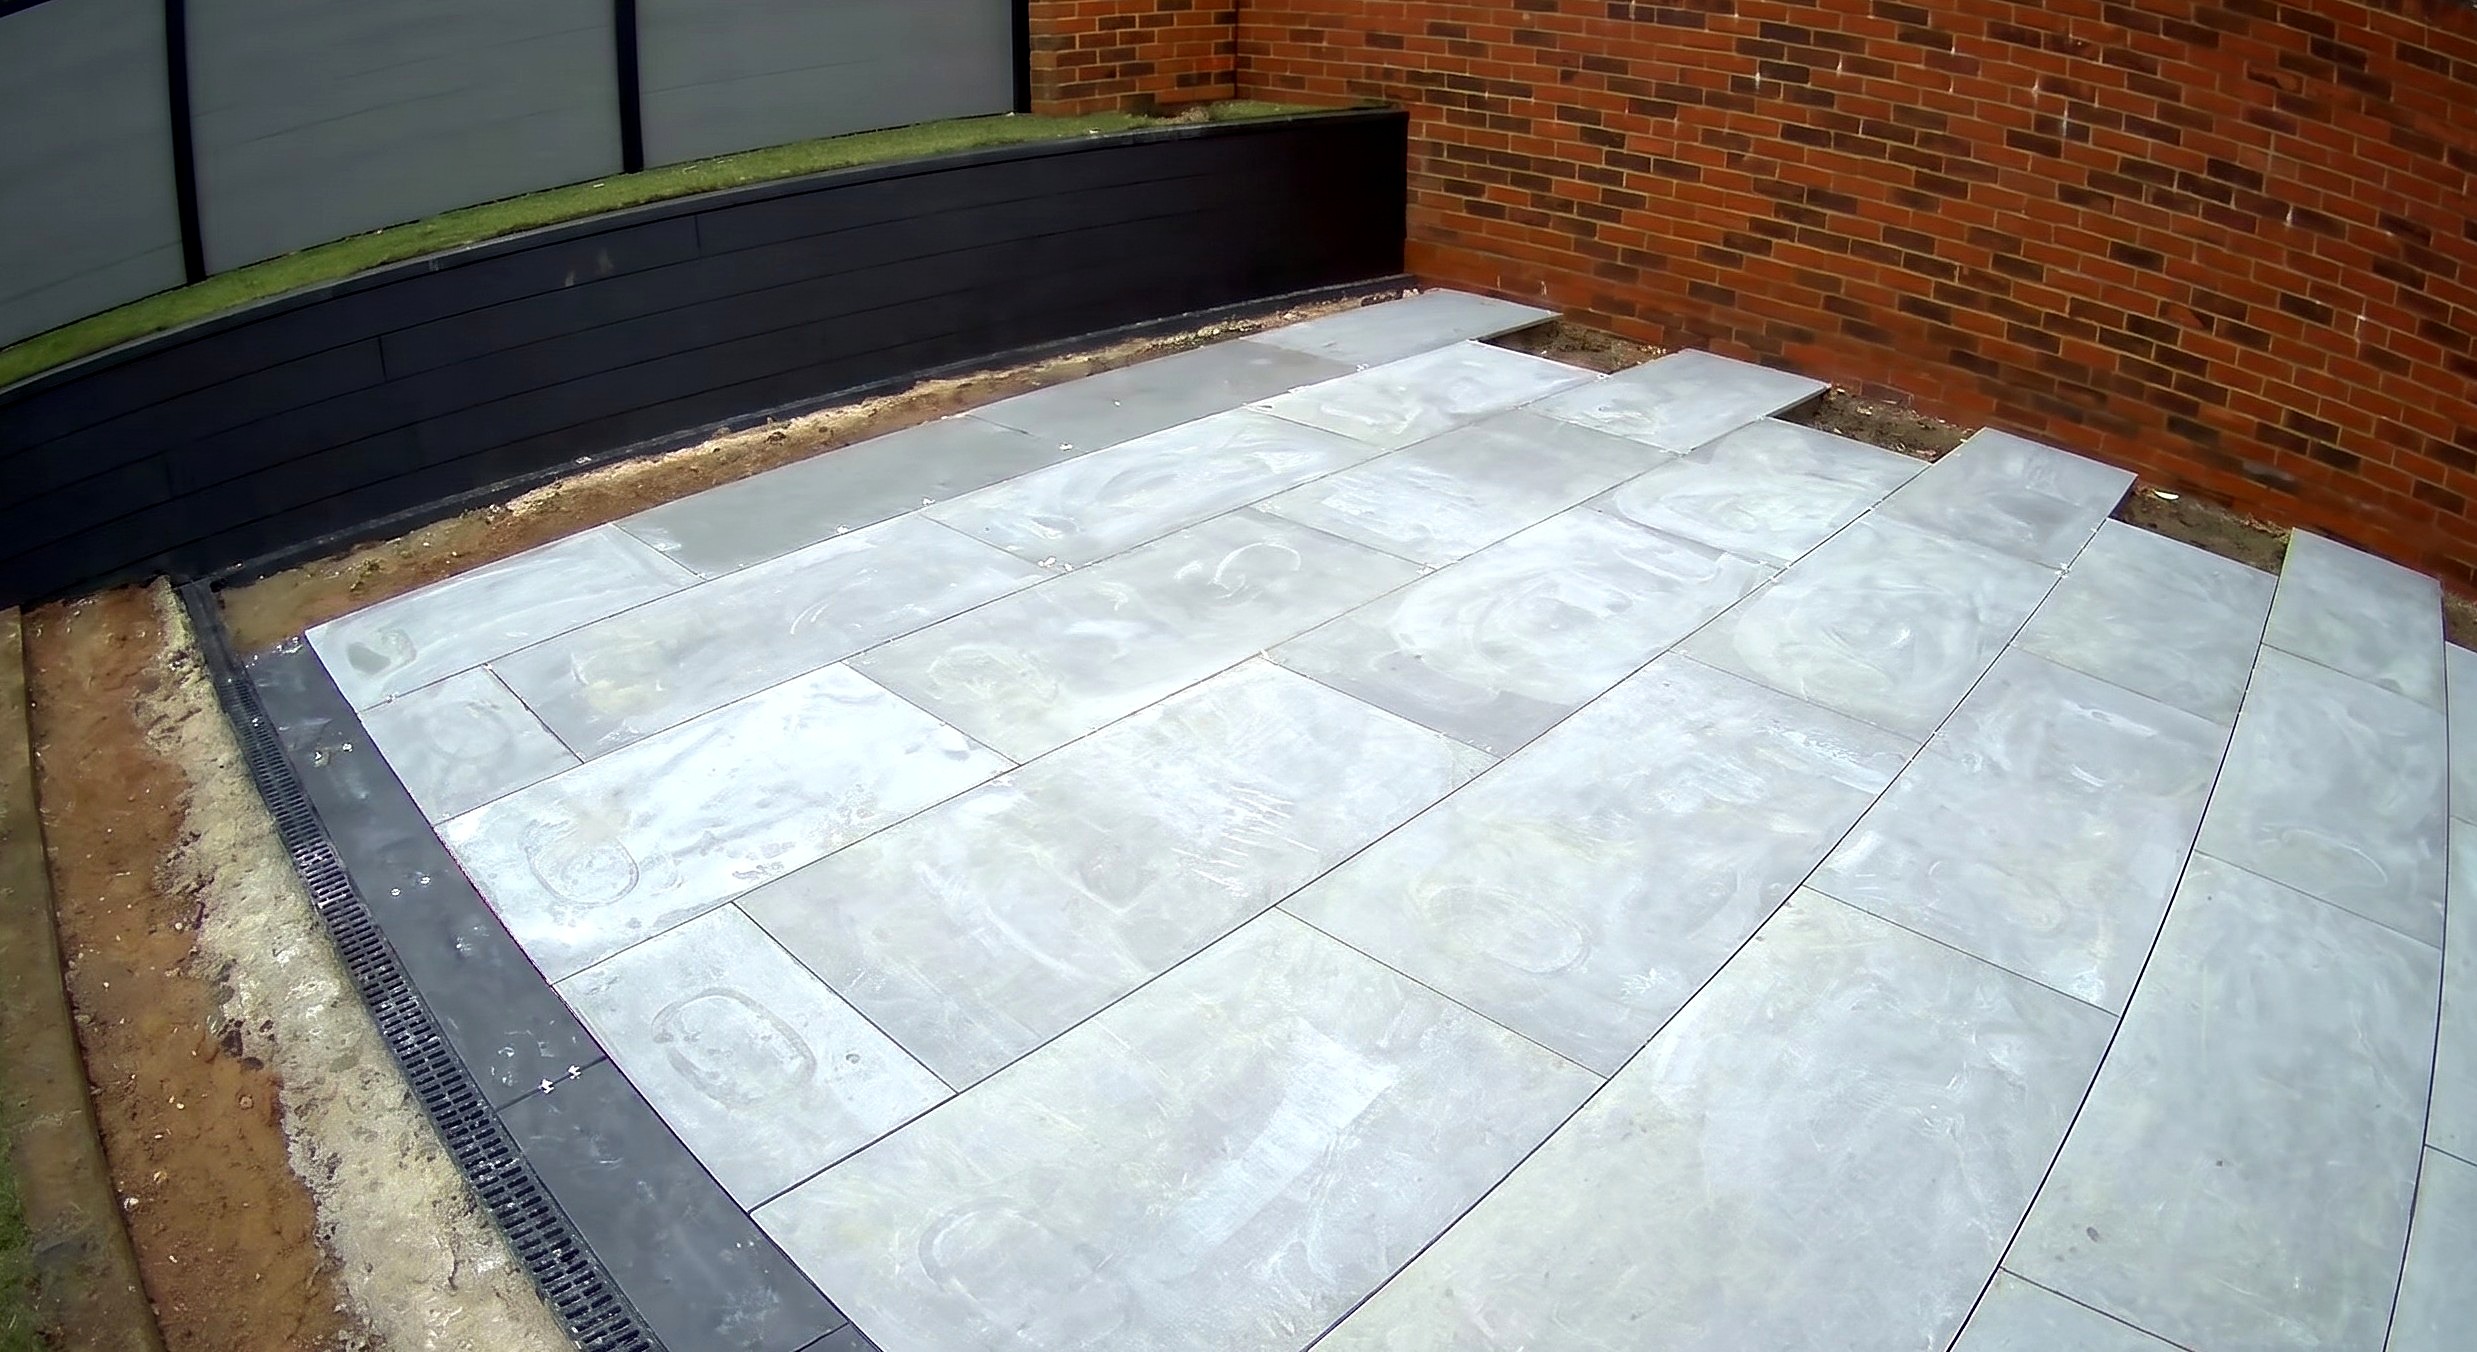
Parts in this step: (A) Grey porcelain paving slab, (B) Black porcelain border tile
You'll need: Cement mixer, Wheelbarrow, Spirit level, Paint roller, Wet bridge tile saw, Pointing and bricklaying trowels, Rubber mallet, Suction cup tile lifters, Concrete finishing float, Adjustable set square, Sharp sand, Cement, Grey porcelain paving slabs, Black porcelain border tiles, Paving slurry primer, Tile spacers
- 4.1 Lay the next two staggered rows of full grey slabs and black border tiles
- Spread, float, and ridge the 4:1 mortar bed across the lower patio.
- Roll slurry primer on the backs of grey porcelain paving slabs (A) and black porcelain border tiles (B).
- Bed two more staggered rows of 600 x 1200 mm grey slabs and 200 mm black border tiles along the drain.
- 4.2 Bed the 45-degree mitered border corner and final full-size field slabs
- Cut and bed the 45-degree mitered black border corner at the ACO drain and lower retaining wall.
- Lay the remaining full 600 x 1200 mm grey slabs across the bottom field.
- Leave the narrow infill strip at the lower retaining wall open until main slabs cure overnight.
Key measurements
- Lower border corner miter angle: 45 degrees
- Tip: Cure the lower field overnight before standing on it to measure and fit retaining wall cuts.
Step 5: Lay the secondary patio section
Secondary patio covered with a house-wall black border and three staggered rows of full grey slabs.
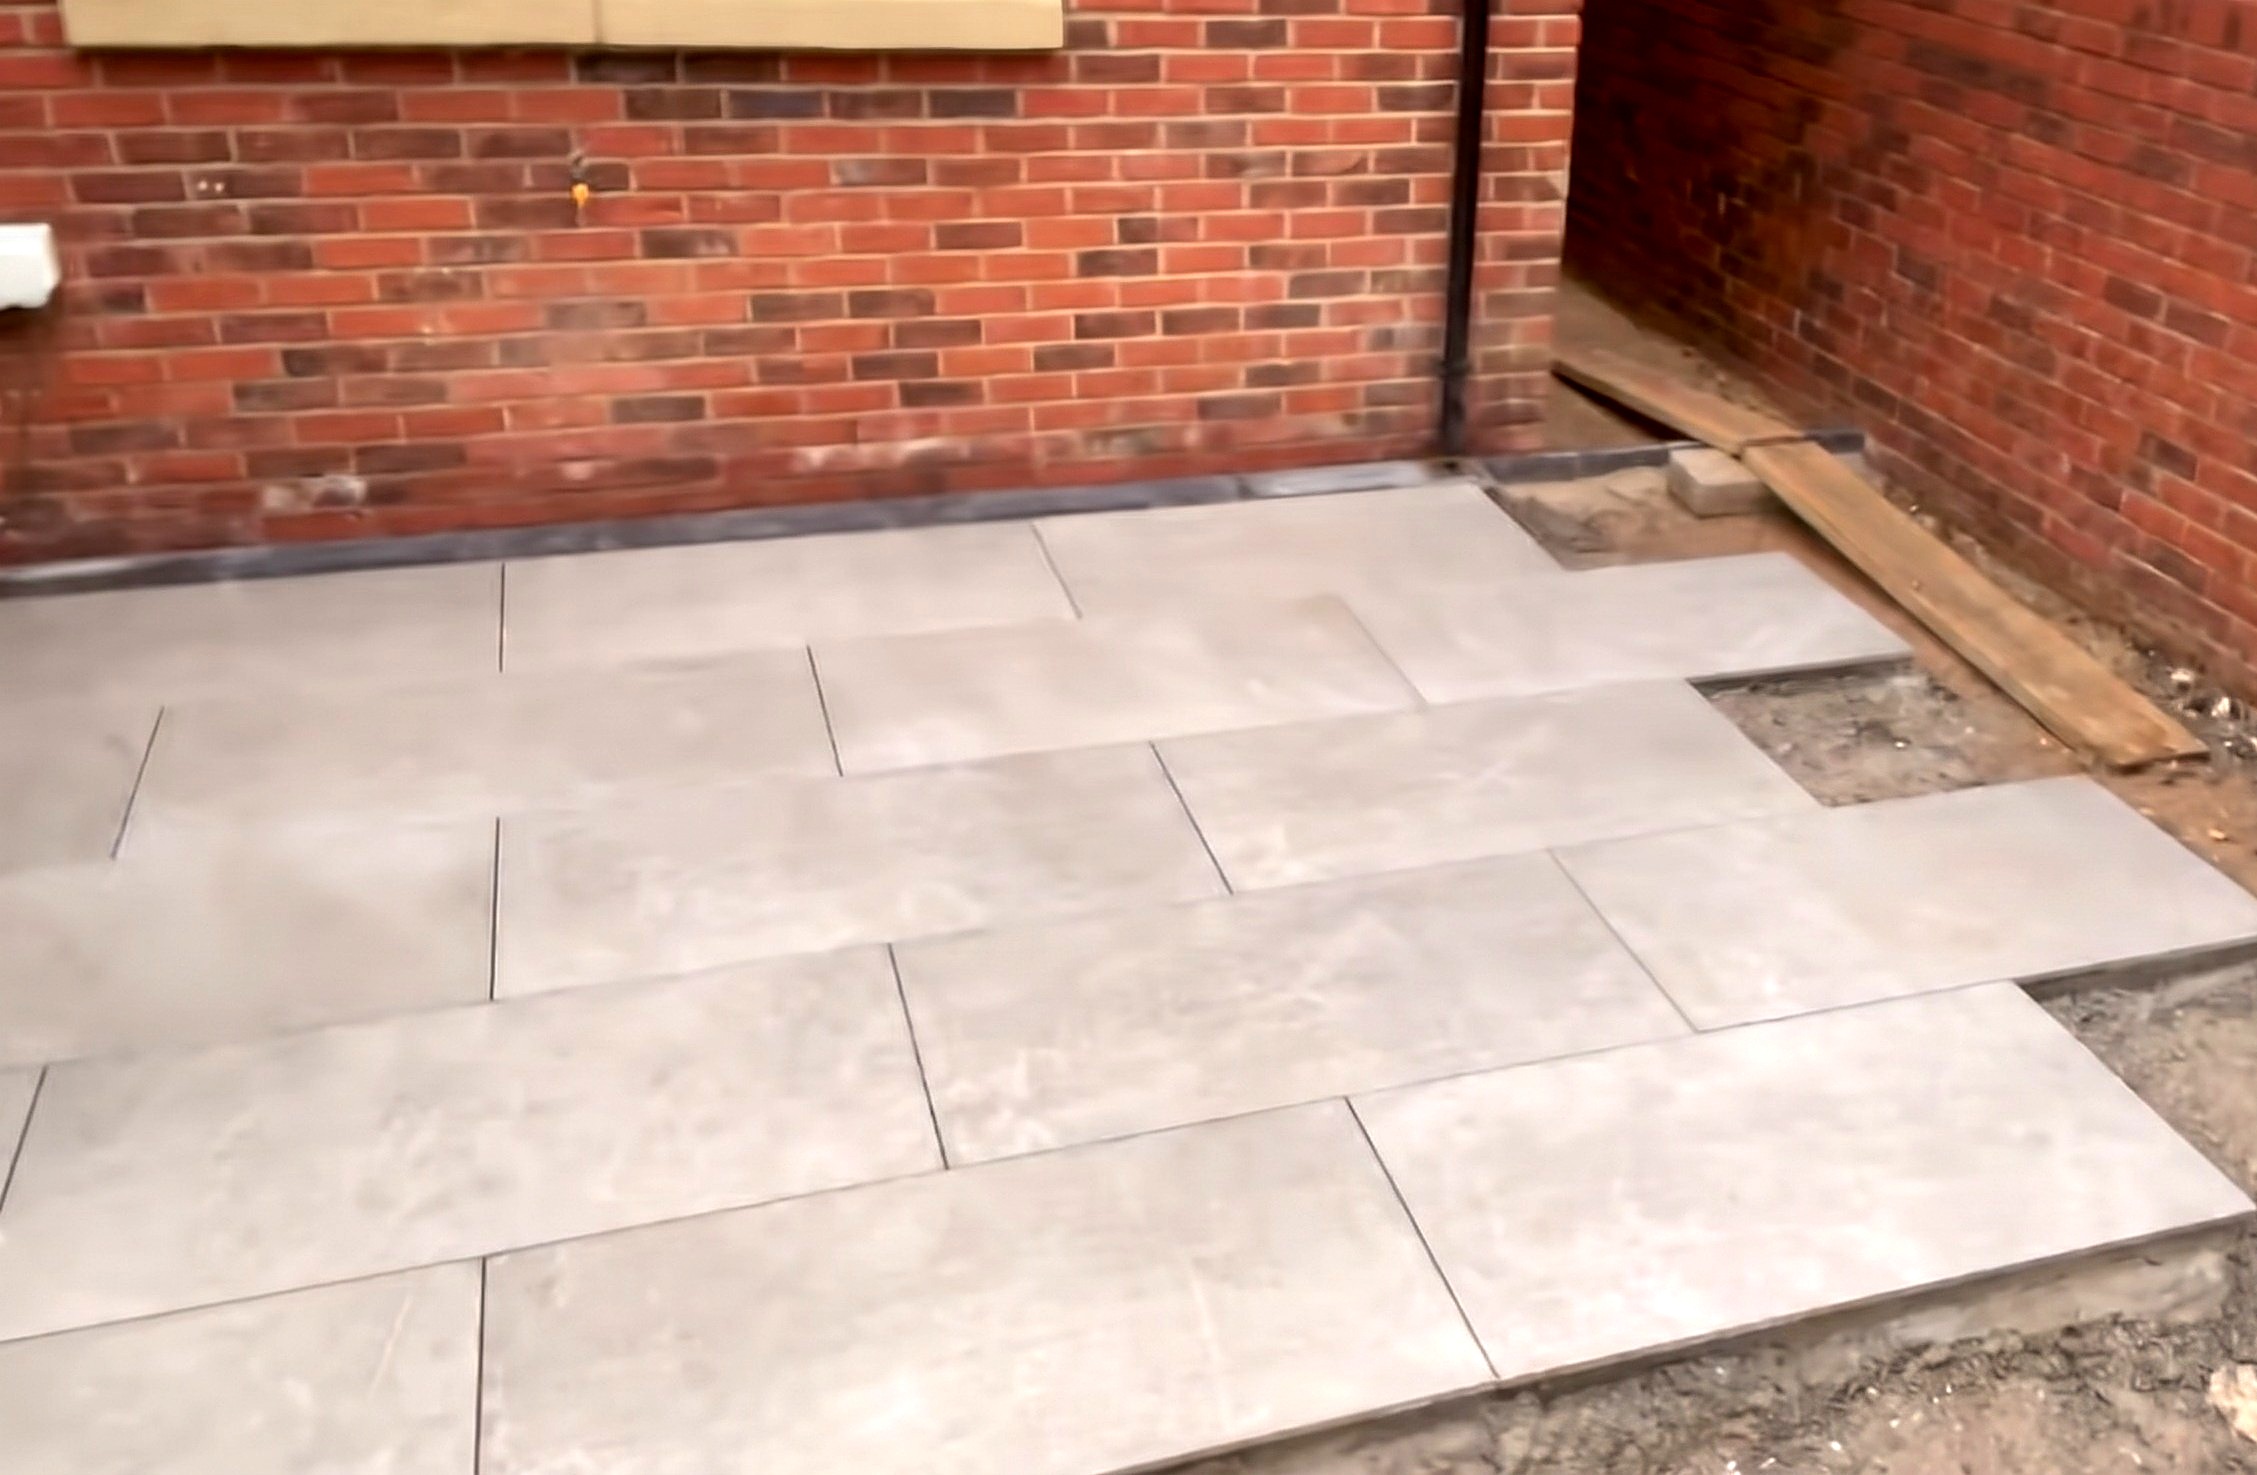
Parts in this step: (A) Grey porcelain paving slab, (B) Black porcelain border tile
You'll need: Cement mixer, Wheelbarrow, Spirit level, Paint roller, Pointing and bricklaying trowels, Rubber mallet, Suction cup tile lifters, Concrete finishing float, Sharp sand, Cement, Grey porcelain paving slabs, Black porcelain border tiles, Paving slurry primer, Tile spacers
- 5.1 Lay the black wall border and first row of 600x1200mm slabs
- Trowel 4:1 mortar along the secondary patio's house brick wall.
- Prime and bed 200 mm black porcelain border tiles (B) along the brickwork.
- Spread and score mortar, then lower the first row of primed grey porcelain paving slabs (A).
- 5.2 Lay the second and third staggered rows of grey slabs
- Spread, float, and score 4:1 mortar across the rest of the secondary patio.
- Roll slurry primer on the 600 x 1200 mm grey slabs; bed staggered rows two and three with spacers.
Key measurements
- Secondary patio field slabs: 600 x 1200 mm
- Wall border width: 200 mm
Step 6: Install perimeter cut slabs, border tiles, and connecting walkway
Perimeter half-slabs, custom-width wall borders, and the zoned walkway are bedded flush.
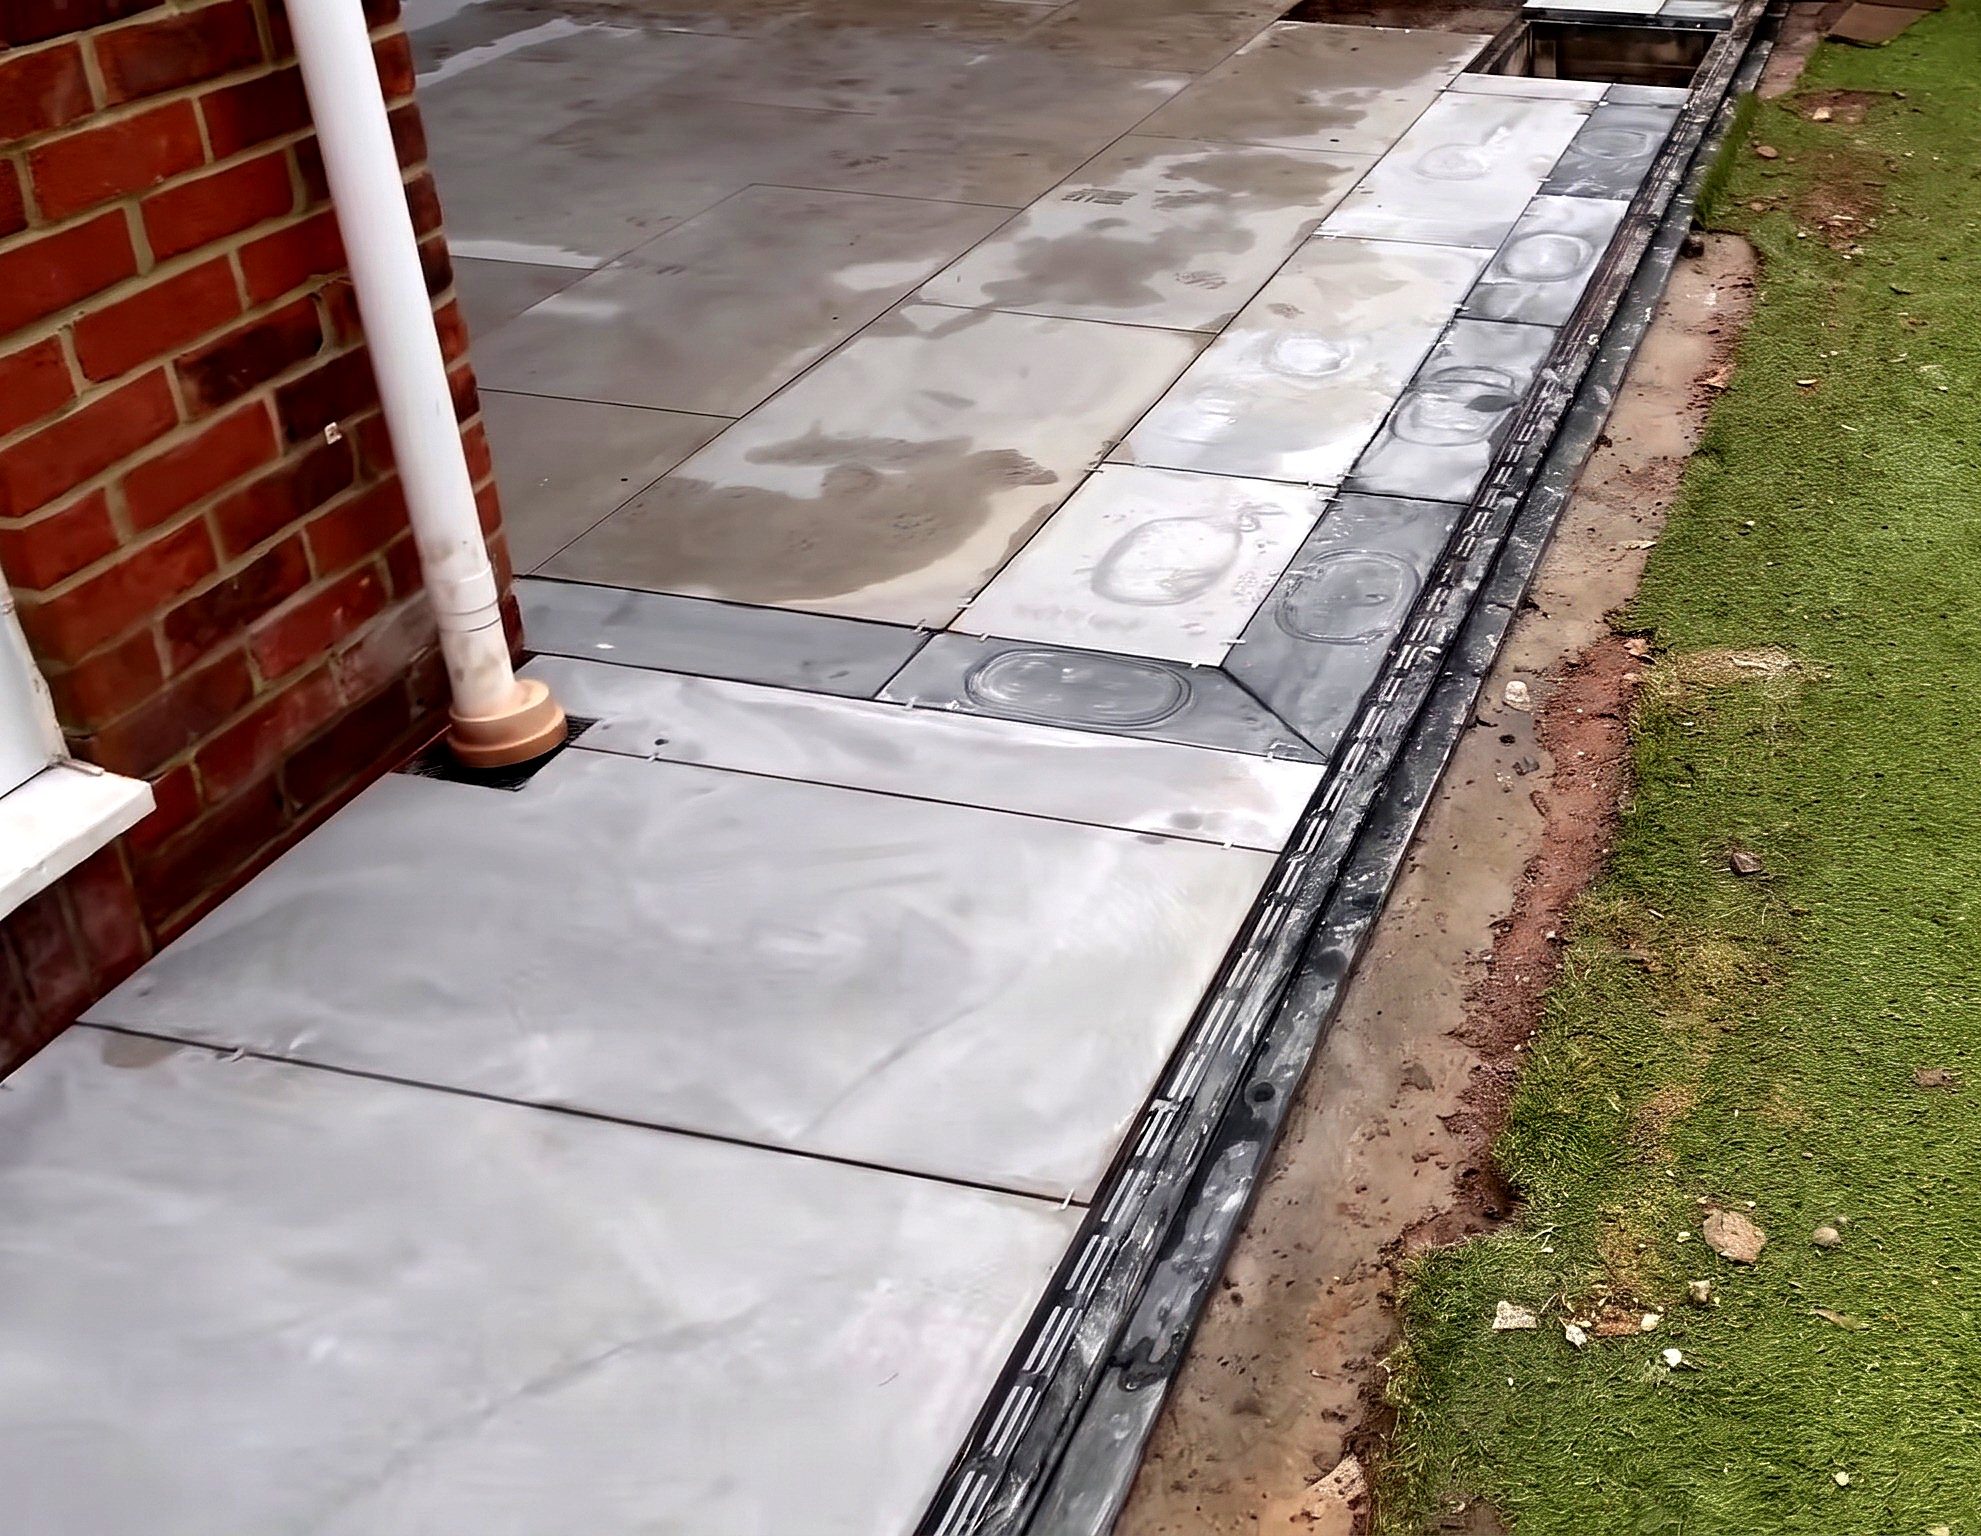
Parts in this step: (A) Grey porcelain paving slab, (B) Black porcelain border tile
You'll need: Cement mixer, Wheelbarrow, Spirit level, Paint roller, Wet bridge tile saw, Angle grinder, Pointing and bricklaying trowels, Rubber mallet, Tape measure, Kneeling pad and knee pads, Washboy, Sharp sand, Cement, Grey porcelain paving slabs, Black porcelain border tiles, Paving slurry primer, Tile spacers
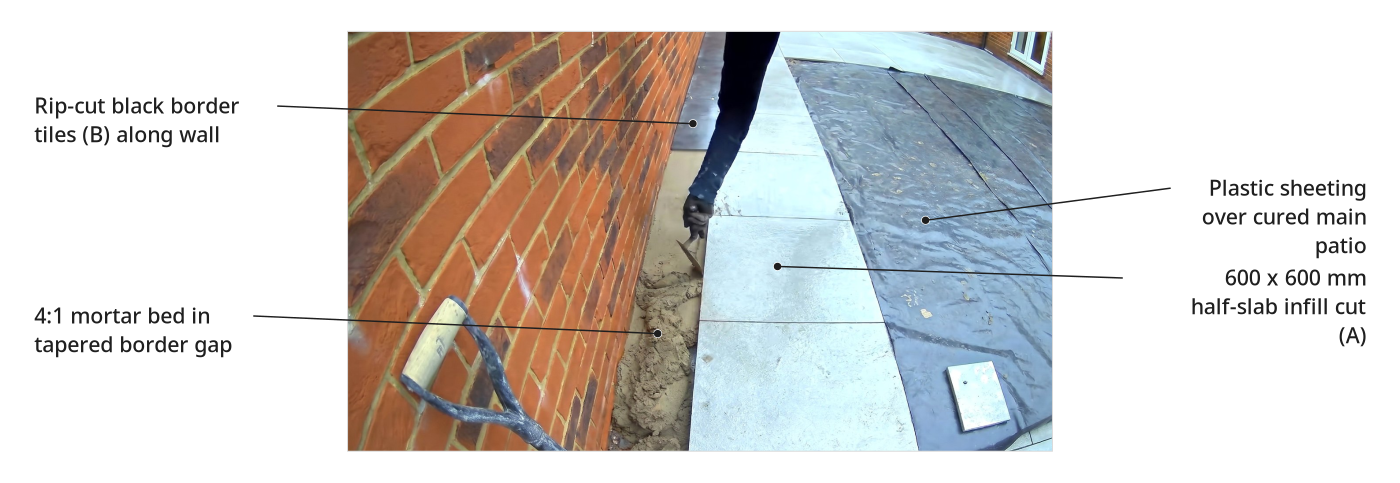
- 6.1 Infill the half-slab cuts and custom-width black border along the brick wall
- Cover the cured main patio with plastic sheeting to prevent mortar stains.
- Cut grey porcelain paving slabs (A) to 600 x 600 mm; bed them in the right-hand brick wall pockets.
- Measure and rip-cut each black porcelain border tile (B) to follow the brick wall's taper.
- Stack cut border tiles in order, prime the backs, and bed against the brickwork.
- 6.2 Fit the cut grey slabs and black border along the lower retaining wall
- Trowel 4:1 mortar into the strip along the lower dark retaining wall.
- Prime and bed 200 mm black border tiles against the retaining wall.
- Measure, cut, prime, and tap grey infill slabs flush between the field and black border.
- 6.3 Lay the connecting walkway with a contrasting black feature band
- Spread and score 4:1 mortar along the main-to-secondary patio walkway.
- Bed a transverse grey slab between two 200 mm black border strips for a decorative zoning band.
- Lay adjacent full and cut grey slabs and mitered black border to the rainwater downpipe and ACO drain.
- 6.4 Install the ACO drain border and perimeter cuts around the secondary patio
- Bed 200 mm black border tiles along the ACO drain channel and secondary patio outer wall.
- Cut, prime, and bed perimeter grey infill slabs, leaving the inspection chamber bay open.
- Wipe slurry primer or mortar off tile faces with a clean wet washboy sponge.
Key measurements
- Half-slab end cut dimensions: 600 x 600 mm
- Feature band border strip width: 200 mm
- Tip: Number or stack custom-cut border tiles in order; garden brick walls vary in width.
Step 7: Fit the recessed inspection chamber cover and surrounding cuts
Matching grey and black porcelain cuts inlay the recessed inspection chamber frame and tray.
Parts in this step: (A) Grey porcelain paving slab, (B) Black porcelain border tile, (C) Recessed inspection chamber cover
You'll need: Spirit level, Paint roller, Wet bridge tile saw, Angle grinder, Pointing and bricklaying trowels, Rubber mallet, Tape measure, Sharp sand, Cement, Grey porcelain paving slabs, Black porcelain border tiles, Paving slurry primer, Tile spacers, Recessed inspection chamber cover
- 7.1 Level the recessed frame and bed the L-cut surrounding slabs
- Bed the recessed inspection chamber cover (C) outer frame in mortar, flush with the patio slope.
- Measure and cut L-notches into surrounding grey porcelain paving slabs (A) and black porcelain border tiles (B) with the wet saw and angle grinder.
- Prime the backs and tap the notched slabs and border tiles flush around the frame rim.
- 7.2 Inlay the inspection chamber tray with matching grey and black porcelain cuts
- Fill the removable metal chamber tray with 4:1 sharp sand and cement mortar.
- Cut grey slab and black border infills so joint lines and the 200 mm border stripe cross the cover.
- Roll slurry primer onto the cut backs and tap them flush into the tray with tile spacers.
- Tip: Align the field joint and black border stripe across the tray so the cover blends in.
Before you move on: Lay a spirit level across the tray and slabs to check the cover sits flush.
Step 8: Tile the side alley, front entrance landing, and side paths
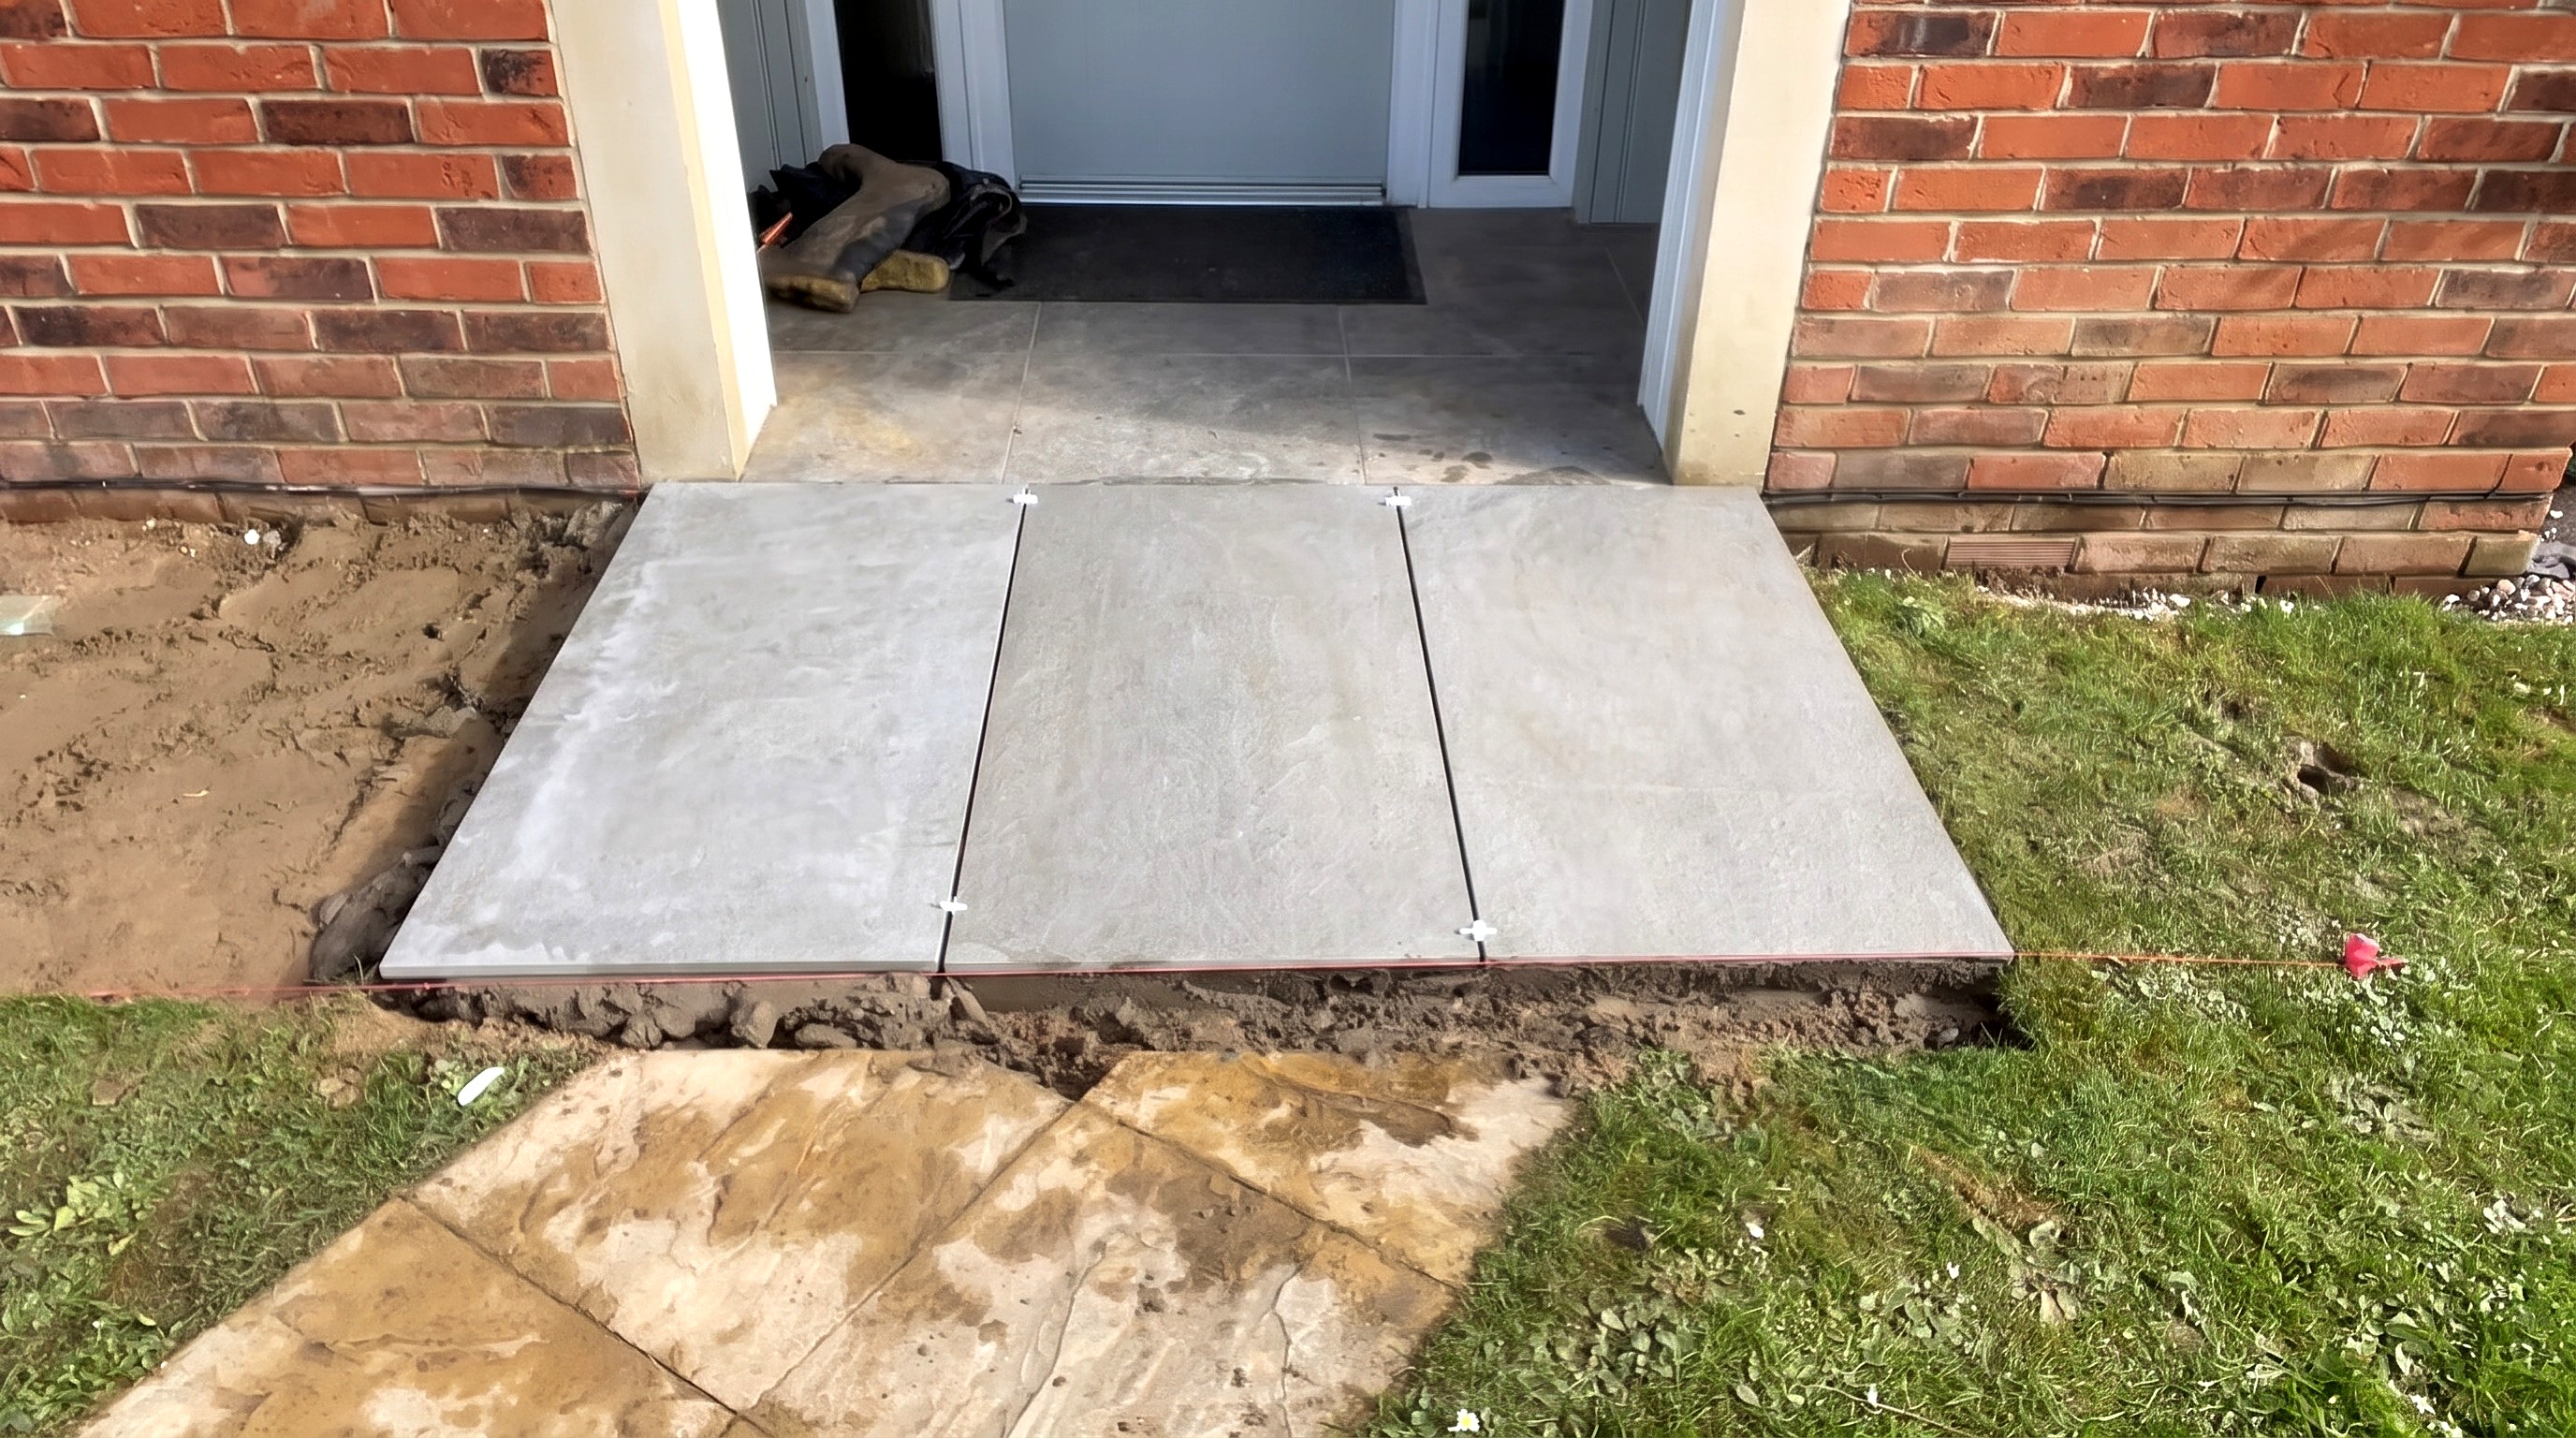
The narrow side alley, symmetrical three-slab front landing, and left and right front paths are tiled.
Parts in this step: (A) Grey porcelain paving slab
You'll need: Cement mixer, Wheelbarrow, Spirit level, Paint roller, Wet bridge tile saw, String line and line pins, Pointing and bricklaying trowels, Rubber mallet, Tape measure, Suction cup tile lifters, Sharp sand, Cement, Grey porcelain paving slabs, Paving slurry primer, Tile spacers
- 8.1 Lay full-width porcelain slabs down the narrow side passageway
- Move the wet bridge tile saw to the front garden before the side alley.
- Work backward down the narrow passage so you never step on fresh slabs.
- Spread and score 4:1 mortar between the walls; lower primed grey porcelain paving slabs (A) to a string line.
- 8.2 Tile the left-hand front garden pathway
- Set a temporary reference slab at the front corner for path alignment.
- Spread and score mortar along the left flowerbed path from the front landing to the side gate.
- Start with full 600 x 1200 mm grey slabs at the landing so cuts sit in the far corner.
- 8.3 Lay the symmetrical three-slab landing outside the front door
- Trowel and ridge 4:1 mortar outside the front porch entrance.
- Center the middle 600 x 1200 mm grey slab on the doorway.
- Bed a full 600 x 1200 mm slab on each side for a symmetrical three-tile landing.
- 8.4 Lay the right-hand front walkway from the driveway toward the side door
- Run a taut string line along the lawn edge, block-paved driveway to side door.
- Spread and score 4:1 mortar along the right path.
- Prime and lay one row of transverse 600 x 1200 mm grey slabs level to the string line.
Key measurements
- Front landing width: 3 full 600 x 1200 mm slabs centered on the doorway
- Tip: Center the middle slab on the front doorway between full slabs for a symmetrical entrance.
- Heads up: Never walk on the freshly tiled side path; move tools to the front first.
Step 9: Complete the side door pathway
Bed the last four slabs outside the side door flush with the threshold.
Parts in this step: (A) Grey porcelain paving slab
You'll need: Cement mixer, Wheelbarrow, Spirit level, Paint roller, String line and line pins, Pointing and bricklaying trowels, Rubber mallet, Suction cup tile lifters, Sharp sand, Cement, Grey porcelain paving slabs, Paving slurry primer, Tile spacers
- 9.1 Bed the first two slabs leading up to the side door threshold
- Trowel and score the 4:1 mortar bed up to the side door.
- Roll slurry primer on two grey porcelain paving slabs (A) and lower with suction cup lifters.
- Tap both level to the string line with a rubber mallet.
- 9.2 Lay the final two slabs outside the side entrance door
- Spread 4:1 mortar to the end border and score wavy ridges with the trowel tip.
- Prime and tap the last two 600 x 1200 mm grey slabs flush with the tiles and side threshold.
Step 10: Tile the main front approach pathway
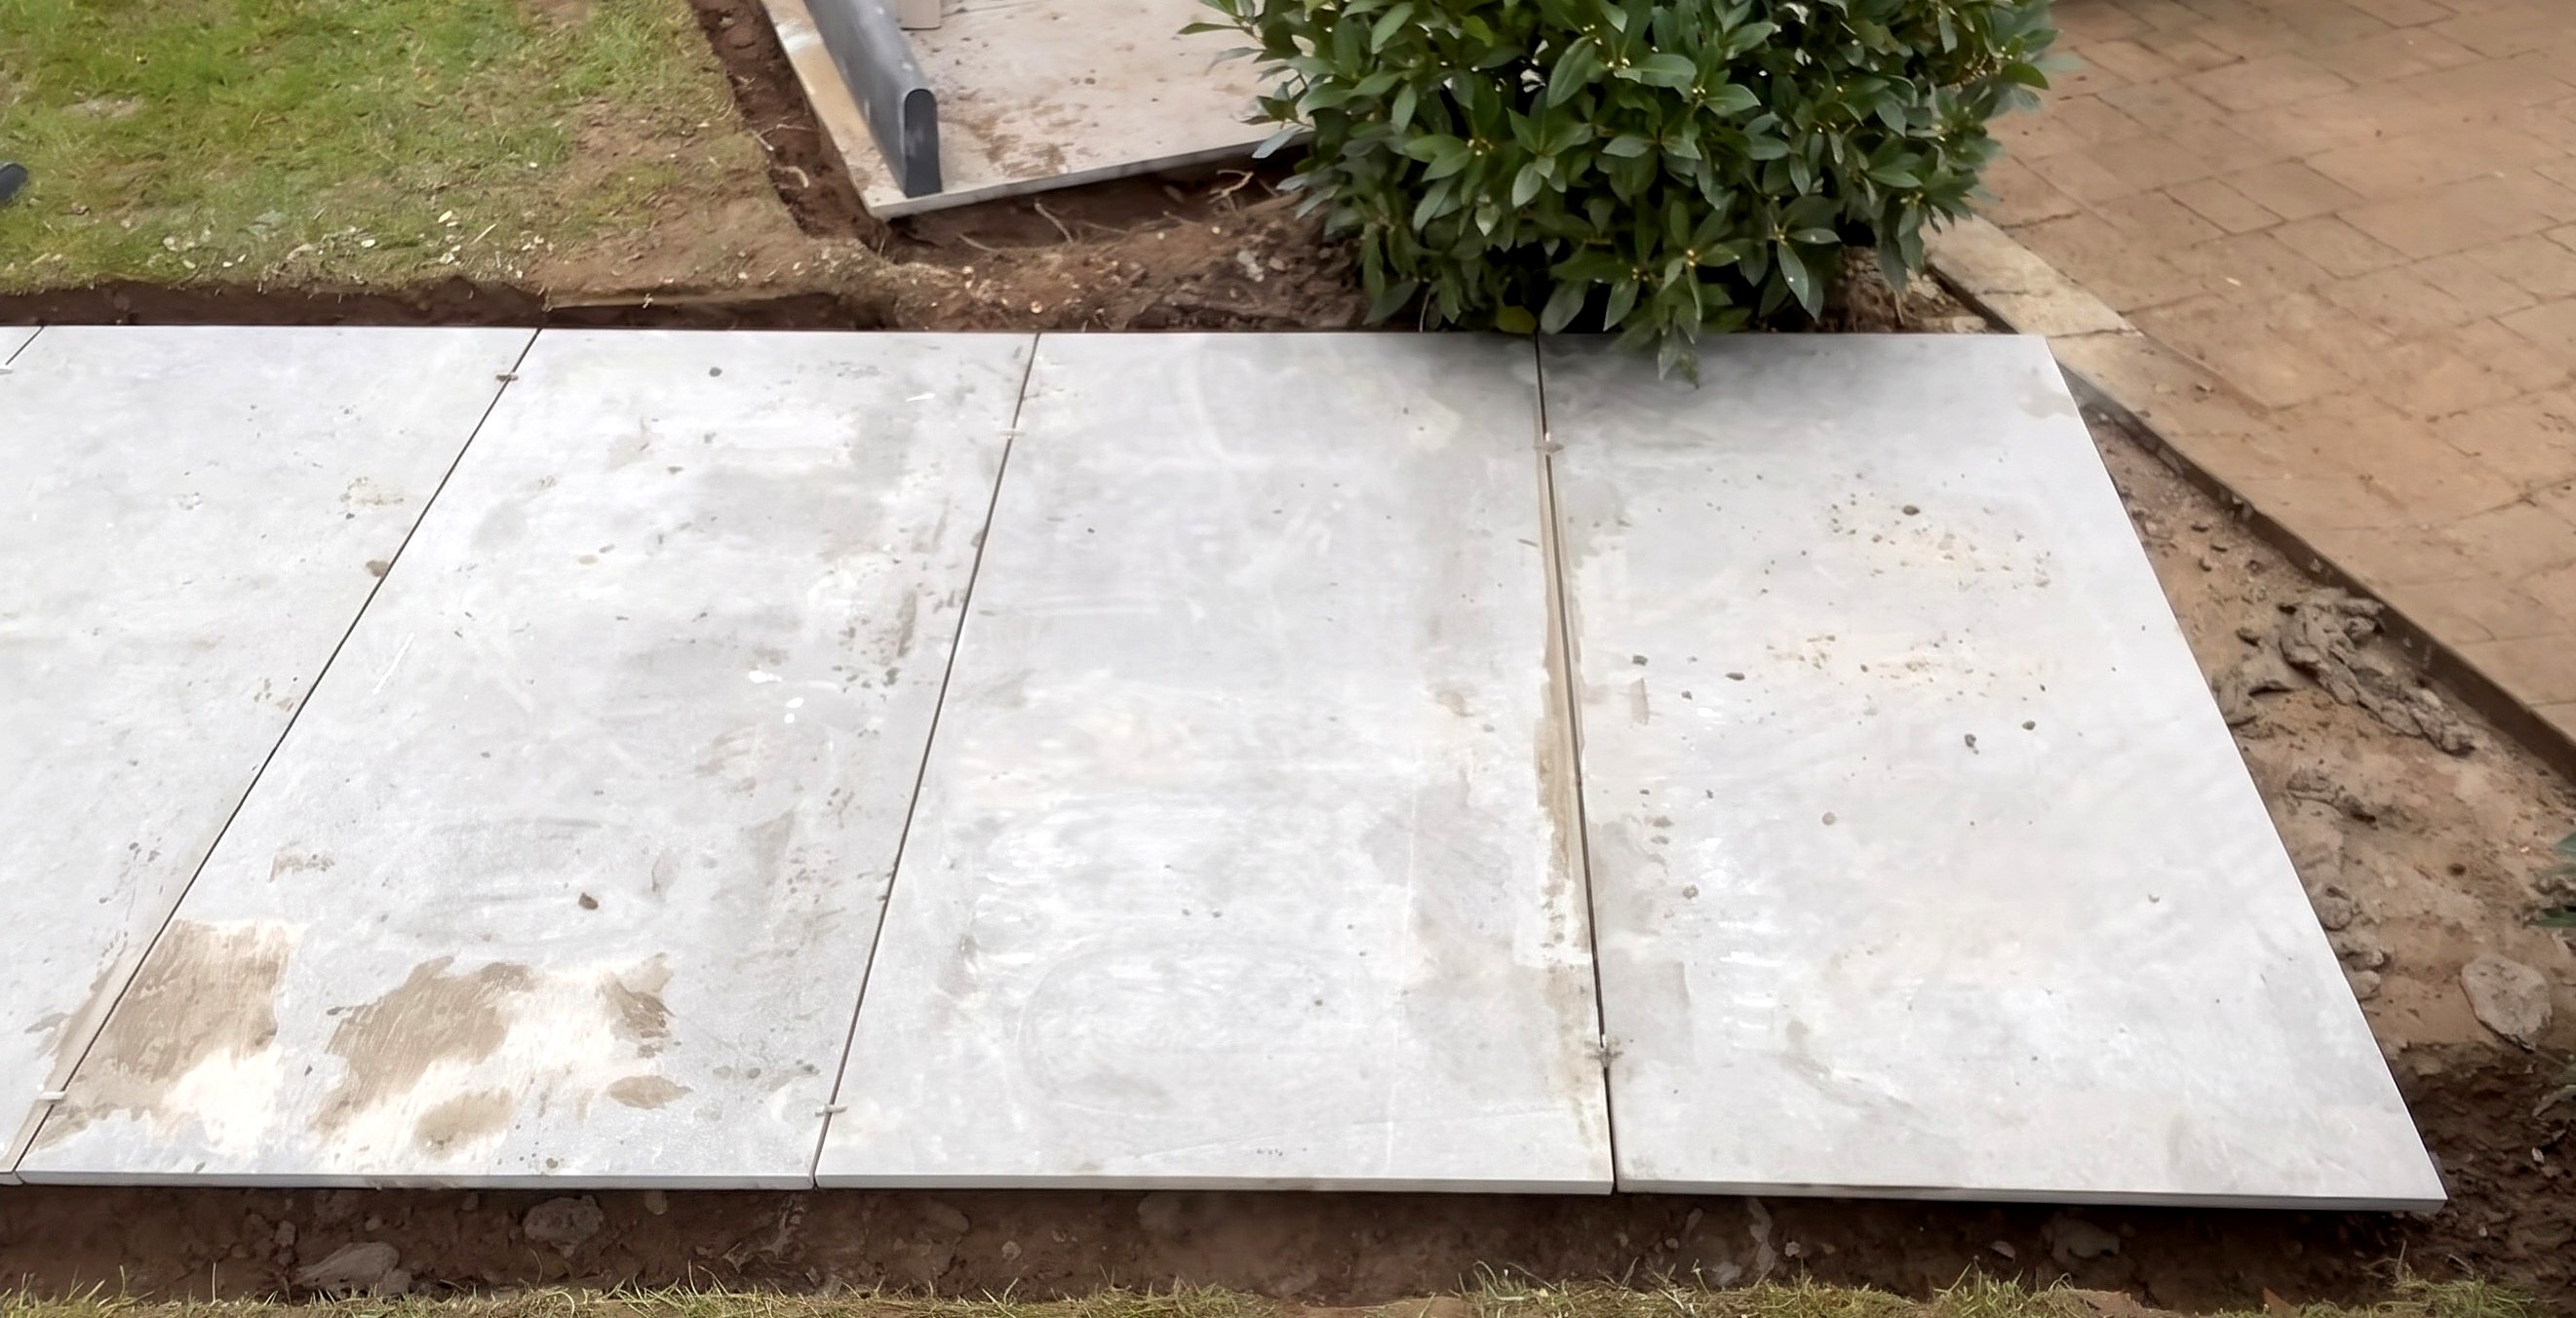
Tile the front path from the angled landing junction to the driveway.
Parts in this step: (A) Grey porcelain paving slab
You'll need: Cement mixer, Wheelbarrow, Spirit level, Paint roller, Wet bridge tile saw, String line and line pins, Pointing and bricklaying trowels, Rubber mallet, Tape measure, Suction cup tile lifters, Sharp sand, Cement, Grey porcelain paving slabs, Paving slurry primer, Tile spacers
- 10.1 Bed the angled transition slabs against the front entrance landing
- Measure and cut two angled transitions from grey porcelain paving slabs (A) on the wet bridge tile saw.
- Spread and score 4:1 mortar on the concrete base against the front landing.
- Prime the backs and bed both angled slabs against the diagonal landing edge.
- 10.2 Lay the full-width porcelain slabs down to the driveway
- Work down the concrete path base to the driveway.
- Trowel and score a full 4:1 mortar bed per transverse 600 x 1200 mm grey slab.
- Roll slurry primer on each slab and tap level to the string line using plastic spacers.
Step 11: Install mitered pathway edging kerbs and front porch tiles
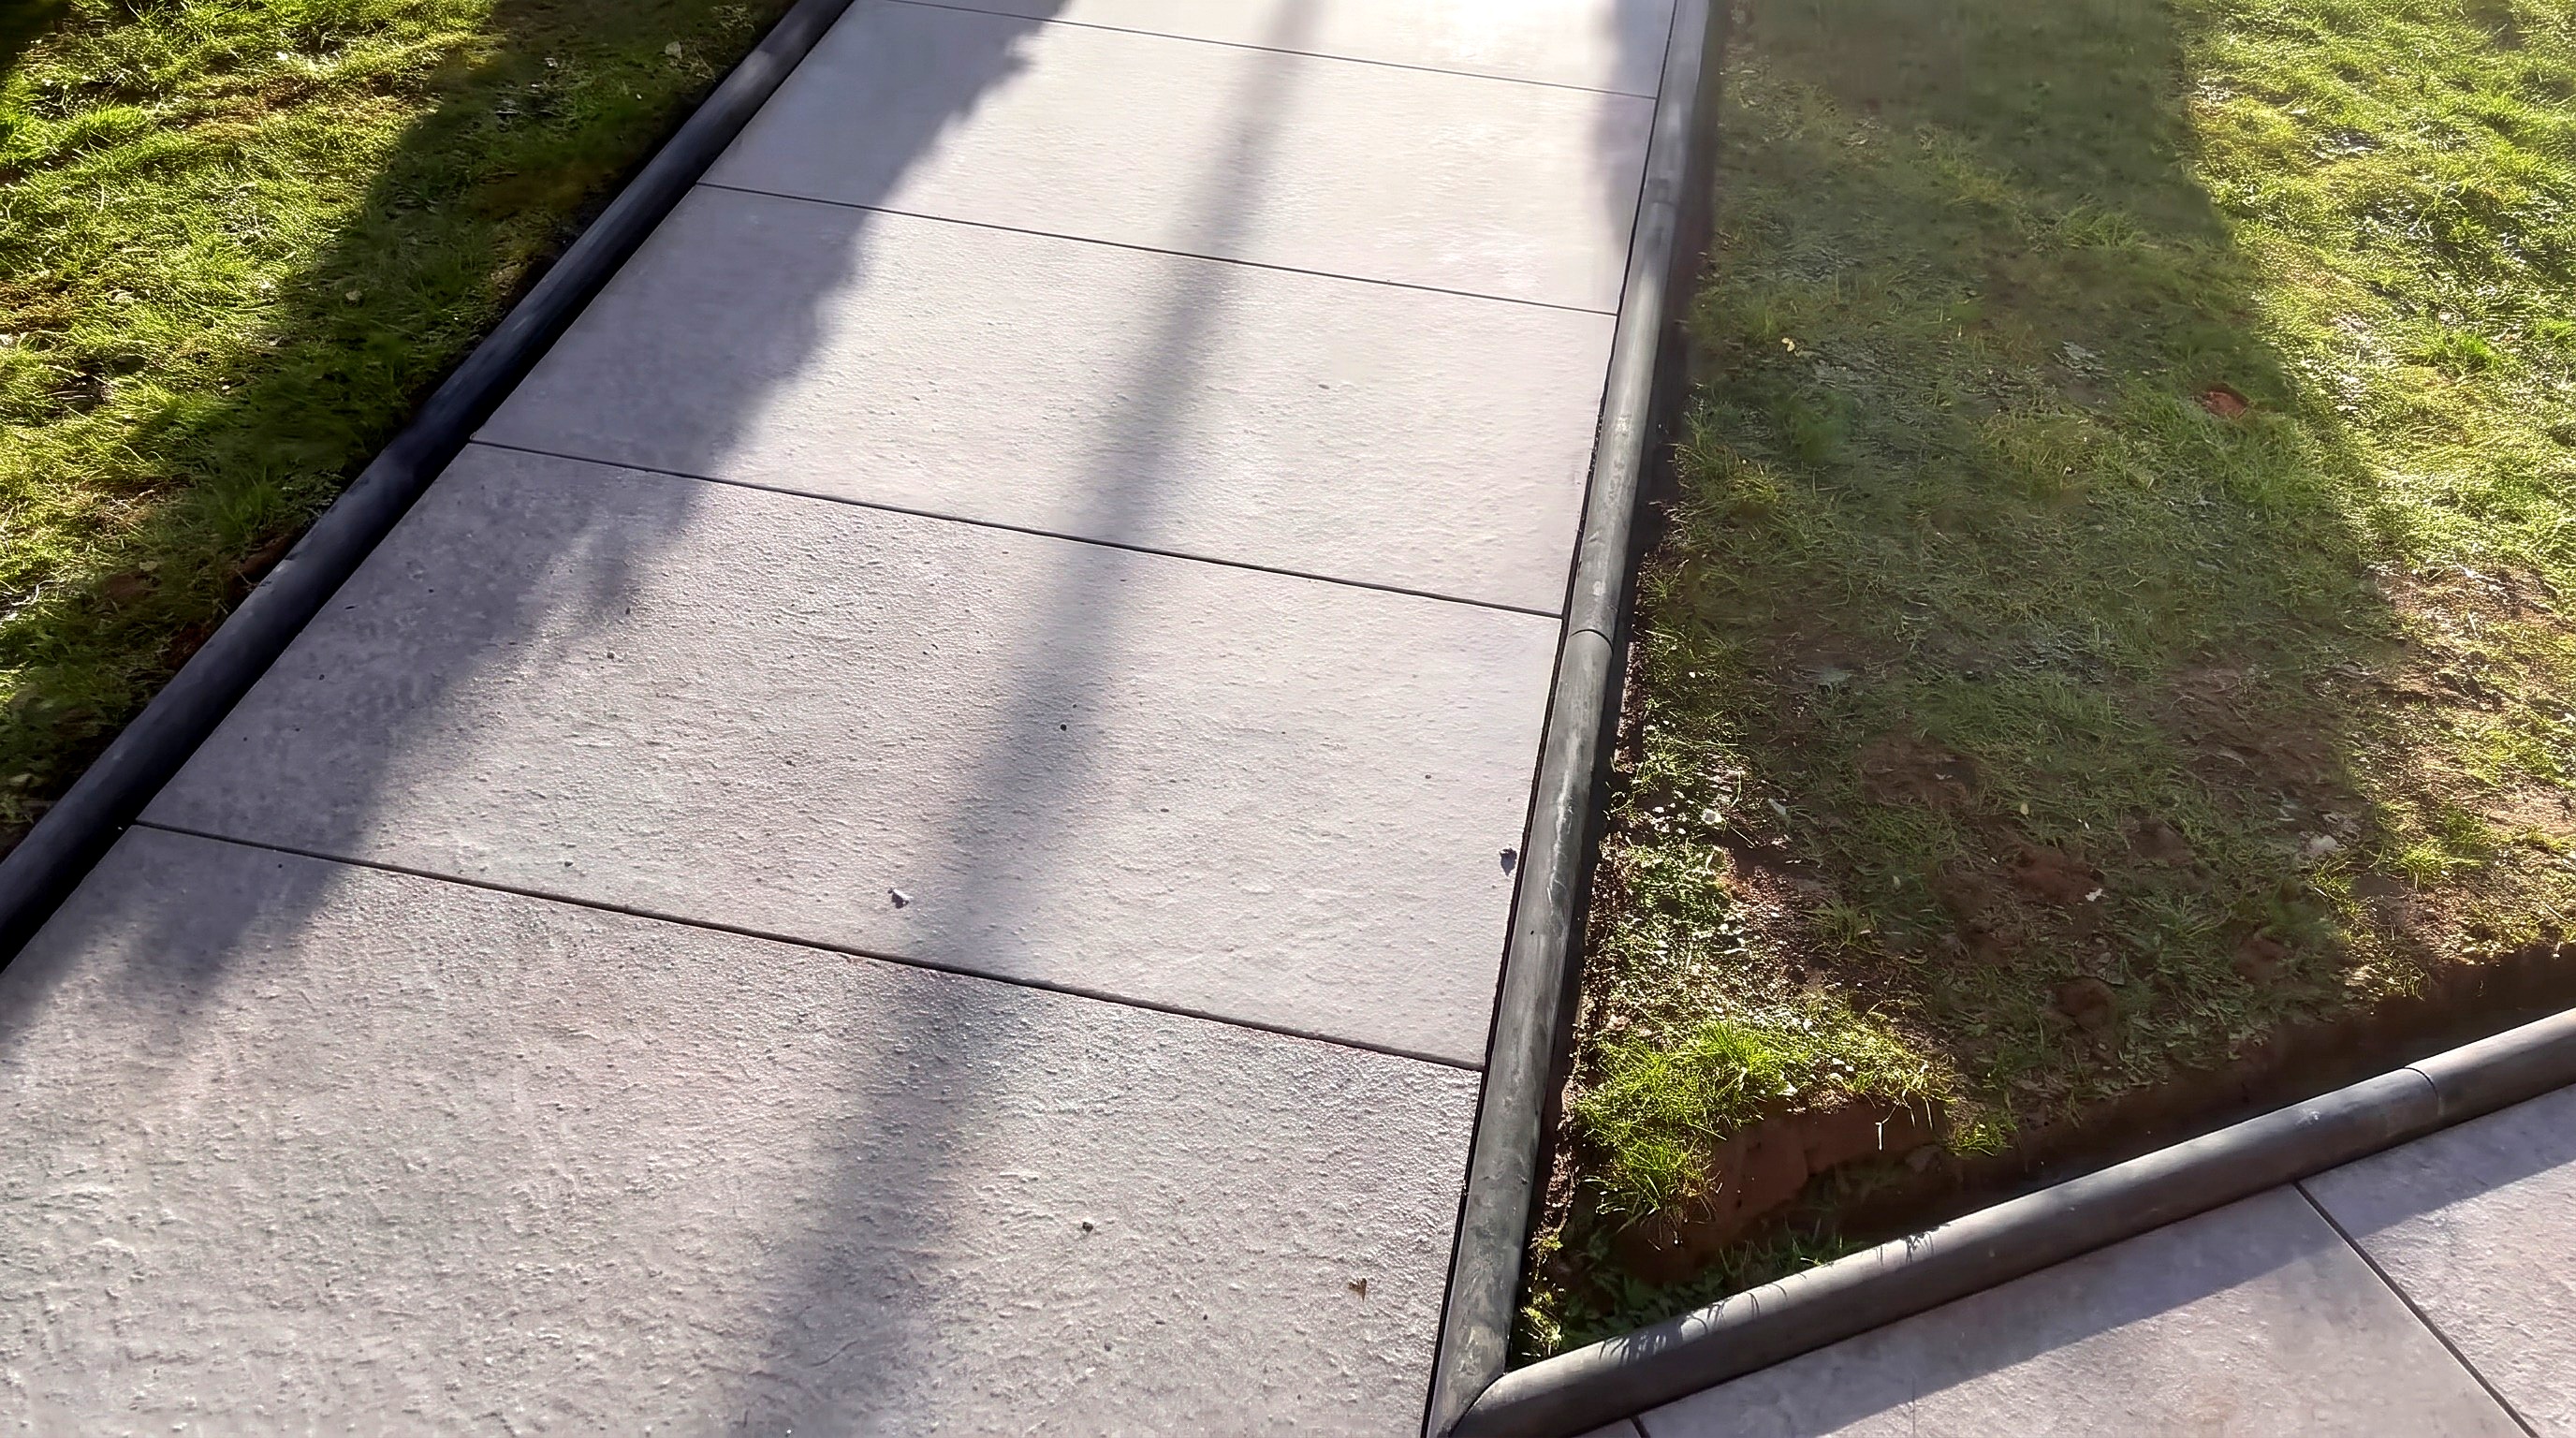
Mitered bullnose edging kerbs hold the front lawn edges; cut slabs line the recessed porch.
Parts in this step: (A) Grey porcelain paving slab, (D) Bullnose edging kerb
You'll need: Spirit level, Paint roller, Wet bridge tile saw, Pointing and bricklaying trowels, Rubber mallet, Tape measure, Sharp sand, Cement, Grey porcelain paving slabs, Paving slurry primer, Tile spacers, Bullnose edging kerbs
- 11.1 Set the mitered bullnose edging kerbs along the front pathways
- Miter-cut dark grey bullnose edging kerbs (D) on the saw for the angled path corners.
- Bed and haunch kerbs in mortar along both walkway sides to hold the lawn edges.
- 11.2 Lay the center and side porcelain slabs inside the recessed front porch
- Cut grey porcelain paving slabs (A) to fit the recessed front porch.
- Prime and bed the center and left porch slabs aligned with outer landing joints.
- Cure the main porch slabs overnight before stepping on them to fit inner corner cuts.
- Tip: Bed mitered concrete kerbs on lawn edges to keep porcelain edges from chipping.
- Heads up: Never step on fresh porch slabs to reach back corners; wait until mortar cures.
Finishing
Cure and Grout
- Let freshly bedded slabs and porch cuts cure before walking on them or clearing tools to the lawn.
- Grout tile joints once the mortar cures (this guide does not state the grout product).
- Use a wheeled mechanical sponge roller machine to wash grout haze off 140 sq m of paving.
Alternatives
- Bed exterior porcelain slabs in flexible exterior tile adhesive on a cured concrete base instead of wet 4:1 mortar.
- Compact the mortar bed to depth with a sacrificial 18 mm plywood tapping board before laying 600 x 1200 mm slabs.
Check before you call it done
| Check | What you should see | If not |
|---|---|---|
| Set a spirit level across each course toward the ACO drain. | The bubble sits touching or just past the line so rainwater drains without puddles. | Tap high edges down with a rubber mallet, or lift and adjust the mortar before it cures. |
| Sight down the string lines and check across tile joints with a spirit level. | Slab edges align with the string line, with even spacer gaps and no lippage. | |
| Test every slab for full mortar contact and bond. | Slabs sit solid without rocking or hollow voids. | Lift fresh unbonded slabs, fill 4:1 mortar bed voids, coat the back with slurry primer, and re-bed. |
| Check the recessed inspection chamber cover against the patio. | The metal frame sits flush with the patio fall and inlaid grey and black tile joints align. |
These Specs are built from Tidybricks patio restore's video “Large-Format Porcelain Tile Patio and Garden Pathways with Contrasting Border”. Open the Large-Format Porcelain Tile Patio and Garden Pathways with Contrasting Border project page.
