Spetz Specs No. 1031: step-by-step repair guide
Repairing Loose Porcelain Patio Slabs with Priming Slurry
The complete step-by-step guide made from Tidybricks patio restore's YouTube video, free on Spetz. For the video, a step-by-step player and answers to your questions, see the Repairing Loose Porcelain Patio Slabs with Priming Slurry project page.
4 steps, 2 parts, 9 tools, 1 materials
Overview
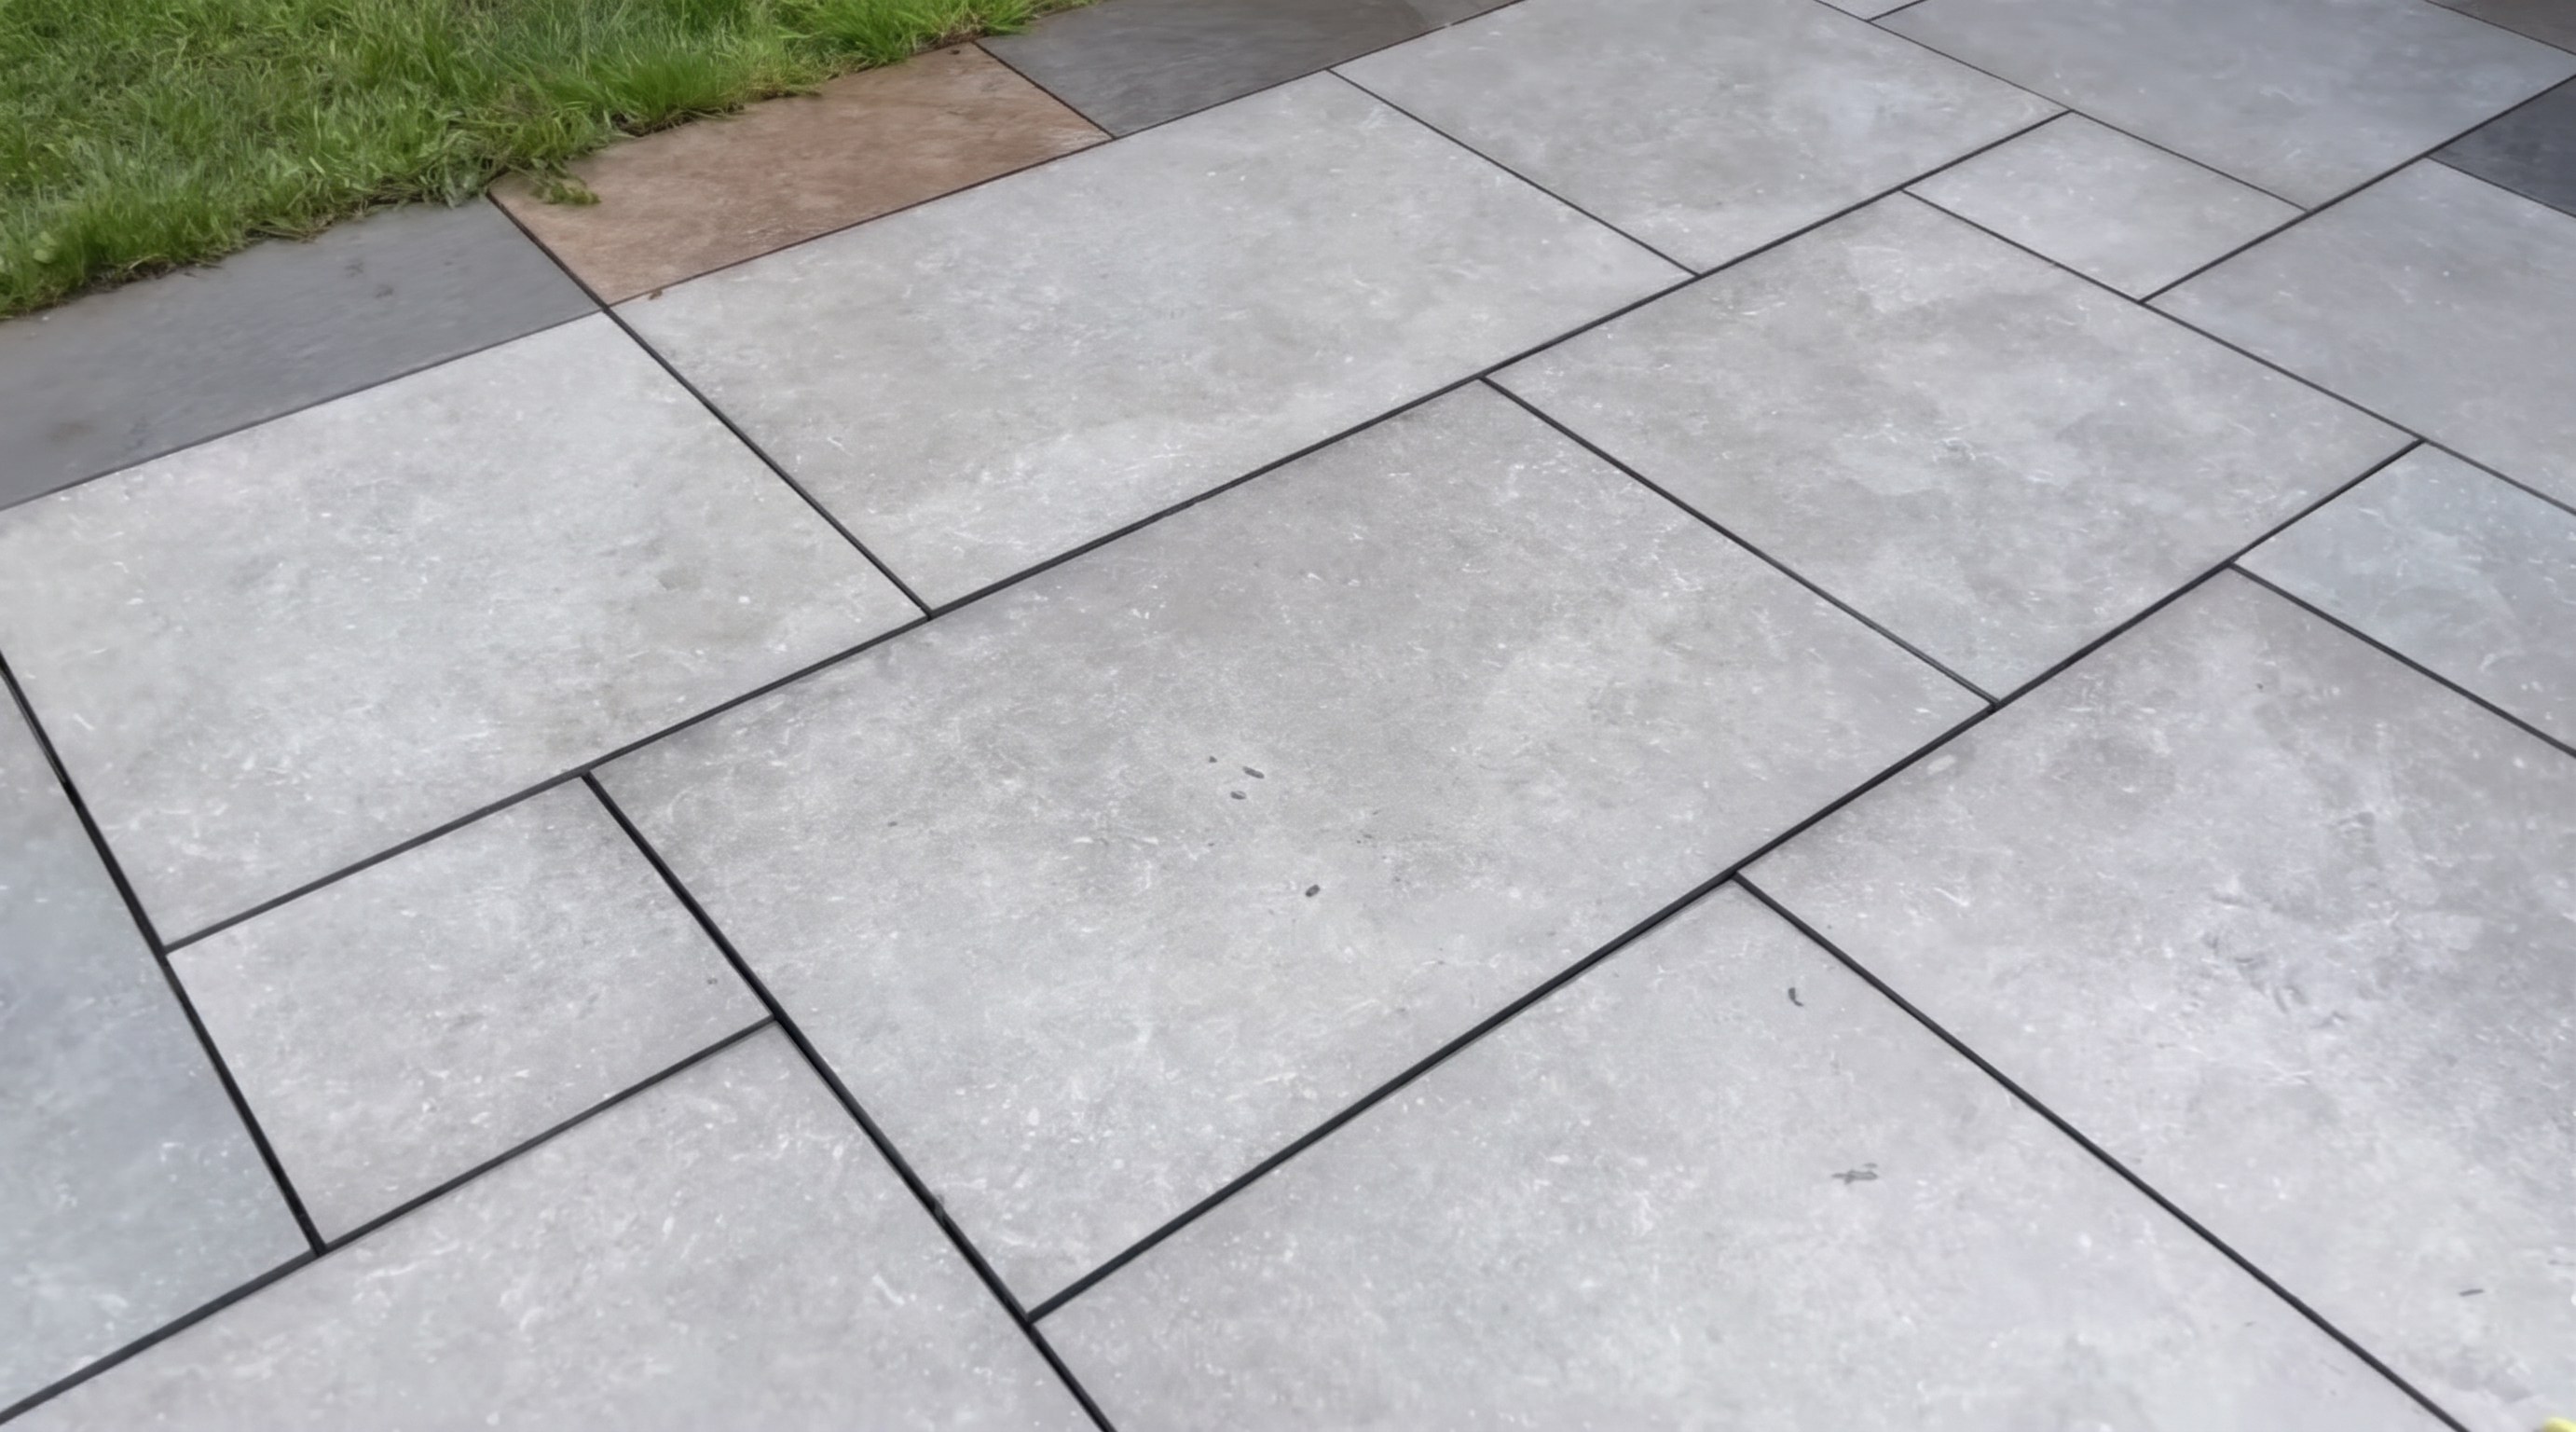
The fault
- Porcelain patio slabs wobble underfoot when the original primer bond fails.
- Ants and loose sand get under the unbonded tile, worsening movement.
- Troweling 1 to 2 mm of priming slurry rebonds the slab to a solid mortar bed.
Why fix it yourself
- Rebonding to an intact mortar bed avoids breaking out and relaying the patio base.
- Grinding old high spots flat on the slab back stops new slurry from raising the tile.
What it takes
- Use a vacuum suction lifter, disc cutter, trowels, buckets, chalk, hand brush, and garden hose.
- Mix a 17 kg cementitious priming slurry tub with a paddle mixer.
What decides success
- Return the slab in the same orientation to match the mortar bed contours.
- Spread a full 1 to 2 mm slurry coat on the clean slab back and mortar bed.
The fault at a glance
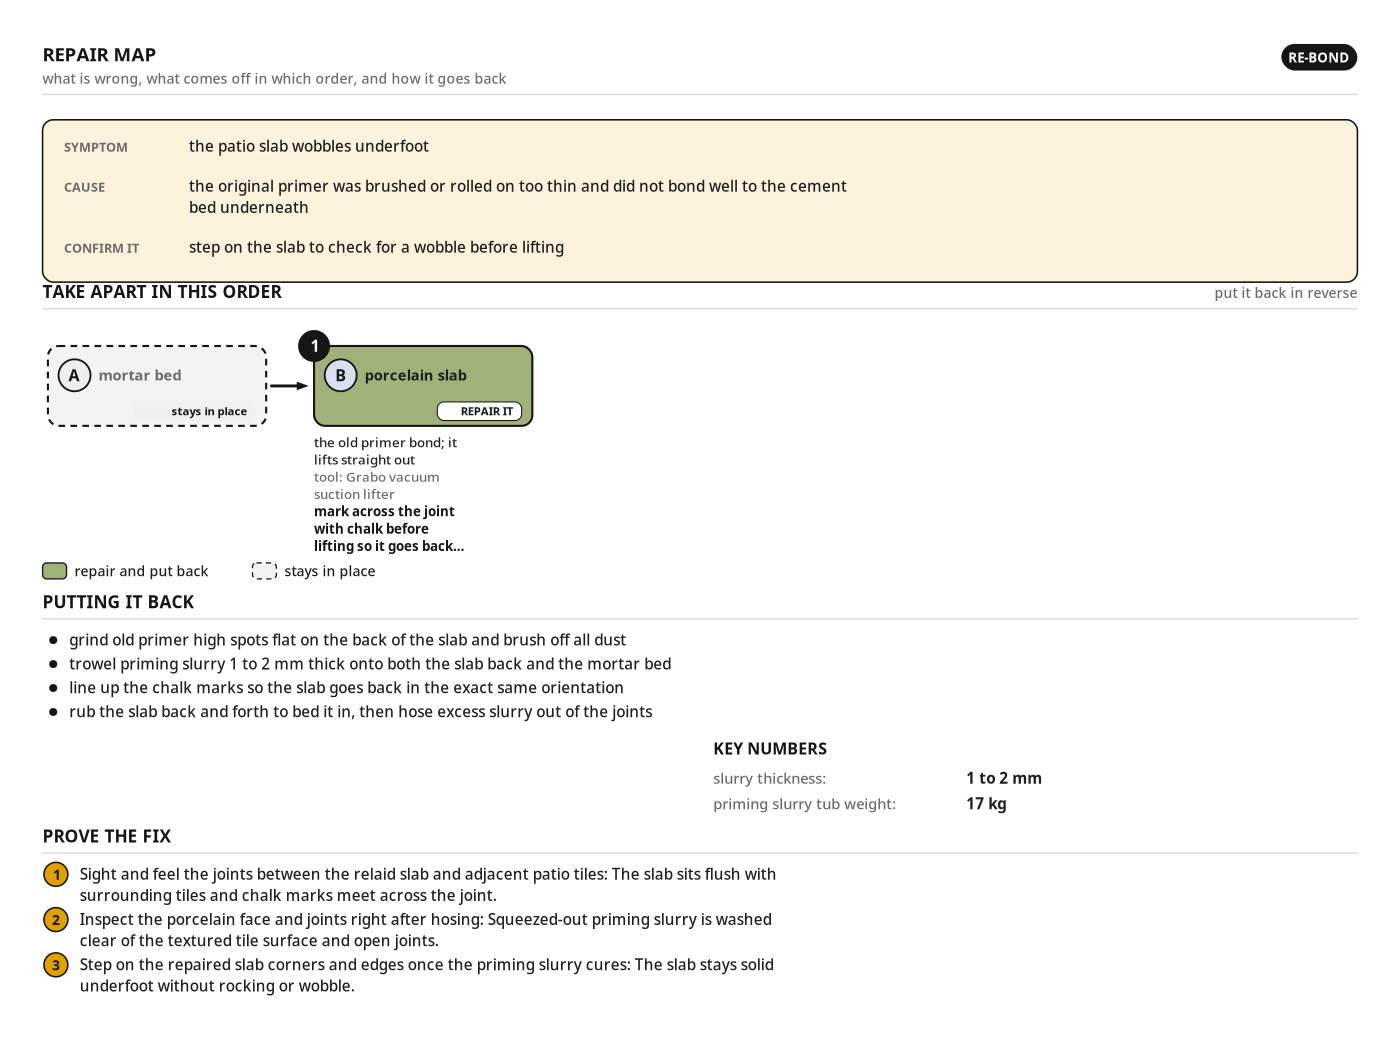
- What you see: the patio slab wobbles underfoot
- What is wrong: the original primer was brushed or rolled on too thin and did not bond well to the cement bed underneath
- Confirm it: step on the slab to check for a wobble before lifting
- slurry thickness: 1 to 2 mm
- priming slurry tub weight: 17 kg
Health and safety
Disc Cutter and Masonry Dust
- Wear a dust mask, eye protection, hearing protection, and sturdy safety footwear when grinding cured mortar with the disc cutter.
- Hold the corded disc cutter firmly with both hands to control kickback while grinding high spots off the slab back.
- Let the cutting disc come to a complete stop before setting the saw down on the ground.
- Grind the slab outdoors in open air so hazardous silica dust from the cured mortar disperses away from your breathing zone.
Lifting Slabs and Heavy Loads
- Use the electric vacuum suction lifter to raise and lower heavy porcelain slabs instead of prying them with your fingers.
- Check that the suction seal is secure on clean porcelain before lifting, and keep hands and feet clear of the slab edges.
- Bend at the knees and keep your back straight when lifting the porcelain slab or the 17 kg priming slurry container.
Mixing and Handling Priming Slurry
- Wear waterproof gloves and eye protection when mixing and troweling cementitious priming slurry to prevent alkaline skin burns and eye irritation.
- Pour dry priming slurry powder slowly into the bucket while wearing a dust mask to avoid breathing airborne cement dust.
- Brace the bucket firmly with your feet and keep hands and loose clothing away from the spinning paddle mixer.
Outdoor Electrical and Water Safety
- Keep the corded disc cutter, electric paddle mixer, and power cords clear of wet patio surfaces and garden hose spray.
- Move all electric tools and extension cords away from the work area before rinsing the slab joints with the garden hose.
Diagnose & make safe
- Step on suspect patio slabs to feel and see rocking underfoot.
- Check joints around loose slabs for pushed-up ant soil or sand.
- Flag wobbling slabs with chalk or pegs before starting.
- After lifting, check the mortar bed is solid and intact, not crumbly.
- Wear eye, hearing, and respiratory protective equipment and safety footwear before grinding.
Tools
- Paddle mixer (electric mortar mixer) (optional)
- Vacuum suction lifter (electric vacuum suction lifter, Grabo)
- Buckets (builder's mixing bucket)
- Chalk (marking chalk)
- Notched trowel (masonry tiling trowel)
- Pointing trowel (masonry gauging / pointing trowel)
- Disc cutter (corded electric masonry saw, Evolution)
- Hand brush (soft bristle dust brush)
- Garden hose (water hose with spray nozzle)
Materials
- Priming slurry (1 tub, cementitious priming slurry, Pavetuf, 17 kg)
Finishes & supplies, in the order they go on
| Product | What it does | Mix & coats | Dry time | Applied with |
|---|---|---|---|---|
| Priming slurry | Bond the porcelain slab to the mortar bed at 1 to 2 mm thickness | 1 coats | Pointing trowel |
Parts
| Part | Name | Qty | Size | Notes |
|---|---|---|---|---|
| A | mortar bed | x1 | stays in place, scrape off loose dried cement and debris before applying fresh slurry | |
| B | porcelain slab | x1 | mark orientation with chalk before lifting, grind high spots flat on the back, goes back in the exact same position |
Step by step
Step 1: Mark and Lift the Loose Slab
Loose porcelain slab (B), marked for orientation, is lifted off mortar bed (A) onto a bucket.
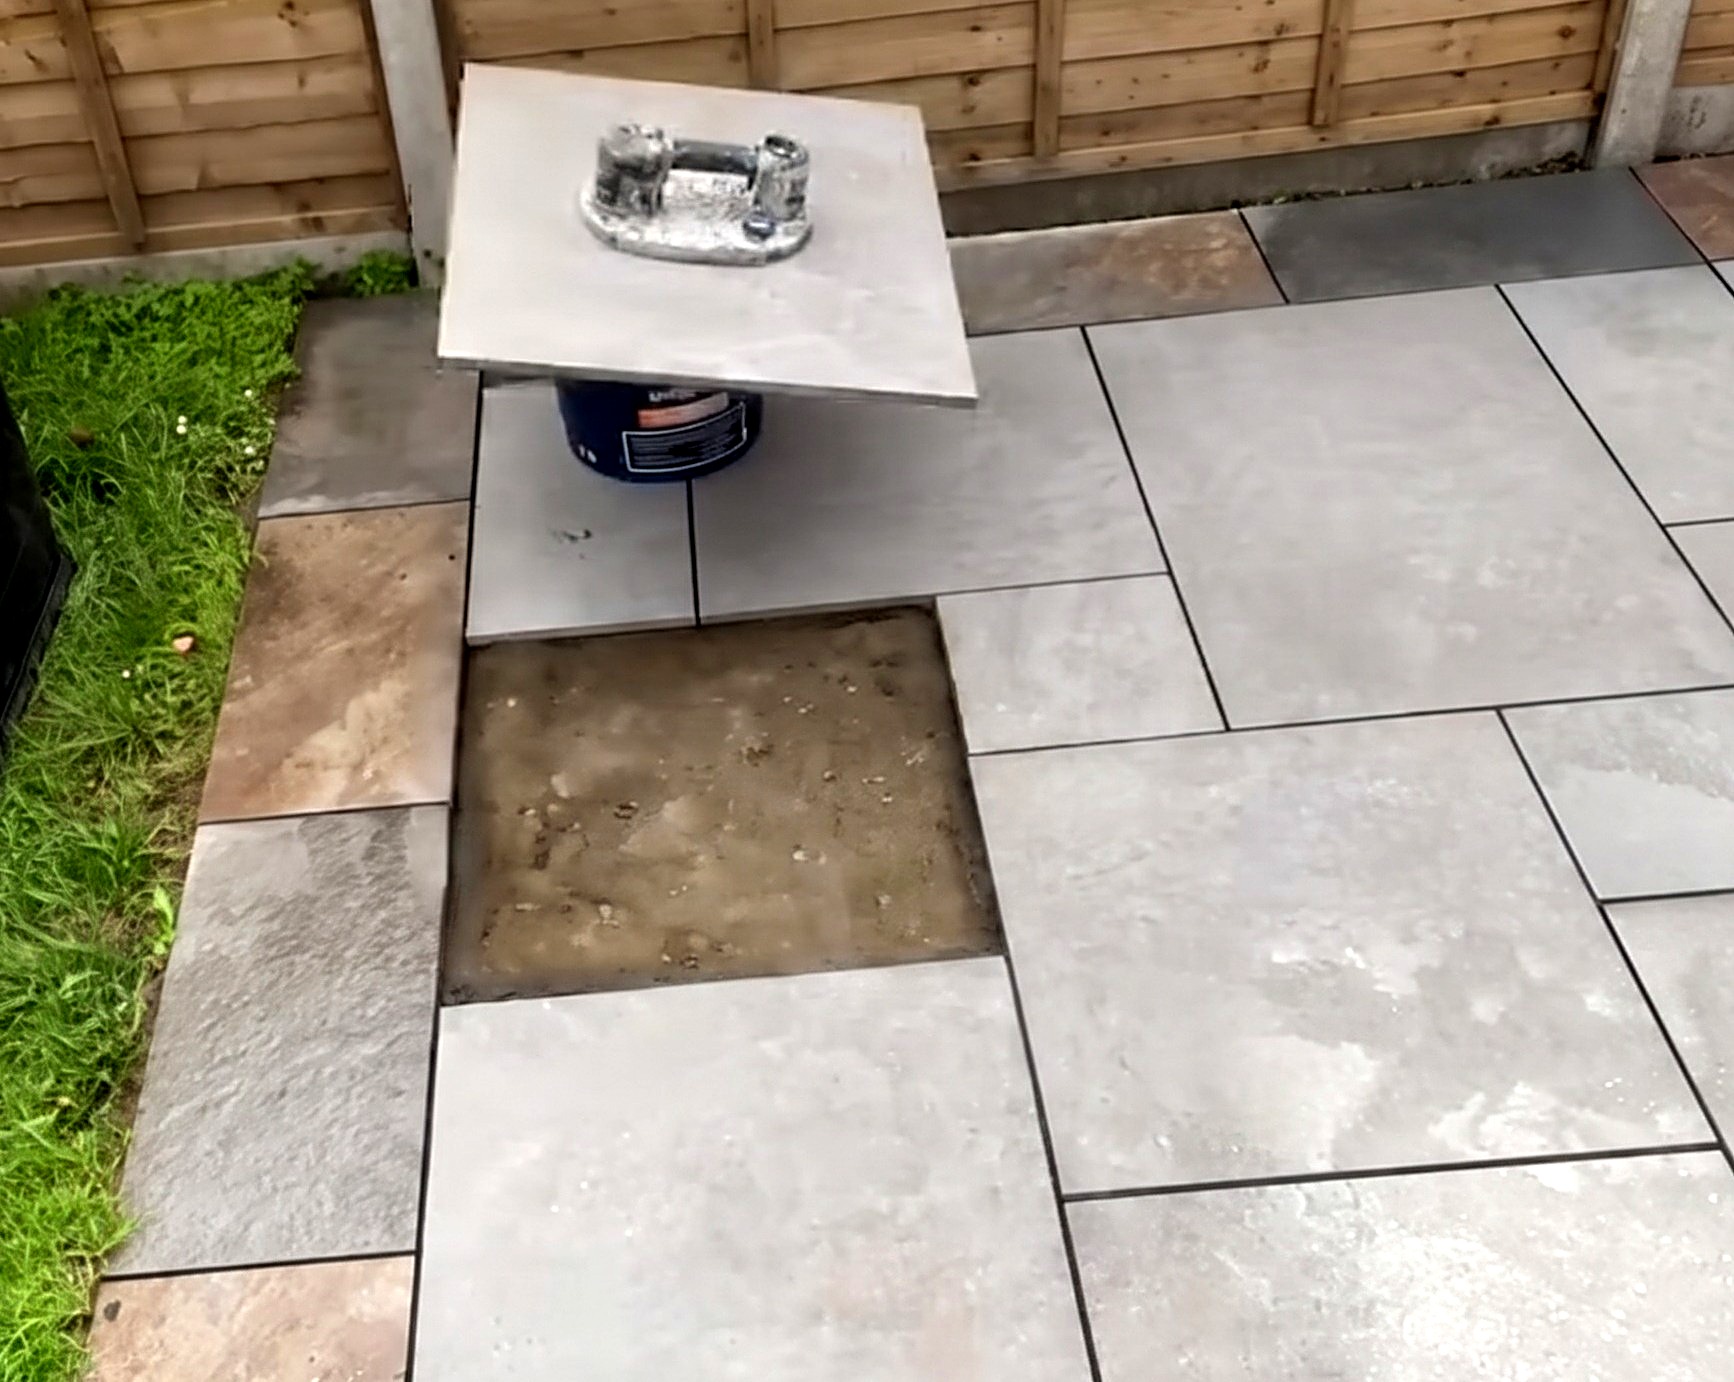
Parts in this step: (A) mortar bed, (B) porcelain slab
You'll need: Chalk, Vacuum suction lifter, Buckets
- 1.1 Mark slab orientation with chalk
- Chalk two alignment lines across the joint between porcelain slab (B) and a fixed neighbor.
- Mark both sides of the joint to return the square slab in the same orientation.
- Keep chalk marks visible: rotating the slab makes it rock on mortar bed (A) contours.
- 1.2 Lift the loose slab with a vacuum suction lifter
- Center the vacuum suction lifter on the dry top face of porcelain slab (B).
- Engage the vacuum pump until the pad seals against the tile.
- Lift the slab straight off mortar bed (A) with proper posture.
- Set the slab face-down on an overturned bucket at working height.
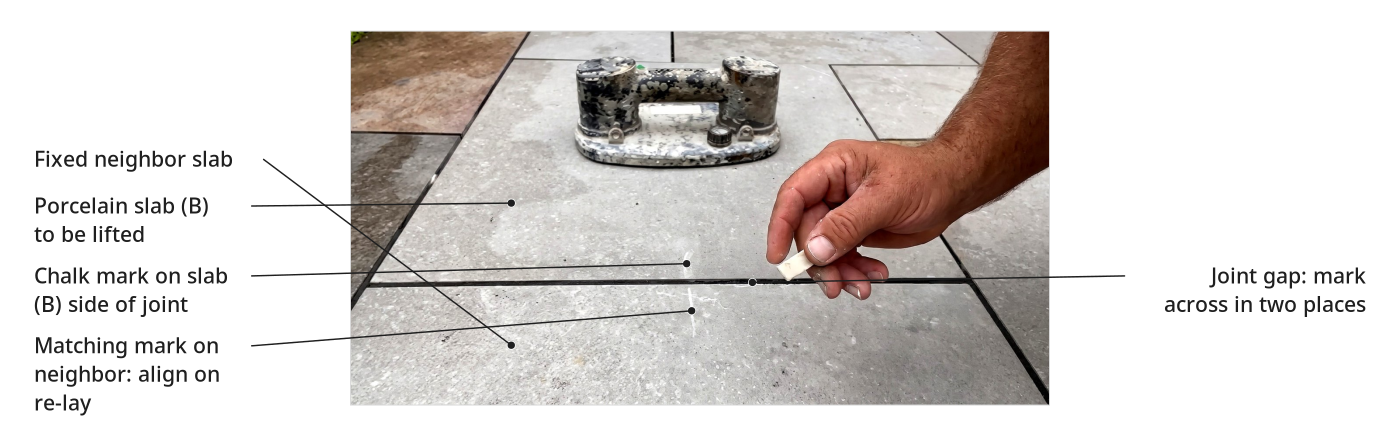
- Tip: Mark both joint sides before lifting a square slab to match the edge.
- Tip: Rest the lifted slab on an overturned bucket off the ground for grinding.
- Heads up: Use a vacuum suction lifter and proper lifting posture to avoid pinched fingers or back strain.
Before you move on: Chalk marks are clear on both slabs, and the mortar bed is solid, not crumbling.
Step 2: Clean the Mortar Bed and Grind the Slab Back
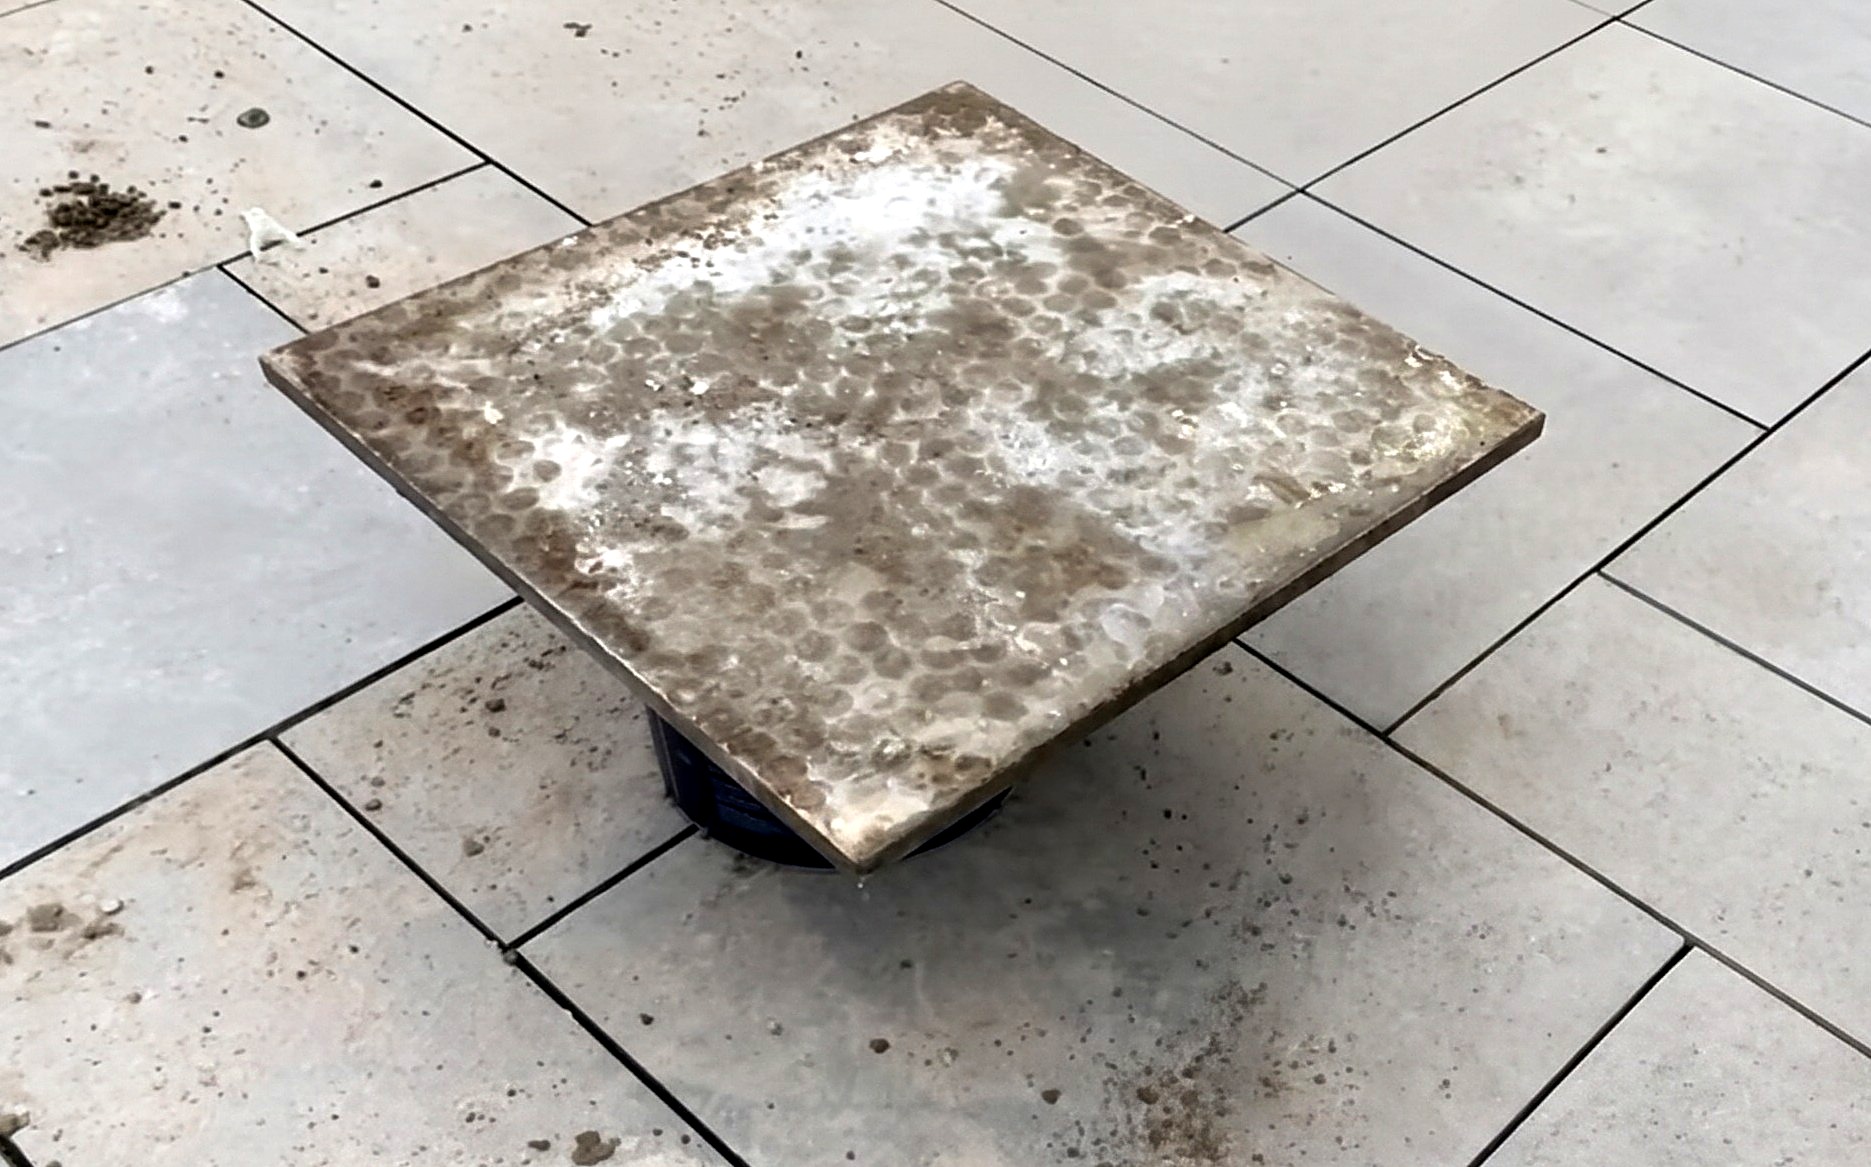
Mortar bed (A) is scraped clean, and the back of porcelain slab (B) is ground flat and brushed dust-free.
Parts in this step: (A) mortar bed, (B) porcelain slab
You'll need: Notched trowel, Buckets, Disc cutter, Hand brush
- 2.1 Scrape loose debris off the mortar bed
- Drag the notched trowel's flat edge across exposed mortar bed (A).
- Scrape off flaky dried cement, loose sand, and ant soil.
- Clear the recess so fresh slurry bonds to solid mortar.
- 2.2 Grind high spots flat on the back of the slab
- Check the back of porcelain slab (B) on the bucket for old primer ridges.
- Wear eye, hearing, and dust protective equipment and safety footwear.
- Grind old mortar high spots off the slab back with the flat disc cutter blade.
- Grind ridges flush so the new primer coat cannot push the slab above adjacent tiles.
- 2.3 Brush grinding dust off the slab back
- Sweep the ground back of porcelain slab (B) with the hand brush.
- Remove loose grinding dust and grit to the edges; dust blocks primer adhesion.
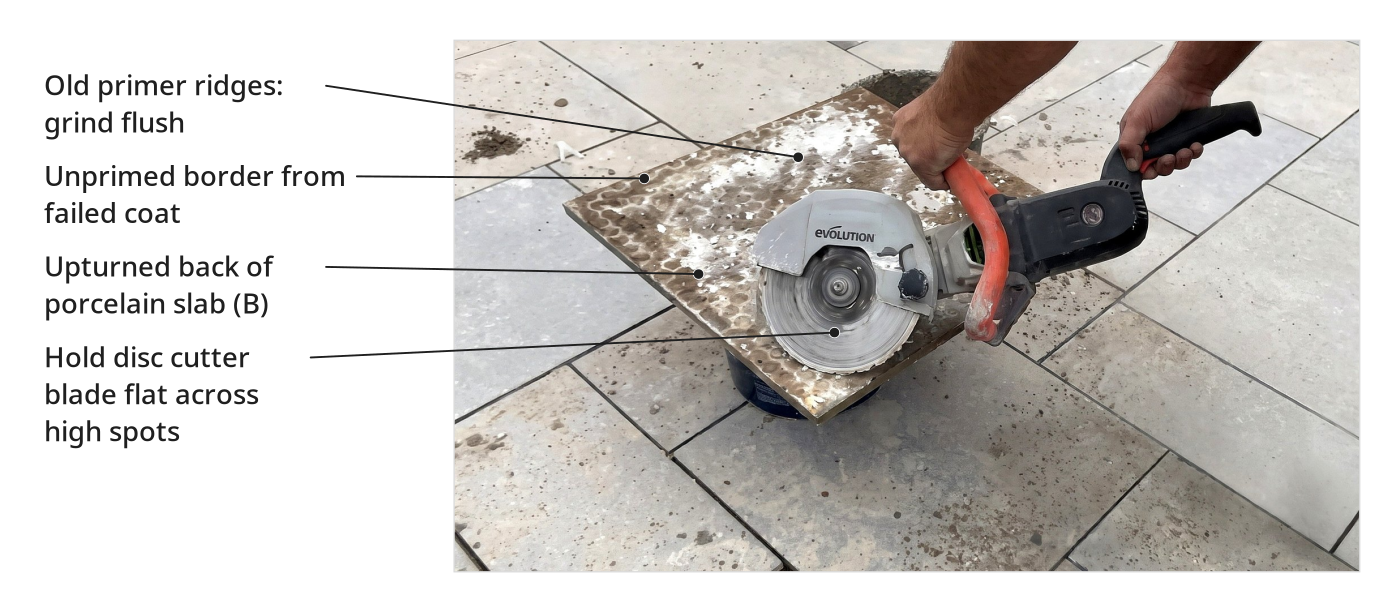
- Tip: Grind down cured mortar ridges so new slurry does not raise the slab.
- Tip: Sweep off grinding dust before priming so the new slurry bonds to the porcelain.
- Heads up: Wear eye, hearing, respiratory protective equipment and safety footwear with the disc cutter.
Before you move on: High ridges on the slab back are ground flat and both surfaces are dust-free.
Step 3: Apply Priming Slurry to the Slab and Bed
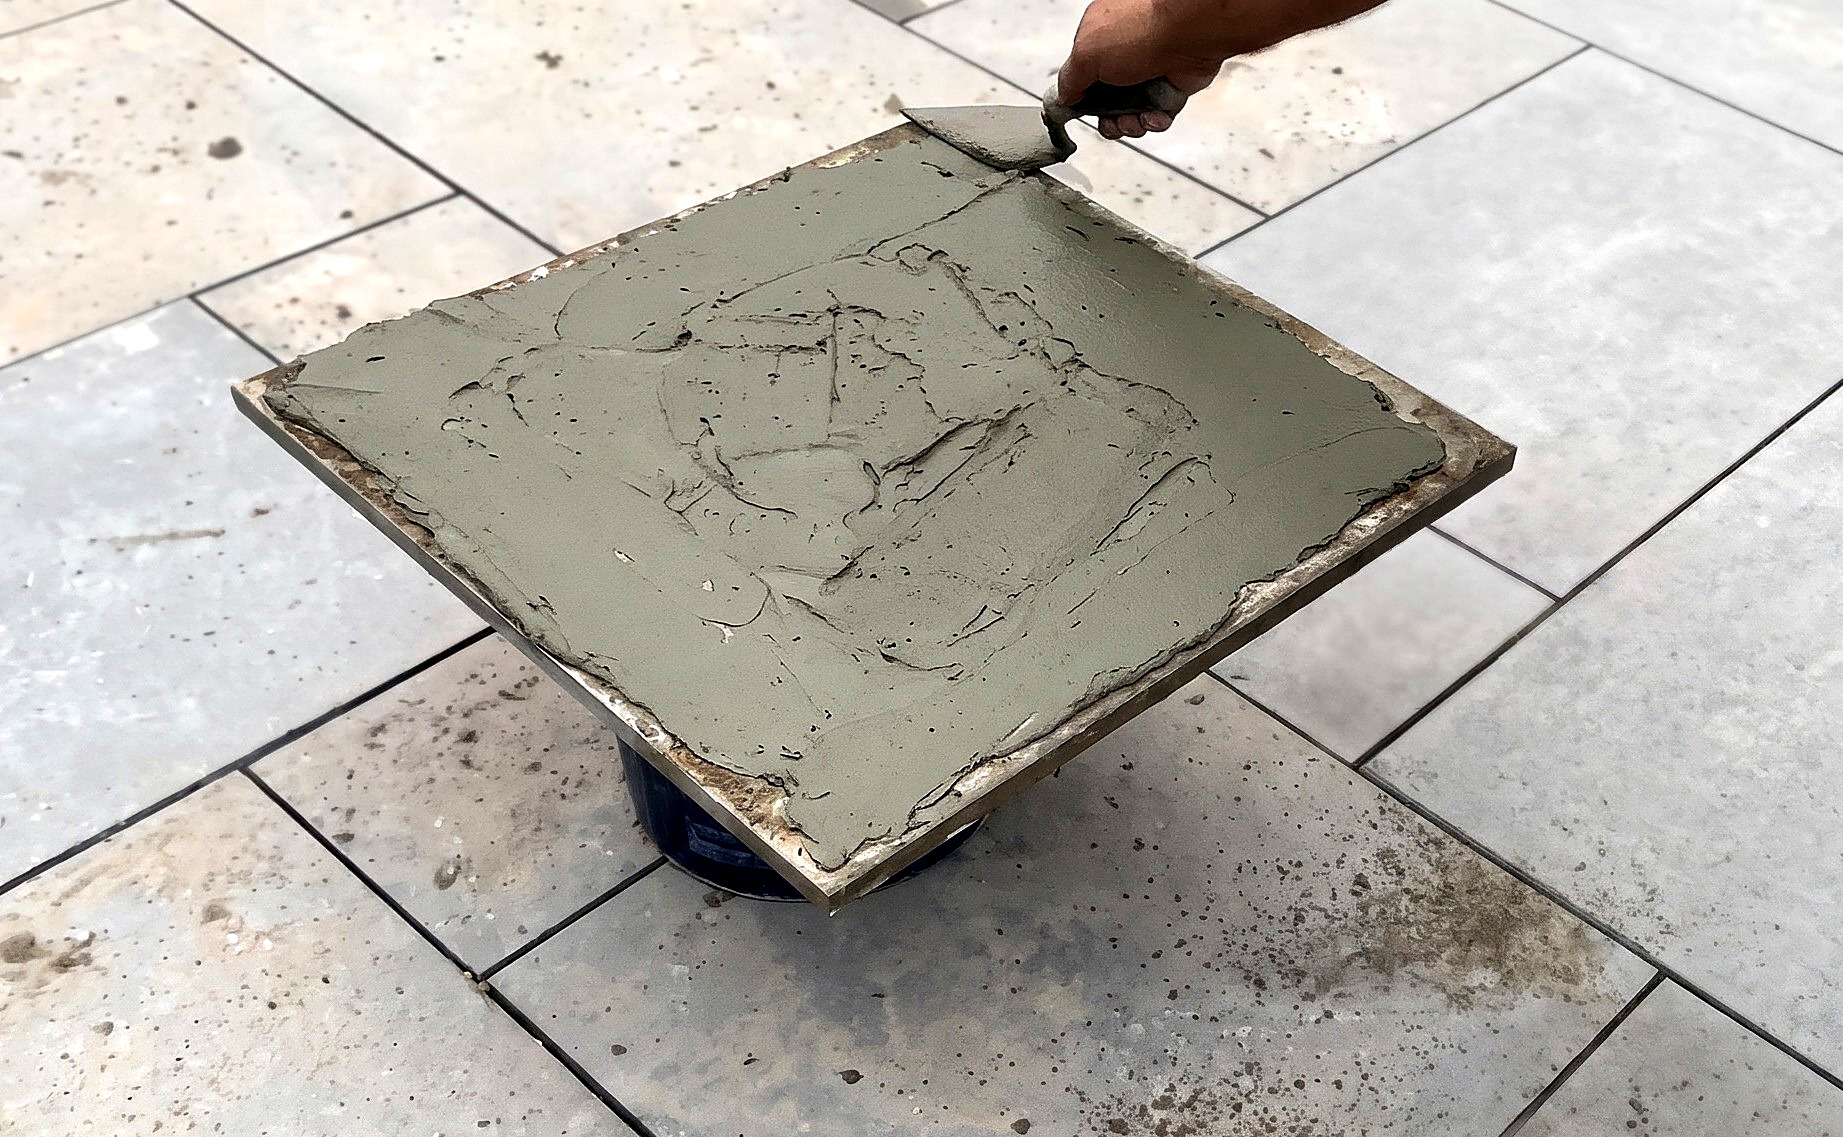
The porcelain slab (B) back and mortar bed (A) have a 1 to 2 mm priming slurry coat.
Parts in this step: (A) mortar bed, (B) porcelain slab
You'll need: Paddle mixer, Buckets, Pointing trowel, Priming slurry
- 3.1 Trowel priming slurry onto the back of the slab
- Mix priming slurry in a bucket with the paddle mixer to a thick, flowable paste.
- Scoop priming slurry onto the porcelain slab (B) back with the pointing trowel.
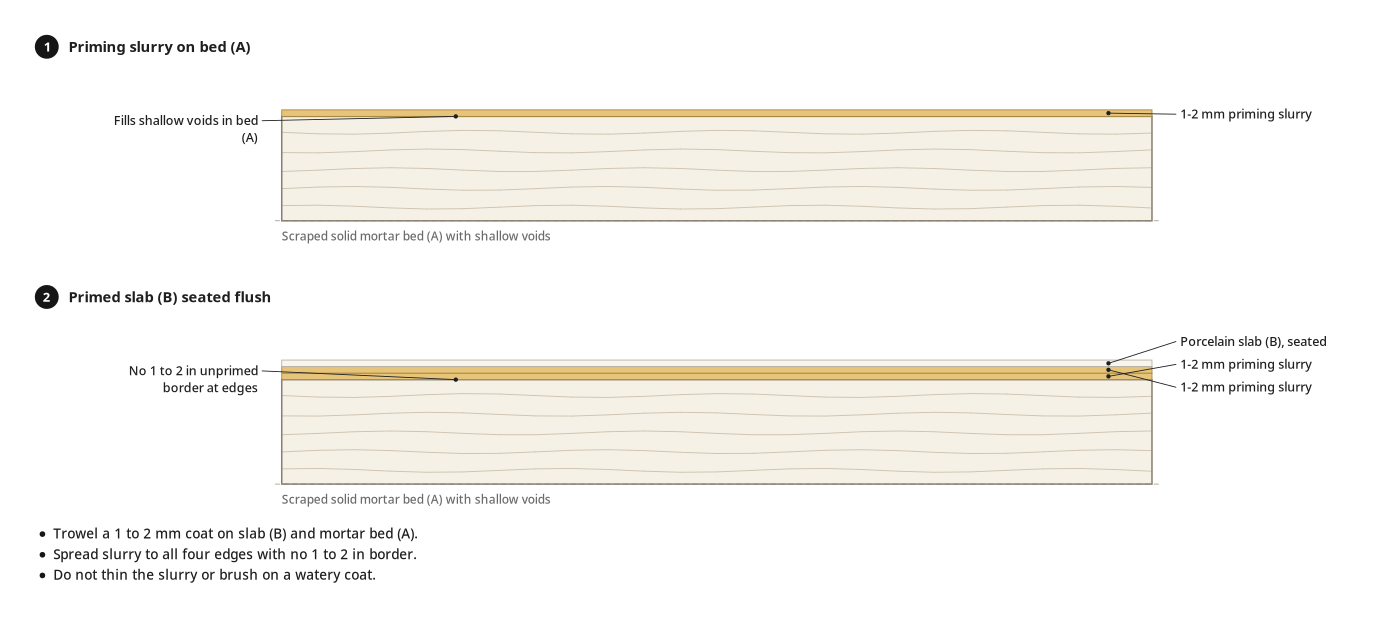
- Spread an even 1 to 2 mm coat across the whole back face.
- Trowel slurry to all four edges, leaving no unprimed border.
- 3.2 Pour and spread priming slurry over the mortar bed
- Pour priming slurry from the bucket onto the scraped mortar bed (A).
- Spread a generous 1 to 2 mm coat over the recess with the pointing trowel.
- Fill shallow bed voids so both primed faces meet without hollow spots.
Key measurements
- Priming slurry coat thickness: 1 to 2 mm on slab back and mortar bed
- Priming slurry tub weight: 17 kg
- Tip: Trowel a 1 to 2 mm layer instead of brushing or rolling a thin, watery coat.
- Tip: Cover the slab back to the edges for full perimeter support.
- Heads up: Do not thin the slurry or leave a 1 to 2 inch unprimed border, or the slab will wobble.
Before you move on: Slab back and mortar bed have a 1 to 2 mm slurry coat to every edge.
Step 4: Re-lay the Slab and Rinse the Joints
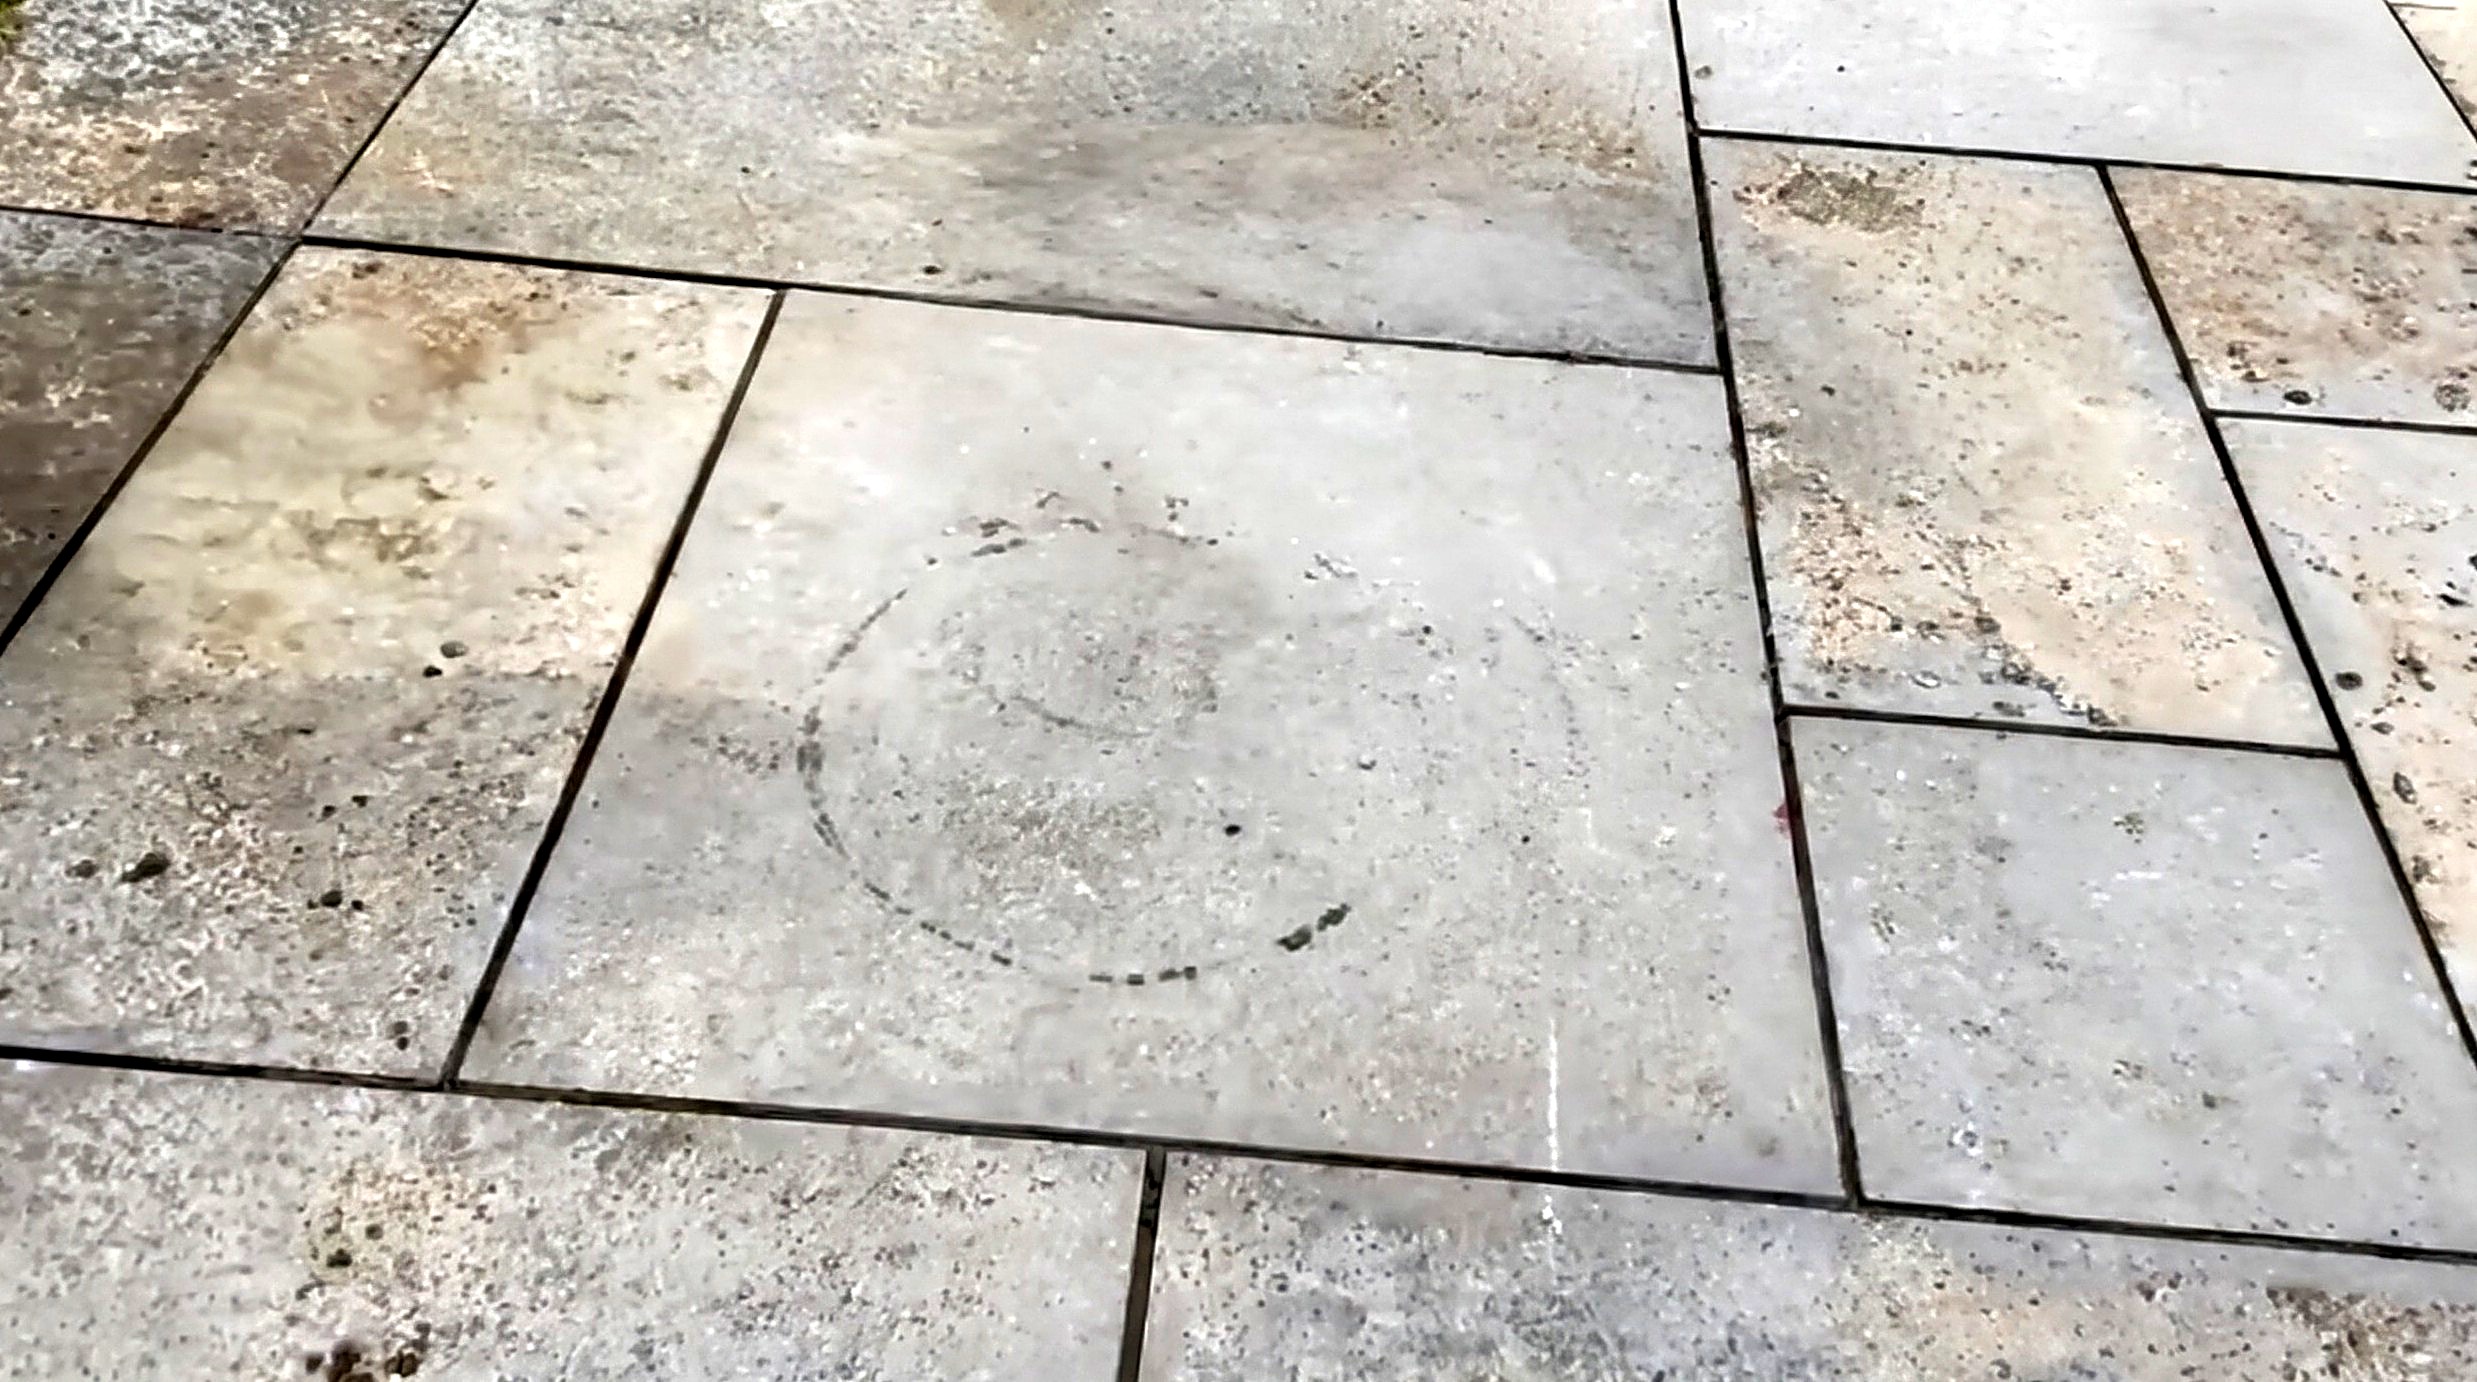
Porcelain slab (B) sits flush on mortar bed (A) in its original orientation, with excess slurry rinsed off.
Parts in this step: (A) mortar bed, (B) porcelain slab
You'll need: Vacuum suction lifter, Garden hose, Priming slurry
- 4.1 Lower and work the slab into position
- Attach the vacuum suction lifter to the primed porcelain slab (B) face.
- Align the slab chalk marks with those on the adjacent patio tile.
- Lower the slab onto the primed mortar bed (A) in its original orientation.
- Press and slide the slab back and forth to expel air and seat it flush.
- 4.2 Rinse excess slurry from the surface and joints
- Release and remove the vacuum suction lifter from porcelain slab (B).
- Immediately spray the slab face and joints with the garden hose.
- Rinse squeezed-out priming slurry from the joints before it cures and stains the tile.
- Tip: Rub and slide the slab while pressing down to settle it flush with neighboring tiles.
- Heads up: Wash excess priming slurry off the porcelain face and joints immediately before it dries.
Before you move on: Chalk marks align across the joint, the slab sits flush with adjacent tiles, and no wet slurry remains on top.
Finishing
Last touches
- Flush joints around the slab with the garden hose so cured slurry cannot block regrouting.
- Wash trowels, paddle mixer, and buckets with water before the slurry sets.
Settle and cure
- Keep traffic off the slab until the slurry sets; cure time is not in this guide, so check the tub label.
Alternatives
- Any professional cementitious paving priming slurry replaces the 17 kg Pavetuf Priming Slurry tub.
- If the mortar bed crumbles, break out the old base and relay on fresh bedding mortar.
Prove the fix
| Check | What you should see | If not |
|---|---|---|
| Sight and feel the joints between the relaid slab and adjacent patio tiles. | The slab sits flush with surrounding tiles and chalk marks meet across the joint. | Lift the slab with the vacuum suction lifter while the slurry is wet; grind remaining high spots. |
| Inspect the porcelain face and joints right after hosing. | Squeezed-out priming slurry is washed clear of the textured tile surface and open joints. | Spray joints and surface again with the garden hose before the cementitious primer cures. |
| Step on the repaired slab corners and edges once the priming slurry cures. | The slab stays solid underfoot without rocking or wobble. |
These Specs are built from Tidybricks patio restore's video “Repairing Loose Porcelain Patio Slabs with Priming Slurry”. Open the Repairing Loose Porcelain Patio Slabs with Priming Slurry project page.
