Spetz Specs No. 7261: step-by-step restoration guide
Refinishing a Dresser with Black Paint
The complete step-by-step guide made from Black Sheep House's YouTube video, free on Spetz. For the video, a step-by-step player and answers to your questions, see the Refinishing a Dresser with Black Paint project page.
5 steps, 6 tools, 5 materials
Overview
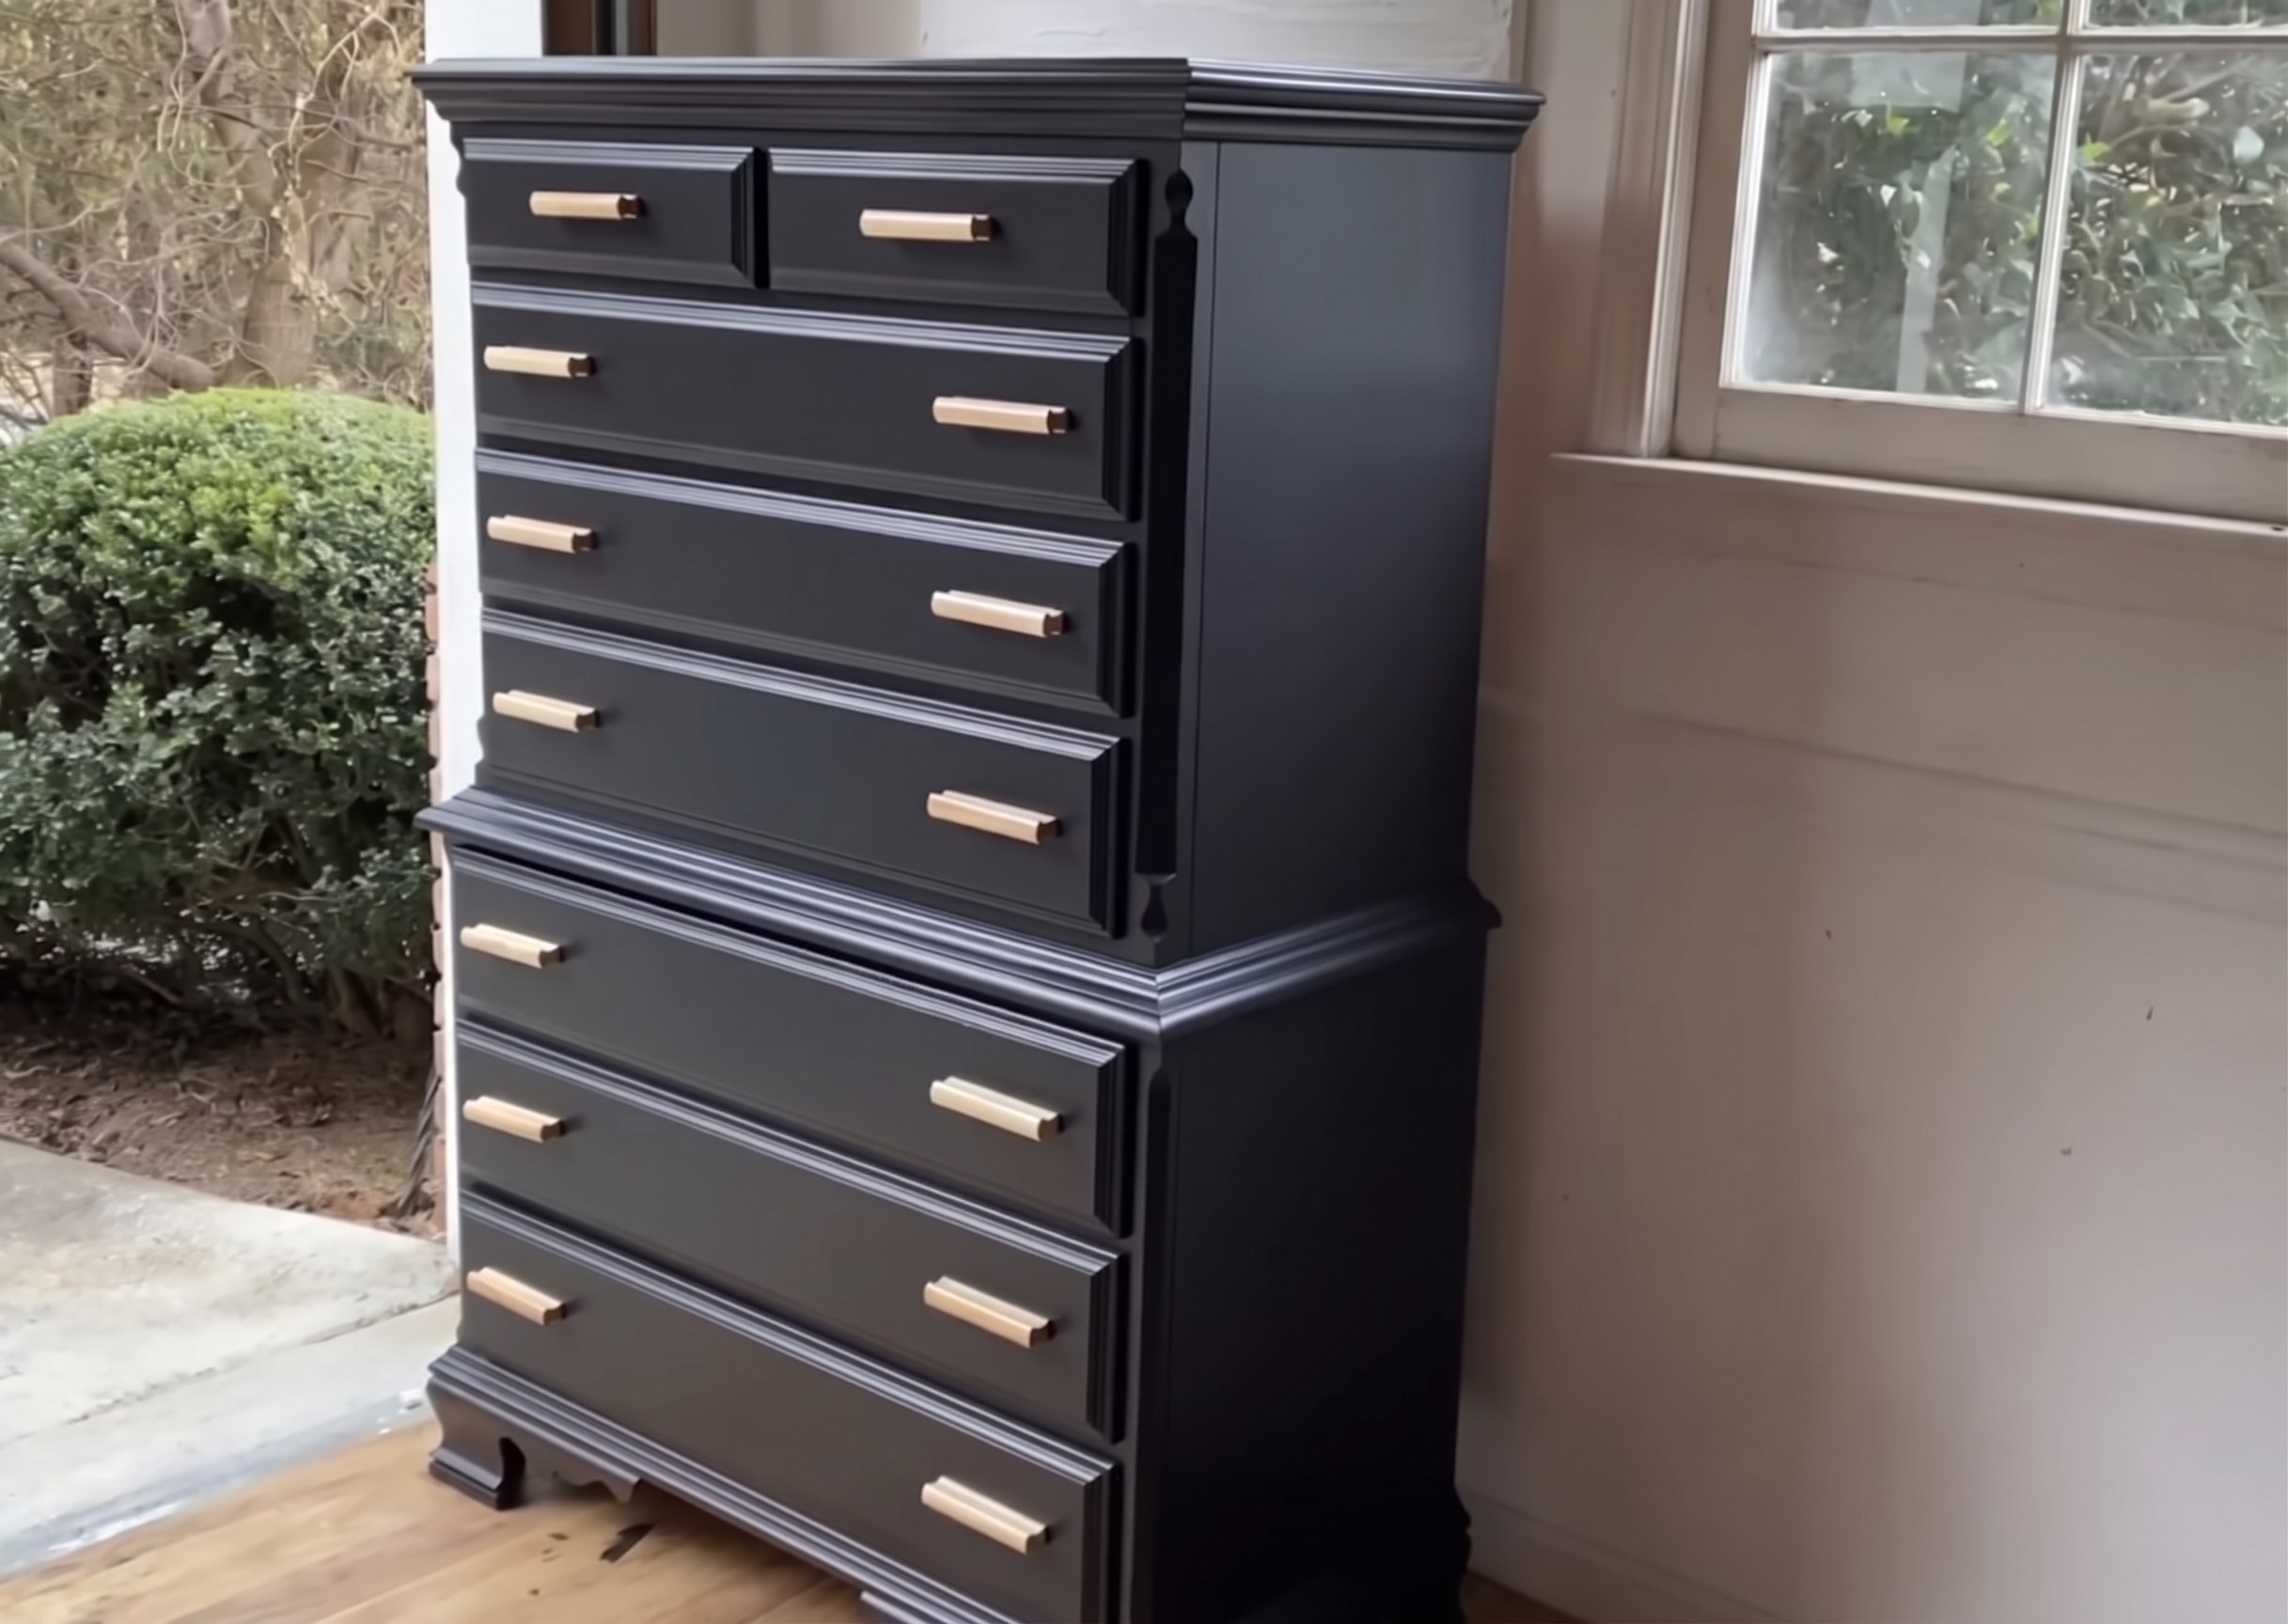
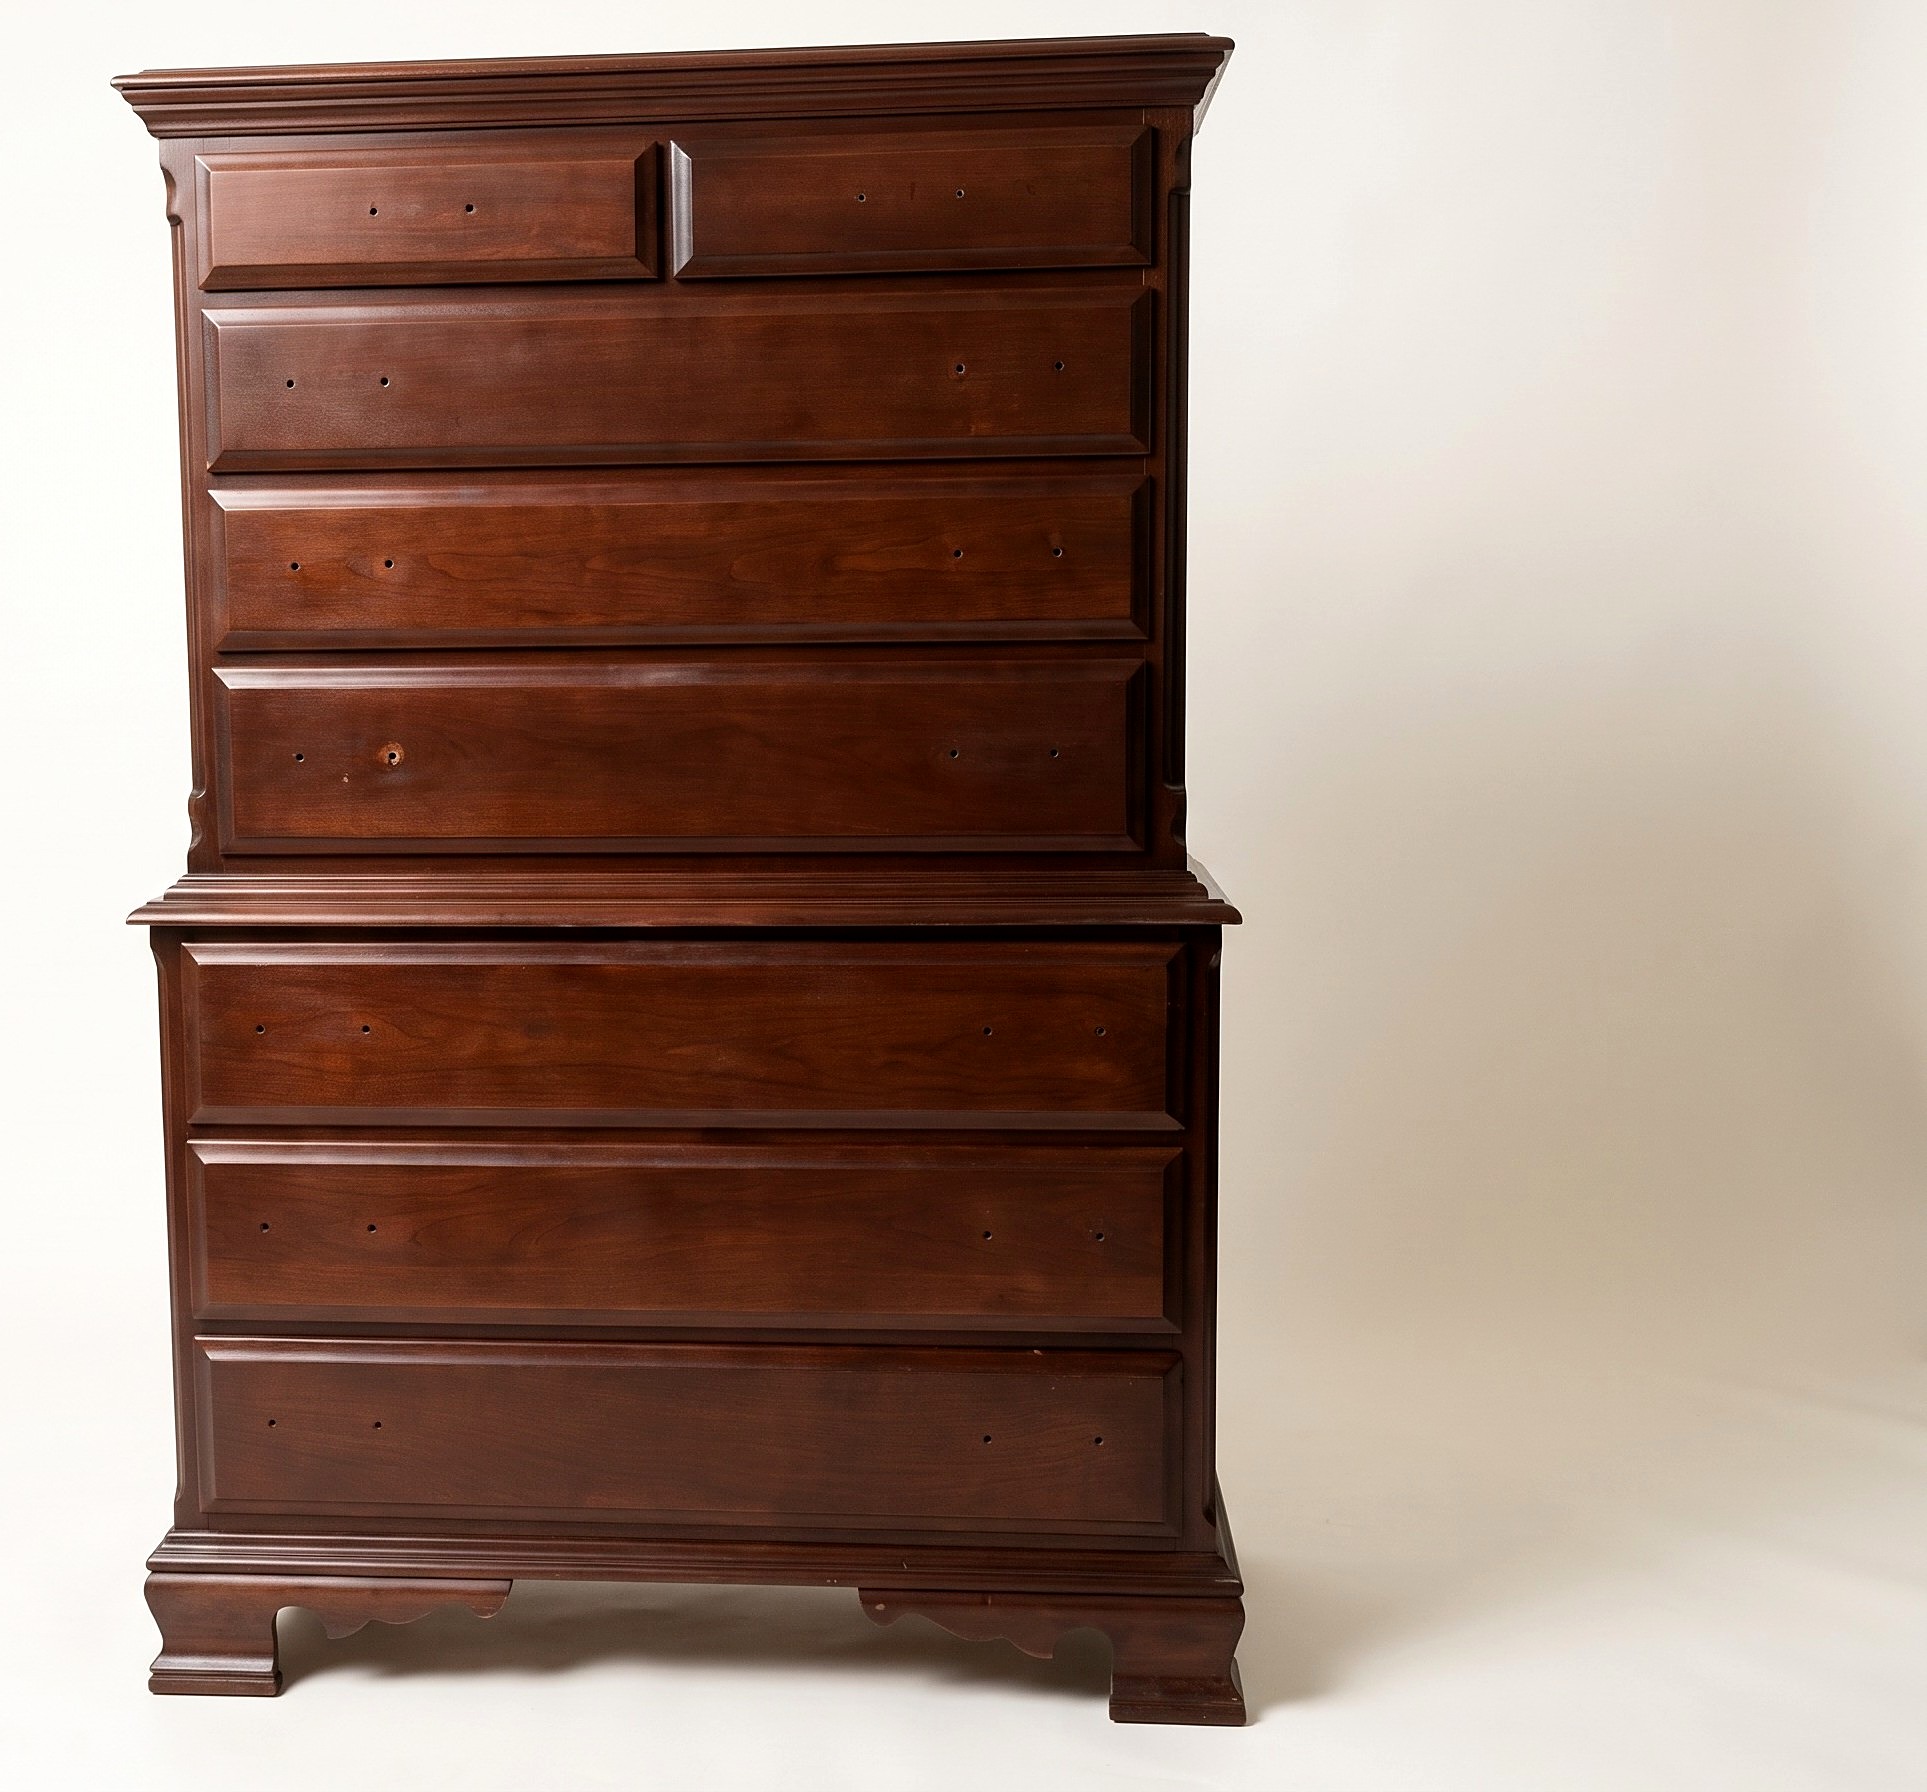
The Piece
- Start with a structurally sound wooden dresser needing only cosmetic updates.
- Before buying, check for loose joints, deep damage, or lingering odors.
- Paying slightly more for a damage-free piece saves days of repairs.
The Target Look
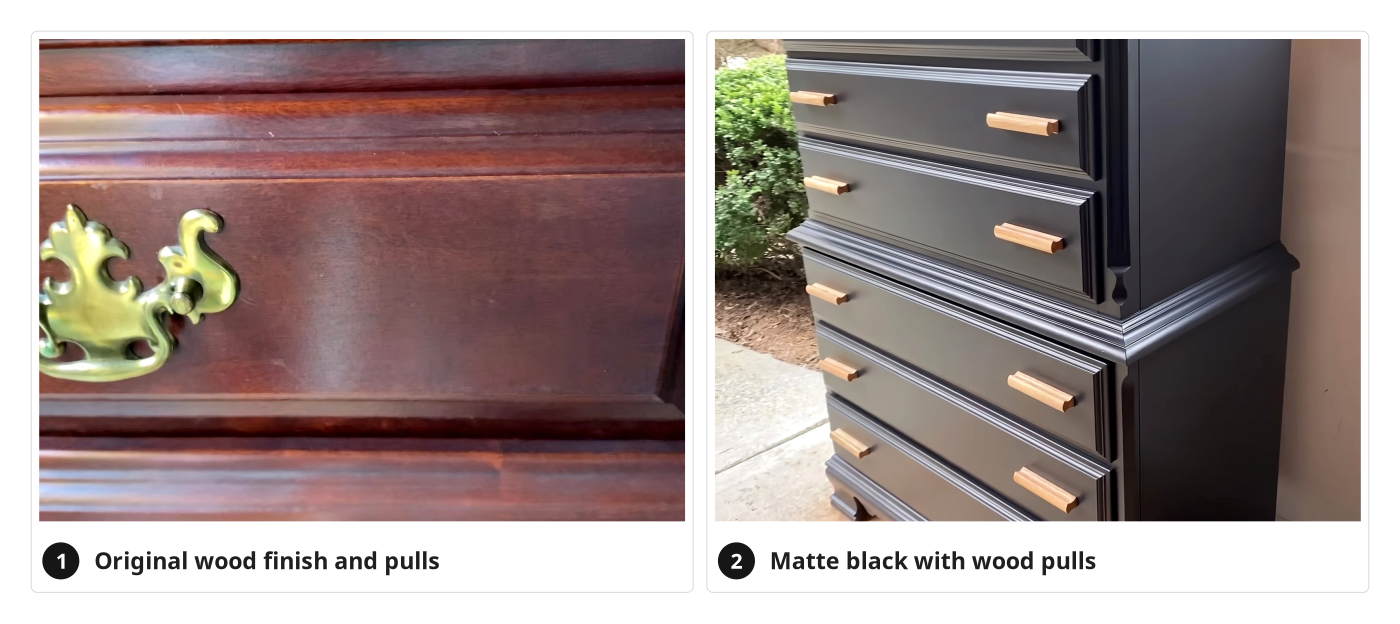
- Create a smooth, streak-free matte black finish with modern wood pulls.
- Acrylic-based satin paint under matte polyurethane hides minor wood flaws and resists streaks.
What It Takes
- Scuff sand by hand, brush details, foam roll flats, and wipe topcoat.
- Plan four hours: one hour each for prep, two paint coats, and sealing.
What Decides Success
- Use washable acrylic-based paint so water-based topcoat never reactivates the dark pigment.
- Avoid chalk paint on black pieces; water-based sealers smear the pigment.
- Drag the foam roller like a sponge, never rolling, to prevent topcoat bubbles.
Health and safety
Sanding and Dust Control
- Wear a dust mask and eye protective equipment while scuff sanding the dresser with the 400-grit sanding sponge.
- Test the existing finish for lead before sanding if the wooden dresser is old or of unknown age.
- Fit the shop vacuum with a fine dust filter so vacuuming does not blow sanding dust back into the air.
Paint and Topcoat Safety
- Wear gloves and eye protective equipment when applying the acrylic paint and water-based polyurethane to avoid skin and eye contact.
- Open windows or run an exhaust fan to clear vapors while brushing and rolling the paint and matte topcoat.
- Wash your hands thoroughly after handling tack cloths, acrylic paint, or water-based polyurethane.
Electrical and Slip Prevention
- Unplug the shop vacuum and move its cord away before cleaning the sanded dresser with dish soap and water.
- Wipe up any soapy water drips on the floor right away to prevent slips while working around the dresser.
Dresser Handling and Hardware
- Remove all drawers before moving the wooden dresser to lighten the load and keep drawers from sliding onto your feet.
- Keep your free hand clear of the screwdriver tip when removing old hardware and installing the new wooden drawer pulls.
- Anchor the finished dresser to the wall so it cannot tip forward when the drawers are pulled open.
The piece & its condition
- Outdated vintage drawer pulls that do not match a modern aesthetic
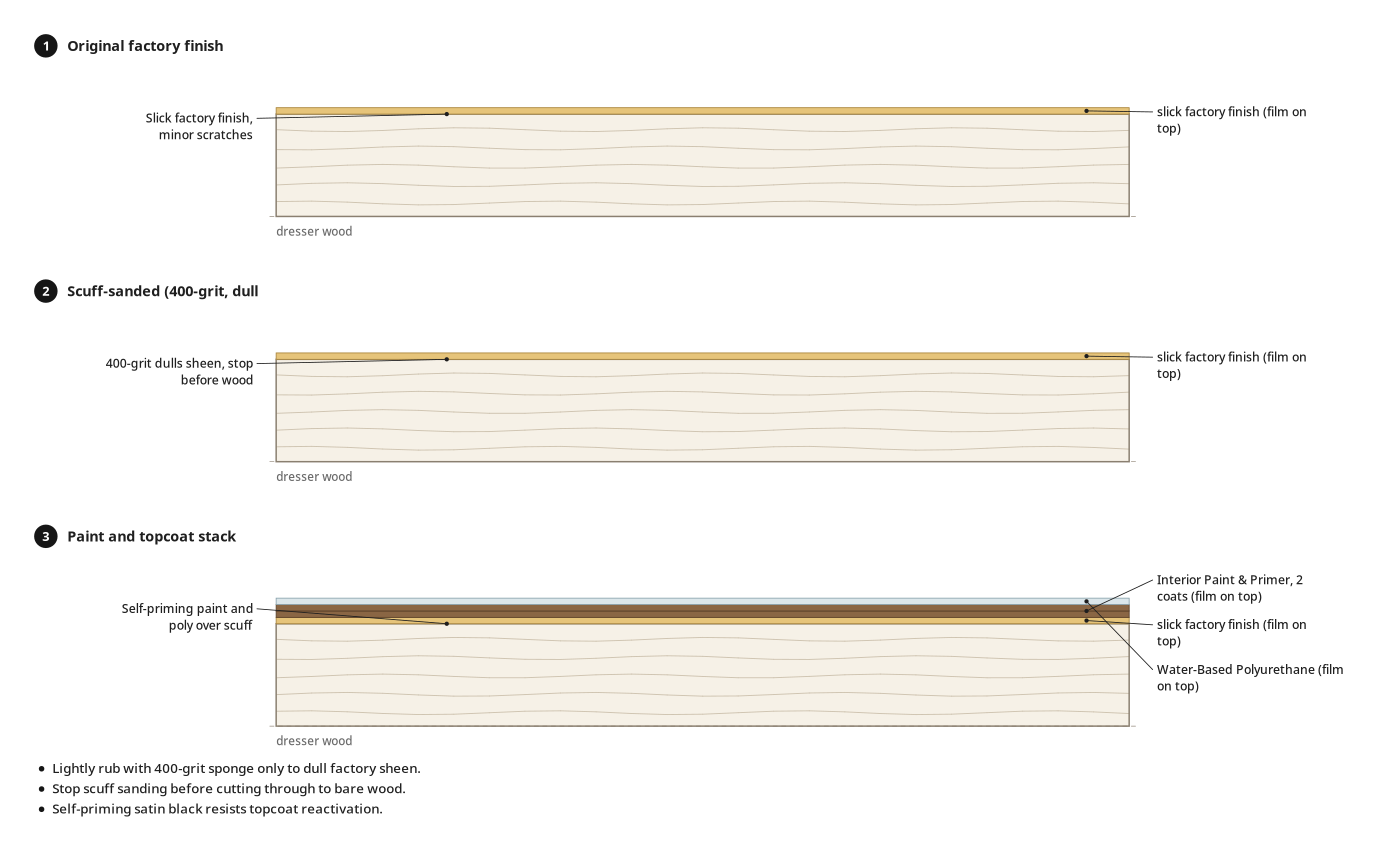
- Slick factory finish needing scuff sanding for paint adhesion
- Minor surface scratches and old hardware impressions in the wood
- Surface dust and grime in the grooves and details
Tools
- Screwdriver
- Sanding sponge (400-grit)
- Shop vacuum (optional)
- Paint brush (Medium, stiff-bristled)
- Foam roller (High-density, Whizz)
- Paint tray
Materials
- Dish soap
- Tack cloths (HDX)
- Interior Paint & Primer (1 quart, Acrylic-based, HGTV Home by Sherwin Williams, Ovation Plus, Satin finish, Color: Caviar)
- Water-Based Polyurethane (Varathane, Ultimate, Crystal Clear Matte)
- Drawer Pulls (10, Wood)
Hardware
| Hardware | Size | Count | Used in steps |
|---|---|---|---|
| Mounting screws | 5 |
Finishes & supplies, in the order they go on
| Product | What it does | Mix & coats | Dry time | Applied with |
|---|---|---|---|---|
| 400-grit sanding sponge | Scuff factory finish so paint adheres without stripping | Hand | ||
| Dish soap | Wash away sanding dust and surface grime | Mixed with water (exact ratio not stated) | Until completely dry before tack cloth | Cloth |
| Tack cloths | Lift remaining fine dust particles before painting | Hand with very light pressure | ||
| Interior Paint & Primer | Self-priming, washable black finish that resists topcoat reactivation | Undiluted, 2 coats | Not stated in sources; wait until dry between coats | Medium stiff-bristled paint brush and Whizz high-density foam roller |
| Water-Based Polyurethane | Seal black paint with a forgiving, streak-free matte topcoat | Undiluted, 1 coats | Not stated in sources; dries clear from a milky state | Whizz high-density foam roller (wiped, not rolled) and paint brush |
Before you start
Workspace
- Lay paper or a drop cloth under the dresser to catch drips.
- Sweep around the base so floor dust does not contaminate your brush.
- Work in cool conditions when possible to extend paint open time.
Disassembly and Setup
- Pull drawers out slightly to paint vertically, or remove them.
- Keep extra high-density foam rollers and a separate small brush for the feet.
Test First
- Practice the foam roller wipe on a side panel before sealing the top.
Step by step
Step 1: Prepare the Dresser
Dresser stripped of hardware, scuff-sanded, washed, and dust-free.
You'll need: Screwdriver, Sanding sponge, Shop vacuum, Dish soap, Tack cloths
- 1.1 Remove Old Hardware
- Unscrew original drawer pulls and hardware with a screwdriver.
- Store vintage pulls and screws together for future projects or resale.
- 1.2 Scuff Sand the Surface
- Lightly rub the dresser and drawer fronts with a 400-grit sanding sponge.
- Scuff only enough to dull the factory sheen so paint grips.
- Stop before sanding through to bare wood.
- 1.3 Clean the Dresser
- Vacuum sanding dust from surfaces, grooves, and drawer cavities.
- Wipe the piece with a cloth dampened in dish soap and water.
- Let the wood dry, then glide a tack cloth over every surface.
- Press very lightly with the tack cloth to avoid waxy residue.
Key measurements
- 400-grit sanding sponge
- Tip: Save vintage hardware for future flips or resale.
- Tip: Reuse tack cloths across projects until they lose tack.
- Heads up: Pressing hard with a tack cloth leaves wax on the wood, ruining paint adhesion.
Before you move on: Check top and grooves with a clean hand for zero dust or sticky tack-cloth residue.
Step 2: Apply First Coat of Paint
Drawer fronts, sides, and frame have a smooth, even first coat of black paint.
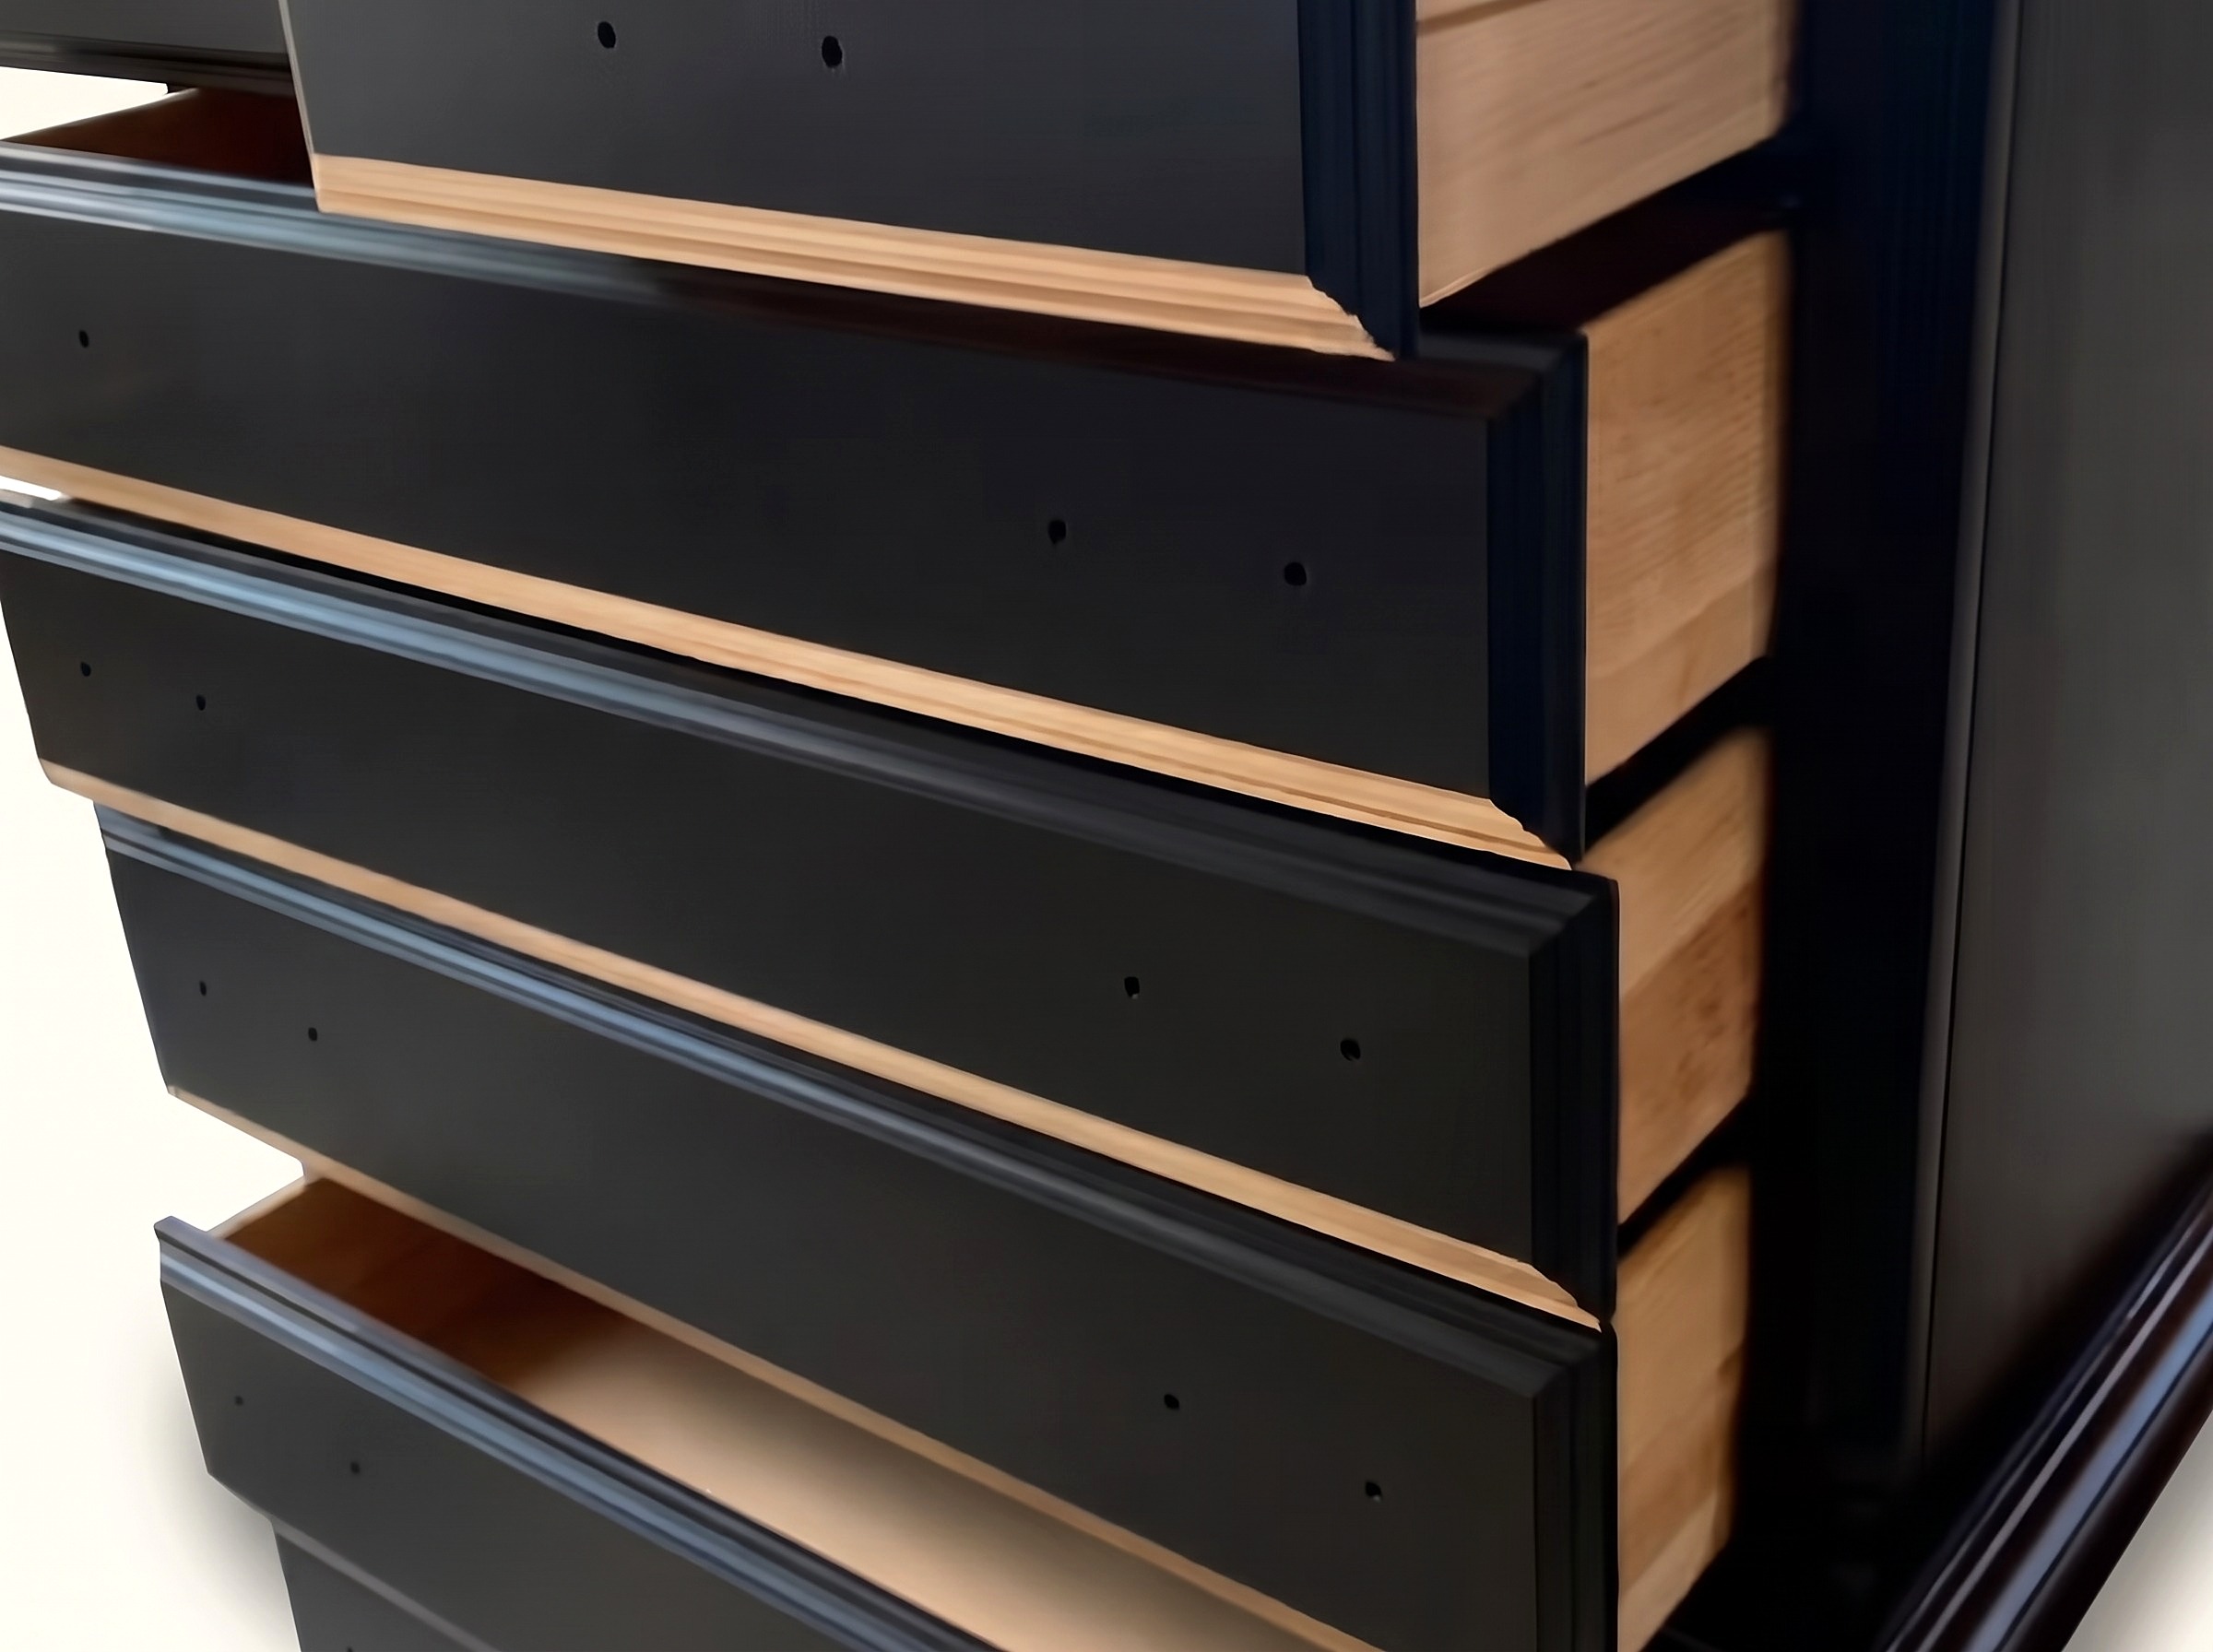
You'll need: Paint brush, Foam roller, Paint tray, Interior Paint & Primer
- 2.1 Introduce Paint and Tools
- Pour acrylic-based satin black paint in a clean plastic container or paint tray.
- Pick a medium stiff-bristled detail brush and a dry high-density foam roller.
- Skip primer: acrylic-based paint adheres directly to scuffed factory finishes.
- 2.2 Paint the Drawer Fronts
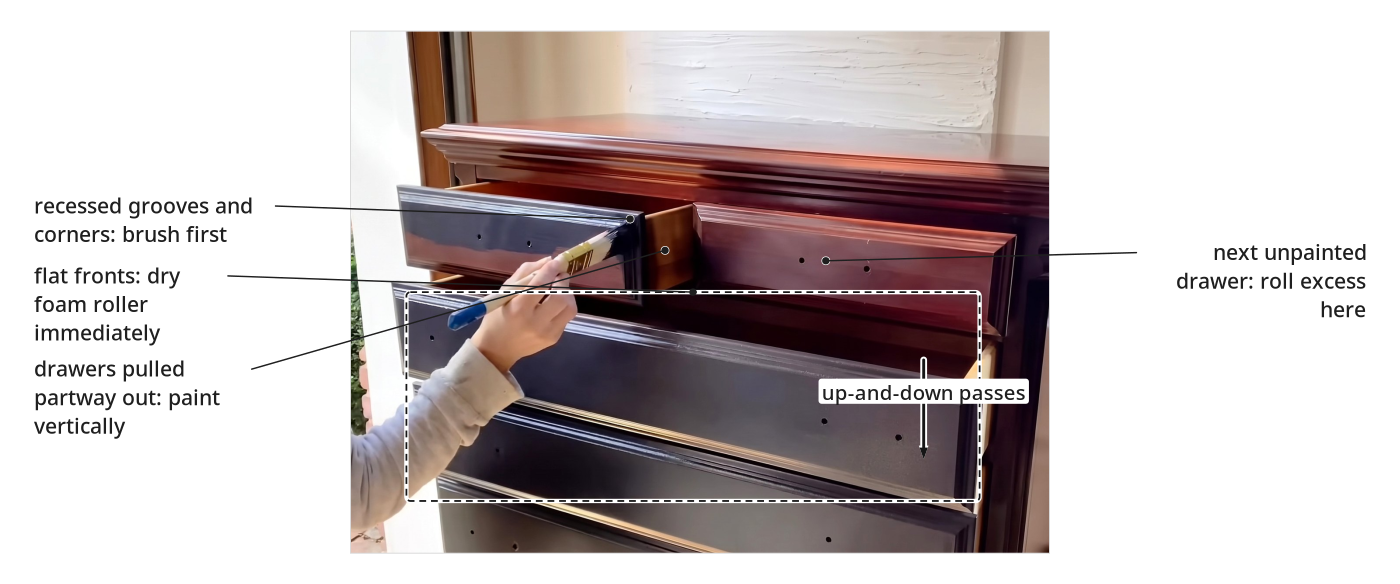
- Pull drawers partway out to paint vertically, or set flat on a worktable.
- Brush paint into recessed grooves, corners, and detailed edges first.
- Roll over wet paint immediately with the dry foam roller.
- Use light pressure in continuous up-and-down passes to erase brush marks.
- 2.3 Paint the Dresser Frame
- Brush paint on the frame and sides in sections; roll smooth immediately.
- Roll excess onto the next unpainted drawer or swap in a dry roller.
- Paint bottom feet last with a separate small brush to avoid floor dust.
Key measurements
- 1 quart Interior Paint & Primer (Satin, Caviar)
- 1st coat
- Tip: Paint drawers vertically, pulled slightly out in the frame, so airborne dust settles less than on flat surfaces.
- Tip: Unload an oversaturated foam roller with a 5-in-1 tool's curved edge or roll onto the next unpainted surface.
- Tip: Mix a splash of paint conditioner like Floetrol in if painting a large surface in warm weather.
- Heads up: An oversaturated foam roller creates tiny finish air bubbles; switch to a dry roller if bubbles appear.
Before you move on: Check wet paint at an angle so no bubbles or heavy roller lines remain before it sets.
Step 3: Apply Second Coat of Paint
Dresser has full, opaque black coverage with a smooth, brush-free second coat.
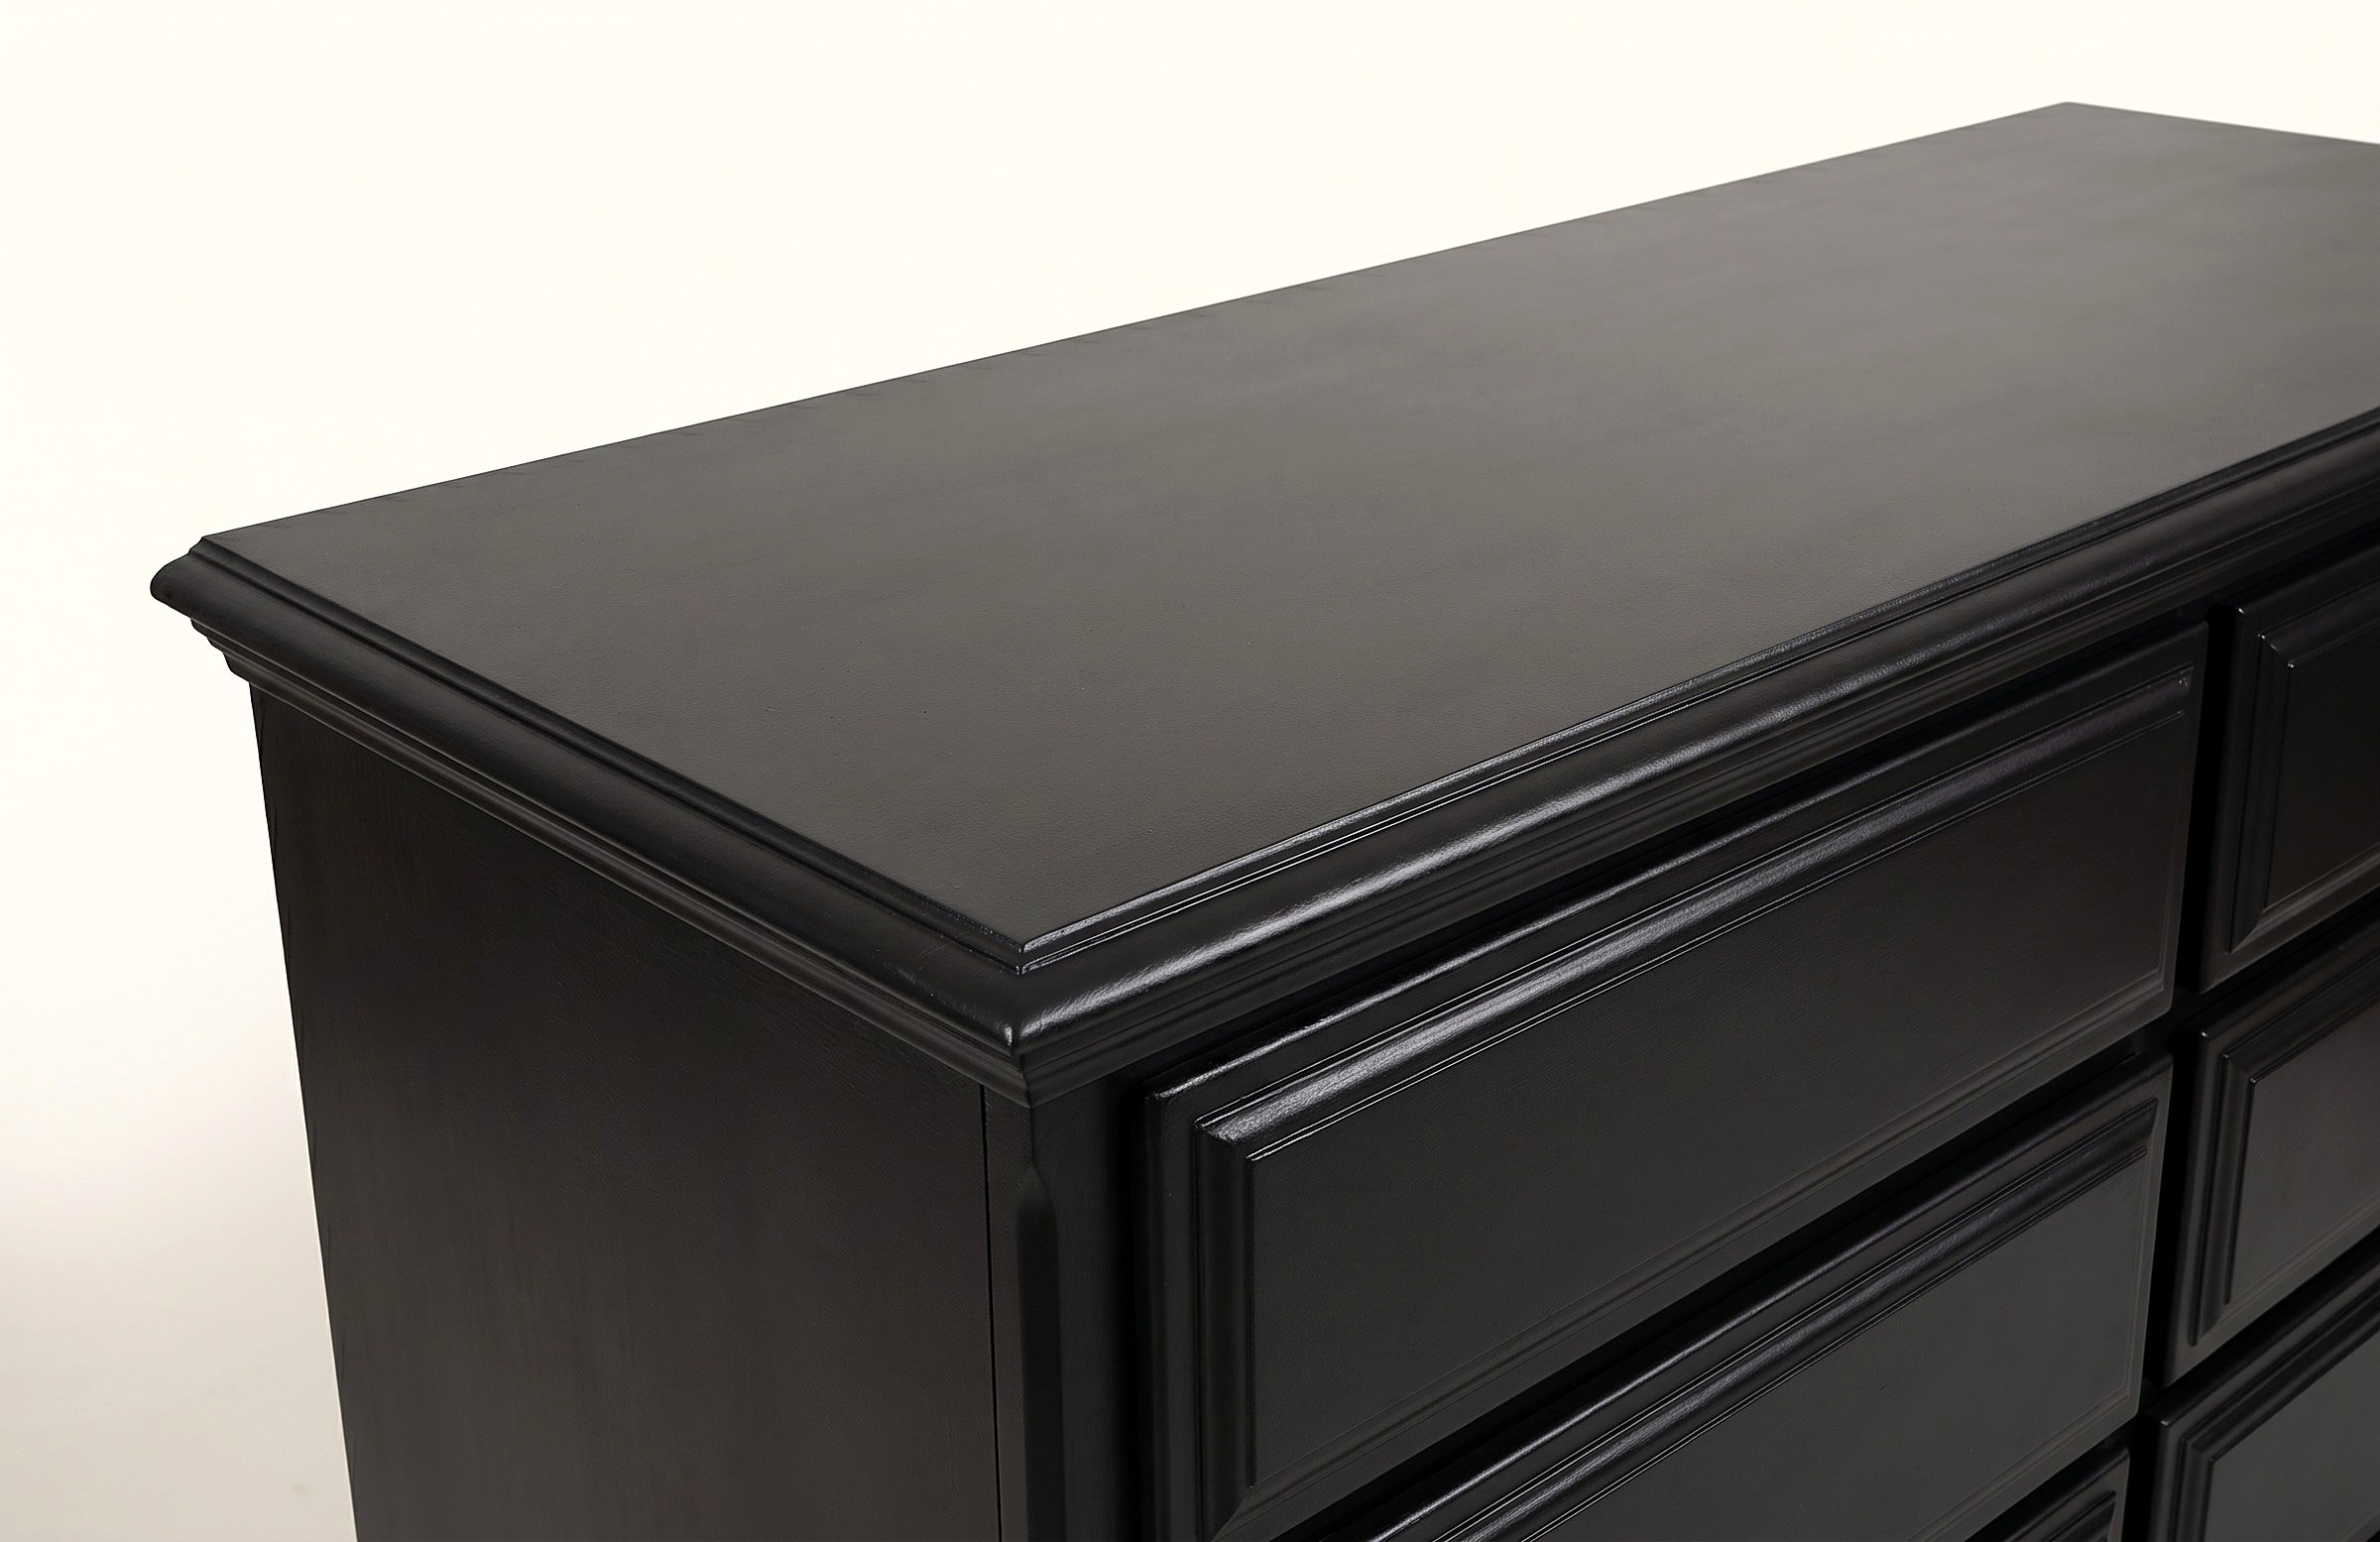
You'll need: Paint brush, Foam roller, Paint tray, Interior Paint & Primer
- 3.1 Brush and Roll the Top Surface
- Wait until the first coat dries before applying the second coat.
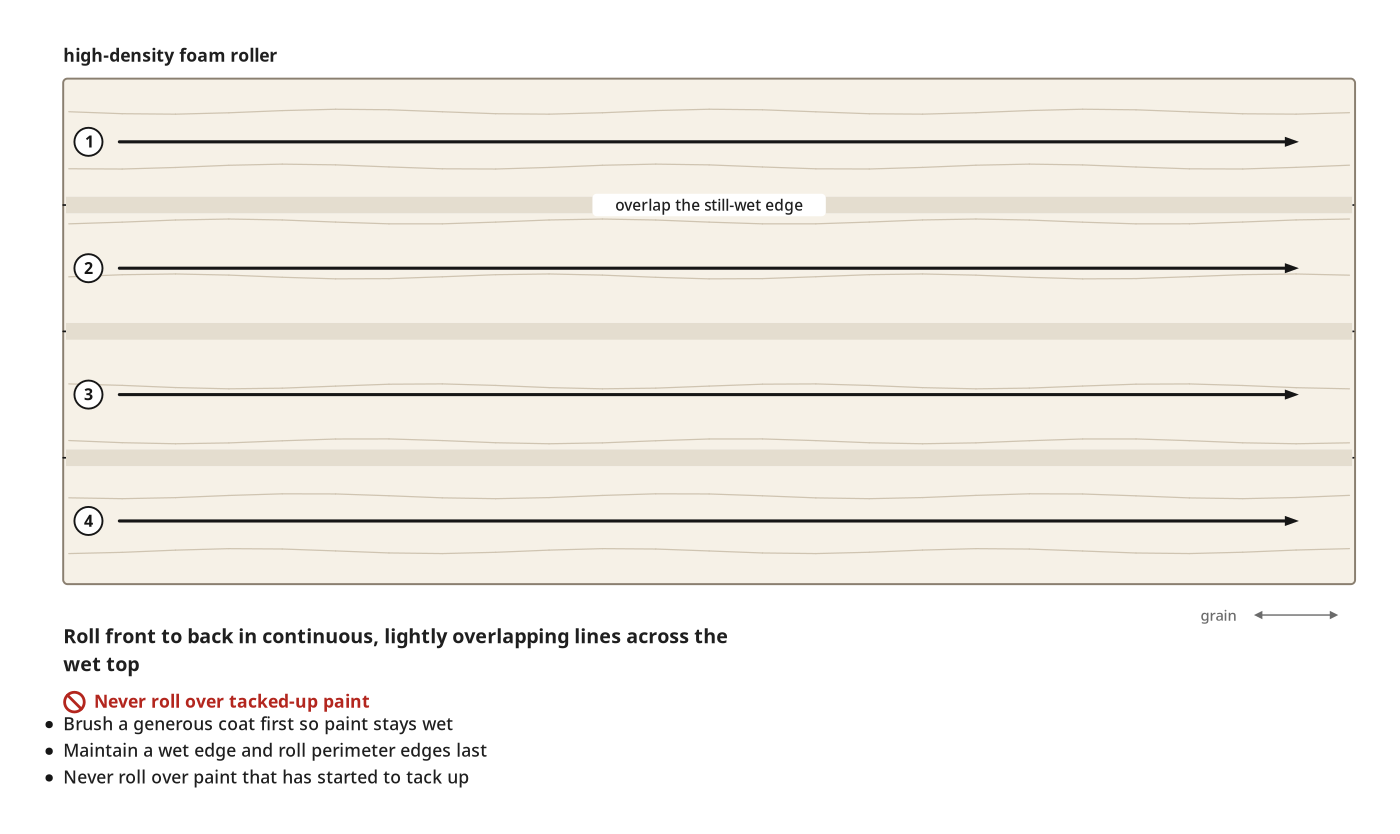
- Brush a generous coat on top so it stays wet while working.
- Roll front to back in continuous, lightly overlapping lines across the top.
- Keep a wet edge across the top and roll perimeter edges last.
- Apply the second coat to drawers and frame the same way.
Key measurements
- 2nd coat
- Tip: If washing brushes or rollers between coats, dry them completely before reuse so trapped water does not streak the black paint.
- Heads up: Do not roll over paint that has started to tack up, or it leaves permanent texture.
Before you move on: Let the second coat dry completely until the surface looks uniformly smooth and flat, not blotchy.
Step 4: Apply the Topcoat
Crystal-clear matte polyurethane topcoat seals the black paint without streaks or bubbles.
You'll need: Foam roller, Paint brush, Paint tray, Water-Based Polyurethane
- 4.1 Prepare and Apply Topcoat to Drawers
- Pour matte water-based polyurethane on a clean plastic plate or paint tray.
- Dip a clean foam roller's end in the topcoat until damp.
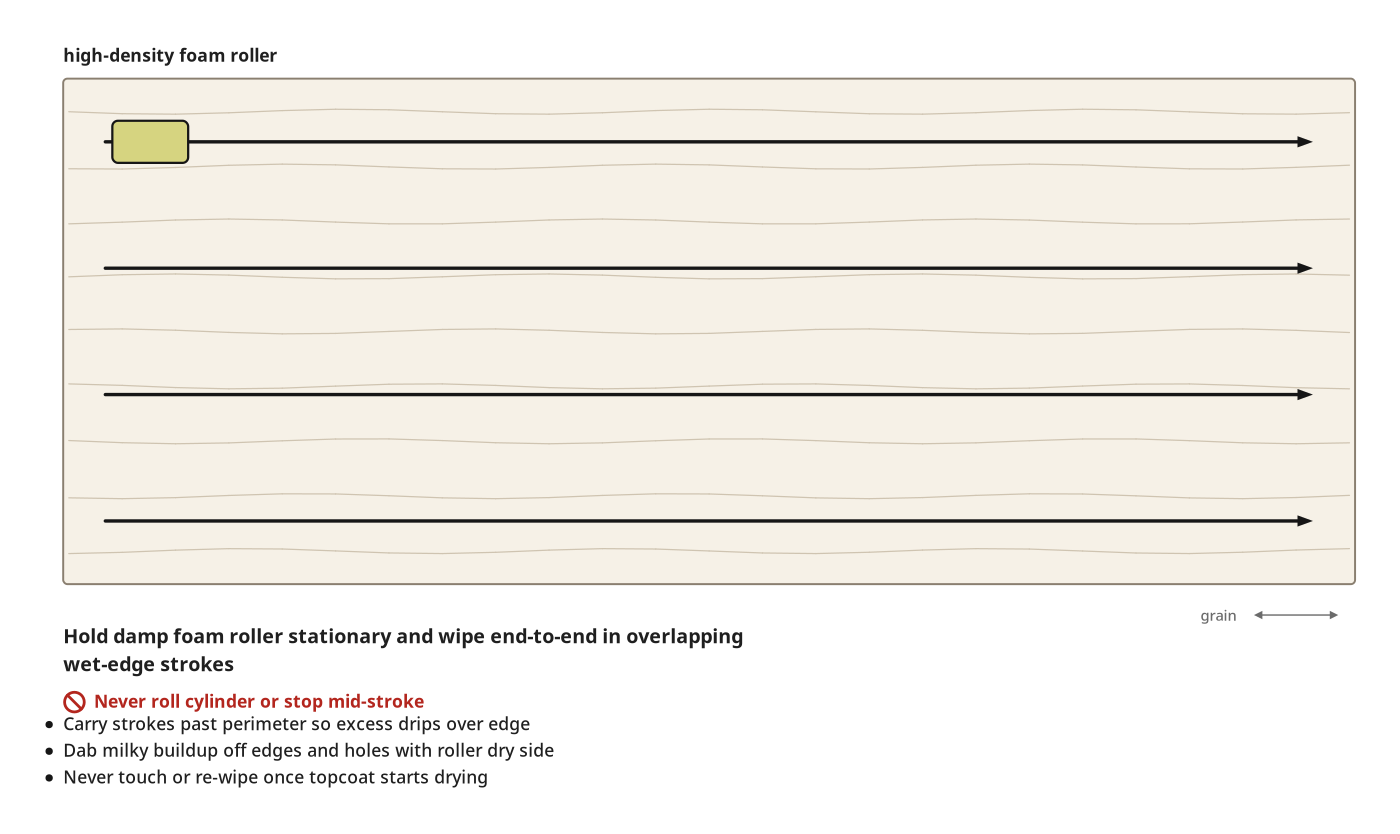
- Hold the roller stationary and wipe across the drawer in one stroke.
- Do not roll the cylinder; spinning whips bubbles into water-based topcoats.
- Dab milky buildup off edges or holes with the roller's dry side.
- 4.2 Apply Topcoat to the Dresser Top
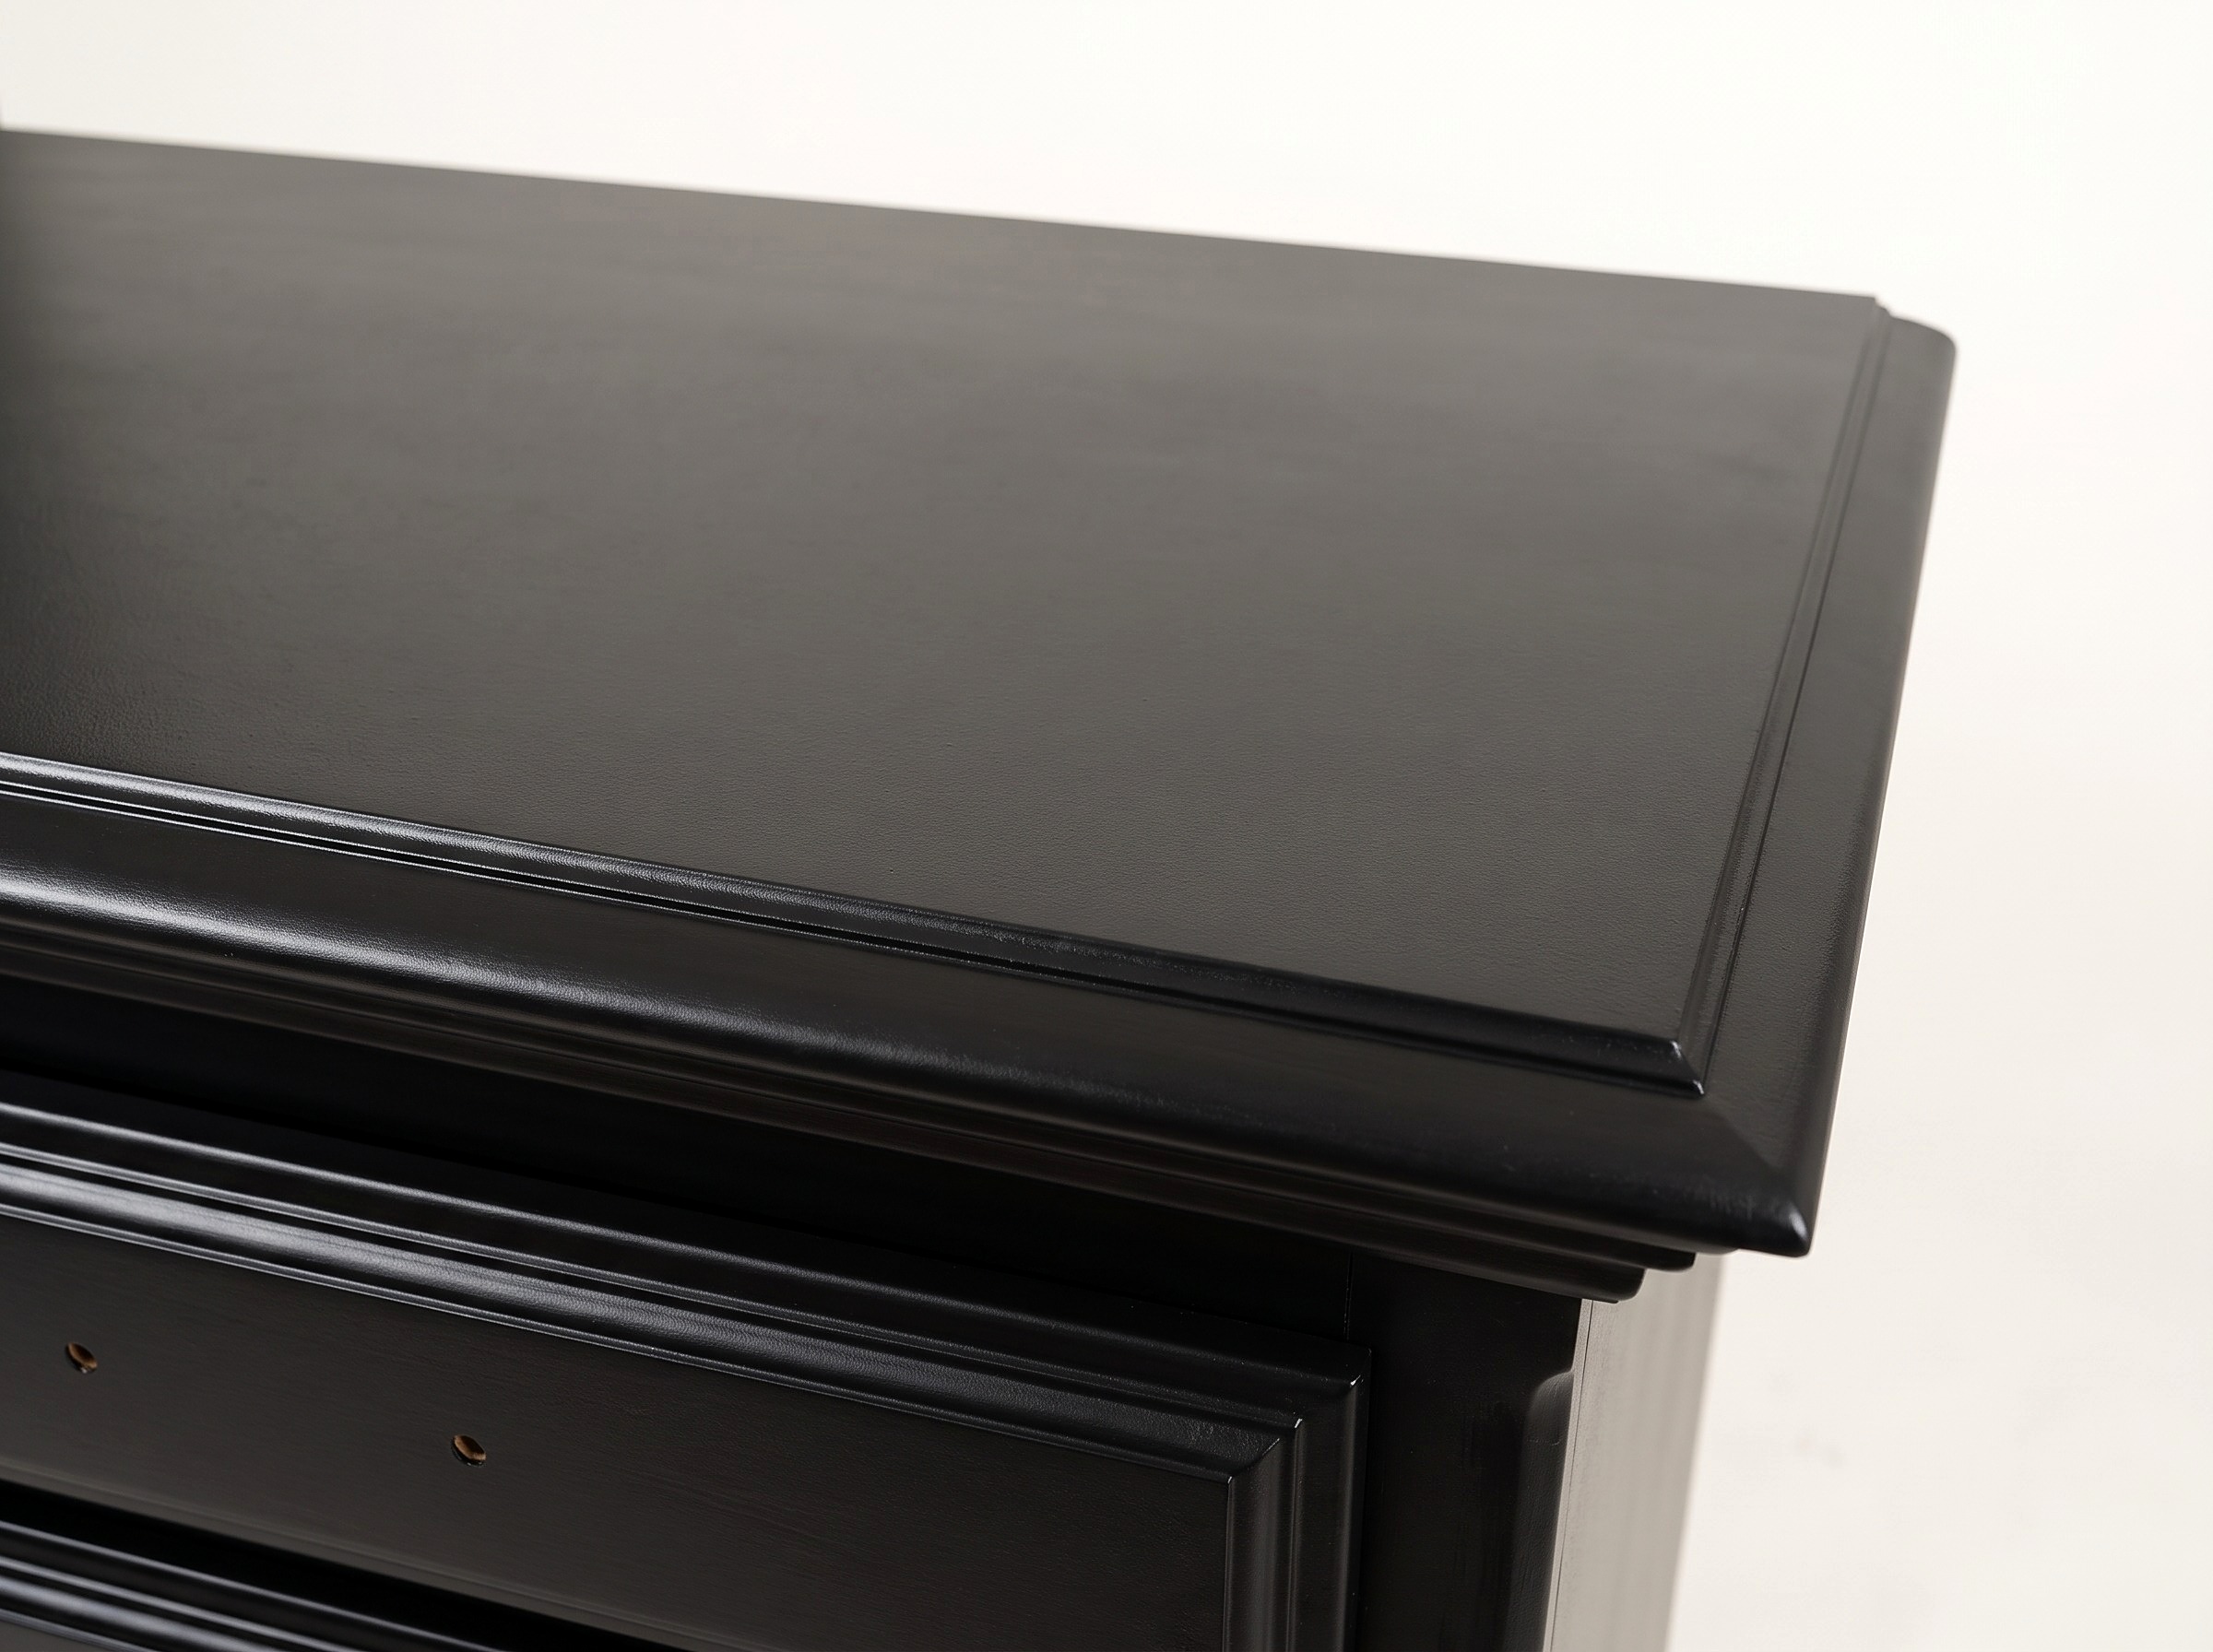
- Wipe topcoat across the dresser top in straight, continuous end-to-end lines.
- Work quickly so each new pass overlaps the previous pass's wet edge.
- Let excess topcoat drip over the perimeter rather than stopping mid-stroke on top.
- Immediately wipe and dab side edges clean; leave the top untouched.
Key measurements
- 1 coat Water-Based Polyurethane (Matte)
- Tip: Matte polyurethane goes on milky and streaky over black paint, leveling out crystal clear as it dries.
- Tip: A flat paint pad, car wax sponge, or foam brush snugly wrapped in a thin nylon stocking also wipes topcoat without bubbles.
- Heads up: Never touch or re-wipe the top once polyurethane starts drying, or white streaks lock into the finish.
Before you move on: Check drawer edges and hardware holes twice while wet; dab away milky drips before moving on.
Step 5: Install New Hardware
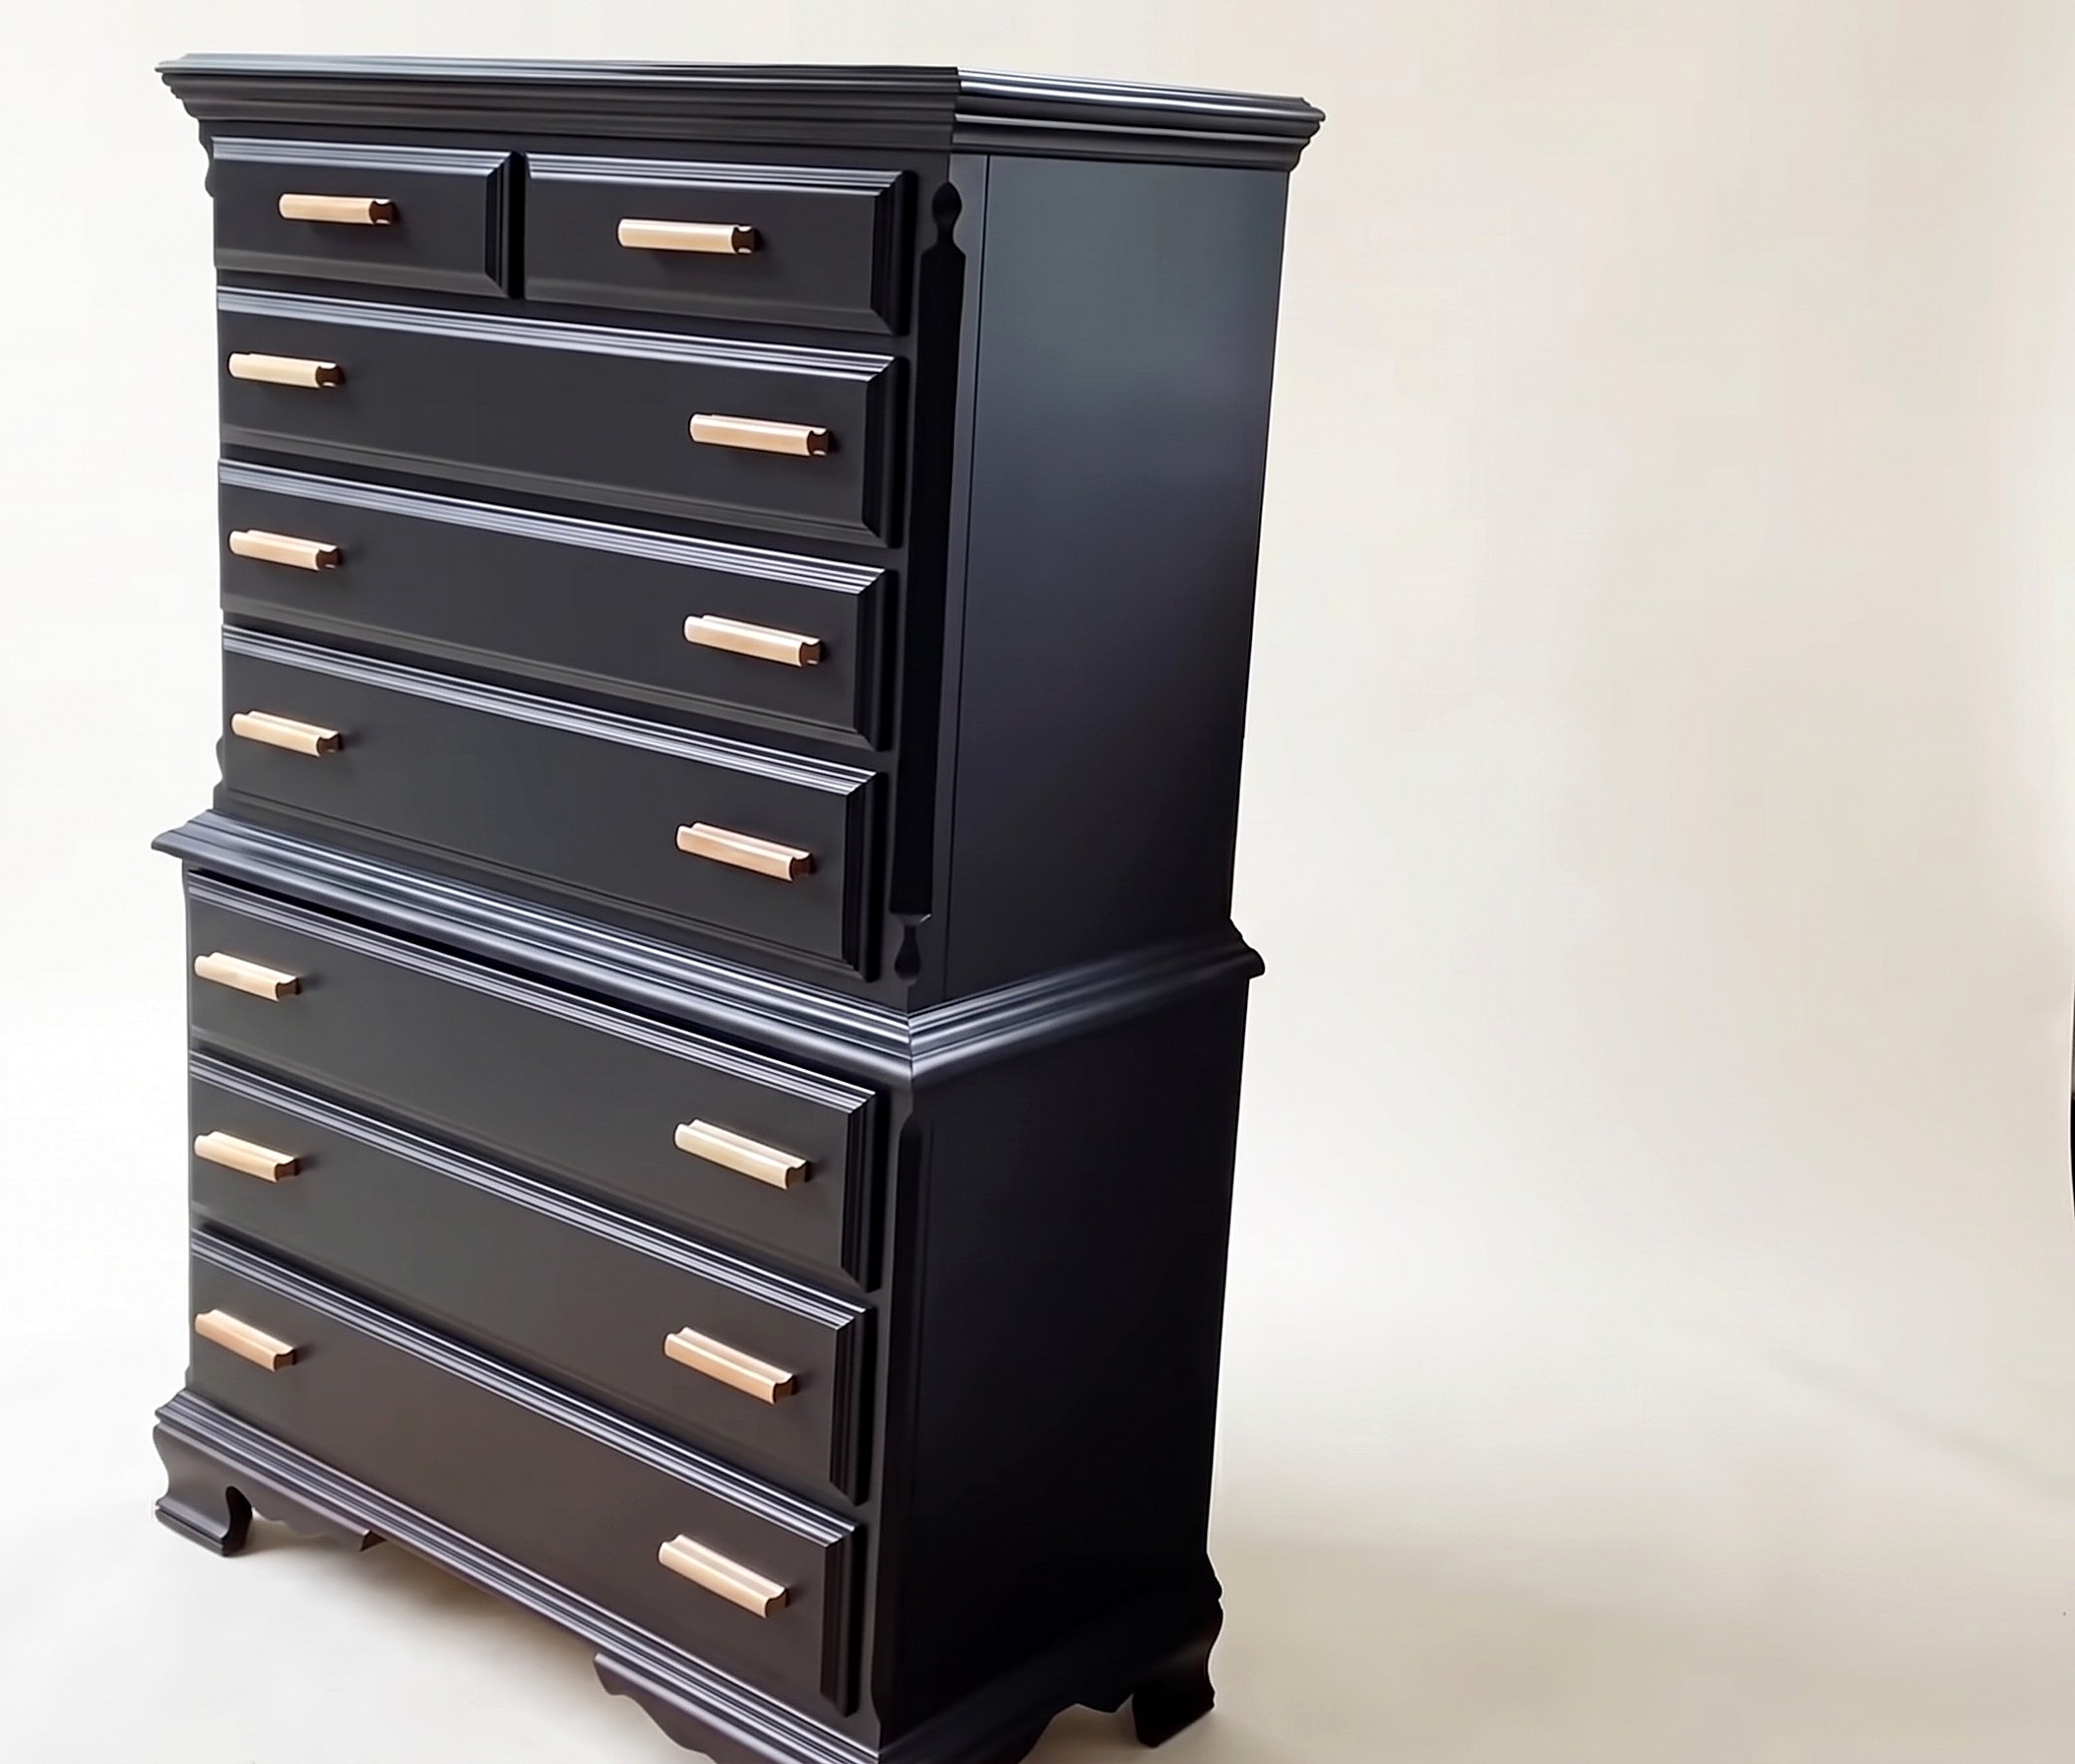
Modern solid wood pulls mounted on all drawers; dresser ready to use.
You'll need: Screwdriver, Drawer Pulls, Mounting screws
- 5.1 Unbox and Attach New Pulls
- Wait until the matte polyurethane topcoat dries clear and touch-dry.
- Align the ten solid wood pulls with the existing drawer-front holes.
- Thread mounting screws from inside each drawer; tighten with a screwdriver.
- Slide drawers back into the dresser frame.
Key measurements
- 10 wooden drawer pulls
- Tip: Hand-snug hardware screws so metal threads do not strip the solid wood pulls.
- Heads up: Do not overtighten hardware on uncured fresh topcoat, or pulls may imprint the finish.
Before you move on: Open and close every drawer; check pulls are tight and level.
Finishing
Cure Time
- Cure times are not stated; follow your polyurethane label.
- Allow 24 hours before light use and 7 to 30 days for full cure.
Care
- Wipe the cured matte surface with a soft damp cloth and mild soap.
- Avoid abrasive scrubbing pads that polish matte polyurethane into shiny spots.
Reassembly
- Slide drawers onto their tracks and check hardware screws stay snug.
Alternatives
- Substitute General Finishes Milk Paint for a similar acrylic-based black finish.
- Or wipe topcoat with a flat paint pad or nylon-wrapped foam brush.
Test it before you call it done
| Check | What you should see | If not |
|---|---|---|
| Inspect flat surfaces in angled light for roller lines or air bubbles. | Uniform, smooth satin-matte black surface mimicking a sprayed finish. | Once dry, lightly scuff with a 400-grit sponge; wipe on a fresh thin coat. |
| Check drawer edges and hardware holes for white or milky pools. | Topcoat dries clear with no thick perimeter drips. | Sand dried drips flat with 400-grit; touch up with a damp foam roller. |
| Test all ten wooden drawer pulls. | Pulls sit flush against drawer fronts without wobbling. | Tighten interior mounting screws with a screwdriver. |
These Specs are built from Black Sheep House's video “Refinishing a Dresser with Black Paint”. Open the Refinishing a Dresser with Black Paint project page.
