Spetz Specs No. 2990: step-by-step craft & decor guide
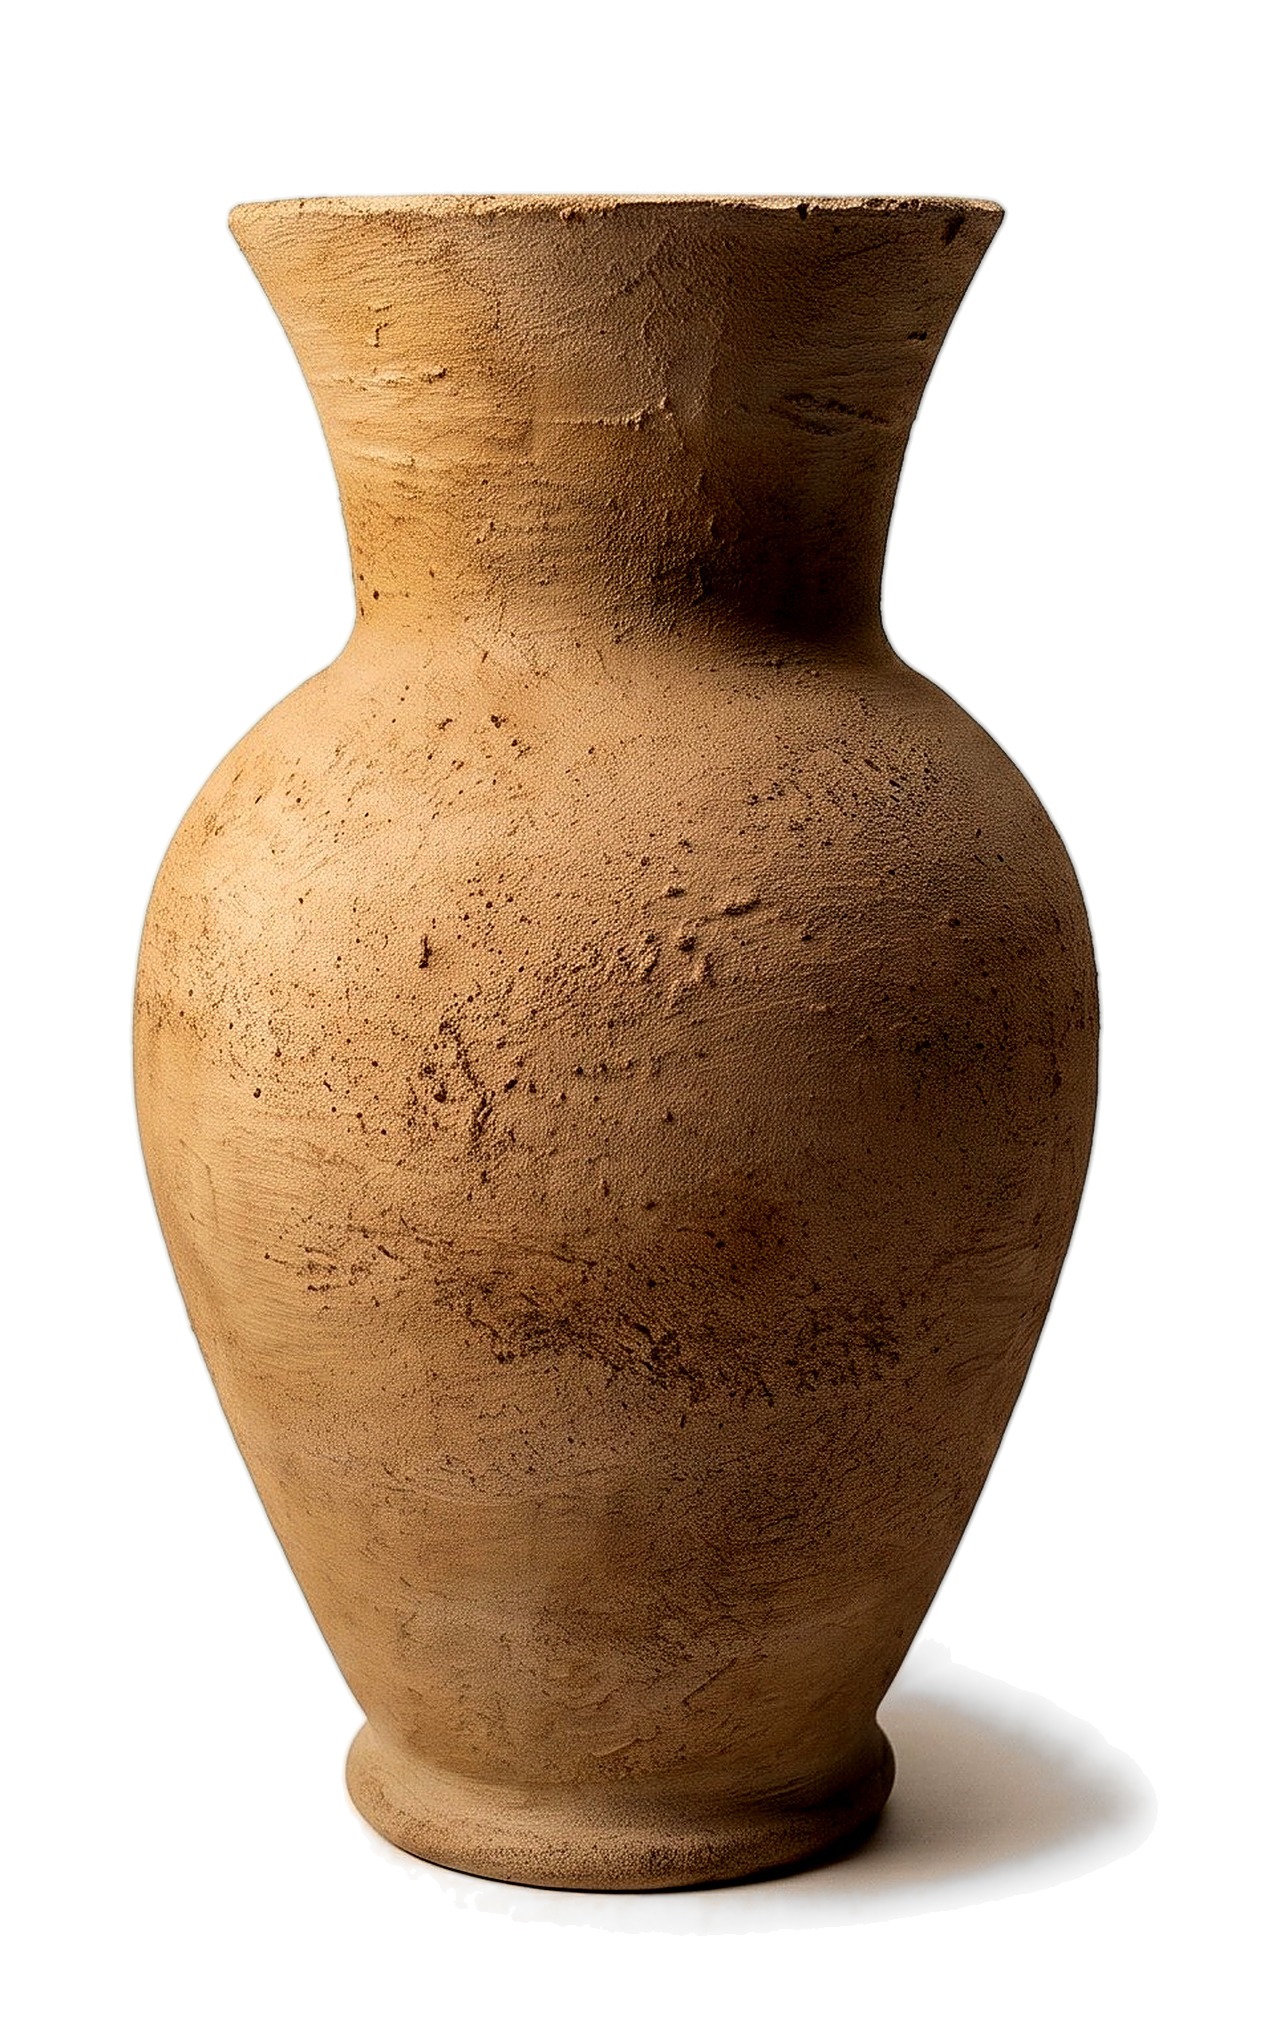
Faux Stone Pottery from Glass Vases
The complete step-by-step guide made from Kathartic Studios's YouTube video, free on Spetz. For the video, a step-by-step player and answers to your questions, see the Faux Stone Pottery from Glass Vases project page.
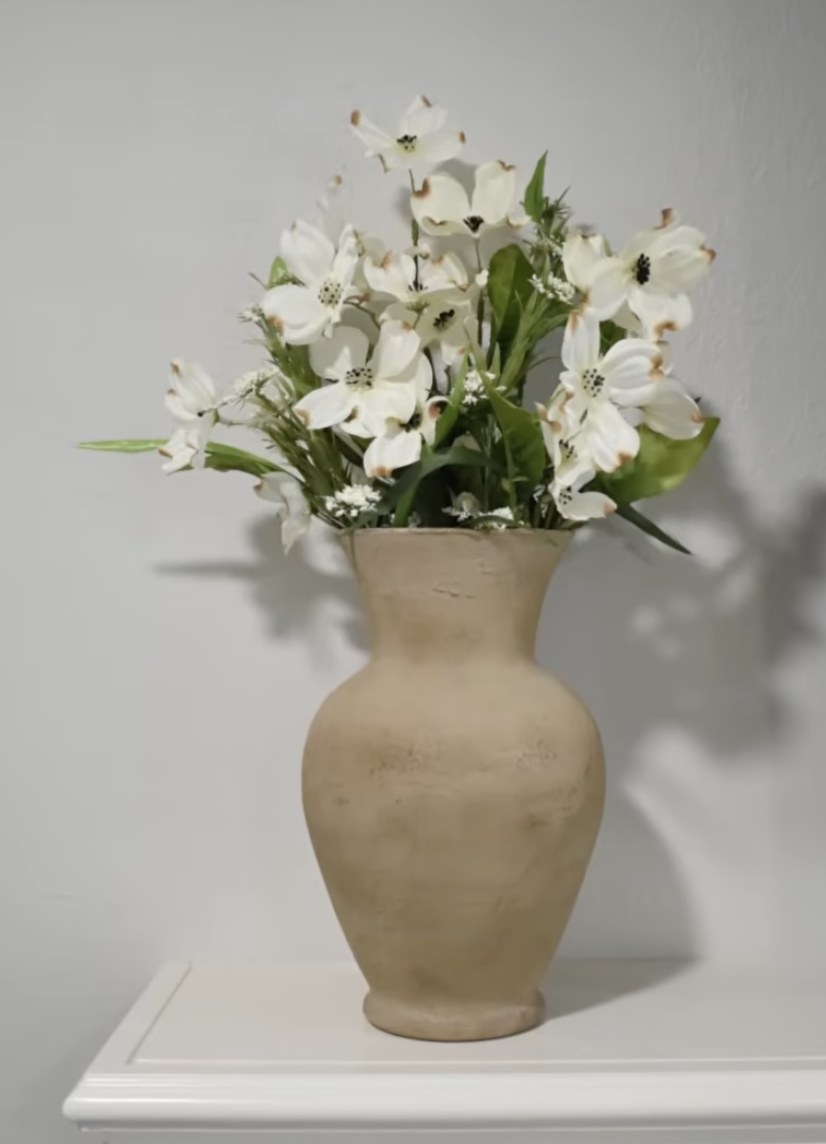
4 steps, 1 parts, 3 tools, 5 materials
Overview
The piece
- Turn two thrifted glass vases into matching faux stone pottery.
- Baking soda and latex paint paste creates matte, clay-like texture.
- Brown furniture wax settles in ridges for aged ceramic patina.
Why make it
- About $3.50 per vase, including thrift glass and pantry supplies.
- Keep the weighty, breakable pottery feel while hiding clear glass.
What it takes
- One afternoon, including two 30-minute flip waits and a 2-hour dry between coats.
- Uses a cup, stirring utensil, round paint brush, paint, baking soda, and wax.
- Rubbing in optional coffee grounds makes hand mess and loose crumbs.
What decides success
- Mix a 50/50 ratio of paint and baking soda into thick paste.
- Brush horizontal strokes around the body for wheel-thrown pottery lines.
- Coat the bottom and inner rim so bare glass never shows.
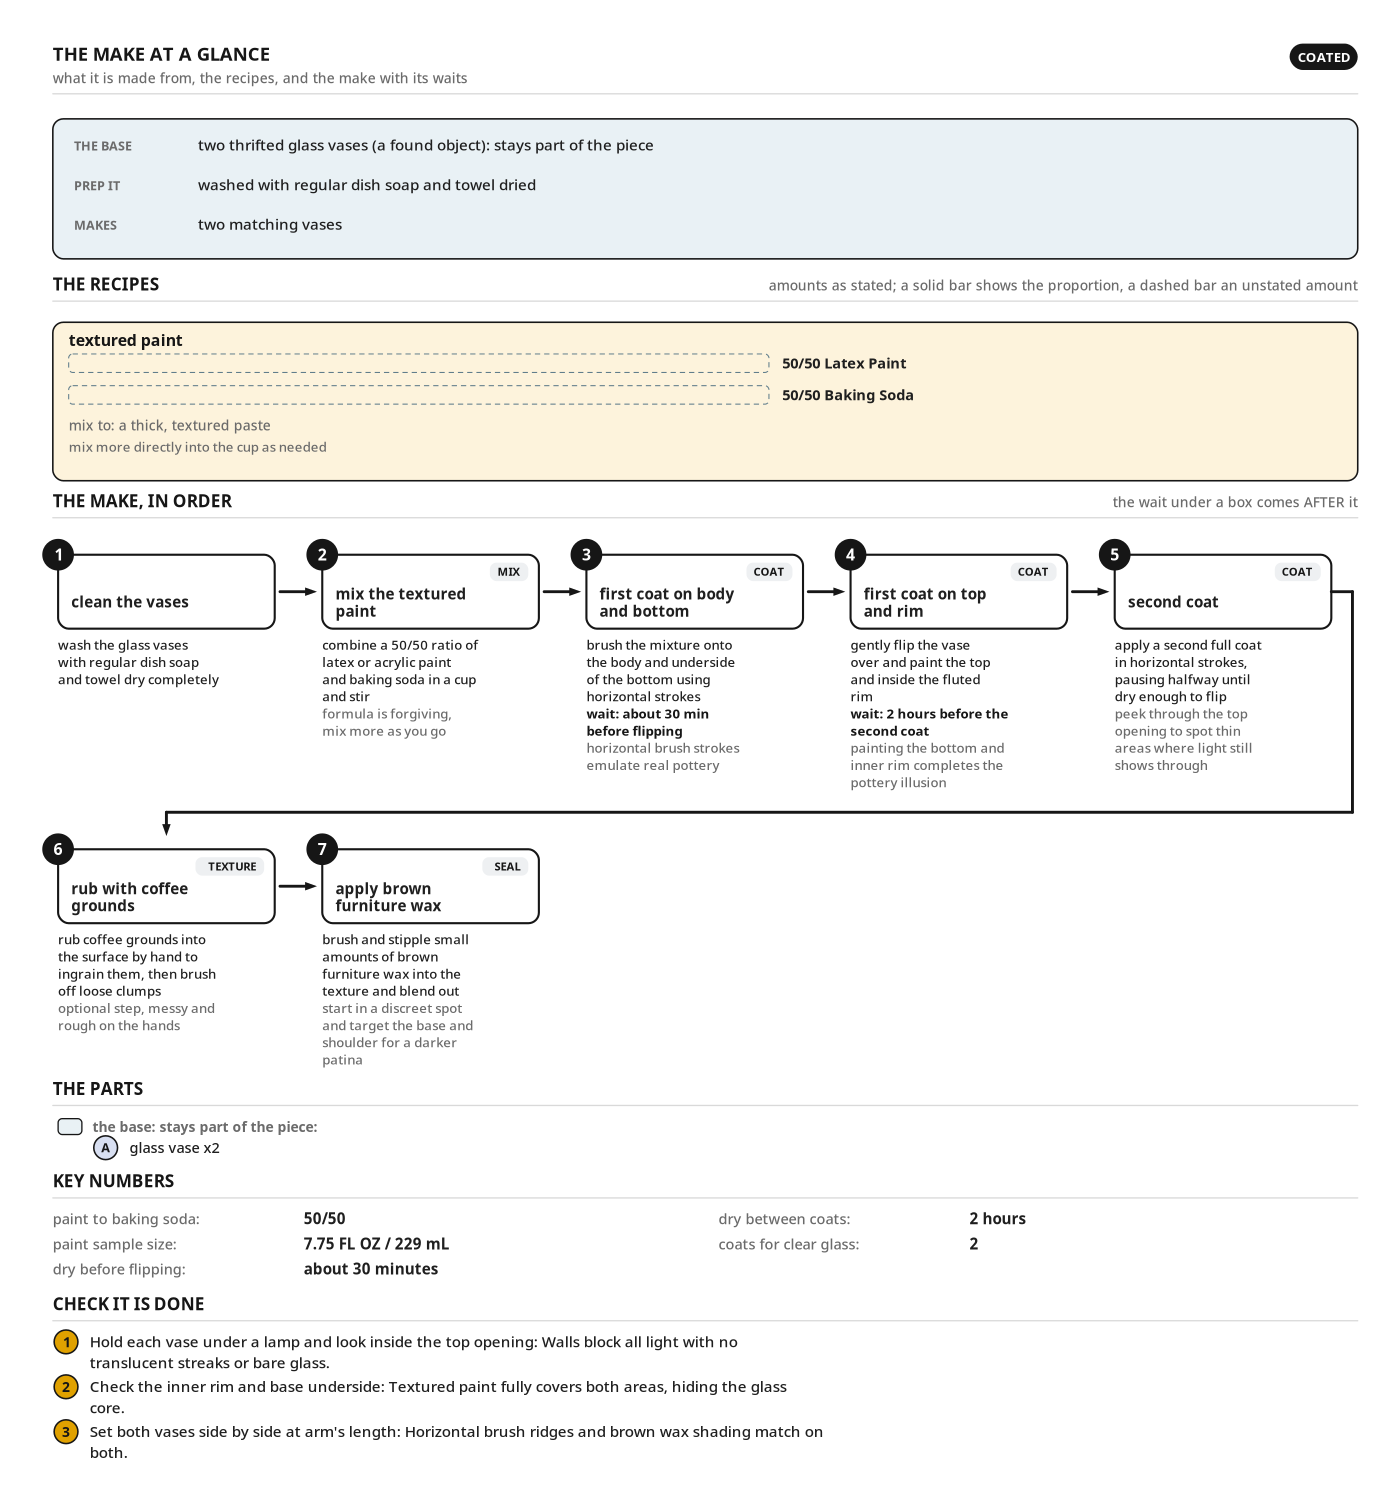
The make at a glance
- Made from: two thrifted glass vases (washed with regular dish soap and towel dried)
- textured paint: 50/50 Latex Paint, 50/50 Baking Soda (a thick, textured paste)
The make, in order
- 1. clean the vases
- 2. mix the textured paint
- 3. first coat on body and bottom, then wait about 30 min before flipping
- 4. first coat on top and rim, then wait 2 hours before the second coat
- 5. second coat
- 6. rub with coffee grounds
- 7. apply brown furniture wax
Health and safety
Glass Vase and Cup Safety
- Inspect thrifted glass vases and the glass mixing cup for hairline cracks or sharp chips before starting work.
- Hold the vase from the inside while painting so wet latex paint does not make the smooth glass slip.
- Work over a stable, covered table to keep the glass vase or mixing cup from shattering if knocked over.
Paint and Furniture Wax
- Apply latex paint and brown furniture wax in a well-ventilated room to avoid breathing concentrated vapors.
- Wear protective gloves when applying brown finishing wax and paint to prevent skin irritation.
- Never reuse the glass mixing cup for food or drink after mixing paint inside it.
- Keep furniture wax and wax-coated brushes or cloths away from heat sources and open flames.
Baking Soda and Coffee Grounds
- Pour the baking soda slowly into the cup so fine alkaline powder does not drift into your eyes or lungs.
- Wear gloves when hand-rubbing dry coffee grounds onto the surface, as the coarse grit scrapes bare skin.
- Clean up scattered coffee grounds and baking soda right away so the grit is not rubbed into your eyes.
Safe Handling and Display
- Use the finished vases only for decoration; latex paint and furniture wax are not safe for food or drink contact.
- Support the glass vase from the bottom when moving it, since textured paint on unprimed glass can peel under your grip.
Set up first
- Choose two thrifted glass vases for a matching pair.
- Cover the work surface to catch paint drips and coffee grounds.
- Wash vases with dish soap and towel dry before pasting.
- Keep the 7.75 fl oz latex paint sample and 1 lb baking soda box handy for batch mixing.
- Allow an afternoon, including two 30-minute flip pauses and a 2-hour dry between coats.
Tools
- Round Paint Brush (Zibra)
- Mixing Cup (glass cup)
- Stirring Utensil (paint brush) (optional)
Materials
- Glass Vases (2)
- Baking Soda (Pure Baking Soda, Arm & Hammer, 1 LB (454g))
- Latex Paint (Paint Sample, Sherwin-Williams, SW9087 Smoky Beige, 7.75 FL OZ / 229 mL)
- Coffee Grounds
- Finishing Wax (furniture wax, Jolie, Brown)
Finishes & supplies, in the order they go on
| Product | What it does | Mix & coats | Dry time | Applied with |
|---|---|---|---|---|
| Baking Soda | Create opaque, stone-like clay texture on clear glass | 50/50 latex paint to baking soda by volume, 2 coats | 30 minutes before flipping; 2 hours between coats | Round Paint Brush |
| Coffee Grounds | Add warm, dirt-like aging in surface pits | 1 coats | Hands | |
| Finishing Wax | Deepen texture ridges and build aged patina at base and shoulder | 1 coats | Round Paint Brush |
Parts
| Part | Name | Qty | Size | Notes |
|---|---|---|---|---|
| A | glass vase | x2 | thrifted matching pair, washed with dish soap and towel dried before painting |
Step by step
Step 1: Mix the Textured Paint
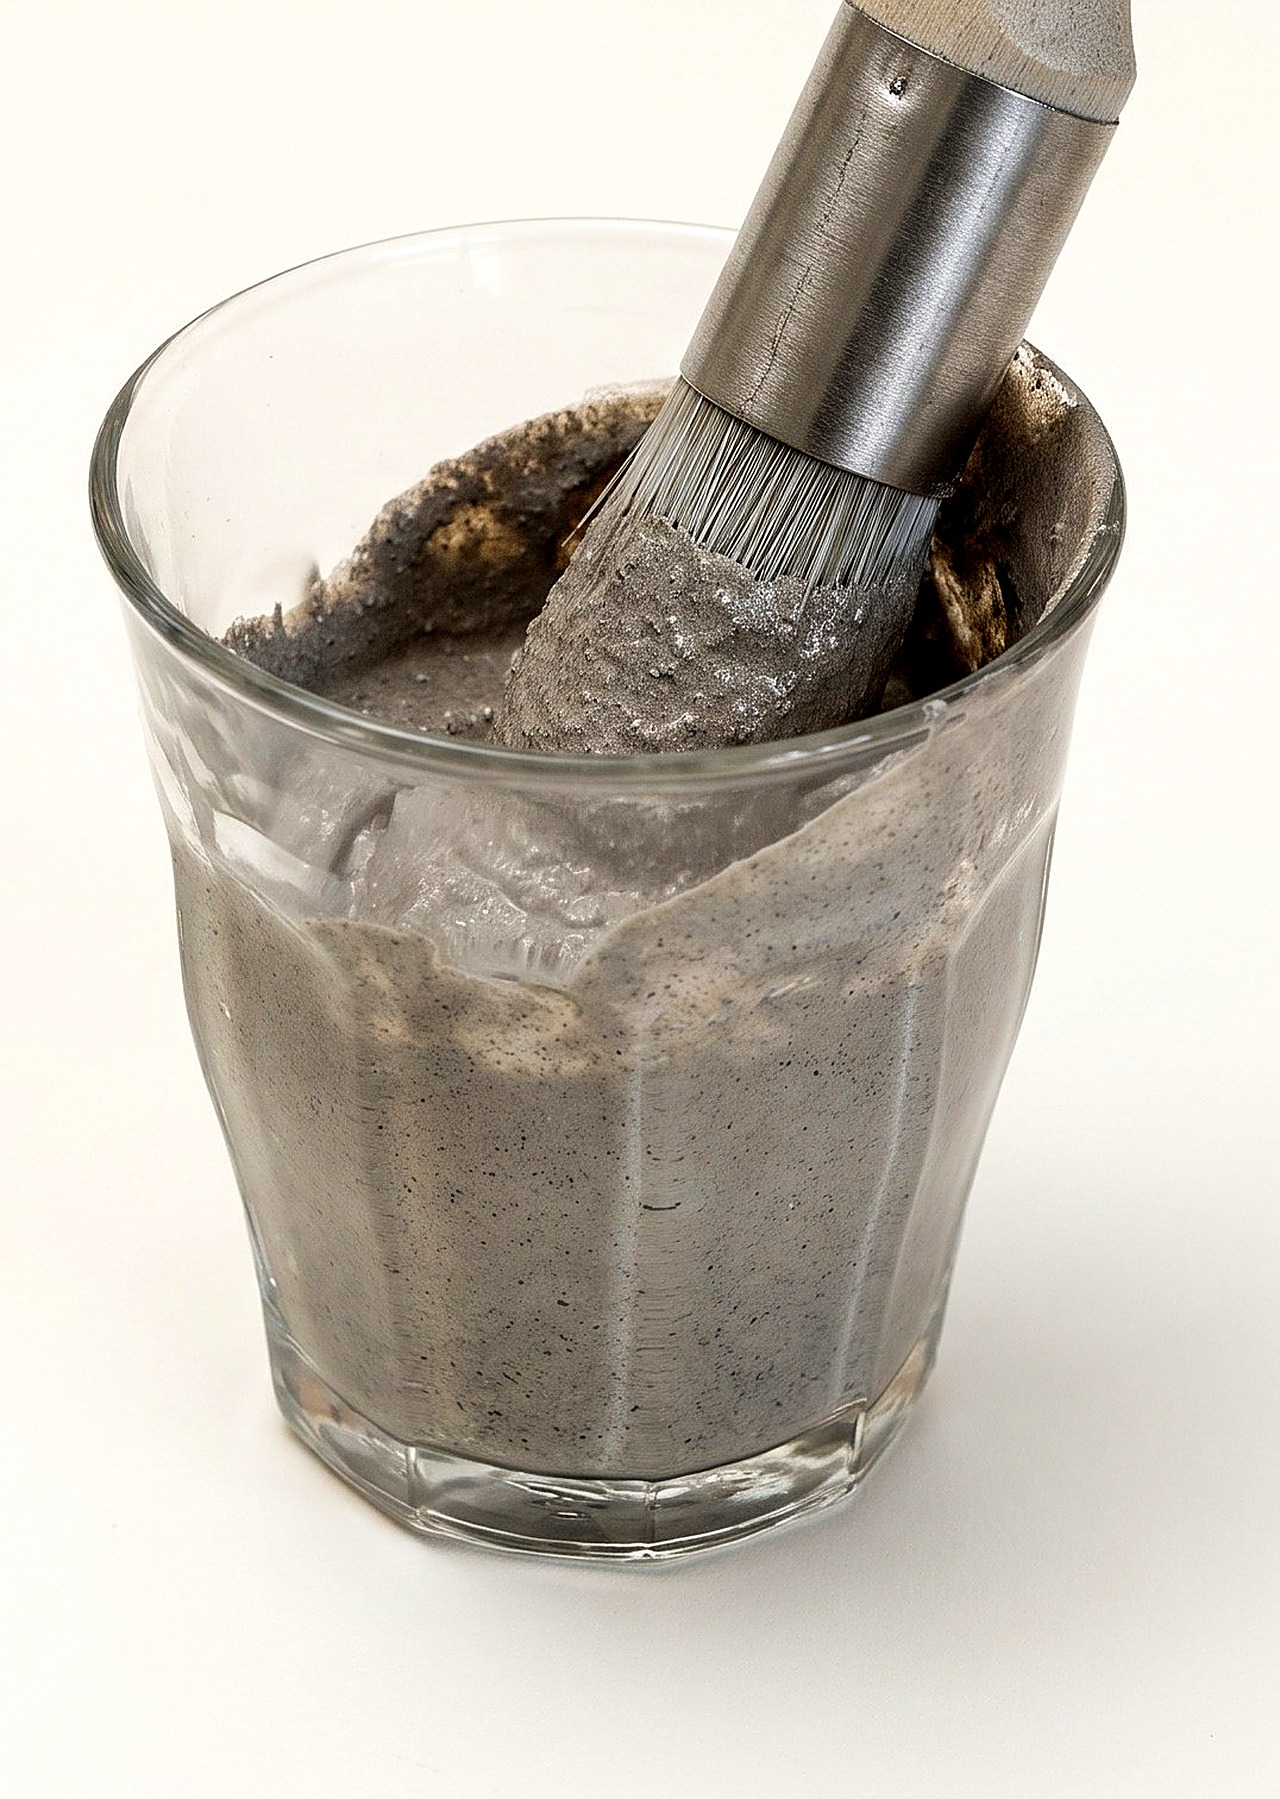
Mix thick, grainy latex paint and baking soda paste in a mixing cup.
You'll need: Mixing Cup, Stirring Utensil, Round Paint Brush, Latex Paint, Baking Soda
- 1.1 Combine Paint and Baking Soda
- Pour latex paint from the 7.75 fl oz sample into the mixing cup.
- Add equal baking soda by volume for a 1:1 paint ratio.
- Start with a small batch and mix fresh paste in the cup as needed.
- 1.2 Mix to a Thick Consistency
- Stir the paint and baking soda with a spoon or paint brush.
- Blend into a thick, gritty paste with no dry powder pockets.
- Adjust thickness with a splash of paint or pinch of baking soda.
Key measurements
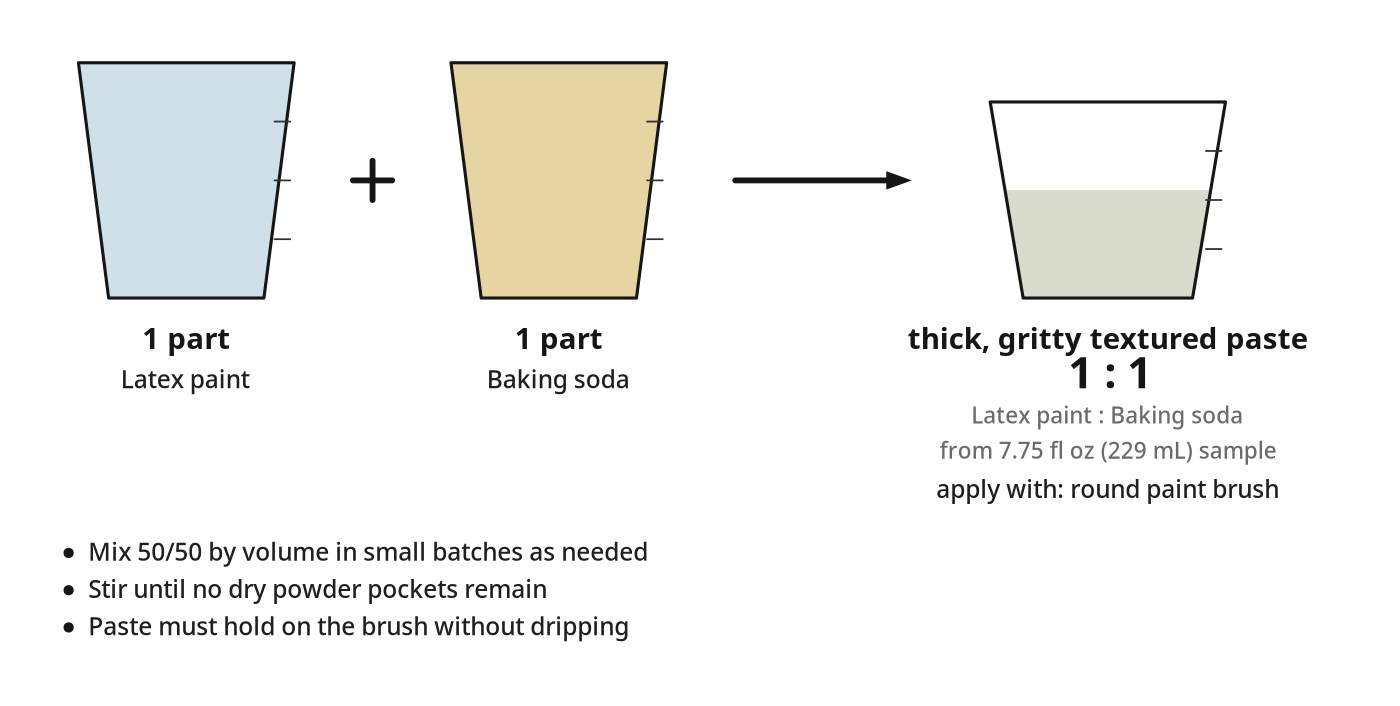
- Paint to baking soda ratio: 50/50 by volume
- Paint sample volume: 7.75 fl oz (229 mL)
- Tip: Buy a house paint sample pot for premixed color without leftover cans.
Before you move on: The thick, gritty paste holds on the brush without dripping.
Step 2: Apply the First Coat
Clean the glass vases and first-coat the exterior, bottom, and inner rim.
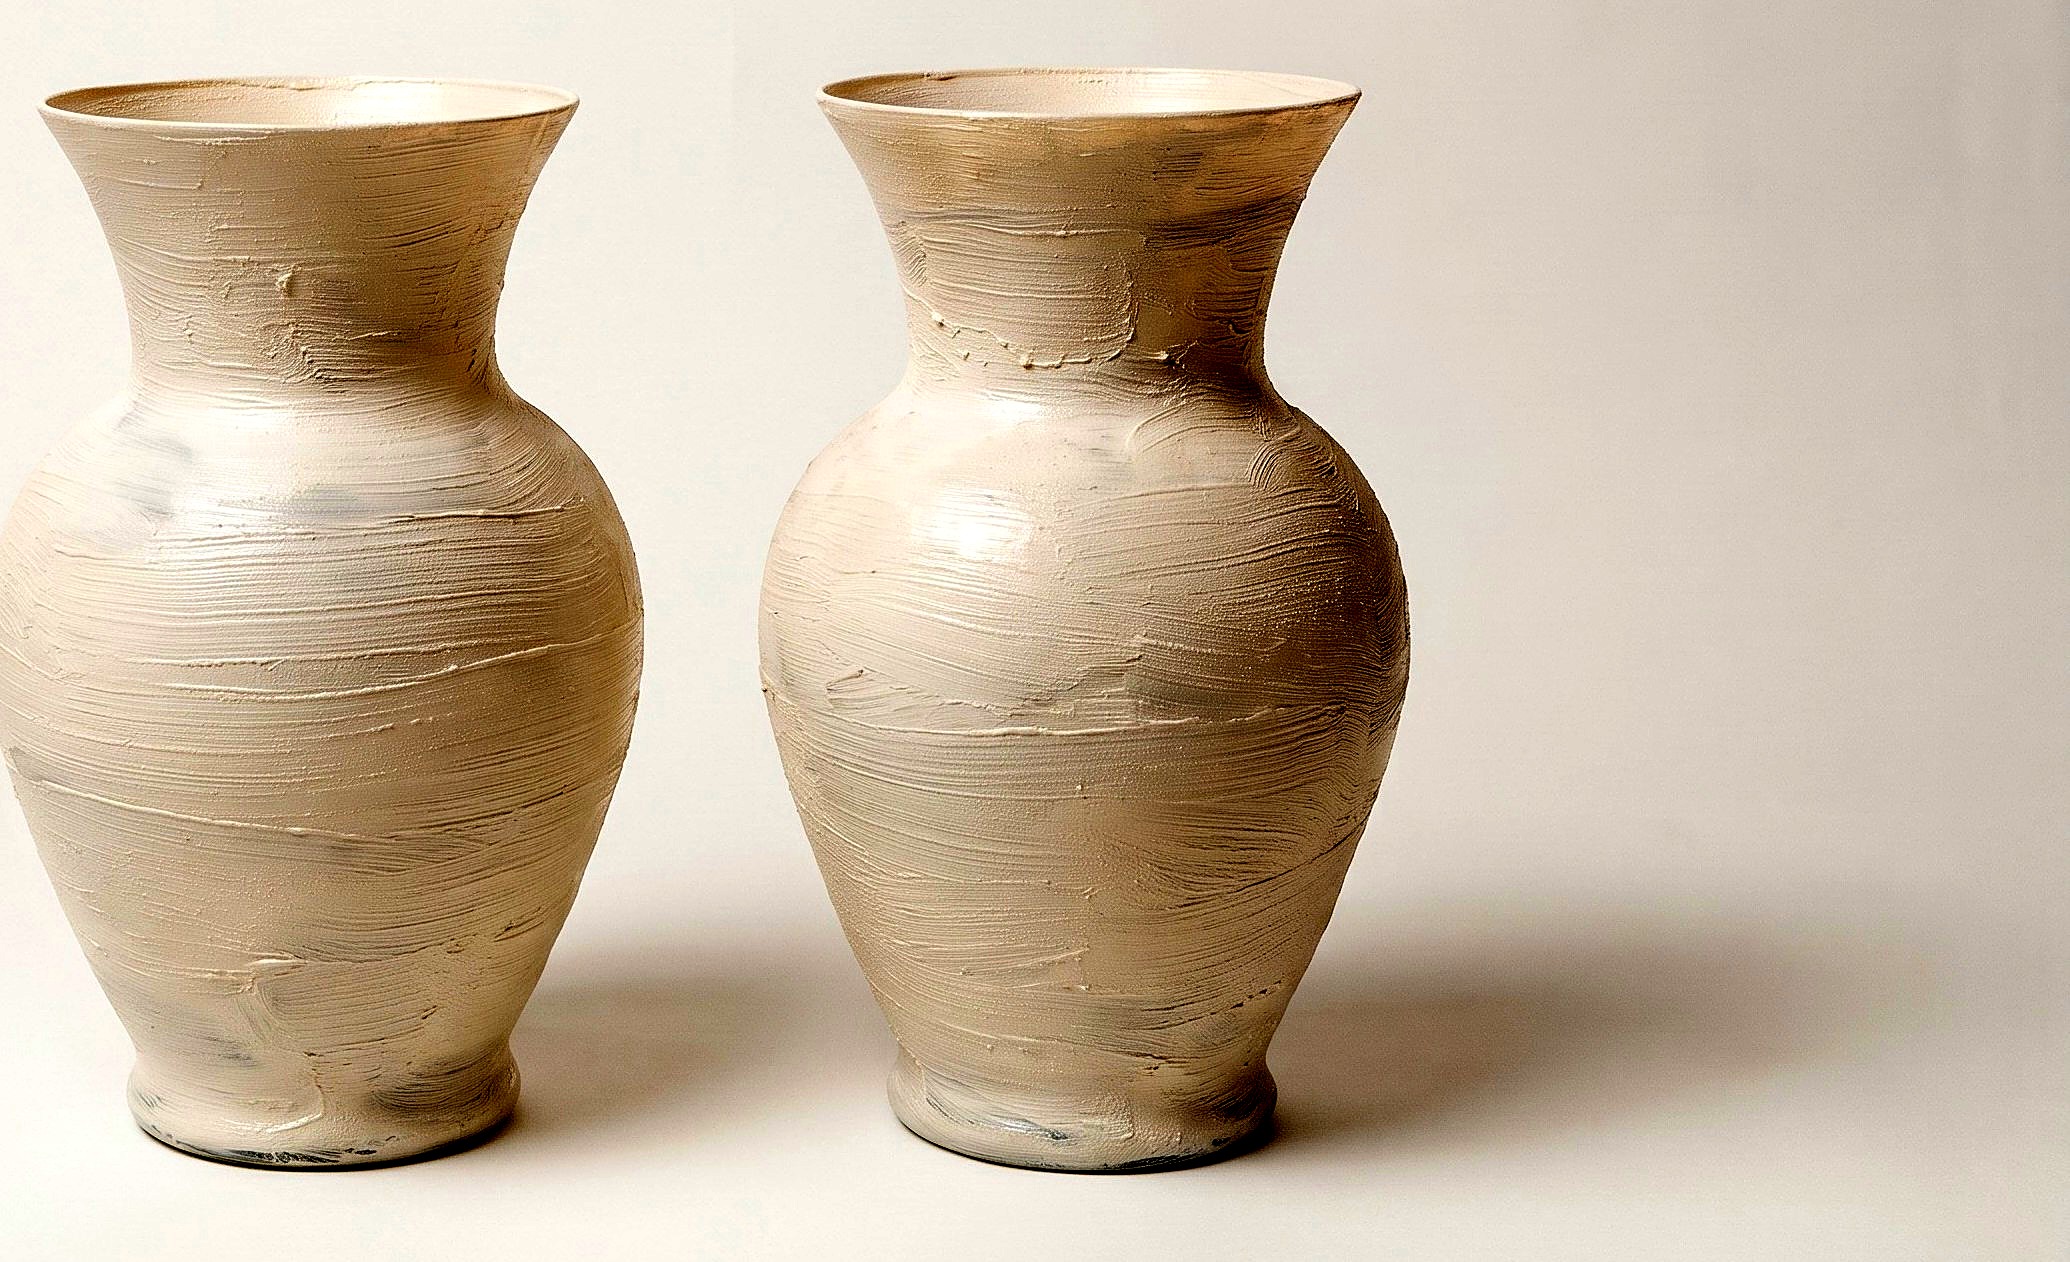
Parts in this step: (A) glass vase
You'll need: Round Paint Brush, Glass Vases, Latex Paint, Baking Soda
- 2.1 Clean and Dry the Vases
- Wash each glass vase (A) with dish soap and warm water to remove oils.
- Dry inside and outside with a clean towel before painting.
- Apply glass primer before the paste if long-term peeling is a concern.
- 2.2 Paint the Body and Bottom
- Flip the vase upside down to reach the body and bottom.
- Brush paste horizontally around the body and bottom.
- Smooth strokes give a clean look; piling paste thicker gives heavy texture.
- Let the body and bottom dry about 30 minutes before handling.
- 2.3 Paint the Top and Inner Rim
- Flip the vase upright once the bottom coat is touch-dry.
- Brush paste horizontally across the upper neck and outer rim.
- Paint inside the fluted inner rim so bare glass never shows from above.
- Let the first coat dry 2 hours before the second.
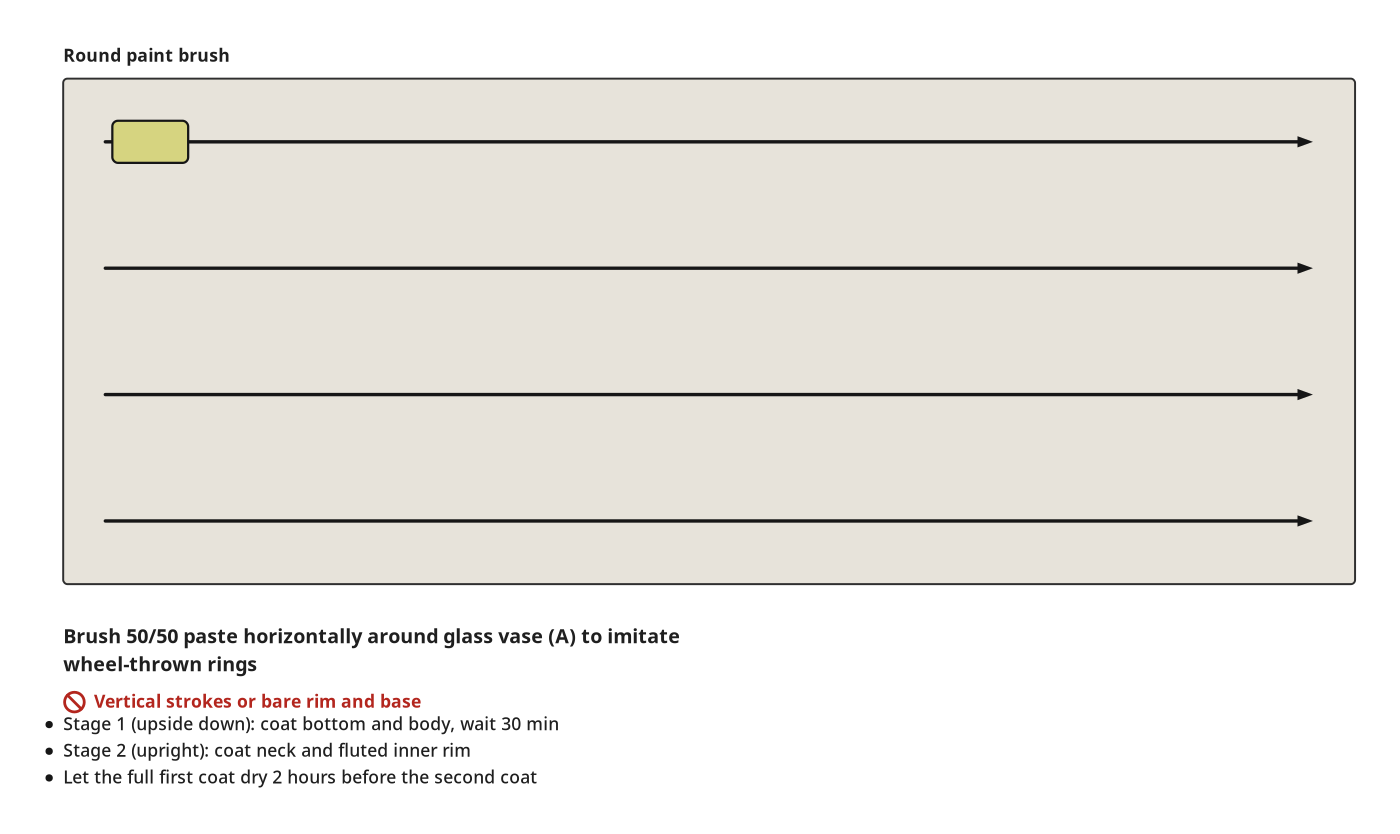
Key measurements
- Wait before flipping vase: about 30 minutes
- Dry time after first coat: 2 hours
- Tip: Brush horizontally all around to imitate wheel-thrown ceramic rings.
- Tip: Coat the base underside and inner throat to complete the stone illusion.
- Heads up: Textured paint on unprimed smooth glass can peel with heavy handling.
Before you move on: First coat dried 2 hours and feels dry on the bottom, body, and rim.
Step 3: Apply the Second Coat
Apply a second paste coat on both vases for full opacity and stone texture.
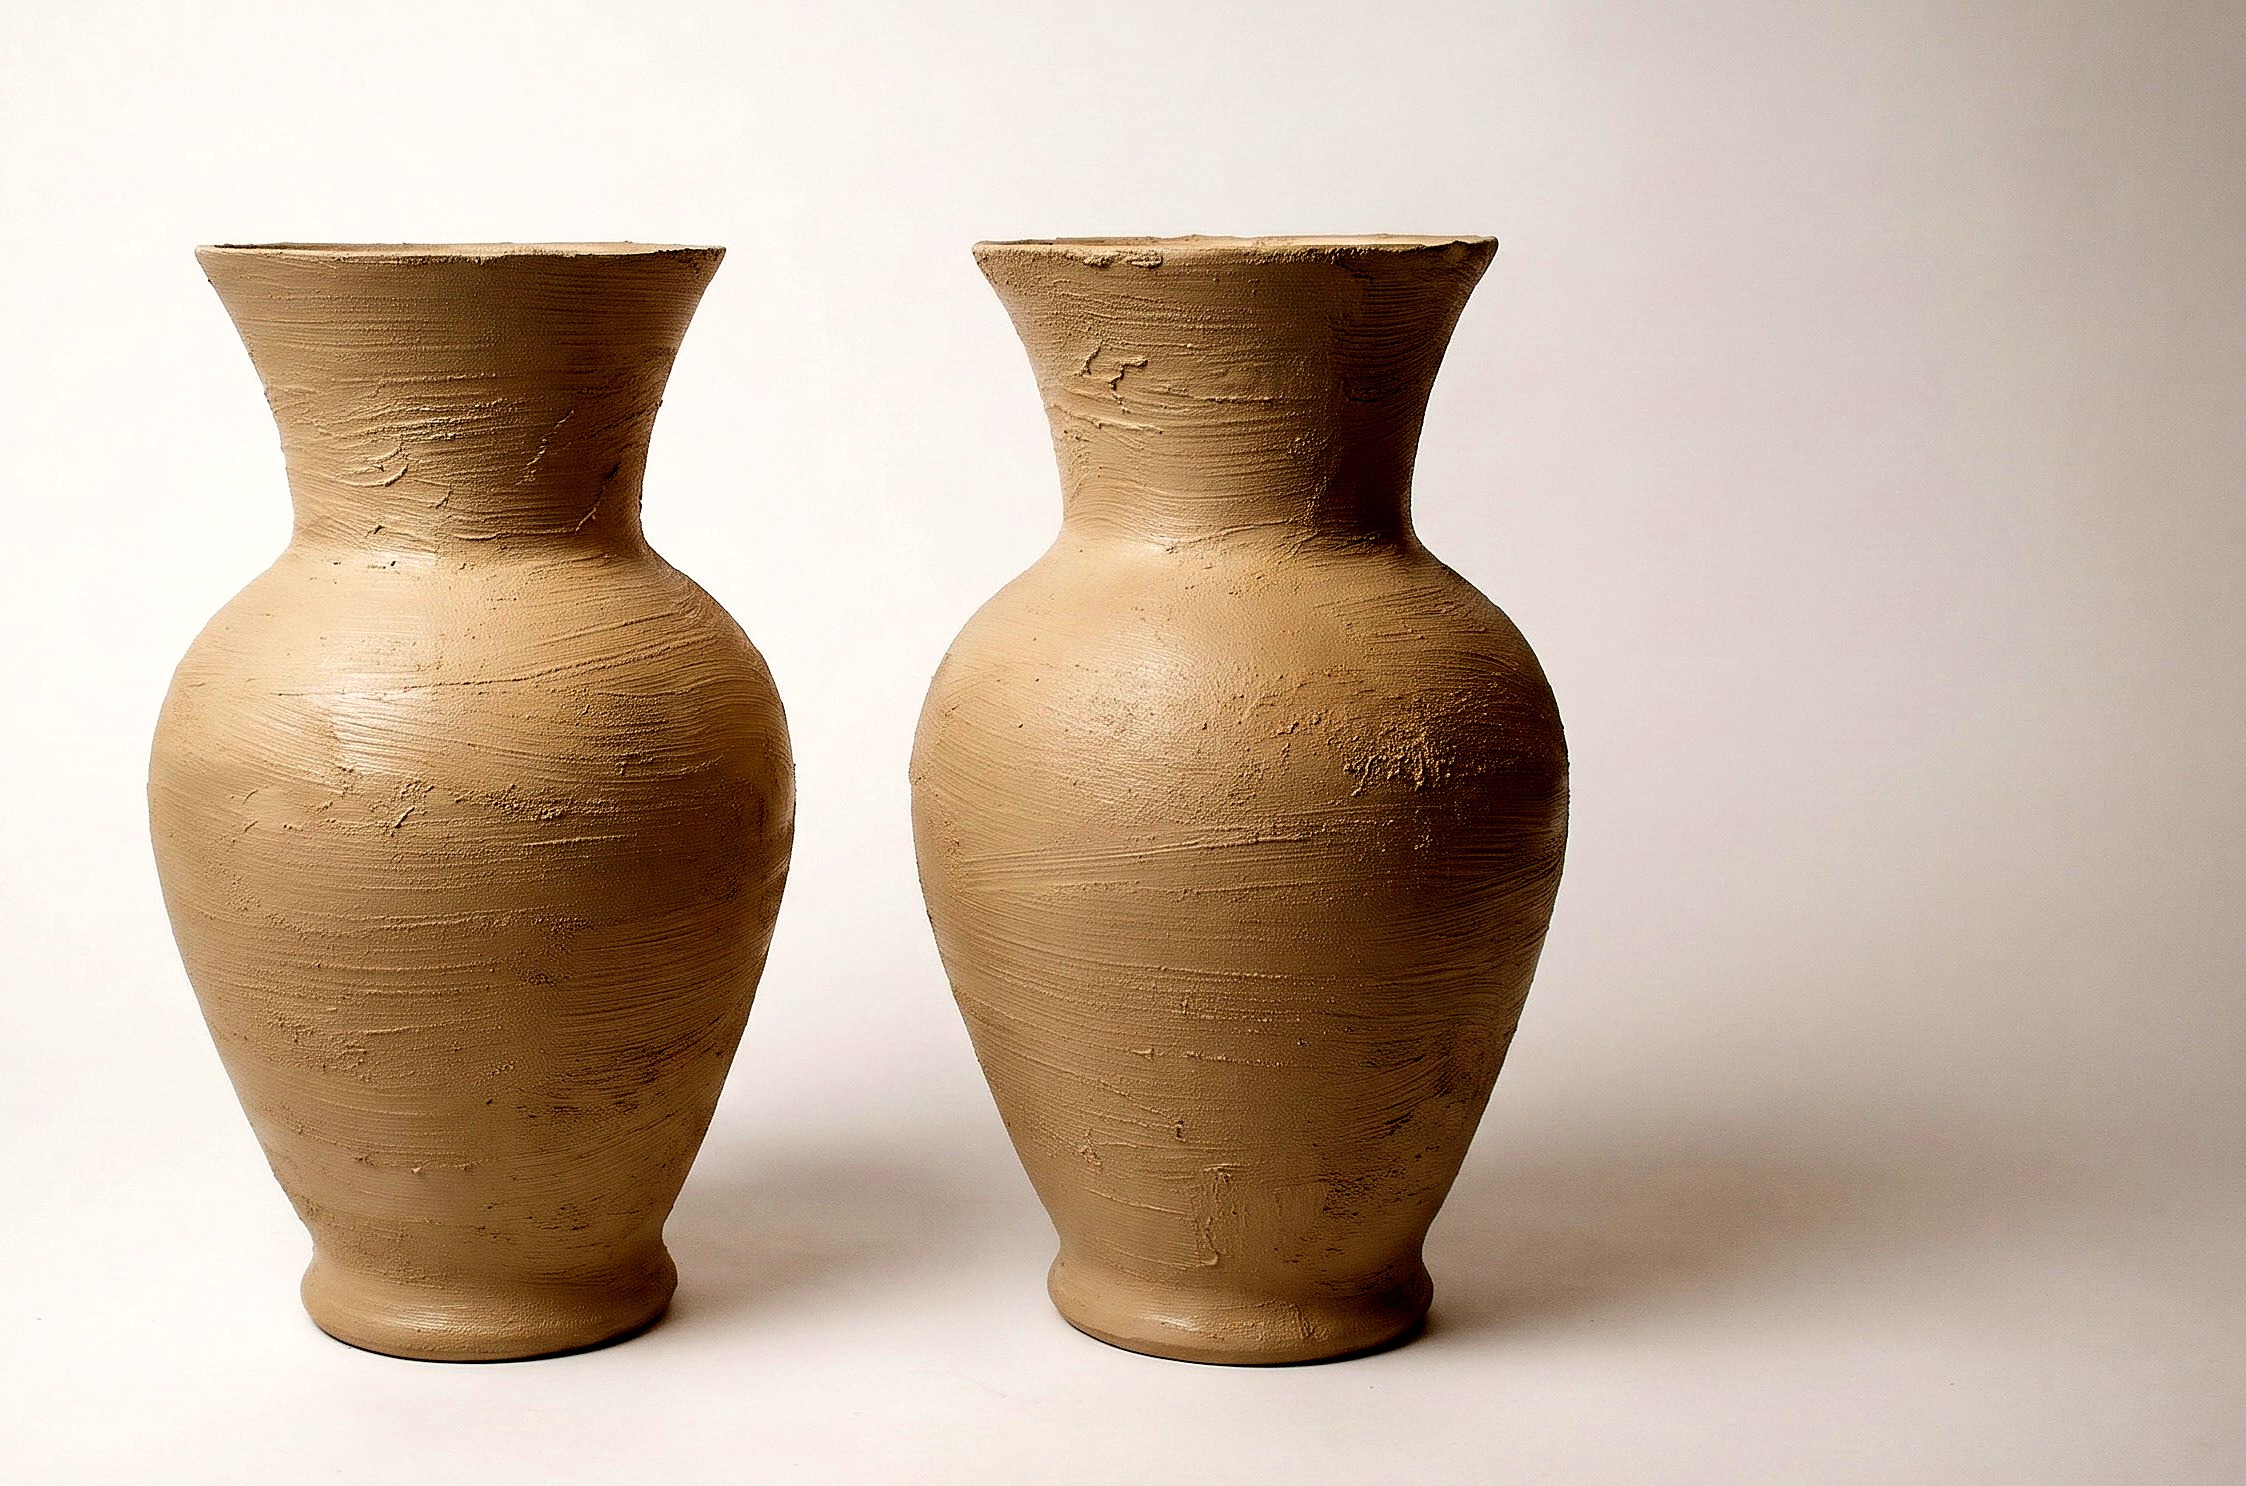
Parts in this step: (A) glass vase
You'll need: Mixing Cup, Stirring Utensil, Round Paint Brush, Glass Vases, Latex Paint, Baking Soda
- 3.1 Mix a Fresh Batch of Paint
- Pour equal parts latex paint and baking soda into the mixing cup.
- Stir with the utensil or brush until it matches the first paste.
- 3.2 Apply the Second Coat
- Brush the second coat horizontally over glass vase (A).
- Pause halfway for about 30 minutes until dry enough to flip.
- Flip and coat the rest and inner rim to finish coverage.
- Look through the top toward a light to spot thin, translucent patches.
- Dab paste on glowing spots until no light passes through the walls.
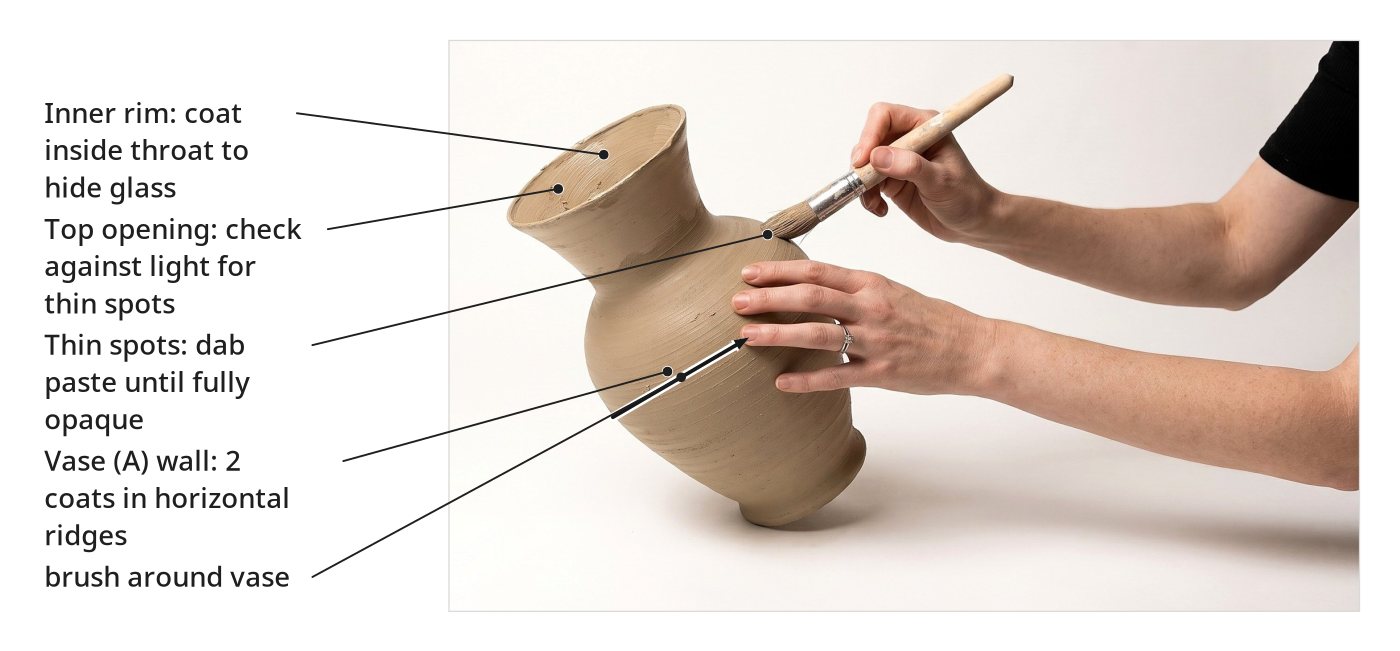
Key measurements
- Total coats for clear glass coverage: 2 coats
- Second-coat pause before flipping: about 30 minutes
- Tip: Look inside the mouth against room light to catch thin spots.
Before you move on: No light shines through the walls from the top opening, and the second coat is touch-dry.
Step 4: Add an Aged Texture
Deepen grain and age the pair with optional coffee grounds and brown furniture wax.
Parts in this step: (A) glass vase
You'll need: Round Paint Brush, Glass Vases, Coffee Grounds, Finishing Wax
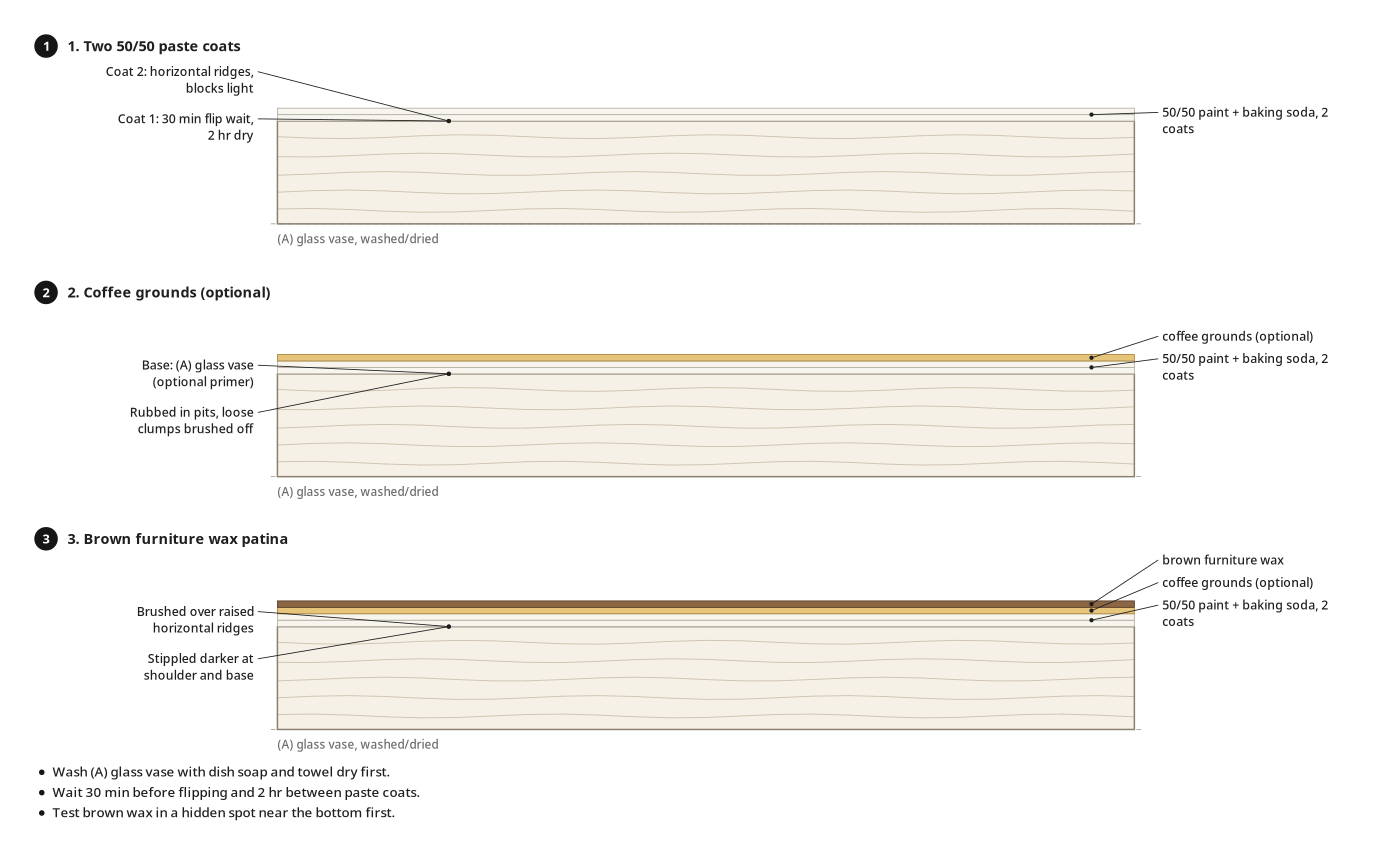
- 4.1 Rub with Coffee Grounds (Optional)
- Put a small handful of damp or dry coffee grounds on dry glass vase (A).
- Hand-rub grounds into the gritty paint texture to tint recesses warm brown.
- Brush off loose coffee clumps and wipe excess grounds with a dry cloth.
- 4.2 Apply Brown Furniture Wax
- Dab brown furniture wax onto the round brush bristles.
- Test the wax in a hidden spot near the bottom first.
- Brush and blend wax over the body to catch the raised horizontal ridges.
- Stipple the bristles on the base and shoulder for darker shading.
- Place both vases side by side and adjust wax shading until they match.
- Tip: Use damp brewed coffee grounds instead of dry so they cling to the texture with less mess.
- Tip: Apply clear furniture wax before brown wax if you want to wipe back heavy dark spots.
- Tip: If lacking furniture wax, use brown shoe polish, leather polish, or coffee-tinted coconut oil.
- Heads up: Hand-rubbing dry coffee grounds is rough on skin and scatters grounds across the workspace.
Finishing
Last touches
- Brush off loose coffee specks before displaying.
- Blend the darker wax edges at the shoulder and base.
Cure and care
- Wax cure time is not stated in this guide; let the surface dry to the touch before styling.
- Keep water strictly inside the glass for fresh stems.
- Do not scrub or submerge outside; baking soda paint is not waterproof.
Variations
- Use joint compound straight from the tub for a smoother plaster finish.
- Mix equal parts yard sand, acrylic paint, and school glue for a coarser stone coat.
Check it is done
| Check | What you should see | If not |
|---|---|---|
| Hold each vase under a lamp and look inside the top opening. | Walls block all light with no translucent streaks or bare glass. | Dab more 50/50 paint and baking soda paste on thin spots; let dry. |
| Check the inner rim and base underside. | Textured paint fully covers both areas, hiding the glass core. | Brush extra paste inside the rim or across the bottom. |
| Set both vases side by side at arm's length. | Horizontal brush ridges and brown wax shading match on both. | Stipple more brown wax on the lighter vase or blend heavy areas out with the brush. |
These Specs are built from Kathartic Studios's video “Faux Stone Pottery from Glass Vases”. Open the Faux Stone Pottery from Glass Vases project page.
