Spetz Specs No. 6771: step-by-step restoration guide
Sealing and Re-Grouting an Indian Sandstone Patio
The complete step-by-step guide made from Tidybricks patio restore's YouTube video, free on Spetz. For the video, a step-by-step player and answers to your questions, see the Sealing and Re-Grouting an Indian Sandstone Patio project page.
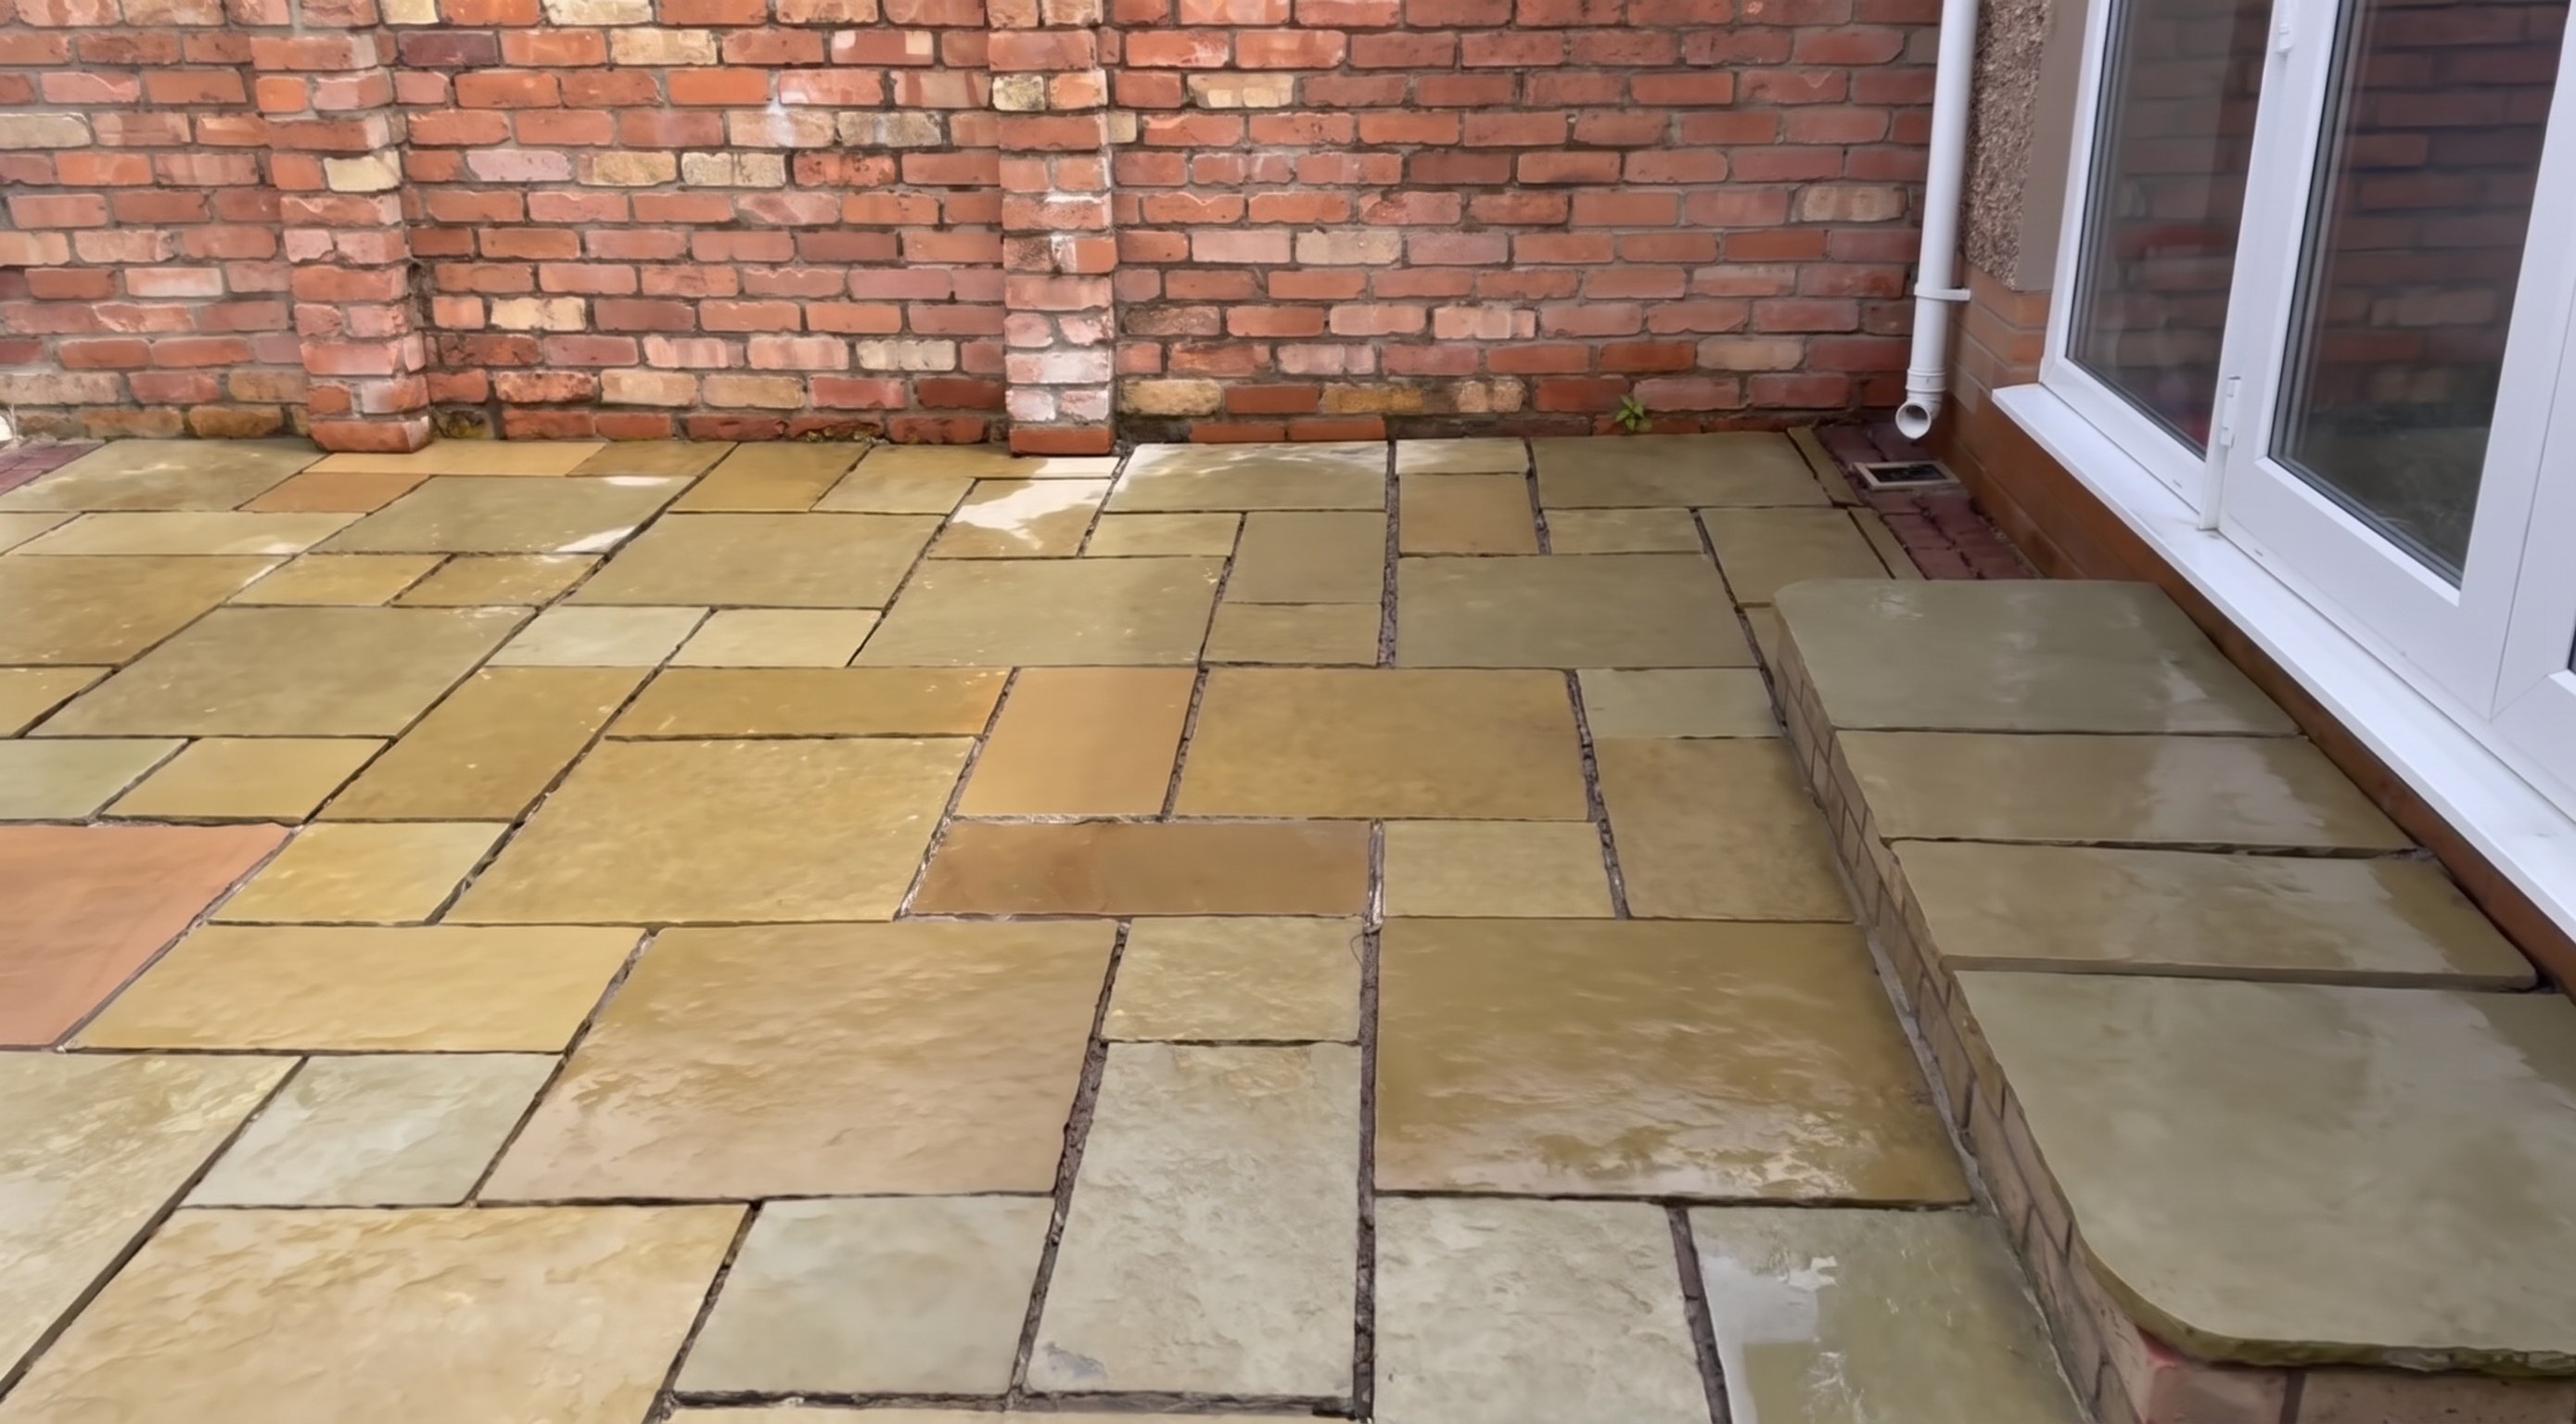
5 steps, 6 tools, 4 materials
Overview
The patio surface
- Porous Indian sandstone slabs have wide joints up to 2 inches deep.
- Check the patio was laid at least 6 to 12 months ago.
- Waiting lets efflorescence escape before stone sealer traps moisture.
- Renewing failed mortar stops weeds and drains puddles in low spots.
The look and function
- Clear fluoro-polymer sealer protects the natural sandstone without making the joints impermeable.
- Neutral polymeric compound cleanly fills wide gaps and blends with stone tones.
- Water-permeable joints drain rainwater through low points instead of pooling.
What it takes
- Roll liquid sealer, pack wet mortar with a trowel, and iron joints.
- Expect long kneeling and constant brushing for each small section.
- Let stone sealer dry completely before soaking and packing compound.
What decides success
- Seal dry slabs before grouting so sticky resin scrapes off without staining.
- Firmly pack water-soaked compound to every joint bottom and brush immediately.
Health and safety
Sealer and Compound Handling
- Wear protective gloves and safety glasses to prevent skin and eye contact when pouring and rolling the liquid Indian stone sealer.
- Apply the fluoro-polymer stone sealer only in a well-ventilated outdoor area and avoid inhaling mist thrown from the paint roller.
- Wear waterproof gloves when pressing wet polymeric compound with the pointing trowel or metal spoon to keep resin off your skin.
- Snap the lid tightly onto the water-filled tub of leftover compound and store all containers out of reach of children.
Kneeling and Heavy Lifting
- Wear knee pads while troweling, smoothing joints with the metal spoon, and brushing across the hard sandstone patio slabs.
- Lift the 20kg tub of polymeric jointing compound using your legs rather than your back, especially after adding soaking water.
- Take regular breaks to stand and stretch your back and wrists during extended periods of kneeling and taping step overhangs.
The piece & its condition
- Failed, crumbling original grout is cut out and pressure washed from joints.
- Wide mortar joints are 1.5 to 2 inches deep in places.
- Low points across the patio trap rainwater puddles.
- Porous, unsealed Indian sandstone slabs grab sticky resin if grouted raw.
- Unprimed, slightly loose slabs sit on the bed where permeable drainage outweighs slurry.
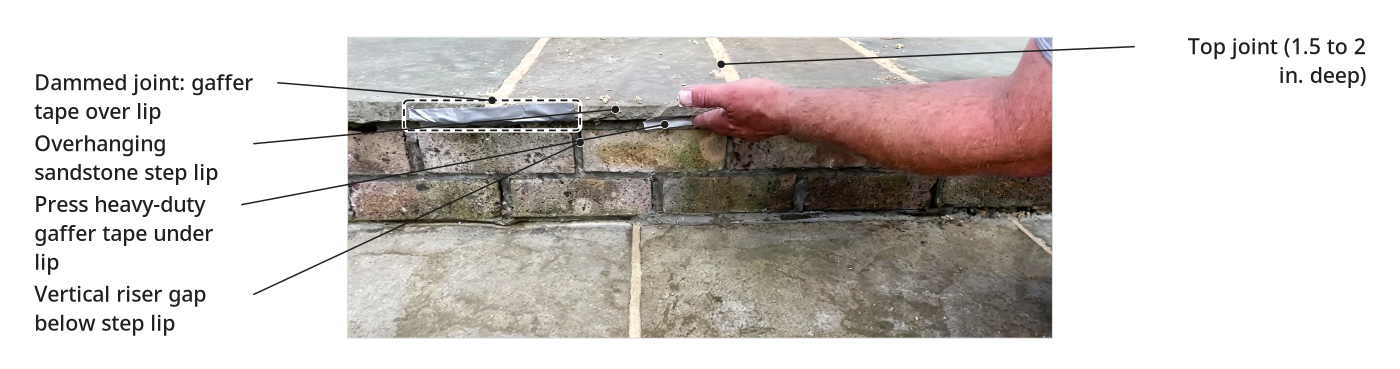
- Overhanging step slabs have open underside gaps at the vertical riser joints.
Tools
- Pointing trowel (small masonry pointing trowel)
- Hand brush (soft-bristle banister brush)
- Plastic bucket (empty square plastic tub, Joint-It, 20kg capacity tub)
- Paint roller (medium-nap roller sleeve and handheld frame)
- Garden hose with spray nozzle (garden hose with multi-pattern trigger sprayer)
- Metal spoon (household dessert/tablespoon) (optional)
Materials
- Polymeric patio jointing compound (water-activated polymeric jointing mortar, Joint-It, 20kg tub, Neutral colour (covers approx. 15m²))
- Indian stone sealer (solvent-free fluoro-polymer natural stone sealer, Bond It, 5L container (Drive Alive Indian Stone Sealer))
- Gaffer tape (heavy-duty cloth gaffer tape)
- Water (clean tap water)
Finishes & supplies, in the order they go on
| Product | What it does | Mix & coats | Dry time | Applied with |
|---|---|---|---|---|
| Indian stone sealer | Seals porous sandstone slabs before pointing so excess polymeric compound scrapes and brushes clean | Ready to use (undiluted from 5 L container), 1 coats | Not stated in sources (general practice: allow to dry fully before pointing) | Paint roller |
| Polymeric patio jointing compound | Fills wide, deep patio joints with permeable mortar so surface puddles drain through | Soaked inside the 20 kg tub under 1 inch of standing clean tap water, 1 coats | Not stated in sources (general practice: 24 to 48 hours to cure) | Pointing trowel, metal spoon, and hand brush |
Before you start
Workspace and weather
- Work outdoors in dry weather with clear access across the patio.
Clean and check slabs
- Cut out failed mortar and pressure wash debris from deep joints.
- Let sandstone slabs dry completely before rolling on stone sealer.
- Firmly bed rocking slabs first; polymeric compound will not lock loose stones.
Step by step
Step 1: Seal the patio slabs
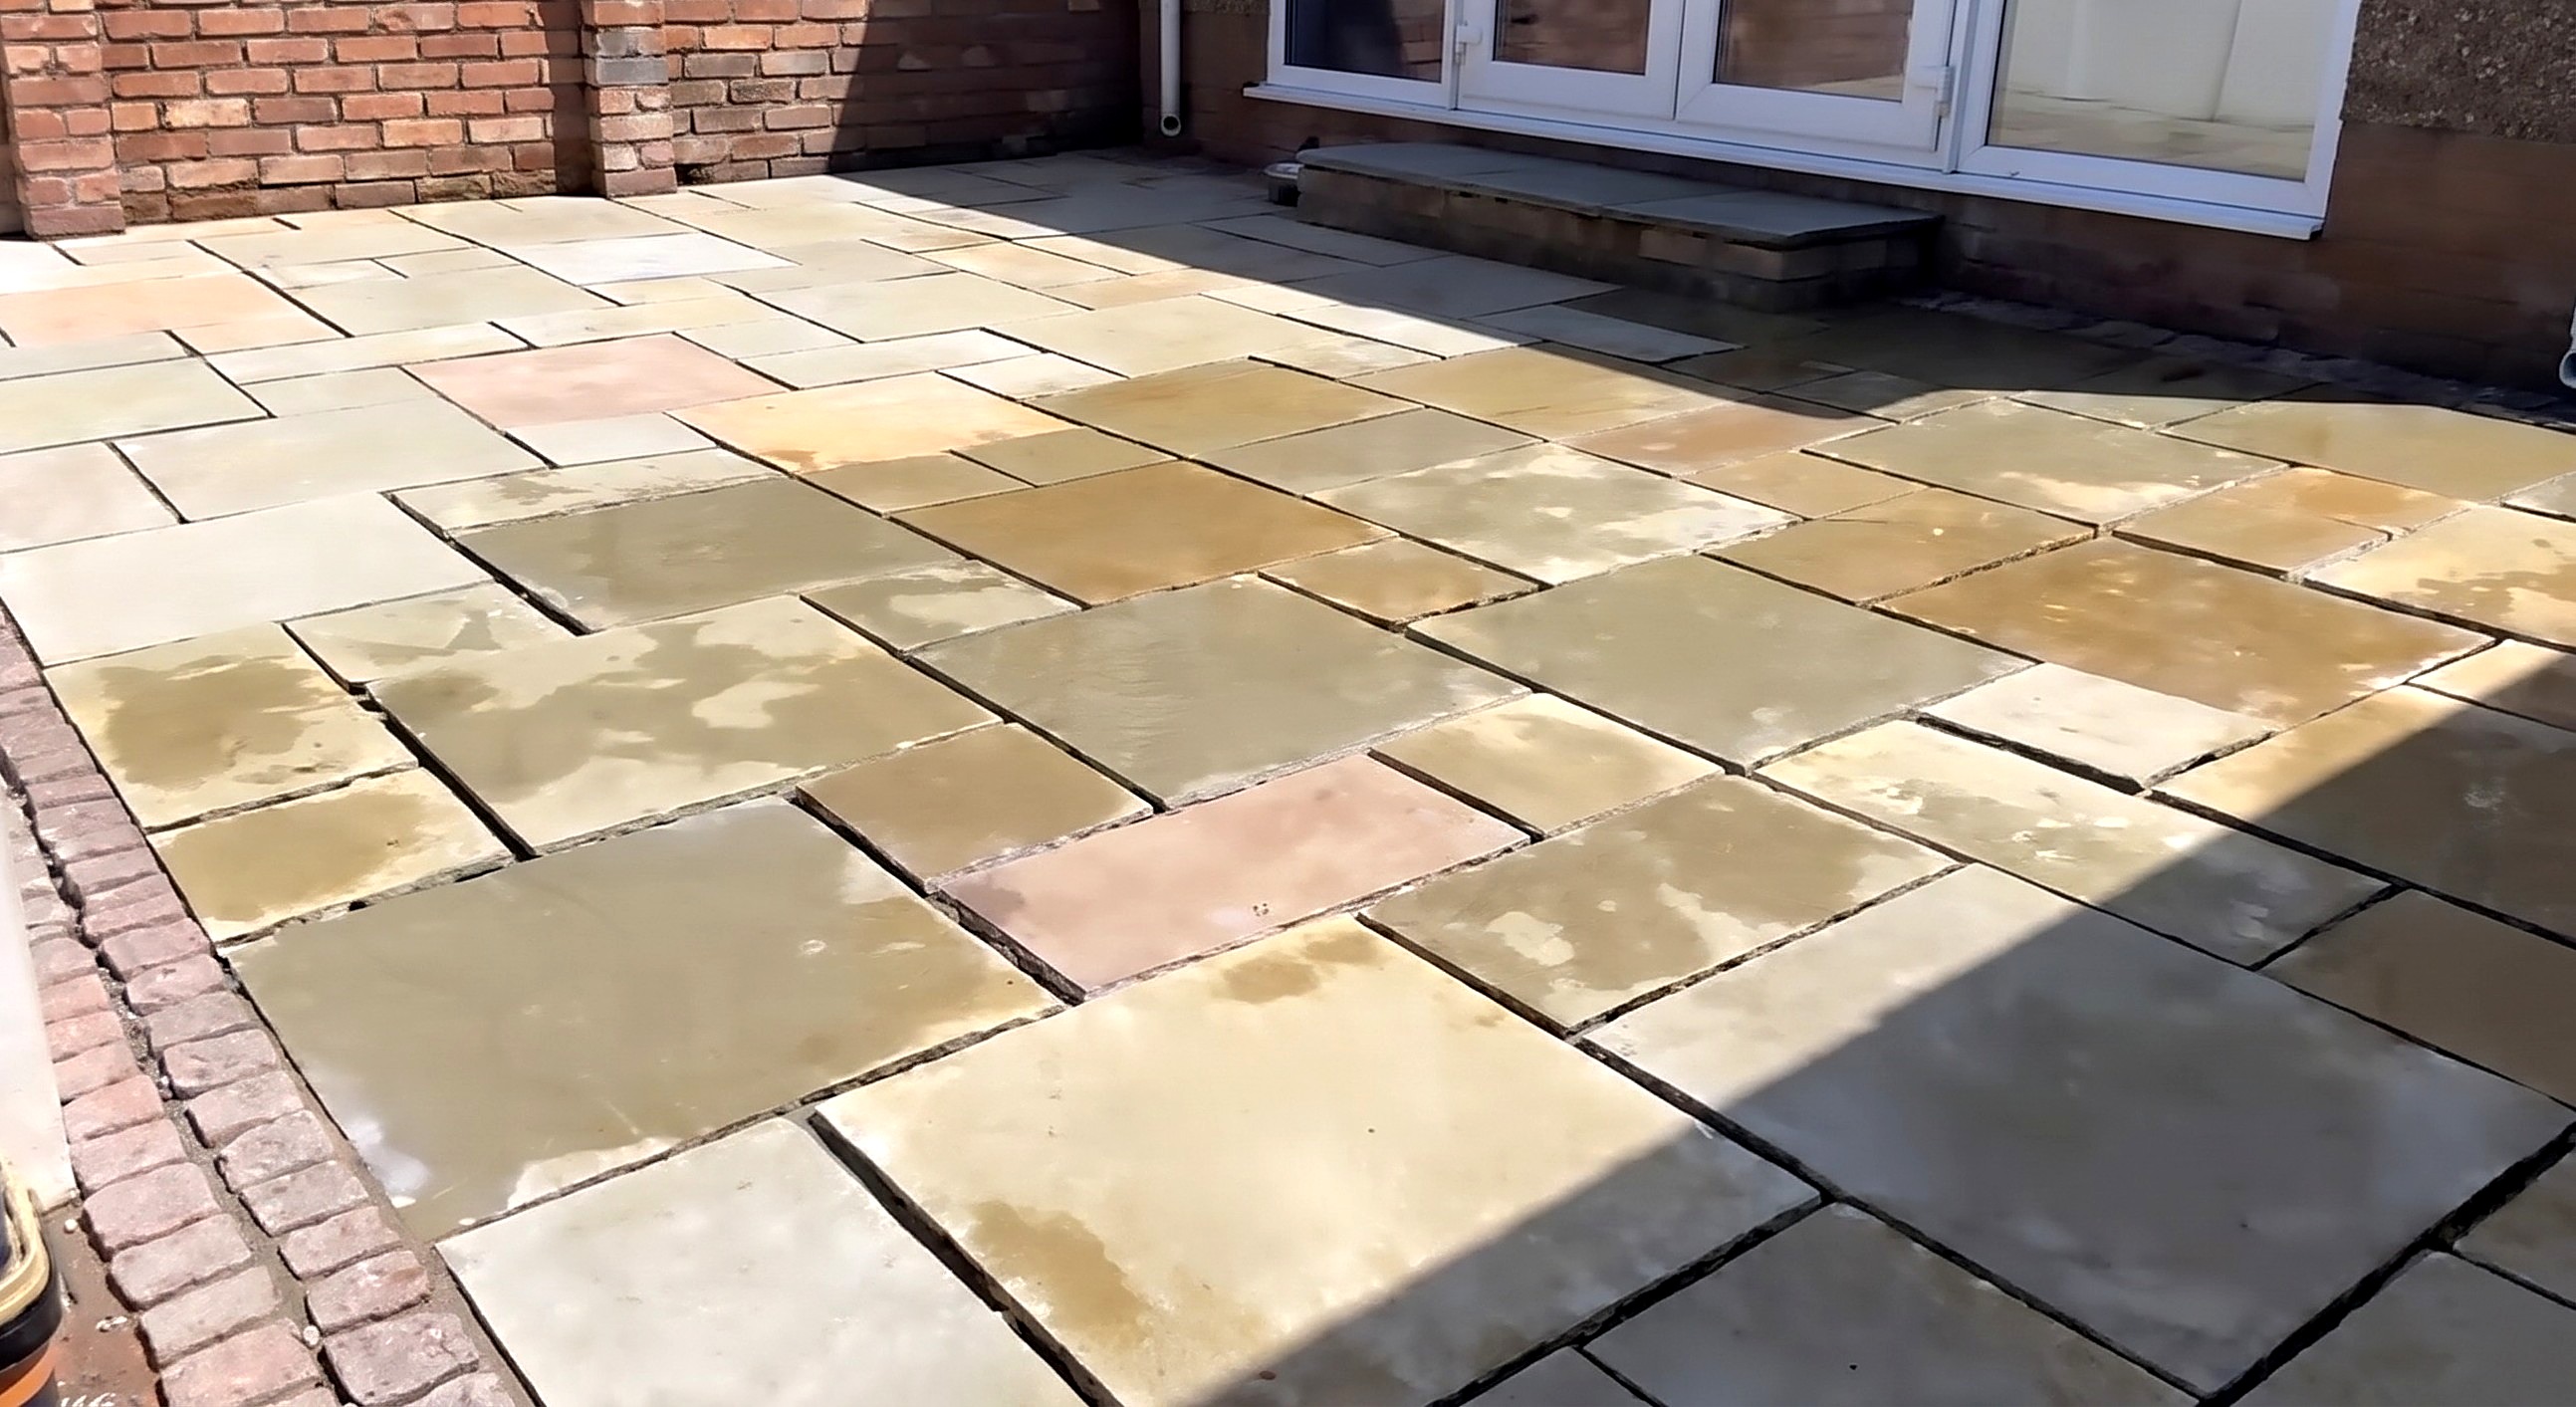
Dry sandstone slabs are coated with stone sealer; open joints stay unsealed and permeable.
You'll need: Plastic bucket, Paint roller, Indian stone sealer
- 1.1 Roll sealer across the dry sandstone slabs
- Pour Indian stone sealer into an empty 20 kg plastic bucket.
- Load a medium-nap paint roller evenly in the bucket.
- Roll one even coat across clean, bone-dry sandstone slab faces.
- Seal before grouting so polymeric resin scrapes off and joints stay permeable.
- Let the sealer dry completely before jointing.
Key measurements
- New stone age before sealing: 6 to 12 months minimum
- Sealer container volume: 5 L container
- Roller bucket capacity: 20 kg empty plastic tub
- Tip: Use an empty square jointing compound tub as a deep bucket for liquid sealer.
- Tip: Seal established stone before pointing so sticky polymeric compound wipes off easily.
- Heads up: Never roll stone sealer over finished polymeric joints; it clogs pores and reduces permeability.
- Heads up: Do not seal a new patio for 6 to 12 months, or efflorescence traps underneath.
Before you move on: Touch the slab; check the sealer is dry with no liquid pools in open joints.
Step 2: Tape step overhangs and soak the jointing compound
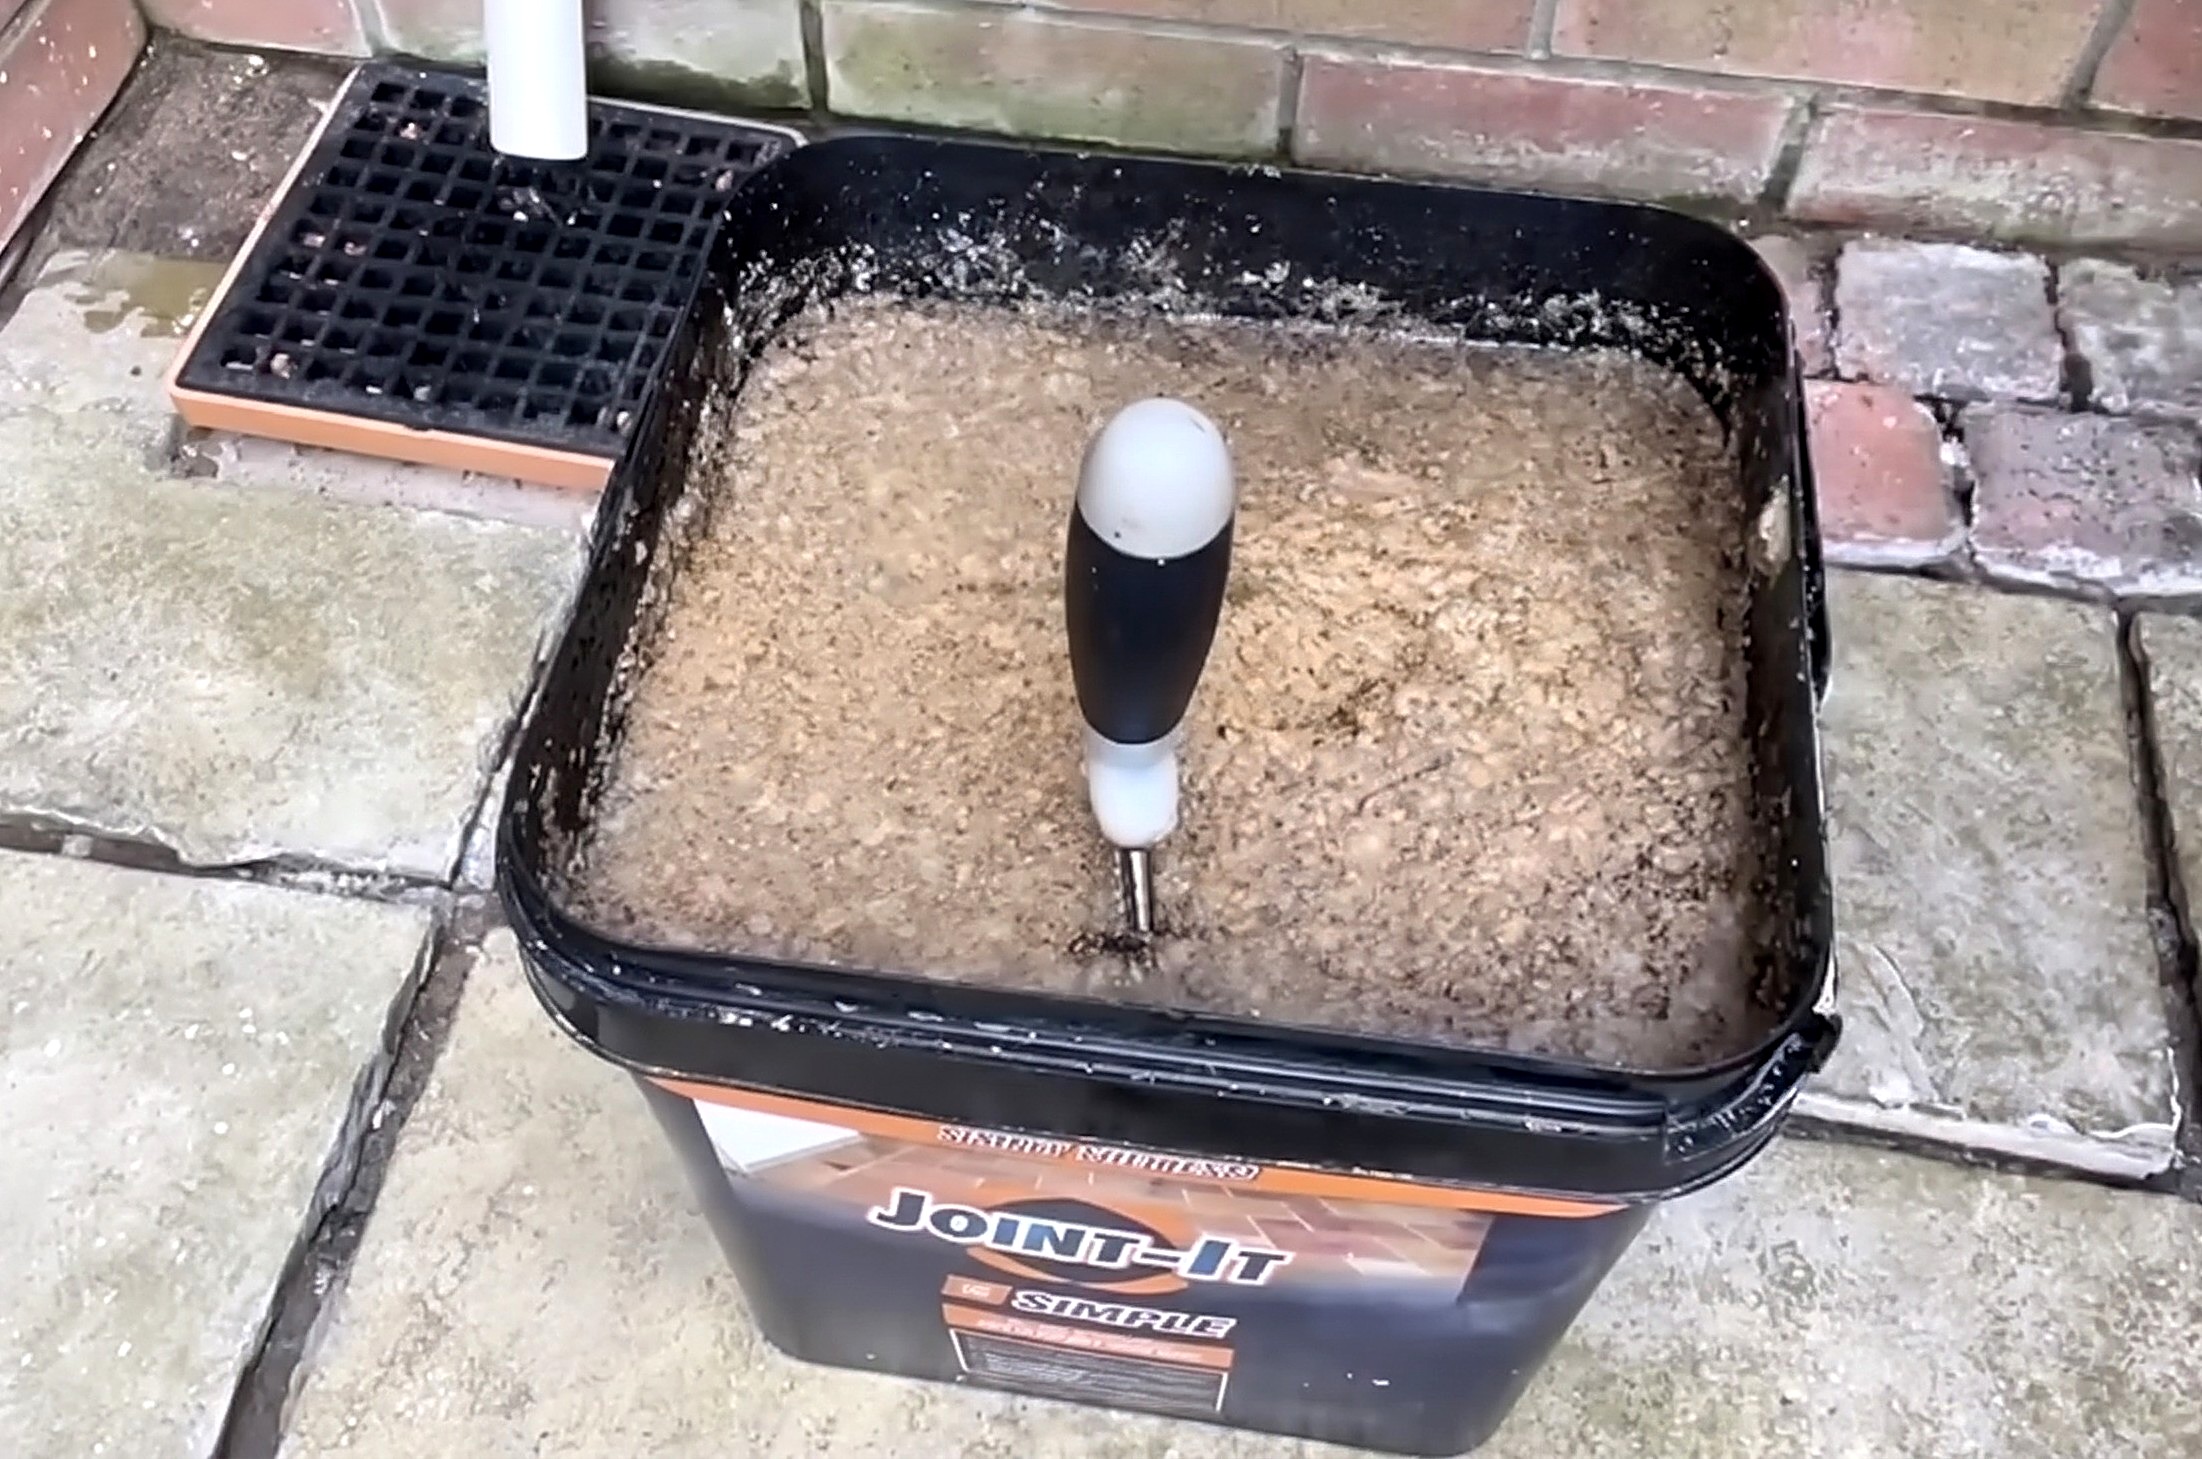
Overhanging step joints are dammed with tape, and polymeric compound sits soaked under standing water.
You'll need: Garden hose with spray nozzle, Gaffer tape, Polymeric patio jointing compound, Water
- 2.1 Tape underneath overhanging step joints
- Find overhanging steps where open joints meet a vertical riser gap below.
- Press heavy-duty gaffer tape strips under the overhanging slab lip across each joint.
- Seal the underside gap so wet compound stays put while curing.
- 2.2 Fill the compound tub with water to soak
- Open the 20 kg polymeric patio jointing compound tub.
- Spray clean tap water from a garden hose into the compound tub.
- Fill until standing water sits 1 inch above the compound.
- Let the compound soak so the water weight helps it sink deep.
Key measurements
- Soaking water depth: 1 inch of standing water above the compound
- Compound coverage: about 15 sq m per 20 kg tub
- Tip: Soak the compound in its original tub so the heavy mix drops deeper into wide joints.
Before you move on: Check water still stands 1 inch above the compound and gaffer tape holds under step lips.
Step 3: Trowel soaked compound into the joints
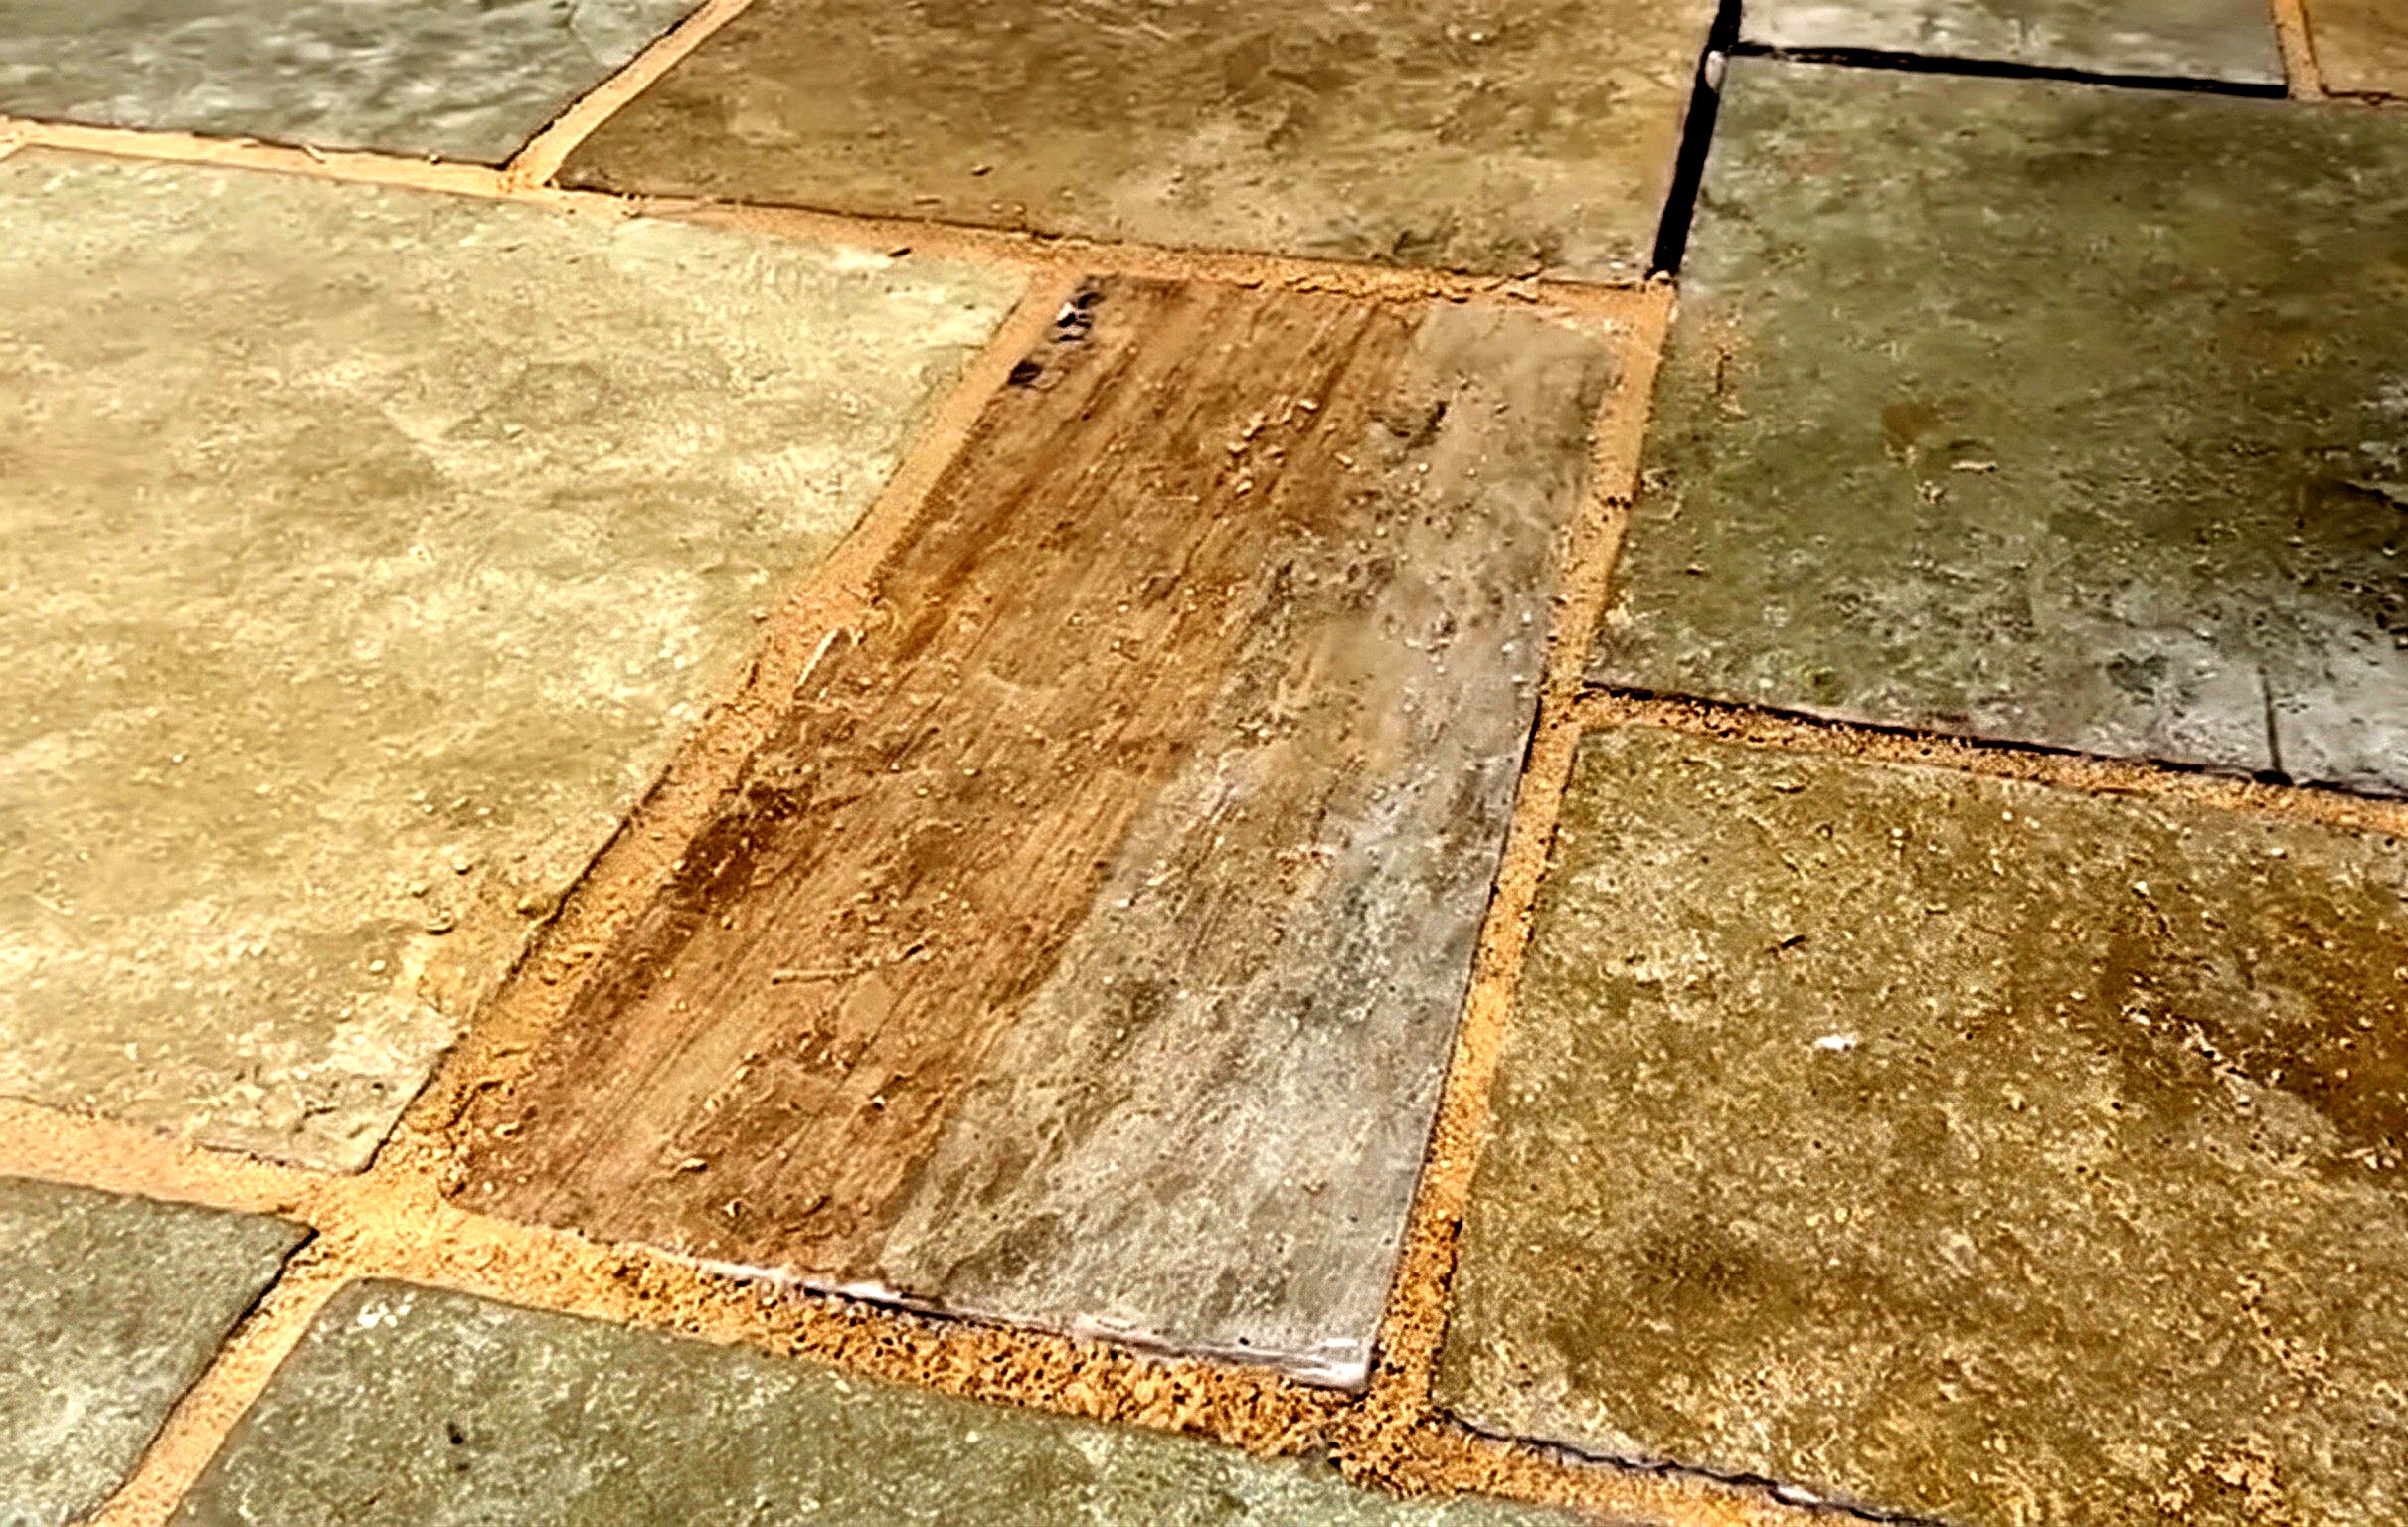
All patio joints are packed solid from the bottom up with water-soaked compound and the slab tops are scraped clean.
You'll need: Pointing trowel, Polymeric patio jointing compound, Water
- 3.1 Swirl and mix the soaked compound in the tub
- Plunge the pointing trowel blade into the water-filled tub.
- Swirl the compound in the tub until water and polymeric sand mix evenly.
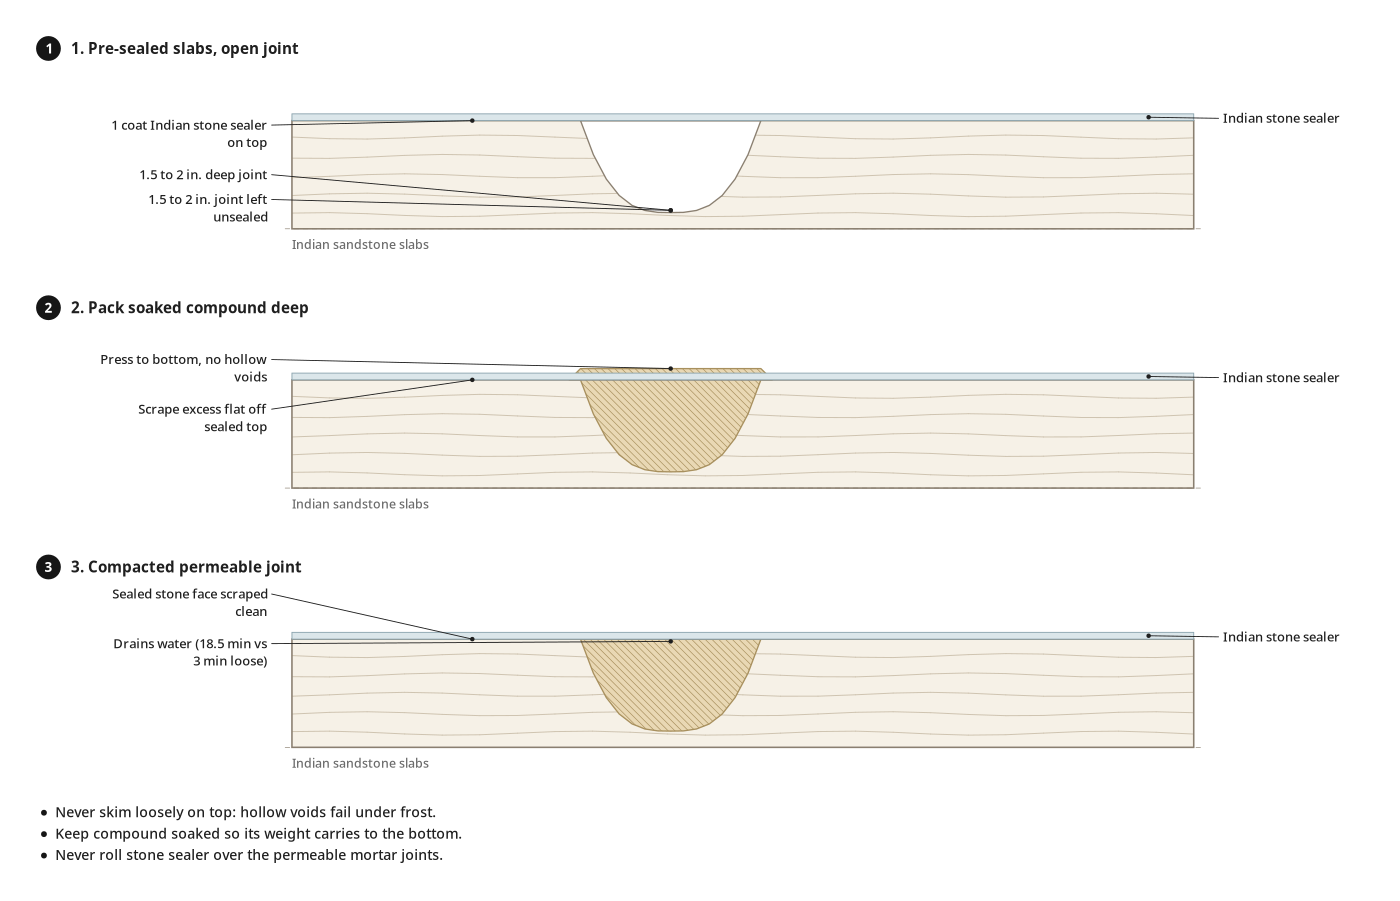
- 3.2 Press soaked compound into the joints and scrape excess
- Scoop a saturated mound of compound with the pointing trowel.
- Dump the wet compound onto the open 1.5 to 2 inch deep joint.
- Press the compound down with the trowel blade, compacting it to the bottom.
- Scrape the trowel flat across the sealed slab immediately to clear excess mortar.
- Never skim loosely over the top; hollow voids fail under frost.
Key measurements
- Maximum joint depth: 1.5 to 2 inches
- Compacted pot drainage time: 18.5 minutes (3 minutes uncompacted).
- Tip: Keep the compound soaked as you scoop so the extra weight carries it to the bottom of deep joints.
- Tip: Scrape maximum excess off the sealed stone with the trowel to reduce brushing.
- Heads up: Less rigid than cementitious slurry grout, polymeric jointing compound will not lock down loose, rocking slabs.
Before you move on: Press along the filled joint with the trowel tip to confirm there are no soft spots or hollow voids.
Step 4: Smooth wide joints and brush off excess
Wide joints are ironed smooth and dense, and sealed stone is brushed free of stray granules.
You'll need: Metal spoon, Hand brush, Polymeric patio jointing compound
- 4.1 Iron wide joints with a spoon and sweep off residue
- Press the rounded convex back of a metal spoon into wider packed joints.
- Draw the spoon along the joint to compress and iron the mortar flush.
- Immediately sweep the finished section with a soft hand brush to remove stray granules.
- Finish and brush one small section before troweling the next.
- Clear all granules off the slabs now so polymeric resin cannot leave stain marks.
- Tip: Use a household metal spoon's rounded back as a wide jointer to compress extra-wide joints.
- Tip: Use a leaf blower after pointing to clear loose granules off slabs without disturbing joints.
- Heads up: Stray polymeric granules left on the stone leave resin stains until sunlight bleaches them out.
Before you move on: Check the slabs in angled light and sweep remaining grit specks from joint edges.
Step 5: Submerge and seal leftover compound for storage
Unused polymeric compound sits submerged under water, sealed airtight for future repairs.
You'll need: Garden hose with spray nozzle, Polymeric patio jointing compound, Water
- 5.1 Cover leftover compound with water and snap the lid on
- Check water level in the leftover polymeric jointing compound tub.
- Add clean tap water until 1 inch covers the leftover compound.
- Press the plastic lid firmly on the tub rim, sealing it airtight for another job.
Key measurements
- Storage water depth: 1 inch above leftover compound
- Tip: Submerging leftover water-activated polymeric compound under 1 inch of water preserves it for later.
Before you move on: Press around the tub lid rim to check it is snapped shut and airtight.
Finishing
Cure and tape removal
- Let compacted joints harden before walking on the patio or removing tape.
- Cure time unstated; allow 24 to 48 dry hours.
Care and aging
- Let sunlight fade faint resin stains on the slabs.
- Avoid heavy jet-washing or steam cleaning, which can dislodge polymeric mortar after frost.
Alternative mortars
- Lock loose slabs with Flowpoint cementitious slurry grout where puddling is absent.
- Use 3:1 sand and cement or two-part epoxy grout for permanent jet-wash resistance.
Test it before you call it done
| Check | What you should see | If not |
|---|---|---|
| Inspect sealed sandstone faces around each joint right after smoothing with the spoon. | No stray polymeric granules or sticky residue remain on the stone. | Sweep immediately with the soft hand brush before the resin cures and stains. |
| Press firmly along ironed joints with the metal spoon back. | Mortar feels dense, flush, and compacted to the bottom of the 1.5 to 2 inch gap. | Pack water-soaked compound into soft or sunken spots with the pointing trowel and re-iron. |
| Check water drainage at low points after joints cure. | Surface water filters steadily through compacted permeable joints (about 18.5 minutes in a pot test). | Check stone sealer was not rolled over joints and the sub-base is permeable. |
These Specs are built from Tidybricks patio restore's video “Sealing and Re-Grouting an Indian Sandstone Patio”. Open the Sealing and Re-Grouting an Indian Sandstone Patio project page.
