Spetz Specs No. 6681: step-by-step build guide
DIY Circular Saw Track Guide
The complete step-by-step guide made from Indy Farm Life's YouTube video, free on Spetz. For the video, a step-by-step player and answers to your questions, see the DIY Circular Saw Track Guide project page.
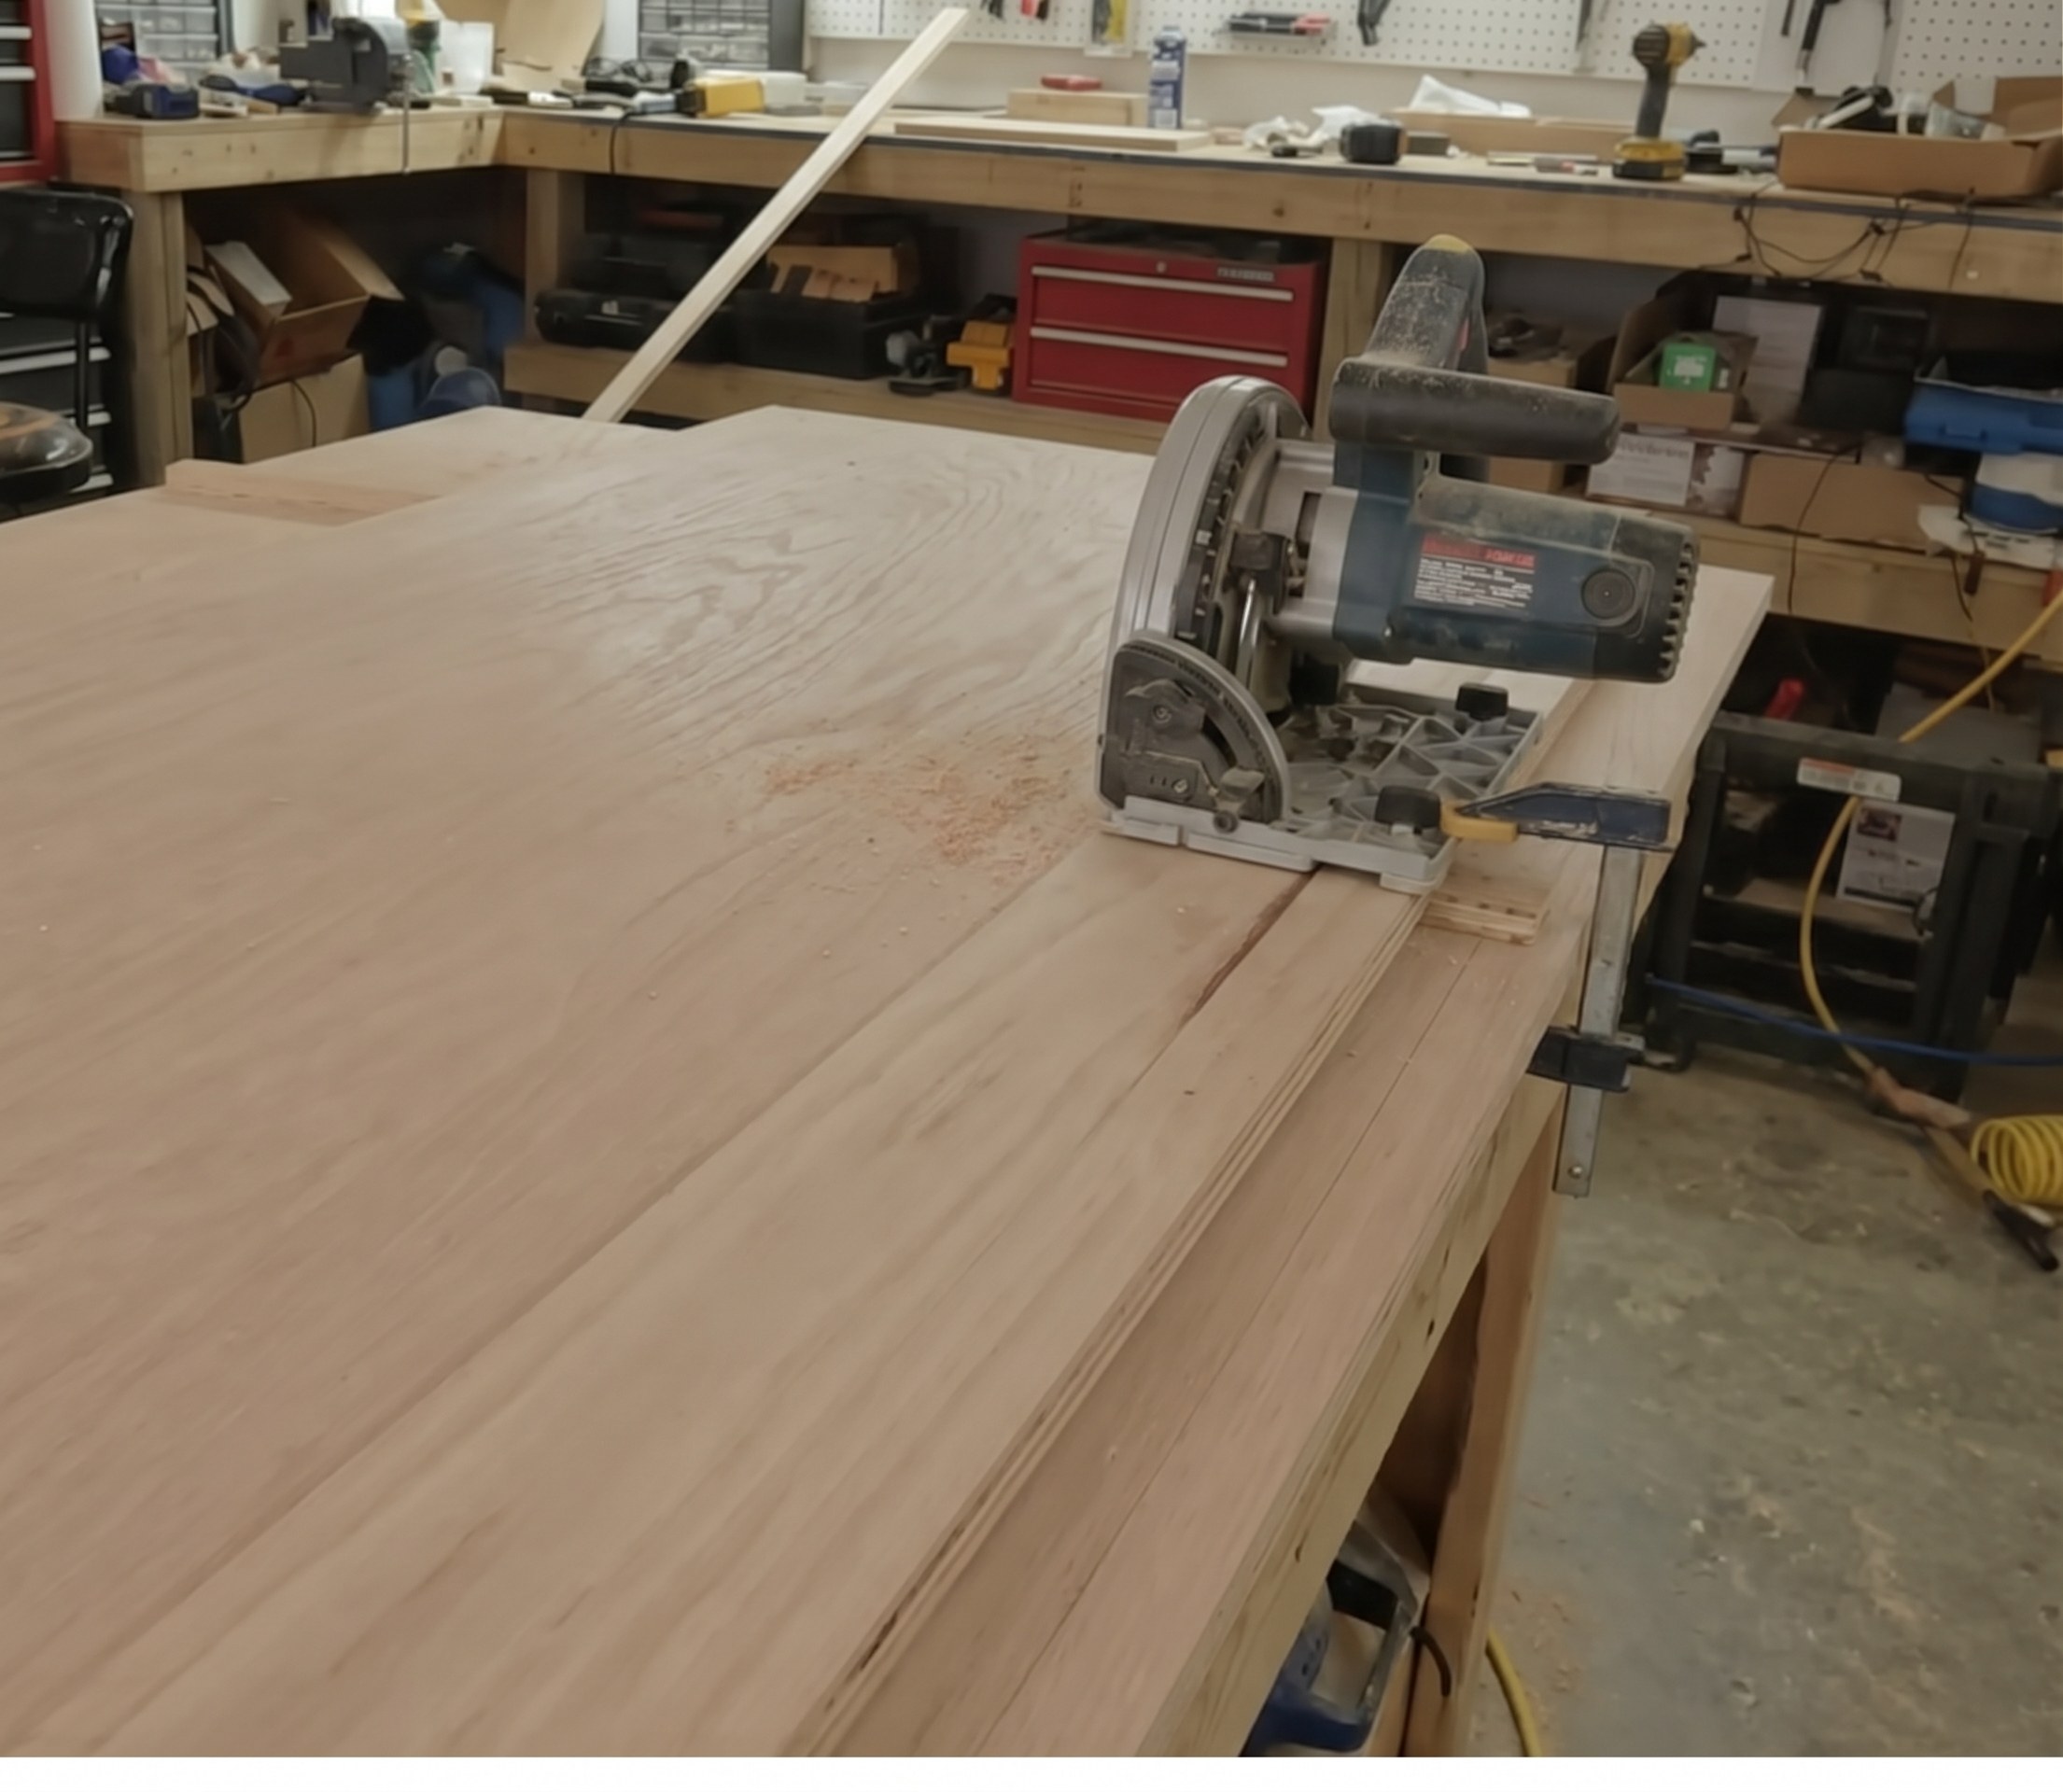
3 steps, 2 parts, 7 tools, 3 materials
Overview
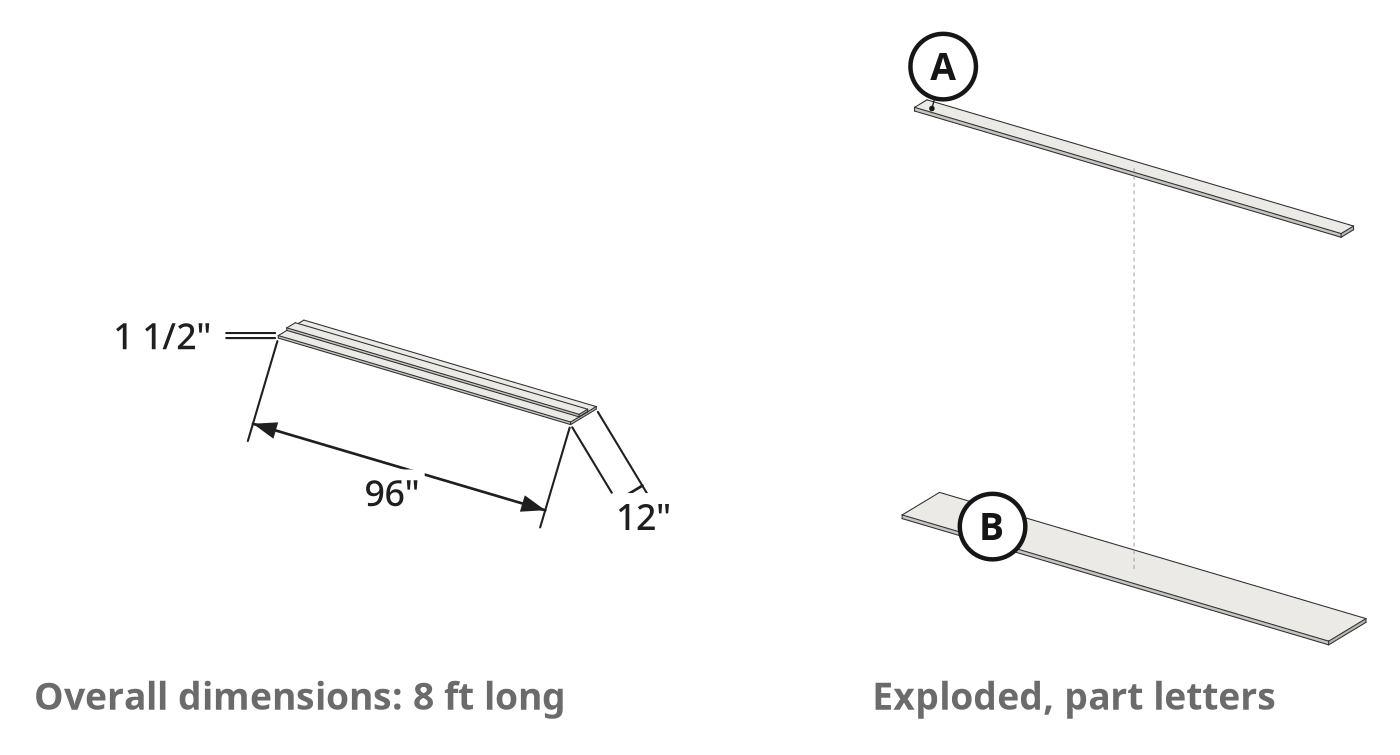
Finished size: 96 in long x 12 in wide x 1.5 in high
What You're Building
- Build an 8-foot zero-clearance circular saw track guide.
- Rip full plywood sheets straight for cabinets and shop projects.
Why This Design Works
- Use the plywood factory edge as a straight 96-inch reference rail.
- Trim the base in place to match the saw blade path.
- Cut from either rail side for saw motor clearance.
What It Takes
- Assemble the jig from one plywood sheet, wood glue, and screws.
- Optionally true the second rail edge on a table saw.
What Decides Success
- Hold the saw base tight to the rail while trimming.
- Check the saw blade clears the jig and workpiece.
Health and safety
Circular Saw Safety
- Unplug the corded circular saw before adjusting blade depth, changing setups, or setting the tool aside after a cut.
- Place scrap lumber between the plywood jig and the sawhorses so the spinning blade does not strike the horses.
- Wait for the circular saw blade to come to a complete stop before lifting the tool from the cut.
- Keep the power cord clear of the cutting path so the blade cannot sever it during the zero-clearance trim.
Table Saw Operation
- Secure the benchtop table saw on a stable surface before ripping the 3/4 inch plywood for the base and rail.
- Keep the riving knife and blade guard installed to prevent kickback while ripping the long plywood strips.
- Use a push stick when feeding narrow plywood pieces past the blade, and never reach over a spinning blade.
Workpiece Support and Fasteners
- Support the plywood securely on sawhorses with bar clamps so the sheet cannot fall or pinch the saw blade.
- Keep all #8 construction screws well clear of the blade path to avoid striking metal while trimming the zero-clearance edges.
- Drive screw heads flush with the guide rail so the circular saw base plate never catches or binds mid-cut.
Dust and Protective Equipment
- Wear eye and hearing protective equipment whenever operating the benchtop table saw, circular saw, or cordless drill.
- Wear a dust mask when cutting 3/4 inch plywood, as sawing sheet goods releases fine wood and adhesive dust.
- Inspect the scrap plywood before cutting and remove any hidden nails, staples, or debris that could fly from the blade.
Tools
- Circular Saw (Corded circular saw, Ryobi)
- Drill/Driver (Cordless drill/driver, DeWalt)
- T-Square
- Tape Measure
- Carpenter's Pencil
- Table Saw (Benchtop table saw, Ryobi) (optional)
- Clamps (Bar clamps, Irwin Quick-Grip)
Materials
- Plywood (1, Scrap plywood, 3/4 inch, 4x8 ft sheet)
- Wood Screws (Construction screws, #8 x 1-1/4 inch)
- Wood Glue (Small bottle, Titebond)
Hardware
| Hardware | Size | Count | Used in steps |
|---|---|---|---|
| #8 x 1-1/4 inch Wood Screws | 2 | ||
| Wood Glue | 2 |
Cut list
| Part | Name | Qty | Size | Notes |
|---|---|---|---|---|
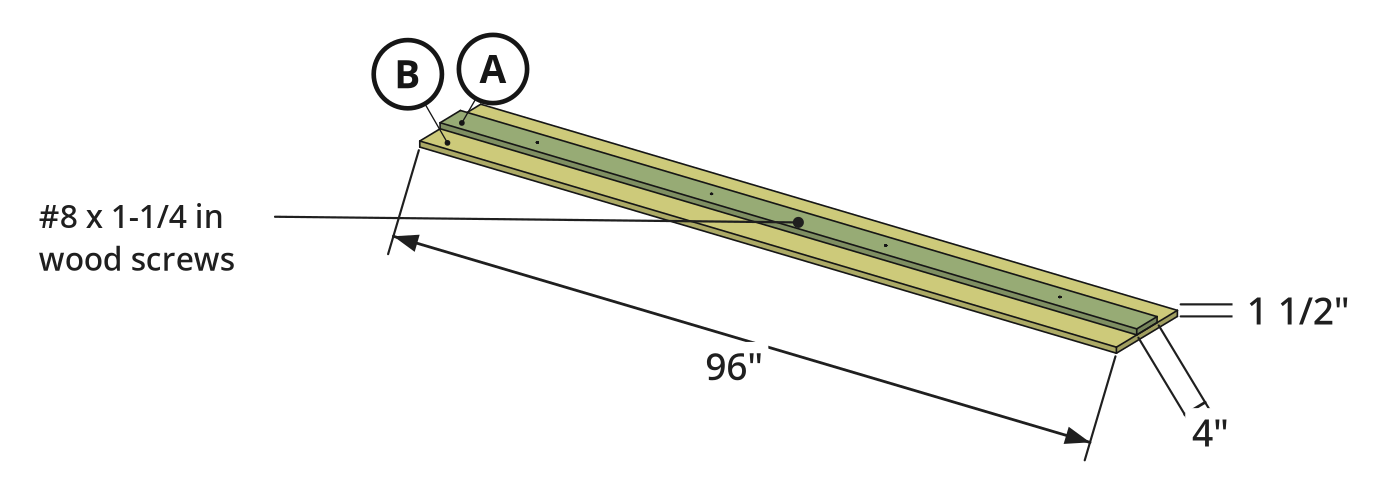
| A | Guide rail | x1 | 3/4" (T) × 4" (W) × 96" (L) | Rip a 4 in wide strip along the factory straight edge of the 4x8 ft sheet using a circular saw. Optionally run the rough-cut edge through a table saw to create a second straight edge so the jig is reversible. |
| B | Base | x1 | 96 in x remaining sheet width, trimmed in place to about 12 in | Leave the remaining plywood wider than the guide rail plus your circular saw's base plate on both sides prior to assembly; after gluing and screwing the guide rail on top, run the circular saw along both sides of the rail to trim the base to its final zero-clearance width. |
What to buy
- Buy 1 × Plywood 4x8 sheet (Plywood)
Before you start
Lumber Selection
- Check the 4x8 plywood sheet for a clean, undamaged 8-foot factory edge.
- Check 3/4-inch plywood leaves enough circular saw blade depth.
Layout and Labeling
- Check the factory edge sits straight against a T-square before marking.
- Mark the factory reference edge with pencil arrows to identify it.
Workspace Setup
- Top sawhorses with sacrificial scrap lumber to protect them.
Step by step
Step 1: Cut the Guide Rail and Base
Rip a 4-inch guide rail with a factory straight edge from the plywood sheet, leaving the wider base.
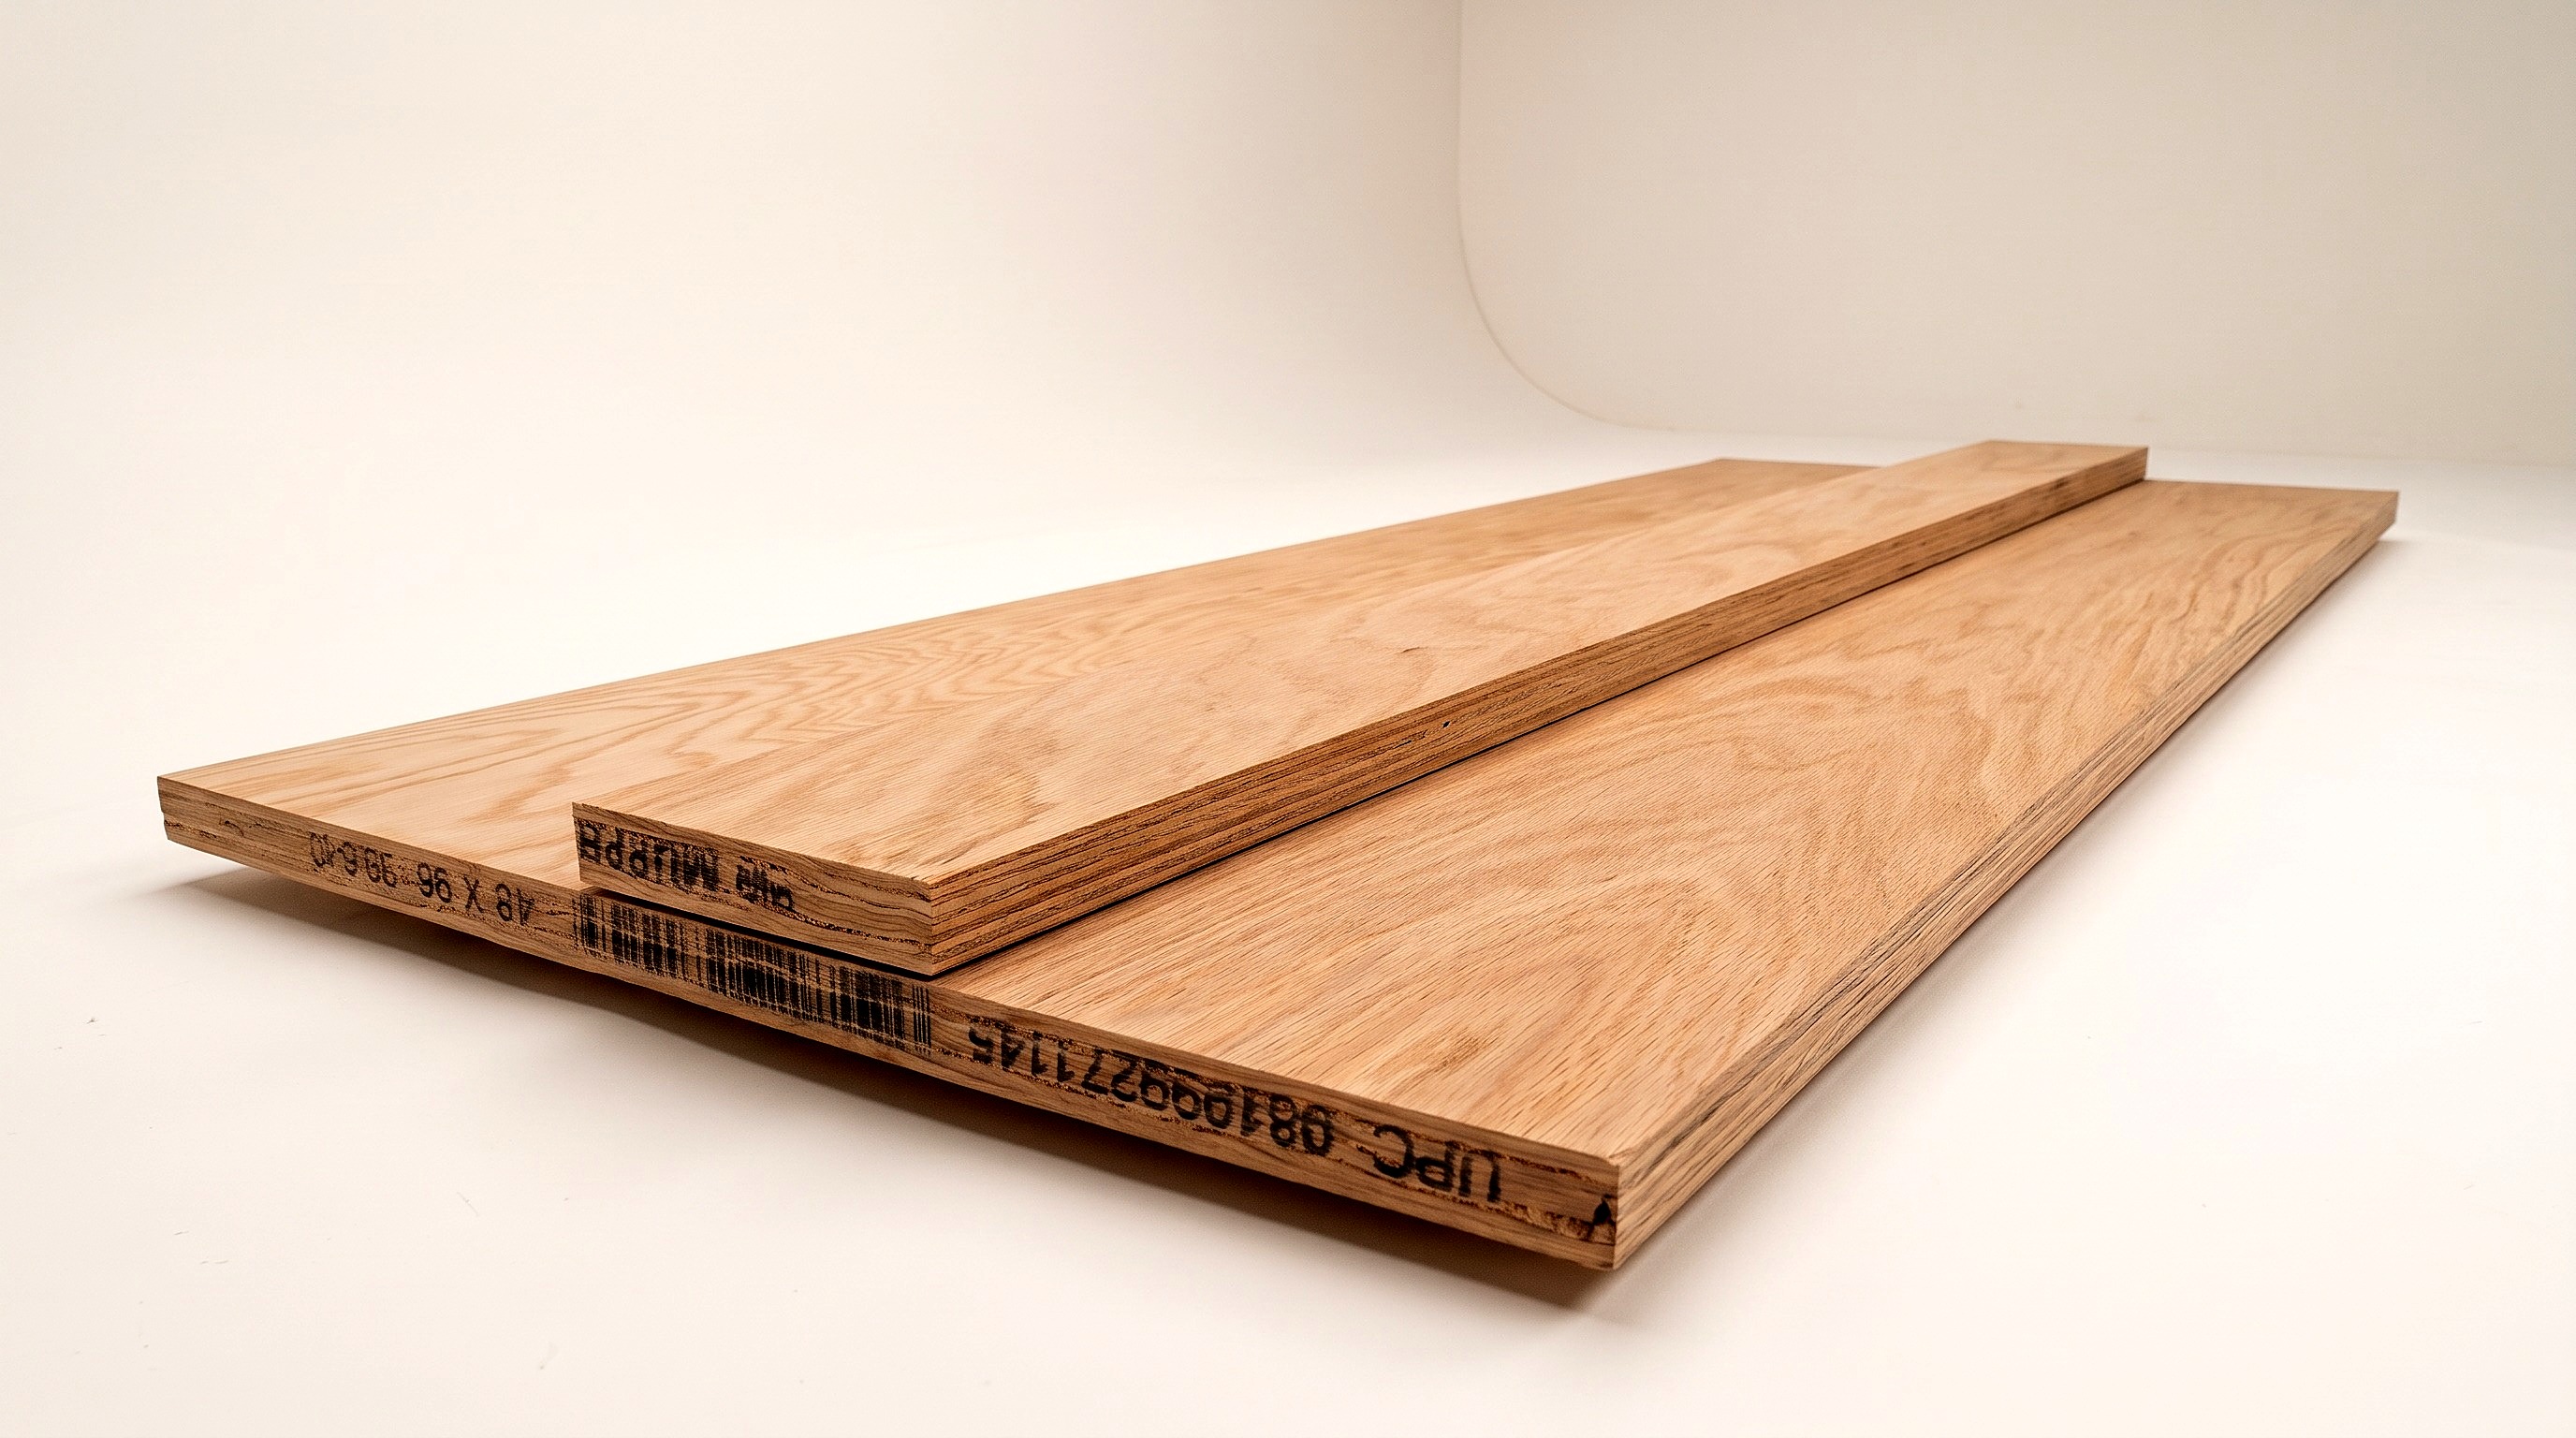
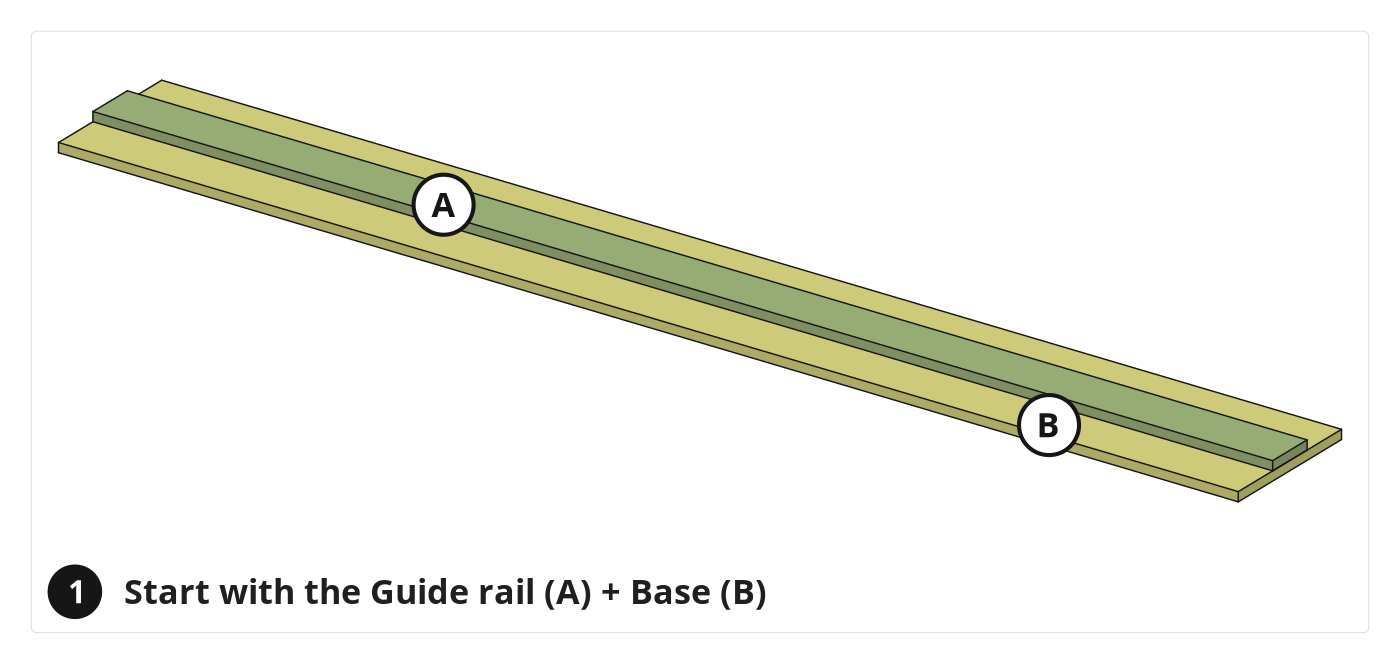
Parts in this step: (A) Guide rail, (B) Base
You'll need: Circular Saw, T-Square, Tape Measure, Carpenter's Pencil, Table Saw, Plywood
- 1.1 Establish a Straight Edge
- Check the plywood 8-foot factory edge for the guide rail (A).
- Check the factory edge sits flat with a T-square.
- Rip a clean straight edge on a table saw if damaged.
- 1.2 Mark the Rail Cut
- Measure 4 inches in from the factory edge at both sheet ends.
- Draw a 96-inch cut line with a carpenter's pencil.
- Point arrows at the factory edge to distinguish it from your cut.
- 1.3 Cut the Rail and Base
- Support the plywood on sawhorses with scrap wood underneath to protect them.
- Freehand-cut the marked line with a circular saw to separate the rail.
- Unplug the circular saw right after the rip cut.
- Keep the remaining sheet, wider than the saw, for the base (B).
- The starting width of the base (B) is not stated.
Key measurements
- Guide rail (A) width: 4 in from the factory straight edge
- Guide rail (A) and base (B) length: 96 in along the full sheet
- Tip: Mark the factory edge with arrows before cutting so a wavy freehand cut is never mistaken for the reference edge.
- Heads up: Unplug the circular saw right after cutting before setting it aside.
Before you move on: Check the guide rail (A) factory edge is marked with arrows and undamaged.
Step 2: Assemble the Jig
Check saw depth clearance, optionally true the second rail edge, and glue and screw the guide rail to the base.
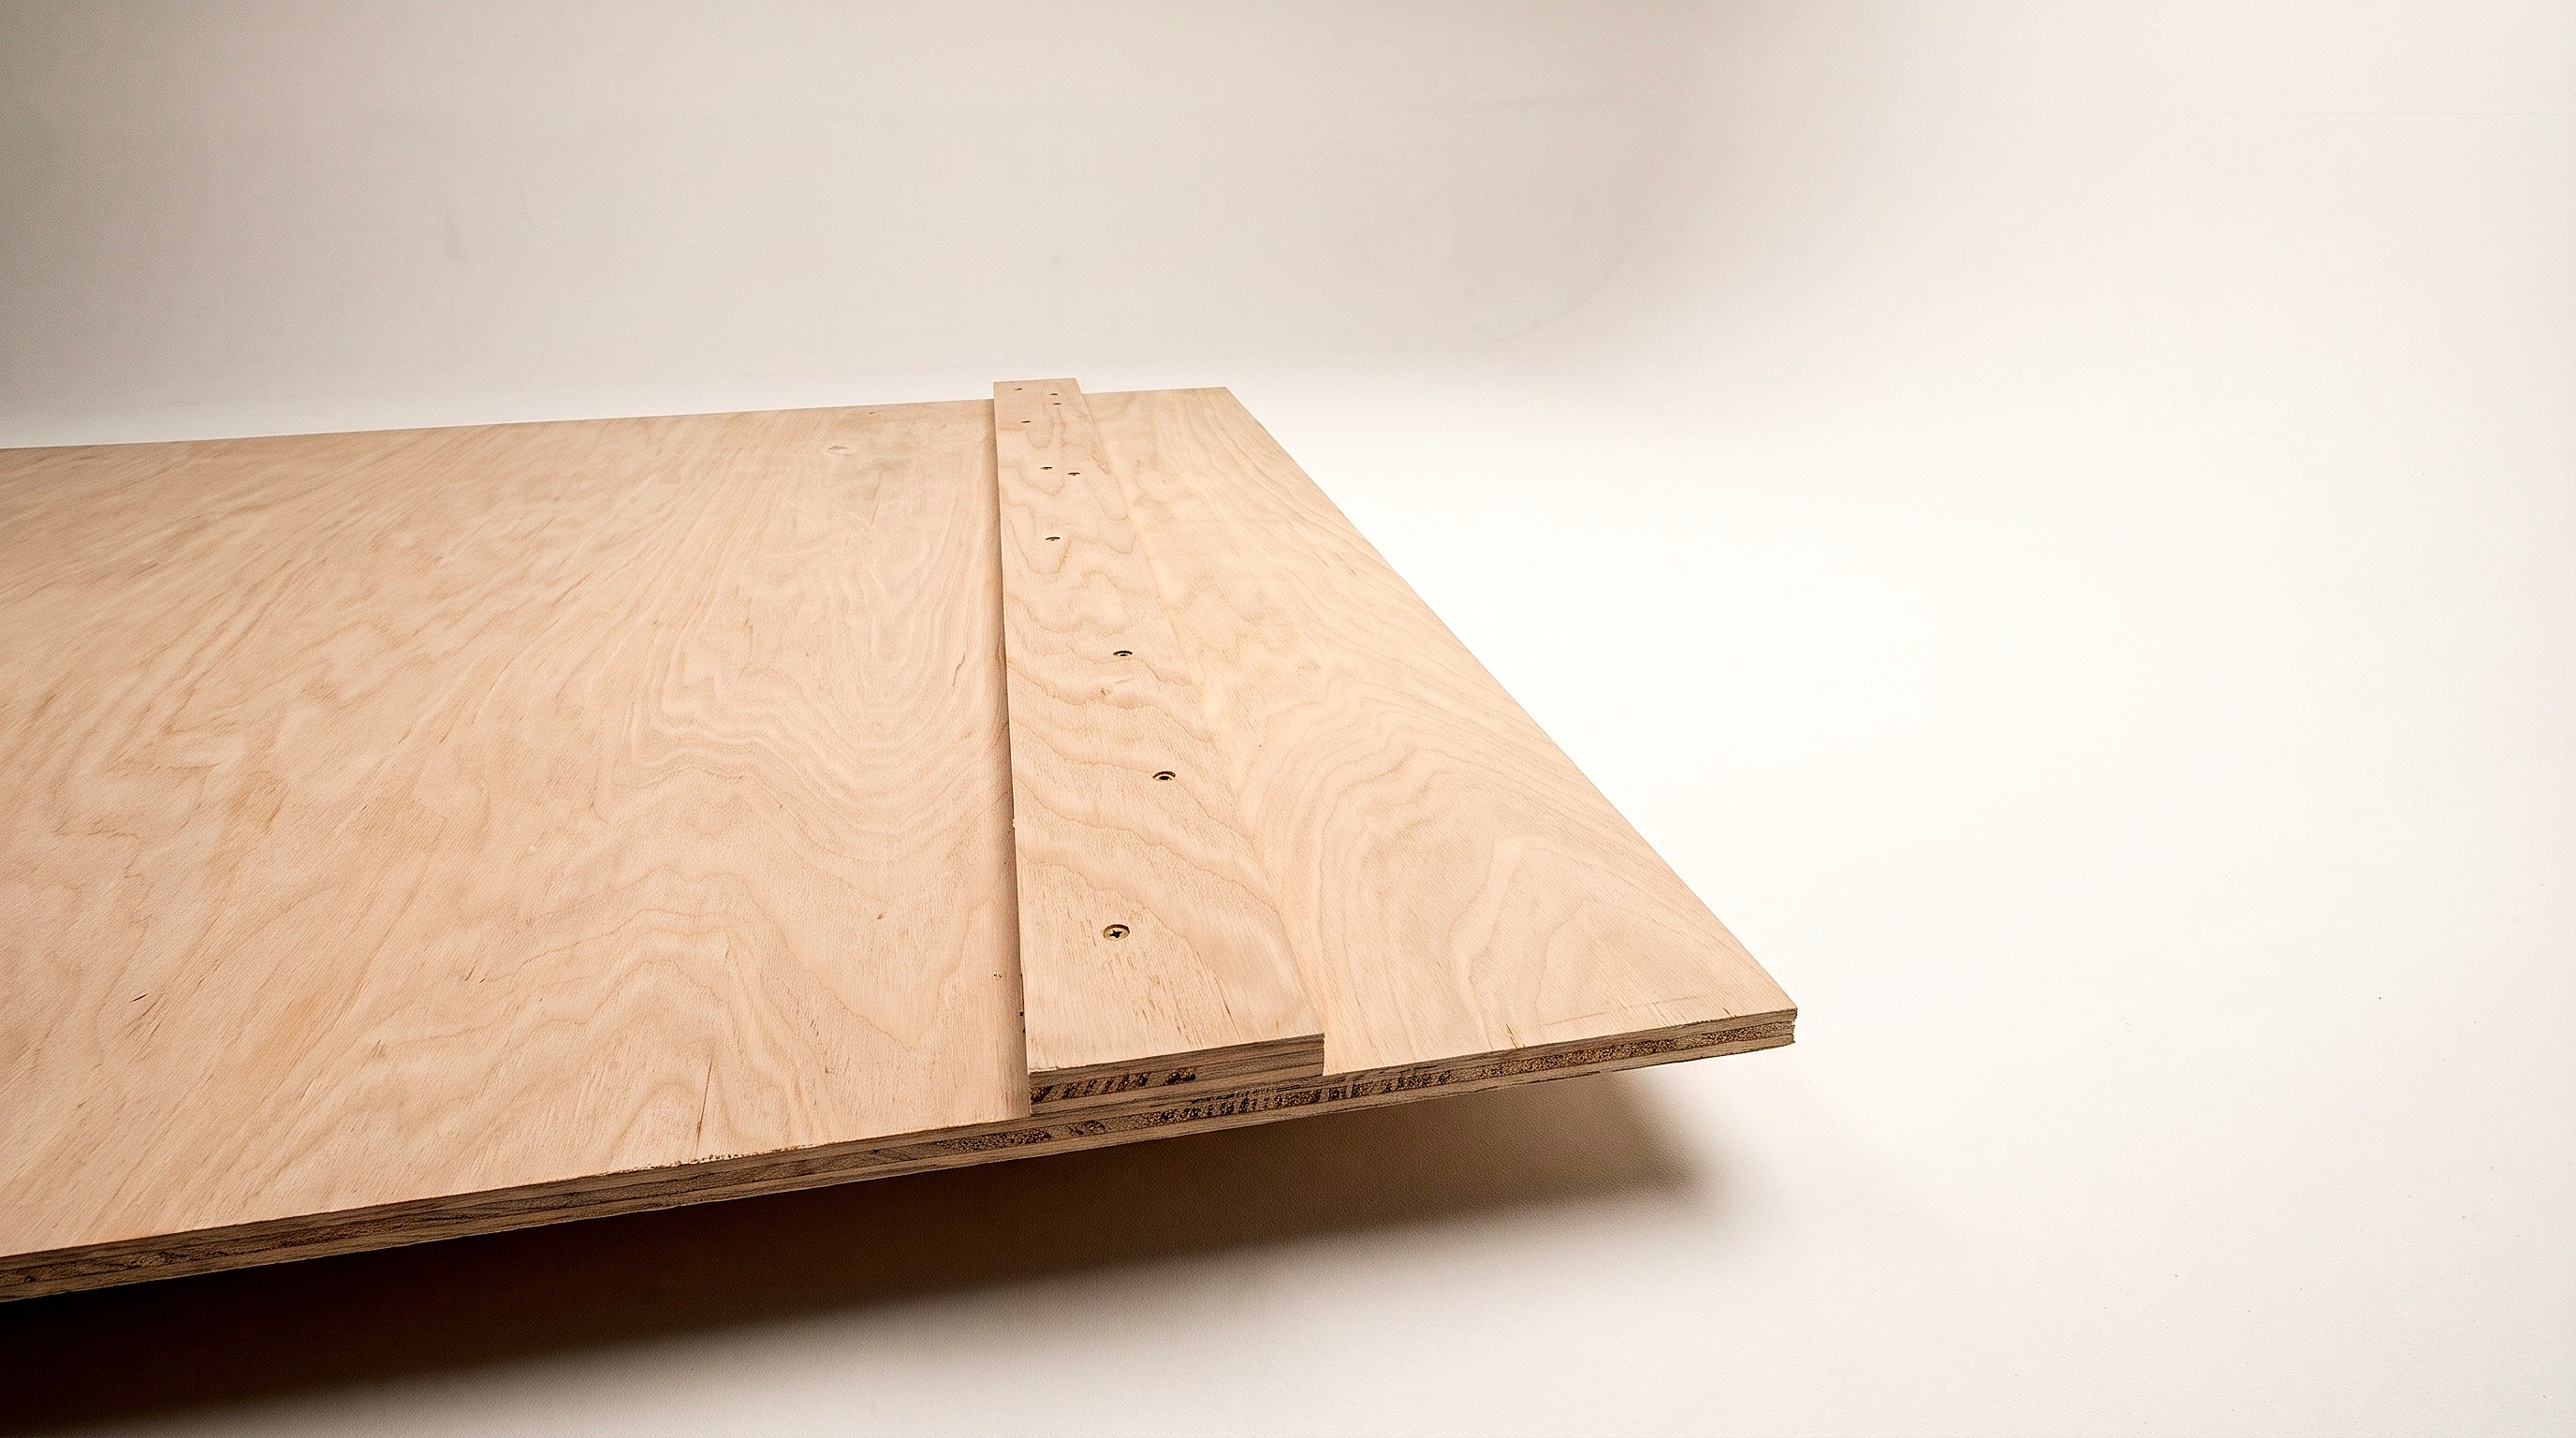
Parts in this step: (A) Guide rail, (B) Base
You'll need: Circular Saw, Drill/Driver, Tape Measure, Carpenter's Pencil, Table Saw, Plywood, Wood Screws, Wood Glue
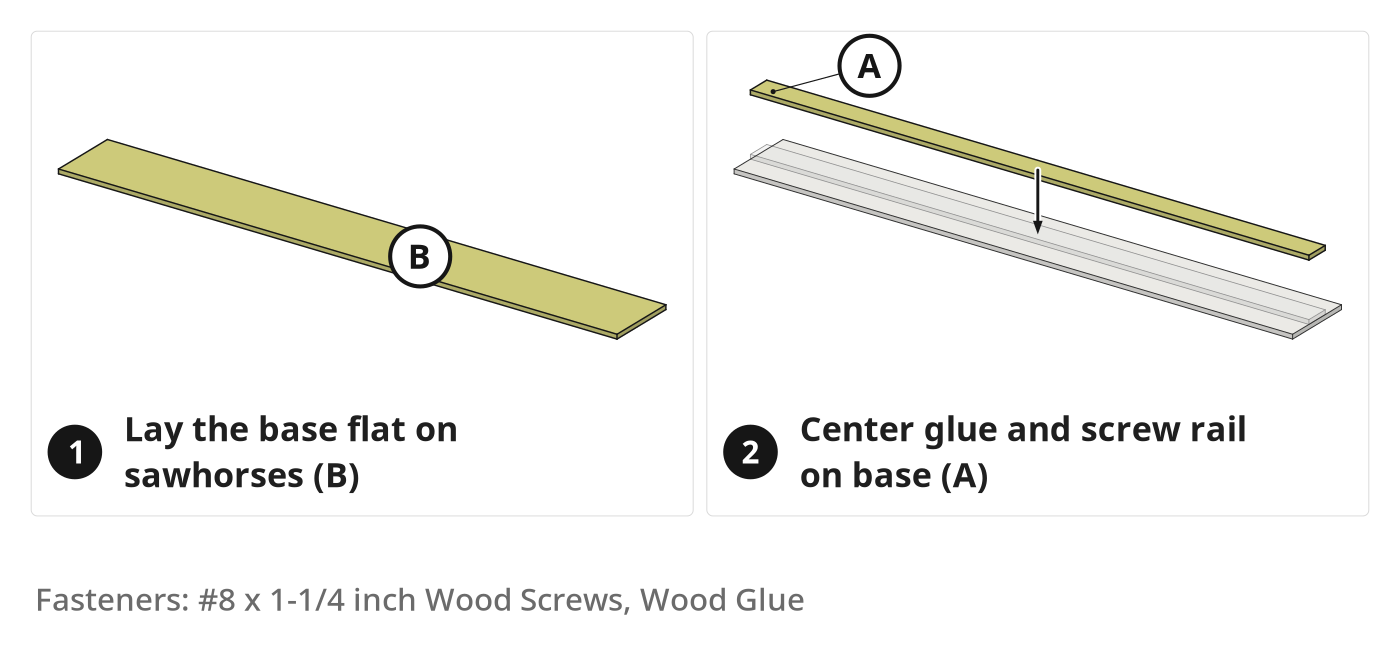
- 2.1 Determine Rail Placement
- Lay base (B) flat on sawhorses or a workbench.
- Set guide rail (A) on base (B), arrows pointing out.
- Place the circular saw on base (B) against guide rail (A).
- Position the rail so base (B) overhangs the saw on both sides.
- 2.2 Check Saw Depth and Clearance
- Set the circular saw blade to maximum cutting depth.
- Slide a 3/4-inch plywood scrap under base (B) to test blade projection.
- Check the saw motor clears guide rail (A) without bottoming out.
- Use 1/2-inch plywood for the rail or base if blade depth falls short.
- 2.3 Glue and Screw the Rail
- For a two-sided jig, do Step 2.4 on the table saw first.
- Measure from the base (B) reference edge and mark both ends.
- Apply a zig-zag bead of wood glue along the base marks.
- Set guide rail (A) on the marks, factory edge facing out.
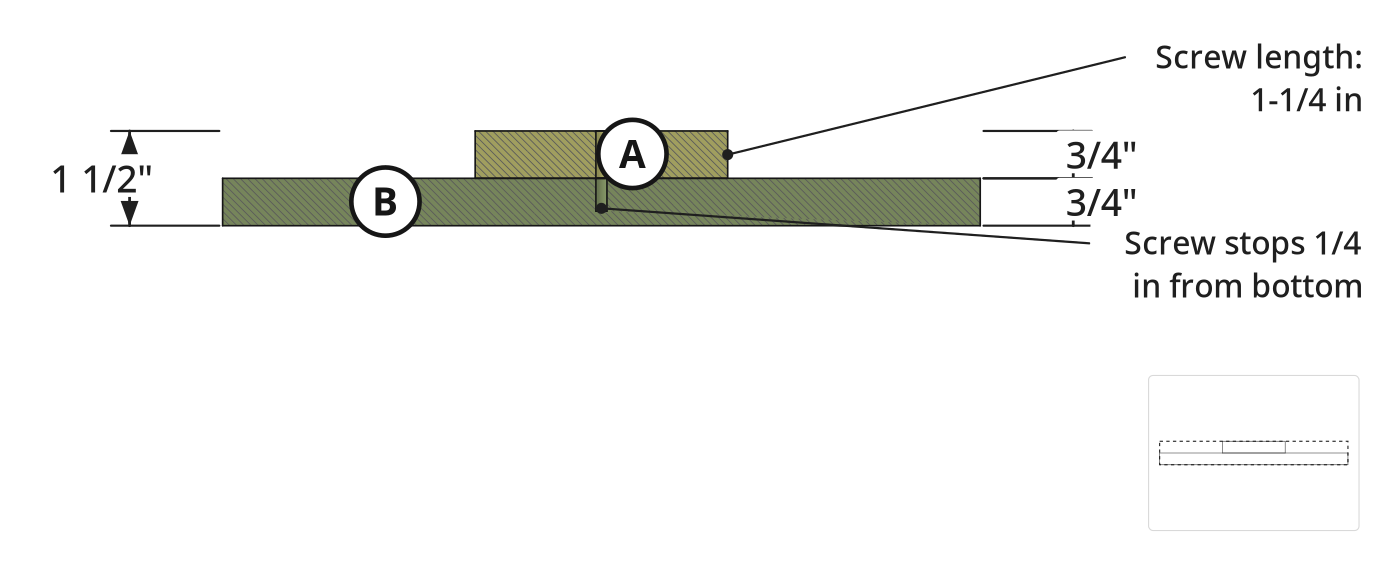
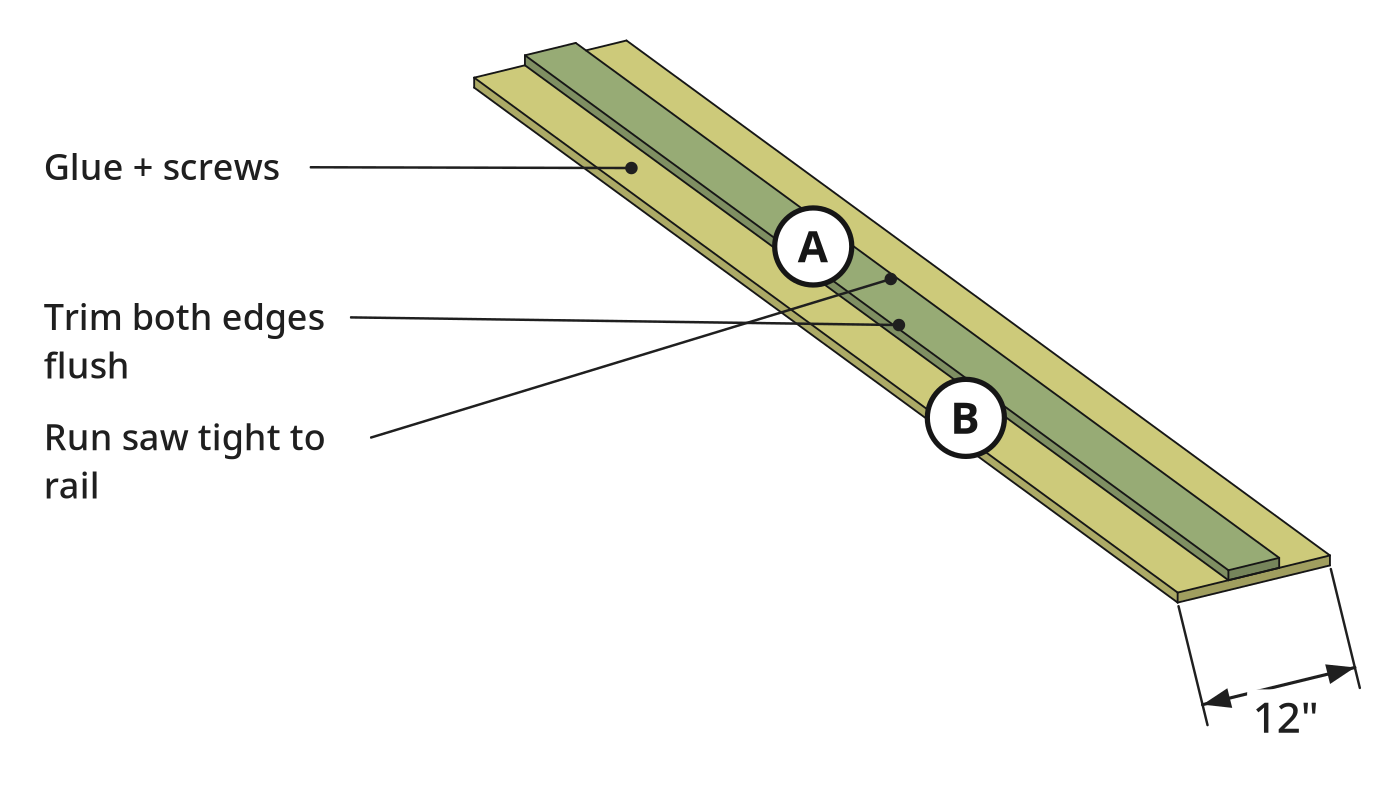
- Drive #8 x 1-1/4 inch wood screws through the rail into the base.
- 2.4 Square the Second Edge (Optional)
- Make this table saw cut before gluing guide rail (A) in Step 2.3.
- Set the guide rail (A) factory edge against the table saw fence.
- Rip the rough freehand edge straight to cut from both sides.
Key measurements
- Combined jig thickness: 1-1/2 in (two 3/4 in plywood layers)
- Fastener length: 1-1/4 in screws to join two 3/4 in layers without poking through
- Tip: Use 1/2-inch plywood for base (B) or guide rail (A) if the saw motor hits the rail before the blade clears 3/4-inch stock.
- Heads up: Drive screw heads flush with guide rail (A), keeping screws out of the saw blade path.
Before you move on: Check the guide rail (A) factory edge faces out and base (B) is wider than the saw footprint on both sides.
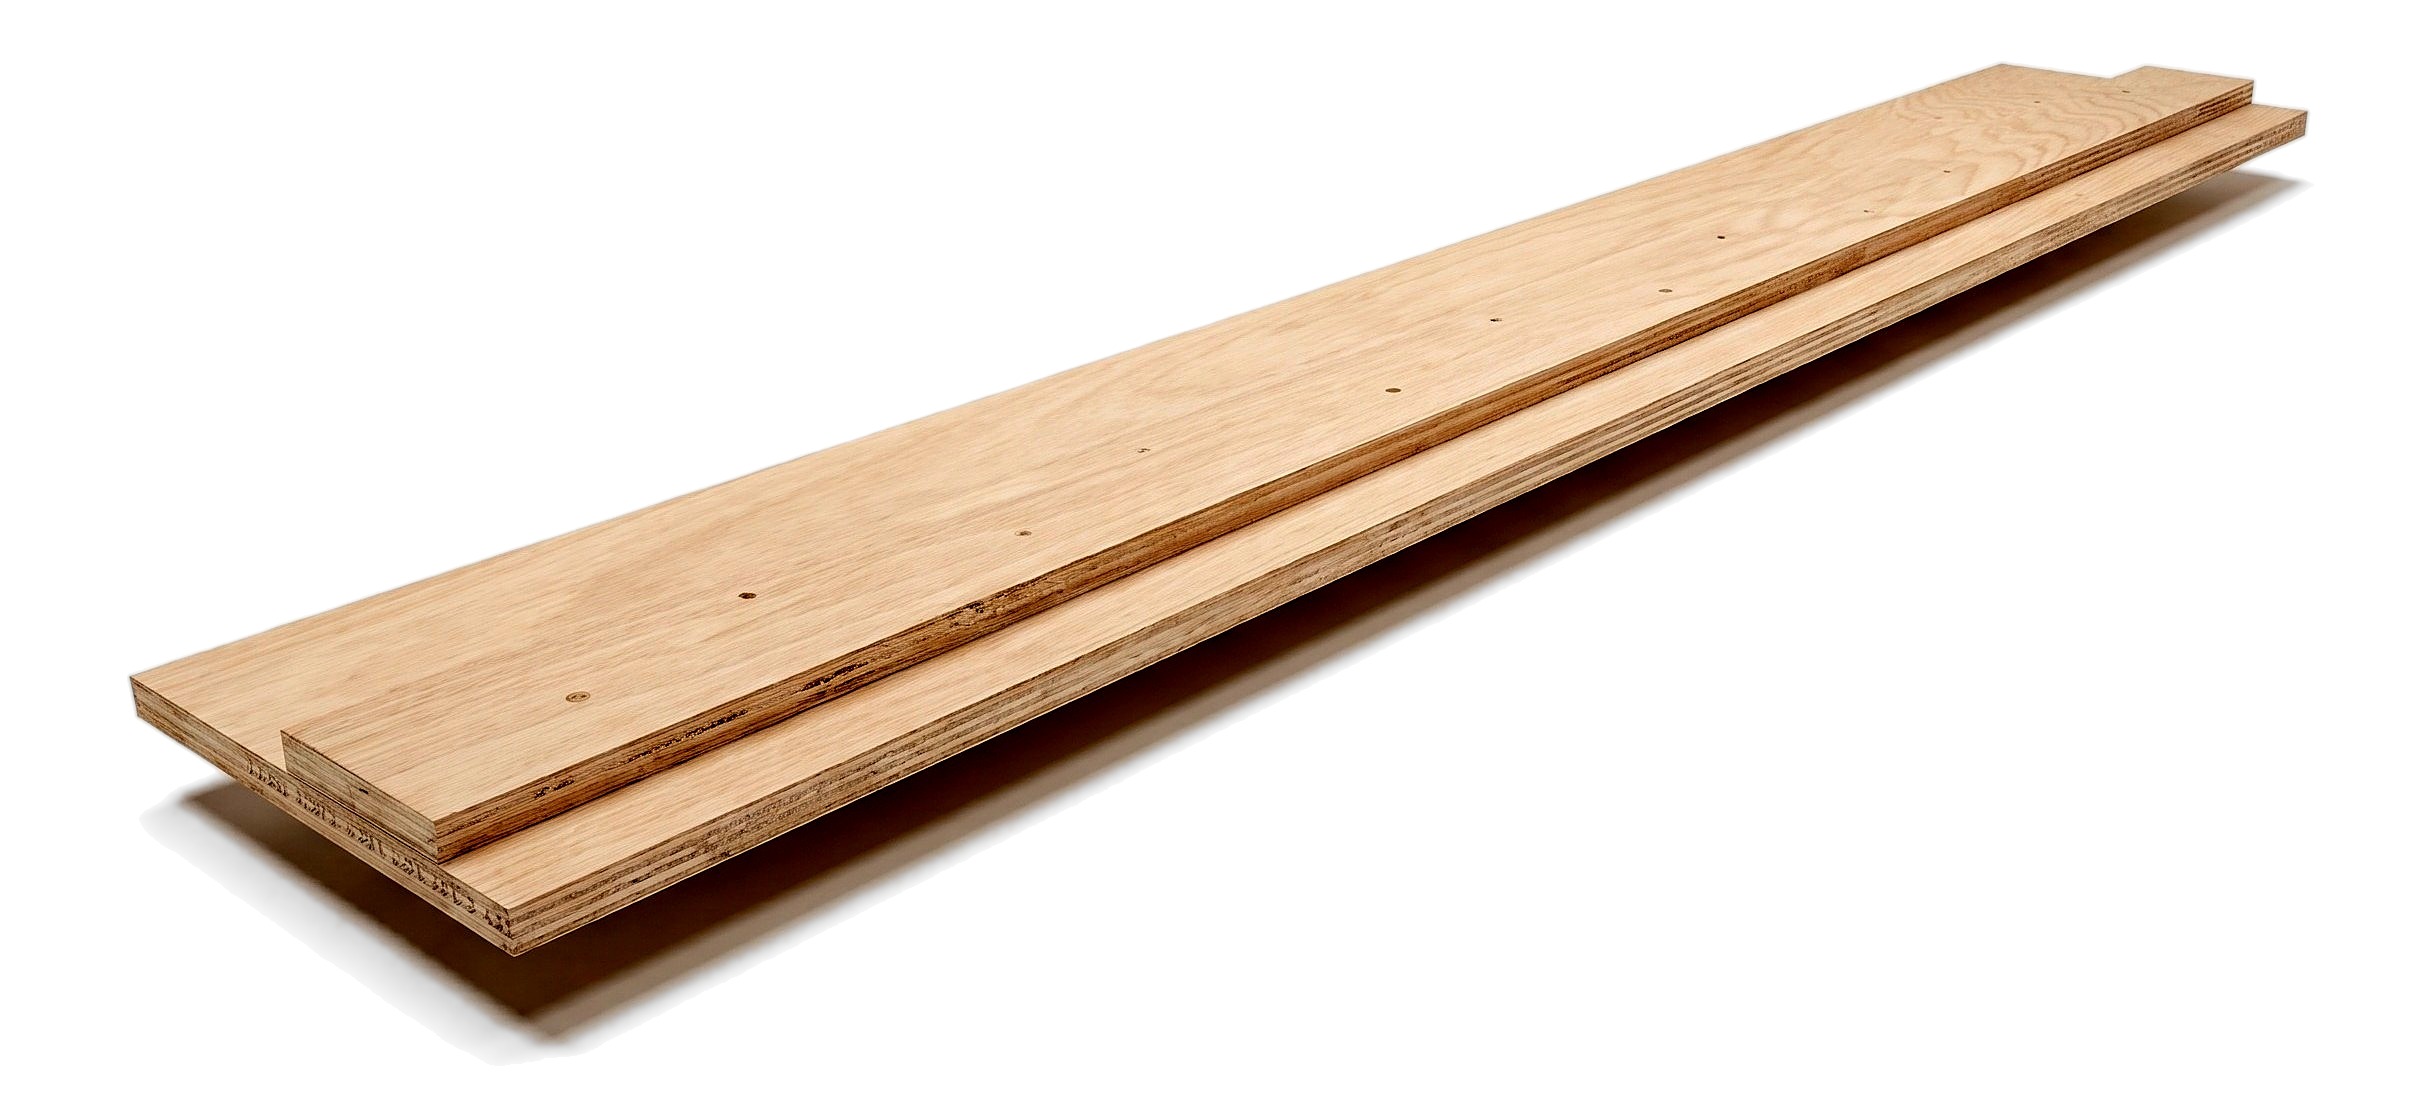
Step 3: Create the Zero-Clearance Edges
Trim both outer base edges with the circular saw held against the guide rail for zero-clearance cut lines.
Parts in this step: (A) Guide rail, (B) Base
You'll need: Circular Saw, Clamps, Plywood
- 3.1 Trim the First Edge
- Set the assembled jig on sawhorses over sacrificial scrap lumber.
- Place the circular saw on base (B) against the factory rail edge.
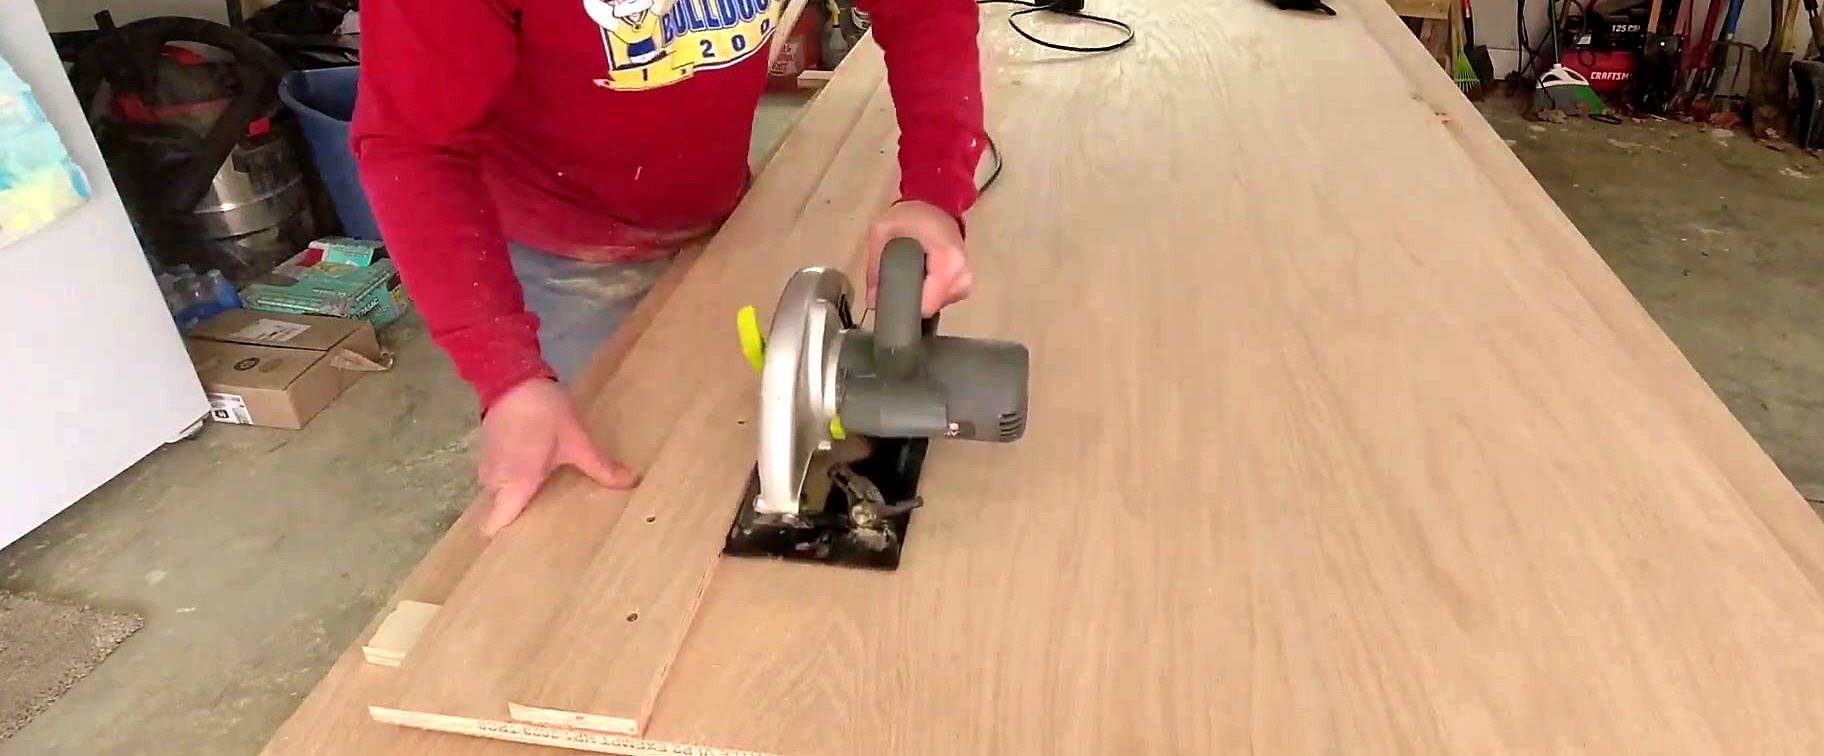
- Hold the saw base plate tight to guide rail (A) and rip.
- Discard the narrow offcut strip to expose the first zero-clearance edge.
- 3.2 Trim the Second Edge
- Set the circular saw on the opposite side of guide rail (A).
- Keep the blade next to the rail, motor hanging over the edge.
- Run the saw tight against the rail to trim the second base (B) edge.
Key measurements
- Finished base (B) width: about 12 in after trimming both sides to the saw footprint
- Tip: Cut along the wide side of base (B) to support the saw motor, or the narrow side with the motor hanging out.
- Heads up: Place scrap lumber between the jig and sawhorses before cutting so the saw blade does not cut the horses.
Before you move on: Check both trimmed base (B) edges to make sure the saw stayed tight to guide rail (A) down the full 96-inch length.
Finishing
Preparation and Cure
- Let the wood glue cure before heavy jig use.
- Leave the plywood raw and unfinished so the saw slides smoothly.
Using the Track Guide
- Mark the cut width at both workpiece ends.
- Align the trimmed base (B) edge on the pencil marks.
- Skip blade-width offset; the trimmed base edge matches the blade path.
- Clamp both jig ends with bar clamps and cut.
Alternatives
- Clamp a straight level or angle iron to the workpiece instead.
These Specs are built from Indy Farm Life's video “DIY Circular Saw Track Guide”. Open the DIY Circular Saw Track Guide project page.
