Spetz Specs No. 3455: step-by-step repair guide
Seal Garage Door Side Gaps with Spring-Loaded Hinges
The complete step-by-step guide made from Indy Farm Life's YouTube video, free on Spetz. For the video, a step-by-step player and answers to your questions, see the Seal Garage Door Side Gaps with Spring-Loaded Hinges project page.
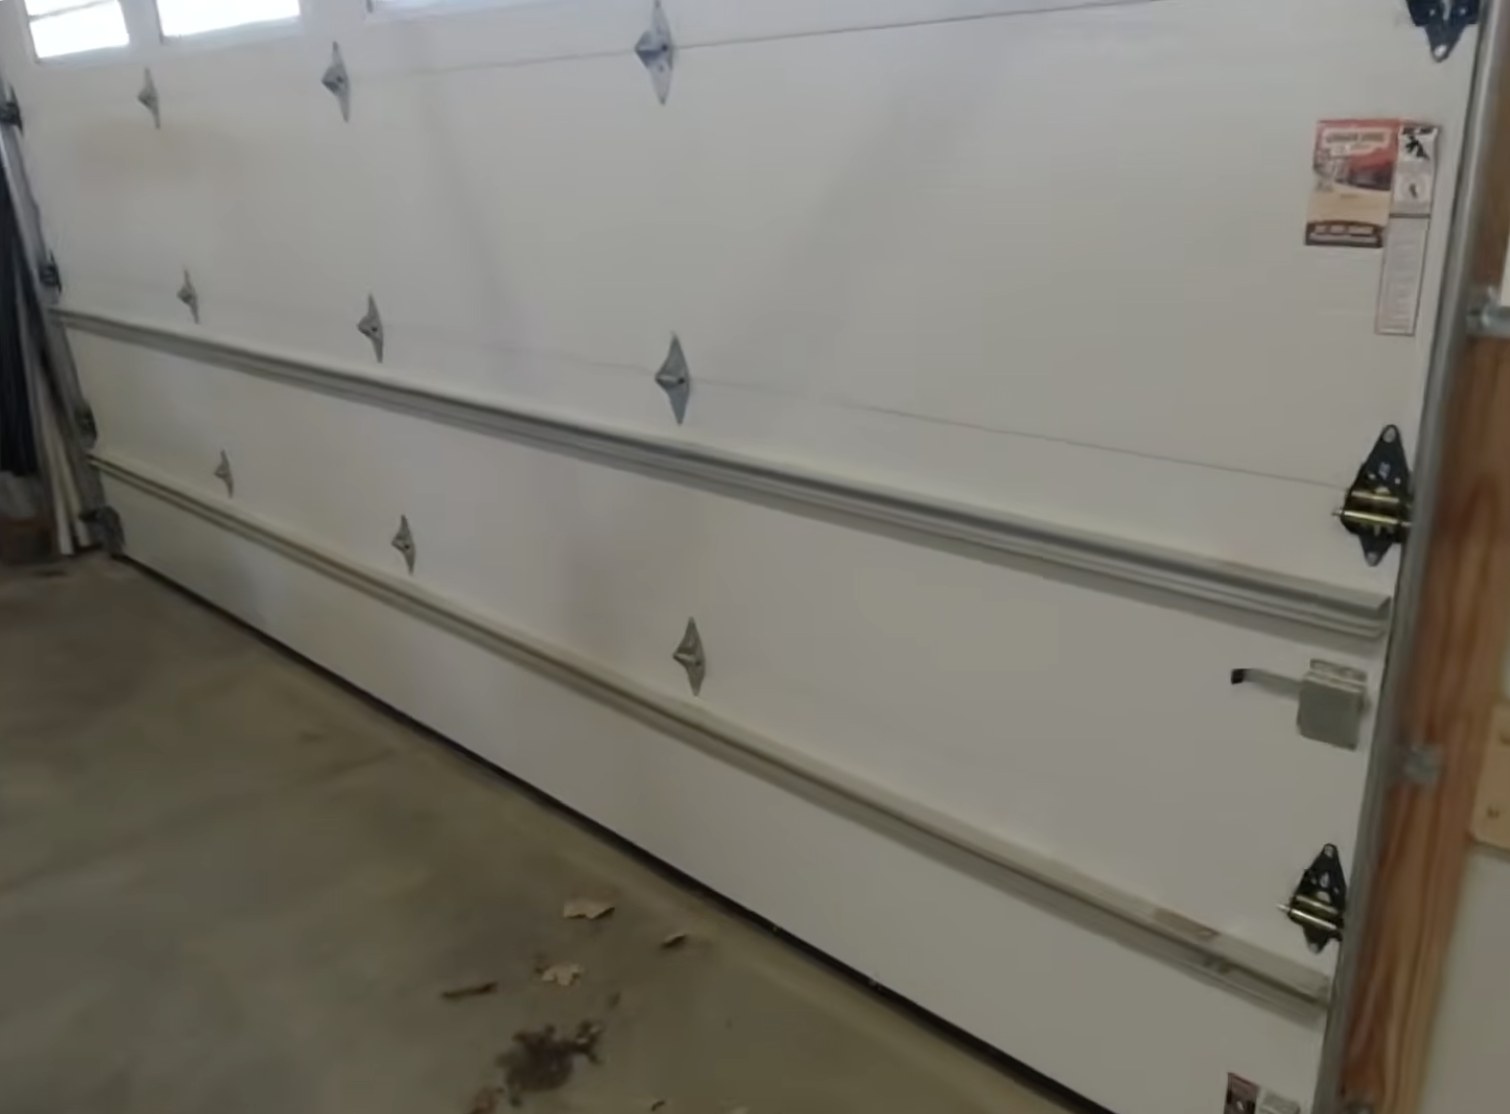
5 steps, 2 parts, 2 tools, 1 materials
Overview
The Fault
- Daylight and cold air leak past the closed garage door's middle.
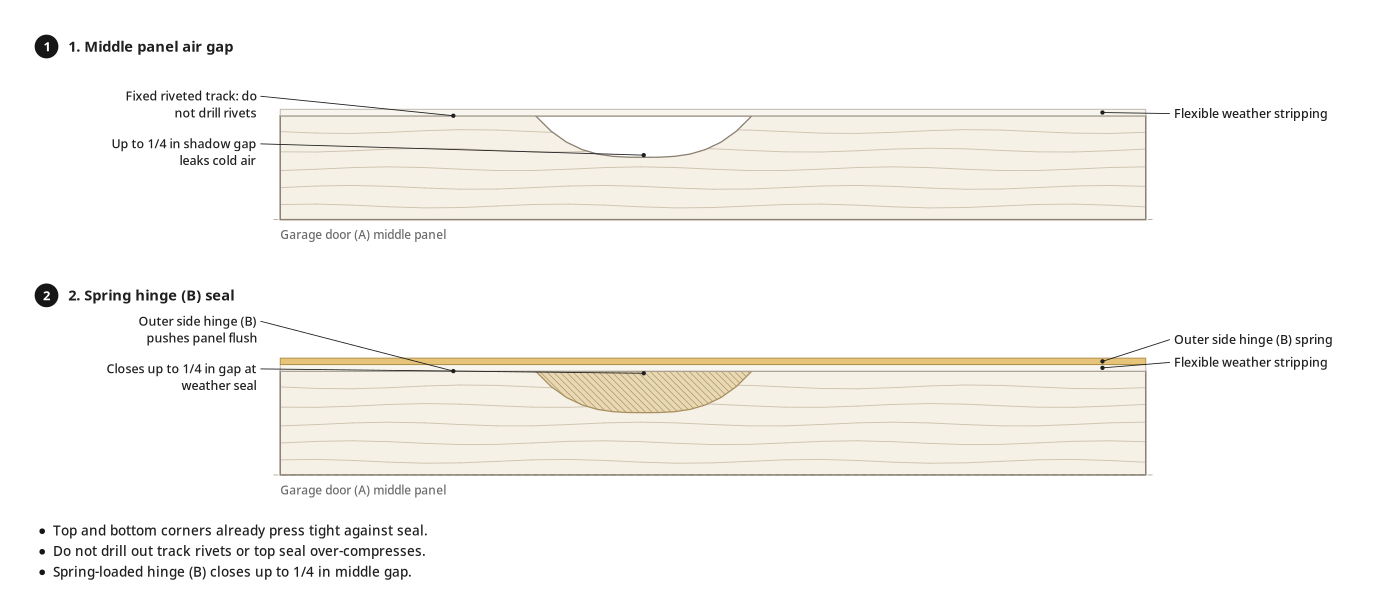
- Middle panels sit off the weather stripping in fixed, riveted tracks.
- Spring-loaded outer hinges push panels up to 1/4 in tighter against the seal.
What It Takes
- Swap six outer hinges with a cordless impact driver and work gloves.
- Get the 6-hinge gold-spring kit for 4-panel doors over 12 ft wide.
What Decides Success
- Install stamped hinges 1, 2, and 3 from bottom to top.
- Slide the roller shaft through each hinge's bottom spring-loaded tube.
- Leave high-tension bottom corner roller brackets untouched.
The fault at a glance
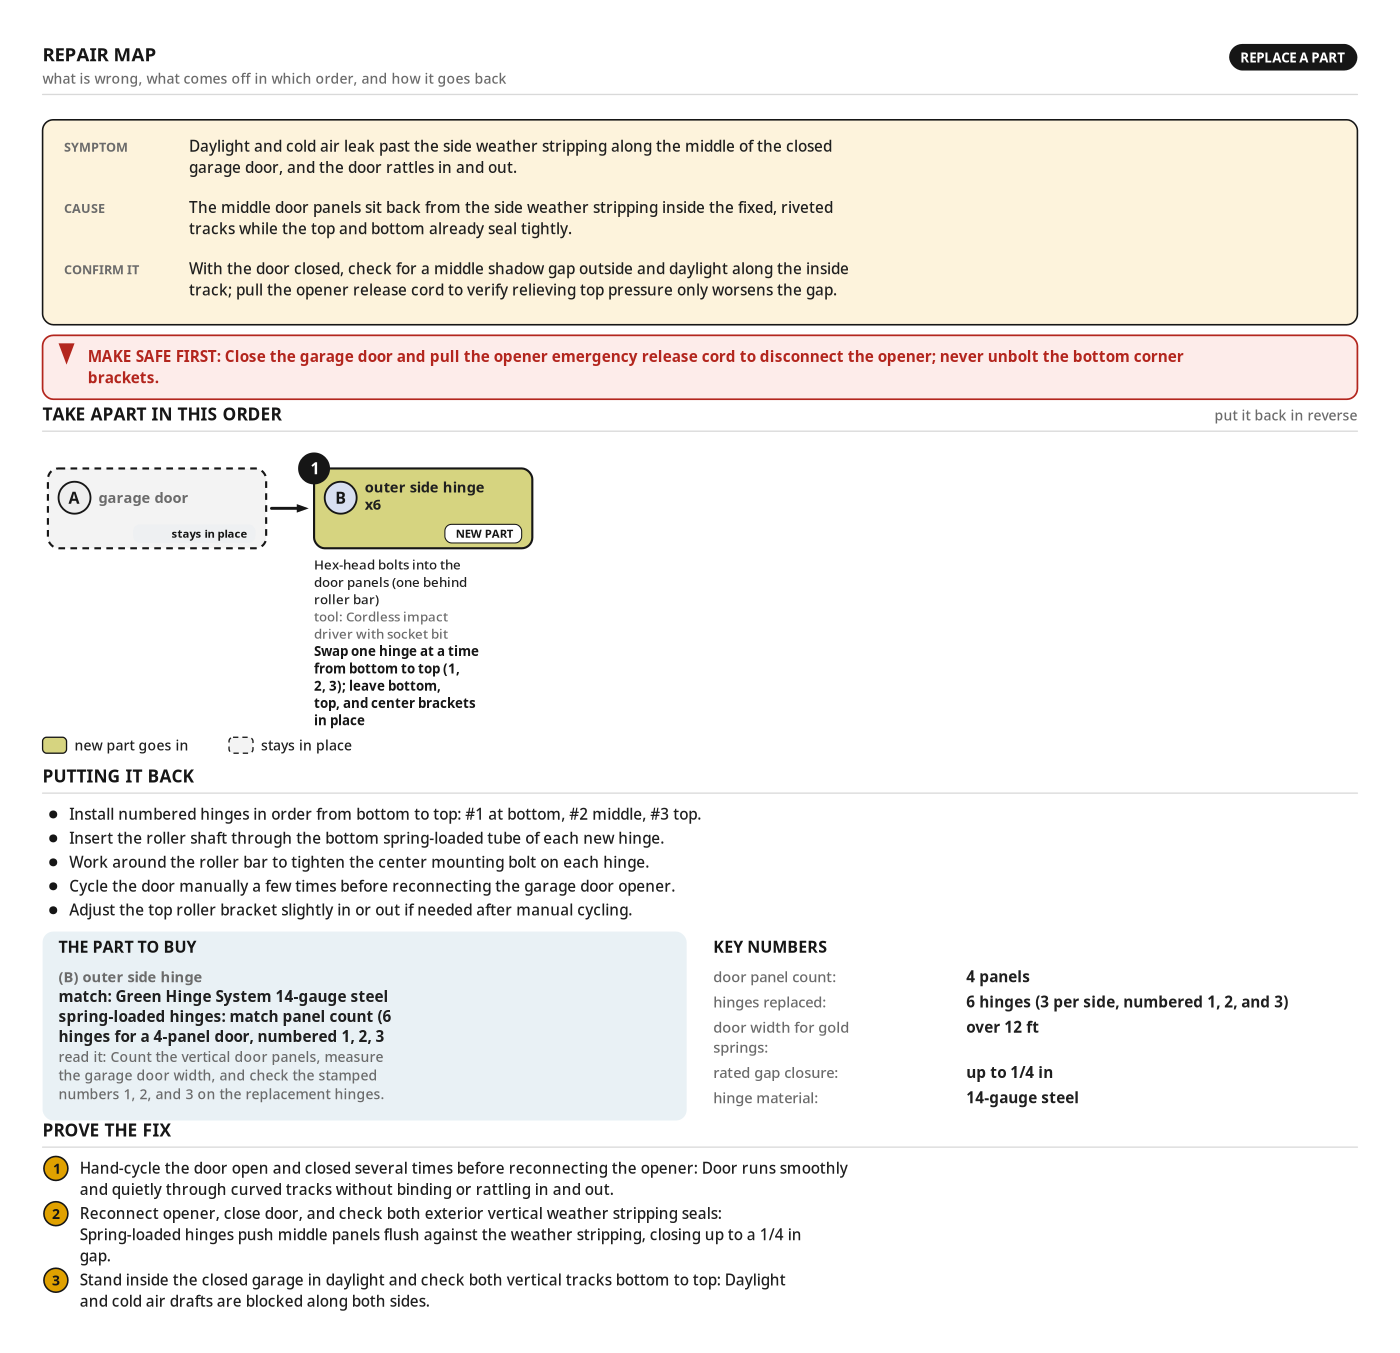
- What you see: Daylight and cold air leak past the side weather stripping along the middle of the closed garage door, and the door rattles in and out.
- What is wrong: The middle door panels sit back from the side weather stripping inside the fixed, riveted tracks while the top and bottom already seal tightly.
- Confirm it: With the door closed, check for a middle shadow gap outside and daylight along the inside track; pull the opener release cord to verify relieving top pressure only worsens the gap.
- Buy: B, Green Hinge System 14-gauge steel spring-loaded hinges: match panel count (6 hinges for a 4-panel door, numbered 1, 2, 3, Count the vertical door panels, measure the garage door width, and check the stamped numbers 1, 2, and 3 on the replacement hinges.
- door panel count: 4 panels
- hinges replaced: 6 hinges (3 per side, numbered 1, 2, and 3)
- door width for gold springs: over 12 ft
- rated gap closure: up to 1/4 in
- hinge material: 14-gauge steel
Make safe first
- Close the garage door and pull the opener emergency release cord to disconnect the opener; never unbolt the bottom corner brackets.
Health and safety
Garage Door Tension Hazards
- Never unbolt the bottom corner roller bracket; it attaches to the high-tension lift cable and can release with severe force.
- Close the garage door completely before pulling the emergency release cord so the heavy door cannot drop suddenly.
- Replace only one side hinge at a time so the remaining hinges keep the door panels aligned and supported.
- Keep the automatic opener disconnected while replacing hinges so the door cannot move unexpectedly during the work.
Pinch Points and Sharp Steel
- Wear leather work gloves when handling the 14-gauge steel hinges, old brackets, and sheet-metal door edges to prevent cuts.
- Keep fingers completely clear of hinge plates, gold springs, rollers, and panel joints while manually lifting or lowering the door.
- Hold the spring-loaded hinge plates firmly away from your fingers when guiding the roller into the door track.
Cordless Impact Driver Safety
- Seat the hex socket bit squarely on each hinge bolt to prevent the spinning driver from slipping onto your hand.
- Keep your free hand clear of the rotating socket when holding the spring-loaded hinge against the door panel.
- Brace your wrist against sudden rotational torque when loosening tight bolts or driving fasteners into the door.
Diagnose & make safe
- Outside, check for a middle shadow gap along the side weather stripping with tight top and bottom corners.
- In daylight, check inside both vertical tracks for daylight and cold air entering past the middle panels.
- Count the vertical door panels: a 4-panel door needs 6 outer hinges (3 per side, stamped 1, 2, and 3).
- Measure door width: doors over 12 ft wide need the heavy-duty gold-spring kit; doors under 12 ft use another kit.
- Close the door fully and pull the red emergency release cord to disconnect the opener before removing hinges.
- Never unbolt bottom corner roller brackets; they anchor the high-tension lift cables.
Tools
- Cordless impact driver (cordless impact driver with hex socket bit, DeWalt)
- Work gloves (leather work gloves) (optional)
Materials
- Spring-loaded garage door hinges (6 hinges, spring-loaded steel garage door hinge kit, Green Hinge System, 14-gauge steel, gold springs for 12+ ft 4-panel doors (numbered 1, 2, and 3))
Hardware
| Hardware | Size | Count | Used in steps |
|---|---|---|---|
| Hex-head hinge mounting bolts | 3 |
Parts
| Part | Name | Qty | Size | Notes |
|---|---|---|---|---|
| A | garage door | x1 | 4-panel sectional door, over 12 ft wide | Leave the bottom corner brackets, top brackets, and center hinges untouched. |
| B | outer side hinge | x6 | Green Hinge System, 14-gauge steel, gold springs for 12+ ft 4-panel door (numbered 1, 2, 3) | 6 · Install numbered hinges 1, 2, and 3 from bottom to top on both sides; roller stem goes in the bottom spring tube. |
Step by step
Step 1: Inspect the Garage Door Air Gaps
Check that side air leaks come from middle panels sitting off the weather stripping, not worn seals.
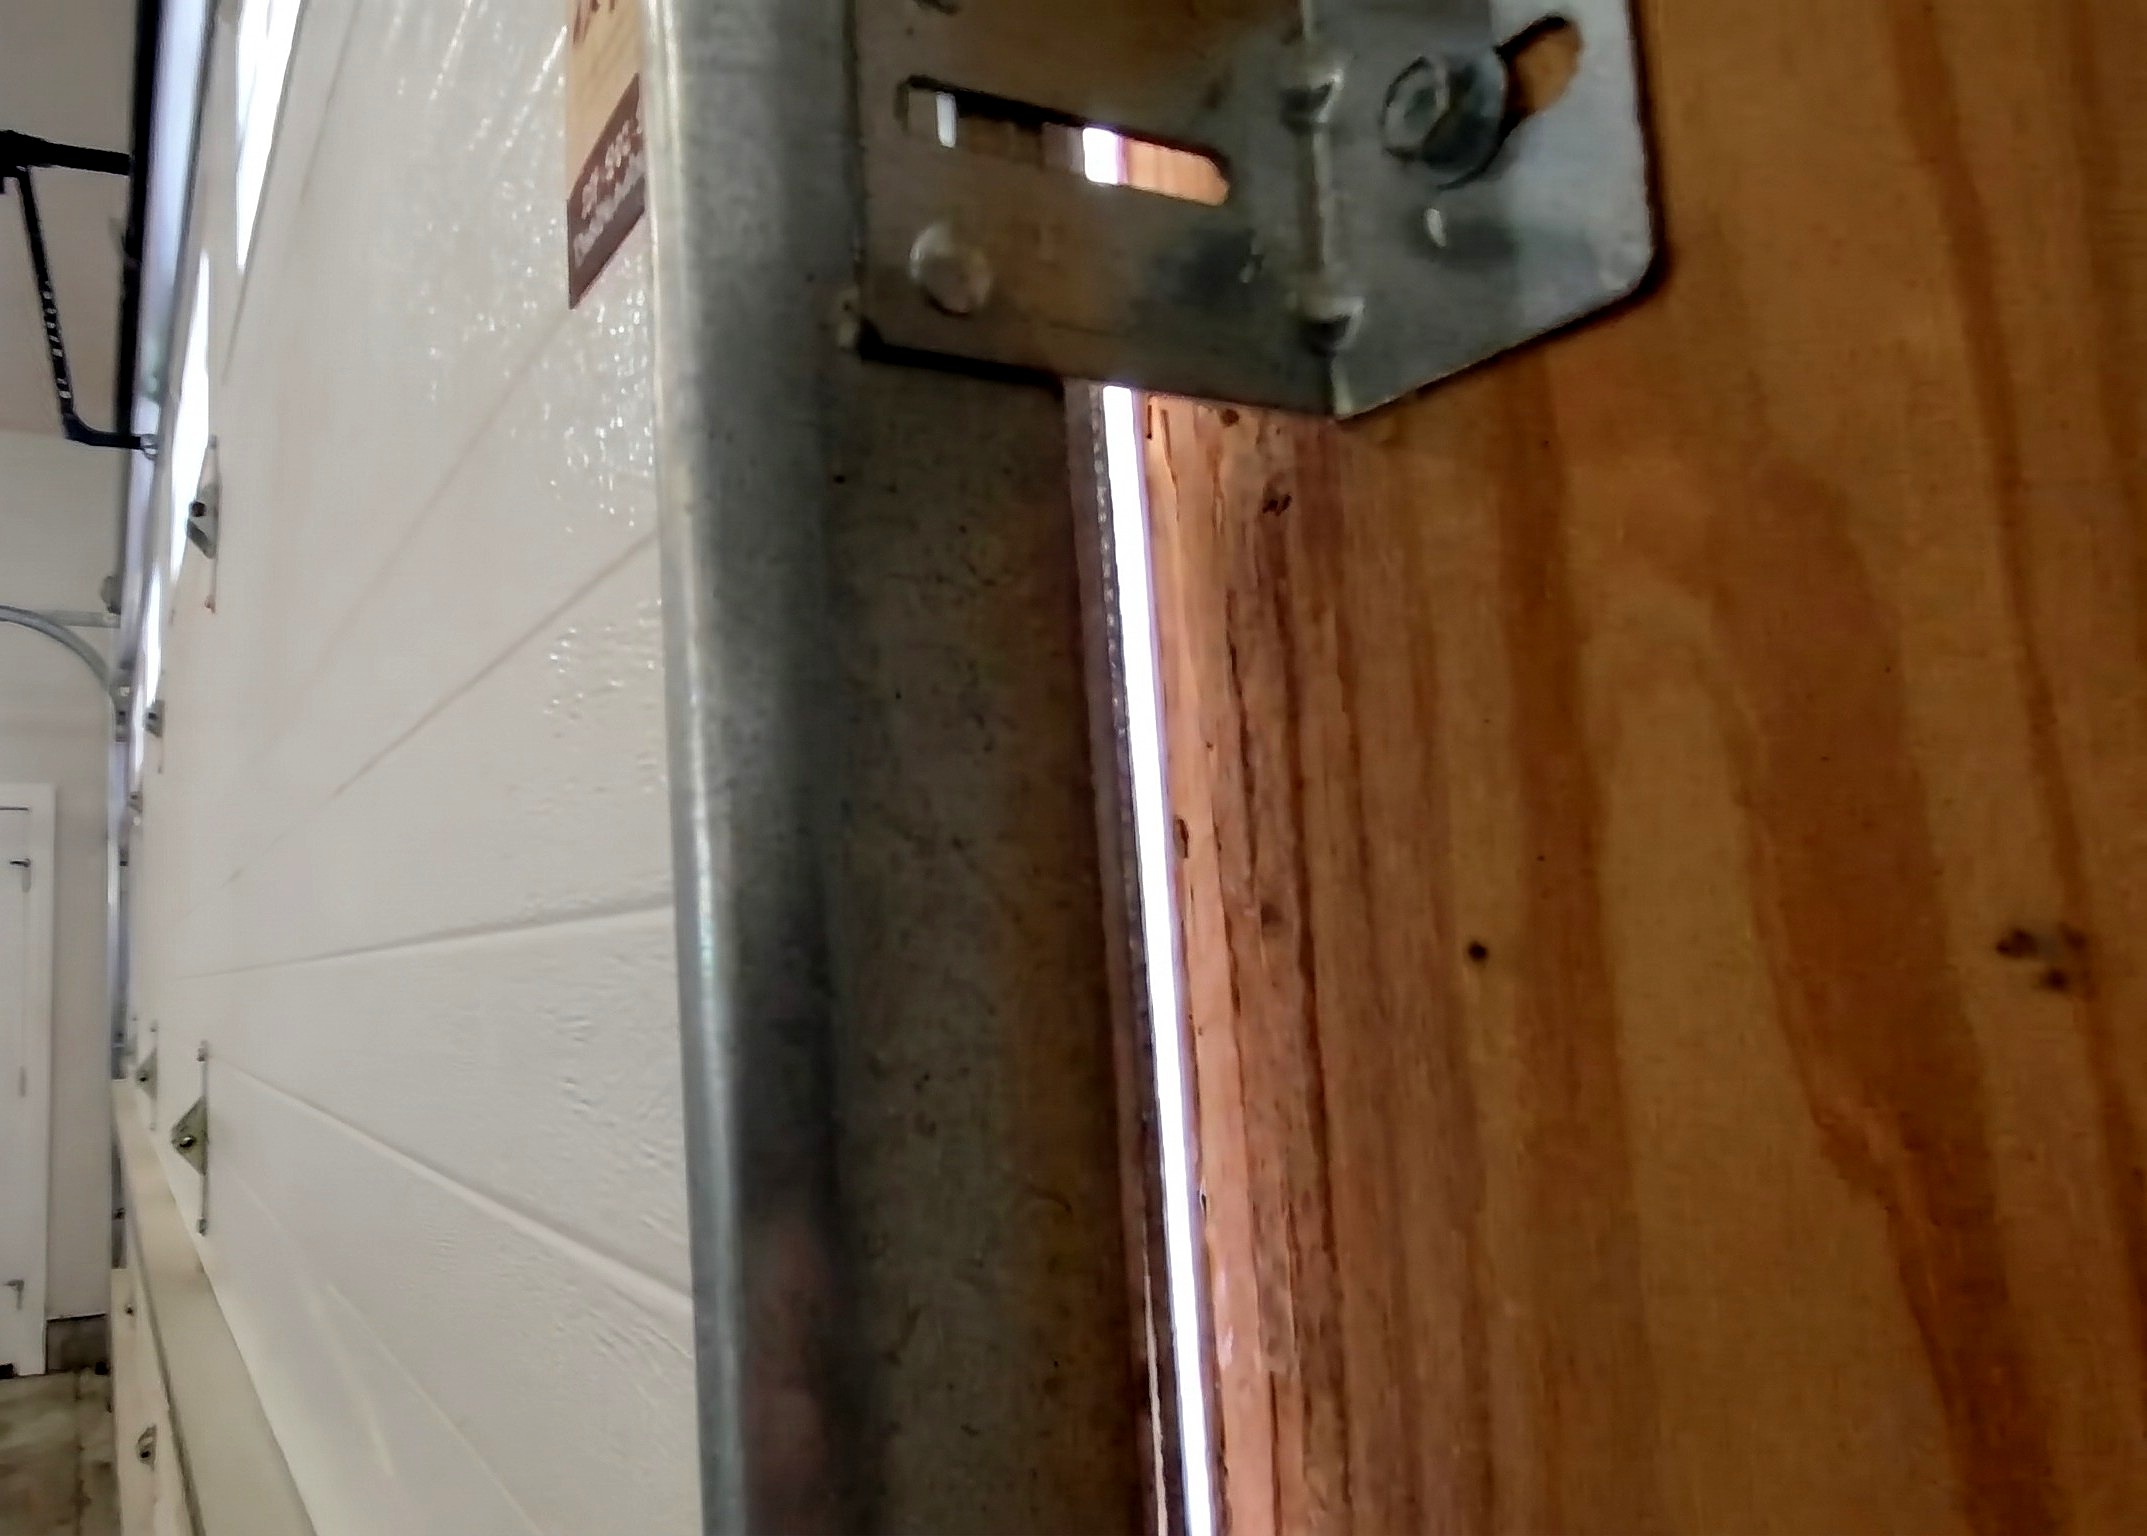
Parts in this step: (A) garage door
- 1.1 Check the exterior weather stripping seal
- Close the garage door (A) fully before checking perimeter seals.
- Outside, inspect both vertical sides along the flexible weather stripping.
- Look for a shadow gap where the middle panels pull away.
- Check top and bottom corners press tight against the weather stripping.
- 1.2 Check for daylight along the interior track
- Stand inside the closed garage in daylight.
- Look along both vertical tracks between door edge and wall jamb.
- Spot bright daylight lines and feel for cold drafts past the middle panels.
Key measurements
- Rated gap closure: up to 1/4 in along vertical weather stripping
- Tip: Inspect outside and inside in daylight so gaps show as bright light lines.
- Heads up: Do not drill out track bracket rivets to slide the track inward; that over-compresses the tight top seal.
Before you move on: Weather stripping is intact, top and bottom corners seal tight, and the gap is in the middle panels.
Step 2: Disconnect the Opener and Optionally Check Door Play
Disconnect the opener for safe manual operation and check that relieving opener pressure does not fix the middle gap.
Parts in this step: (A) garage door
- 2.1 Pull the opener emergency release cord
- Check the garage door (A) rests closed on the floor.
- Note the top panel seats tight against the upper weather seal.
- Pull the opener carriage's red emergency release cord to disconnect the opener.
- 2.2 Optionally push the top panel to check door play
- Observe how releasing opener down-pressure lets the top panel pull off the seal.
- Push the top panel forward by hand until the top gap closes.
- Check that middle and lower panels still sit off the side seal.
- Tip: Do not reduce opener down-pressure to stop panel bowing; removing top pressure widens the side gap.
- Heads up: Close the garage door fully before pulling the emergency release cord so the door cannot drop.
Before you move on: Opener carriage disconnected from the door arm; door rests stably closed.
Step 3: Replace the Side Hinges
Swap the six outer side hinges one by one, bottom to top, for numbered spring-loaded hinges.
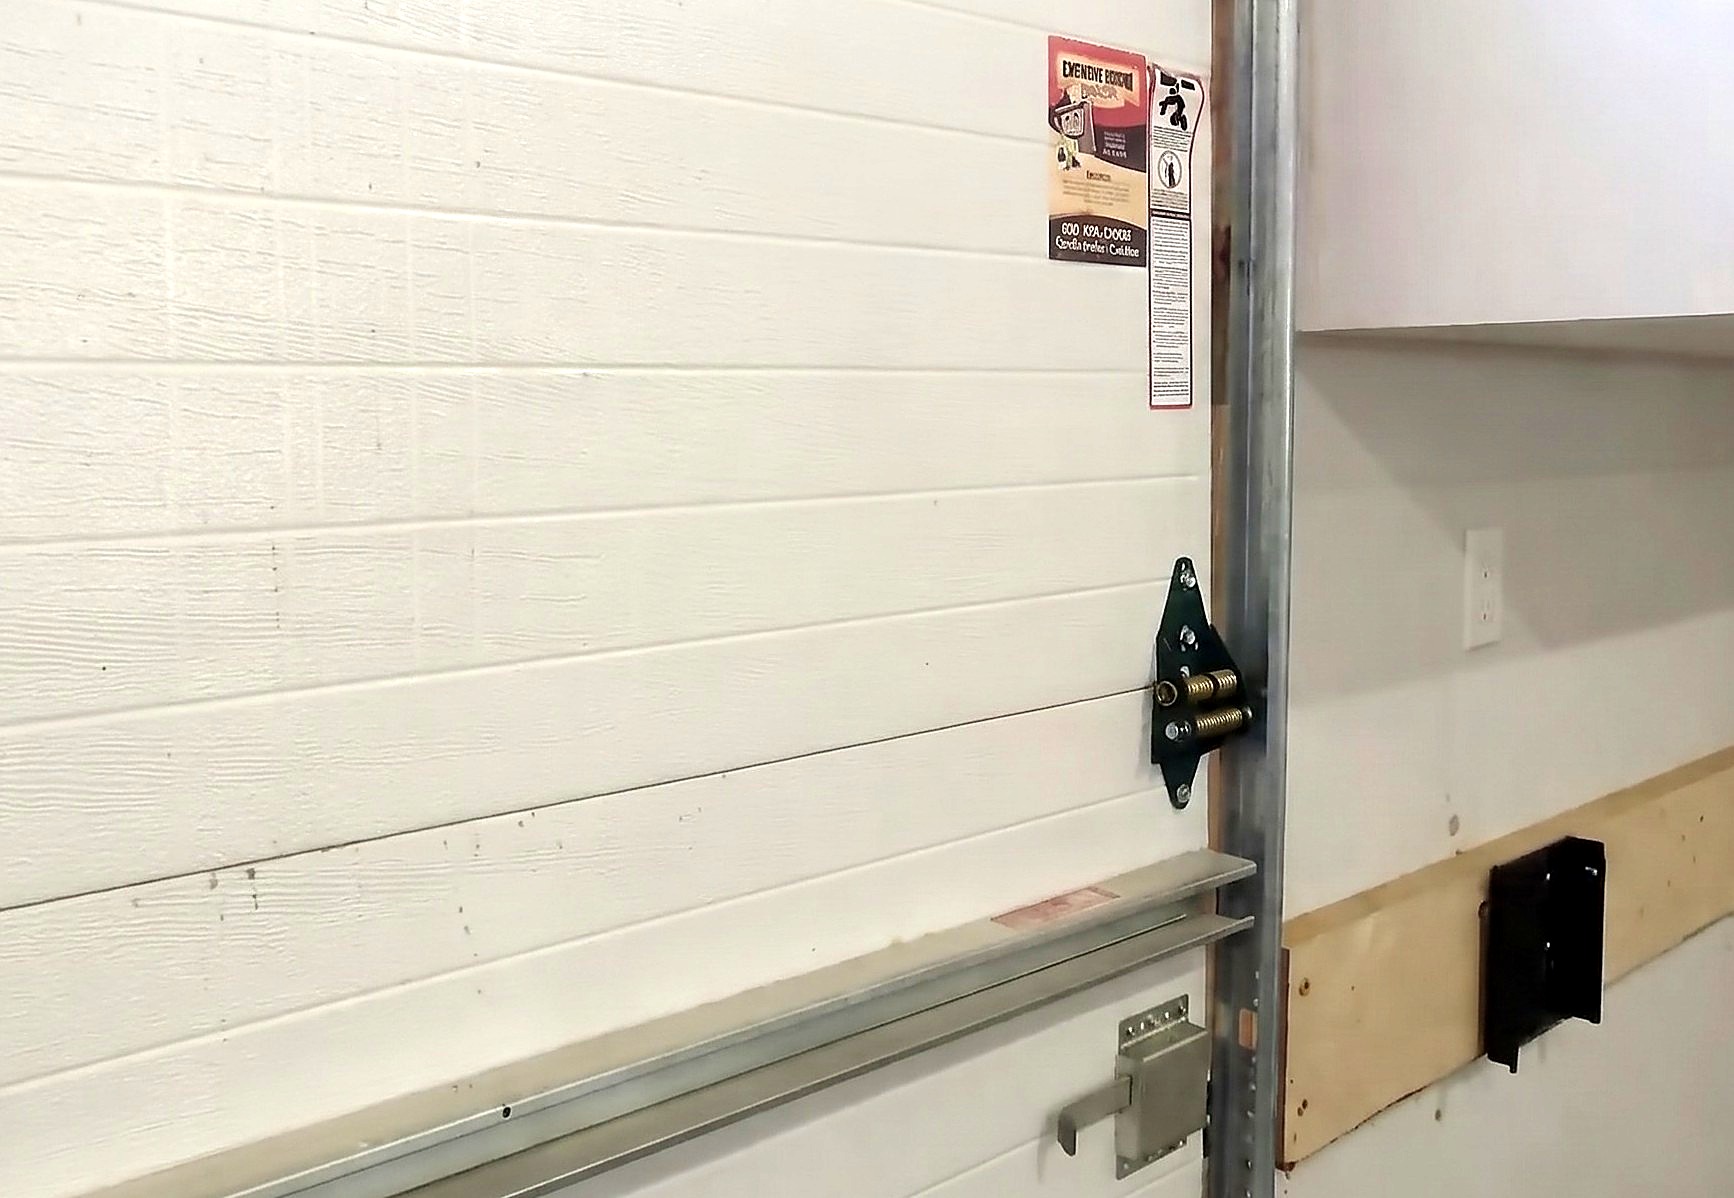
Parts in this step: (A) garage door, (B) outer side hinge
You'll need: Cordless impact driver, Spring-loaded garage door hinges, Hex-head hinge mounting bolts
- 3.1 Install the #1 spring-loaded hinge at the bottom seam
- Leave the garage door (A) bottom corner roller bracket untouched.
- Unbolt lowest outer side hinge (B) at the first seam with a cordless impact driver.
- Slide the old hinge off the roller shaft, leaving the roller in the track.
- Slide the #1 hinge's bottom spring-loaded tube onto the roller shaft.
- Reinstall the original hex-head bolts into the panels, angling behind the roller bar.
- 3.2 Install the #2 and #3 hinges and repeat on the opposite side
- Unbolt the middle side hinge; install the #2 hinge on the roller shaft.
- Unbolt the upper side hinge; install the #3 hinge at the top seam.
- Leave the top roller bracket and center door hinges untouched.
- Repeat one by one, bottom to top (#1, #2, #3), on the opposite side.
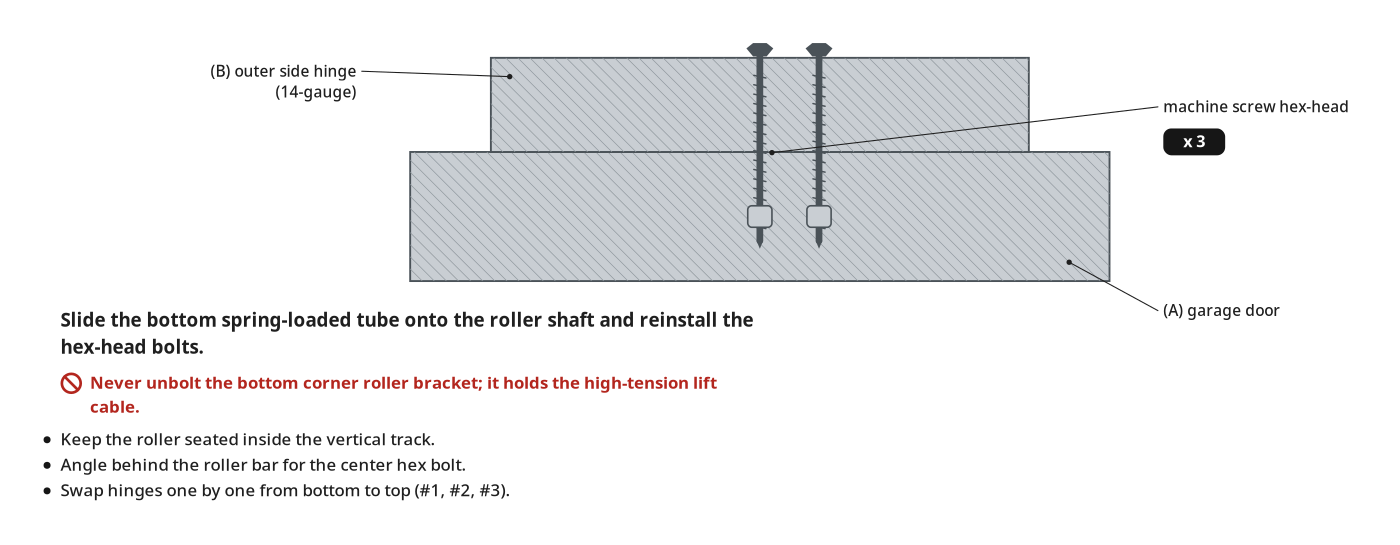
Key measurements
- Door width for gold springs: over 12 ft wide (under 12 ft needs another unit).
- Hinges replaced (4-panel door): 6 outer total, 3 per side stamped 1, 2, and 3.
- Hinge construction: 14-gauge steel, offsets widening from #1 (bottom) to #3 (top).
- Tip: Swap one hinge at a time to keep door panels aligned and rollers in the track.
- Tip: Hinge bolt hex socket size is unstated; fit a socket bit to the bolt heads without play.
- Heads up: Never unbolt the bottom corner roller bracket; it holds the high-tension lift cable.
Before you move on: Hinges #1, #2, and #3 bolted bottom to top on both sides, every roller shaft in the bottom spring tube.
Step 4: Test the Garage Door Operation
Before reconnecting the opener, check smooth manual travel and spring hinge articulation through track curves.
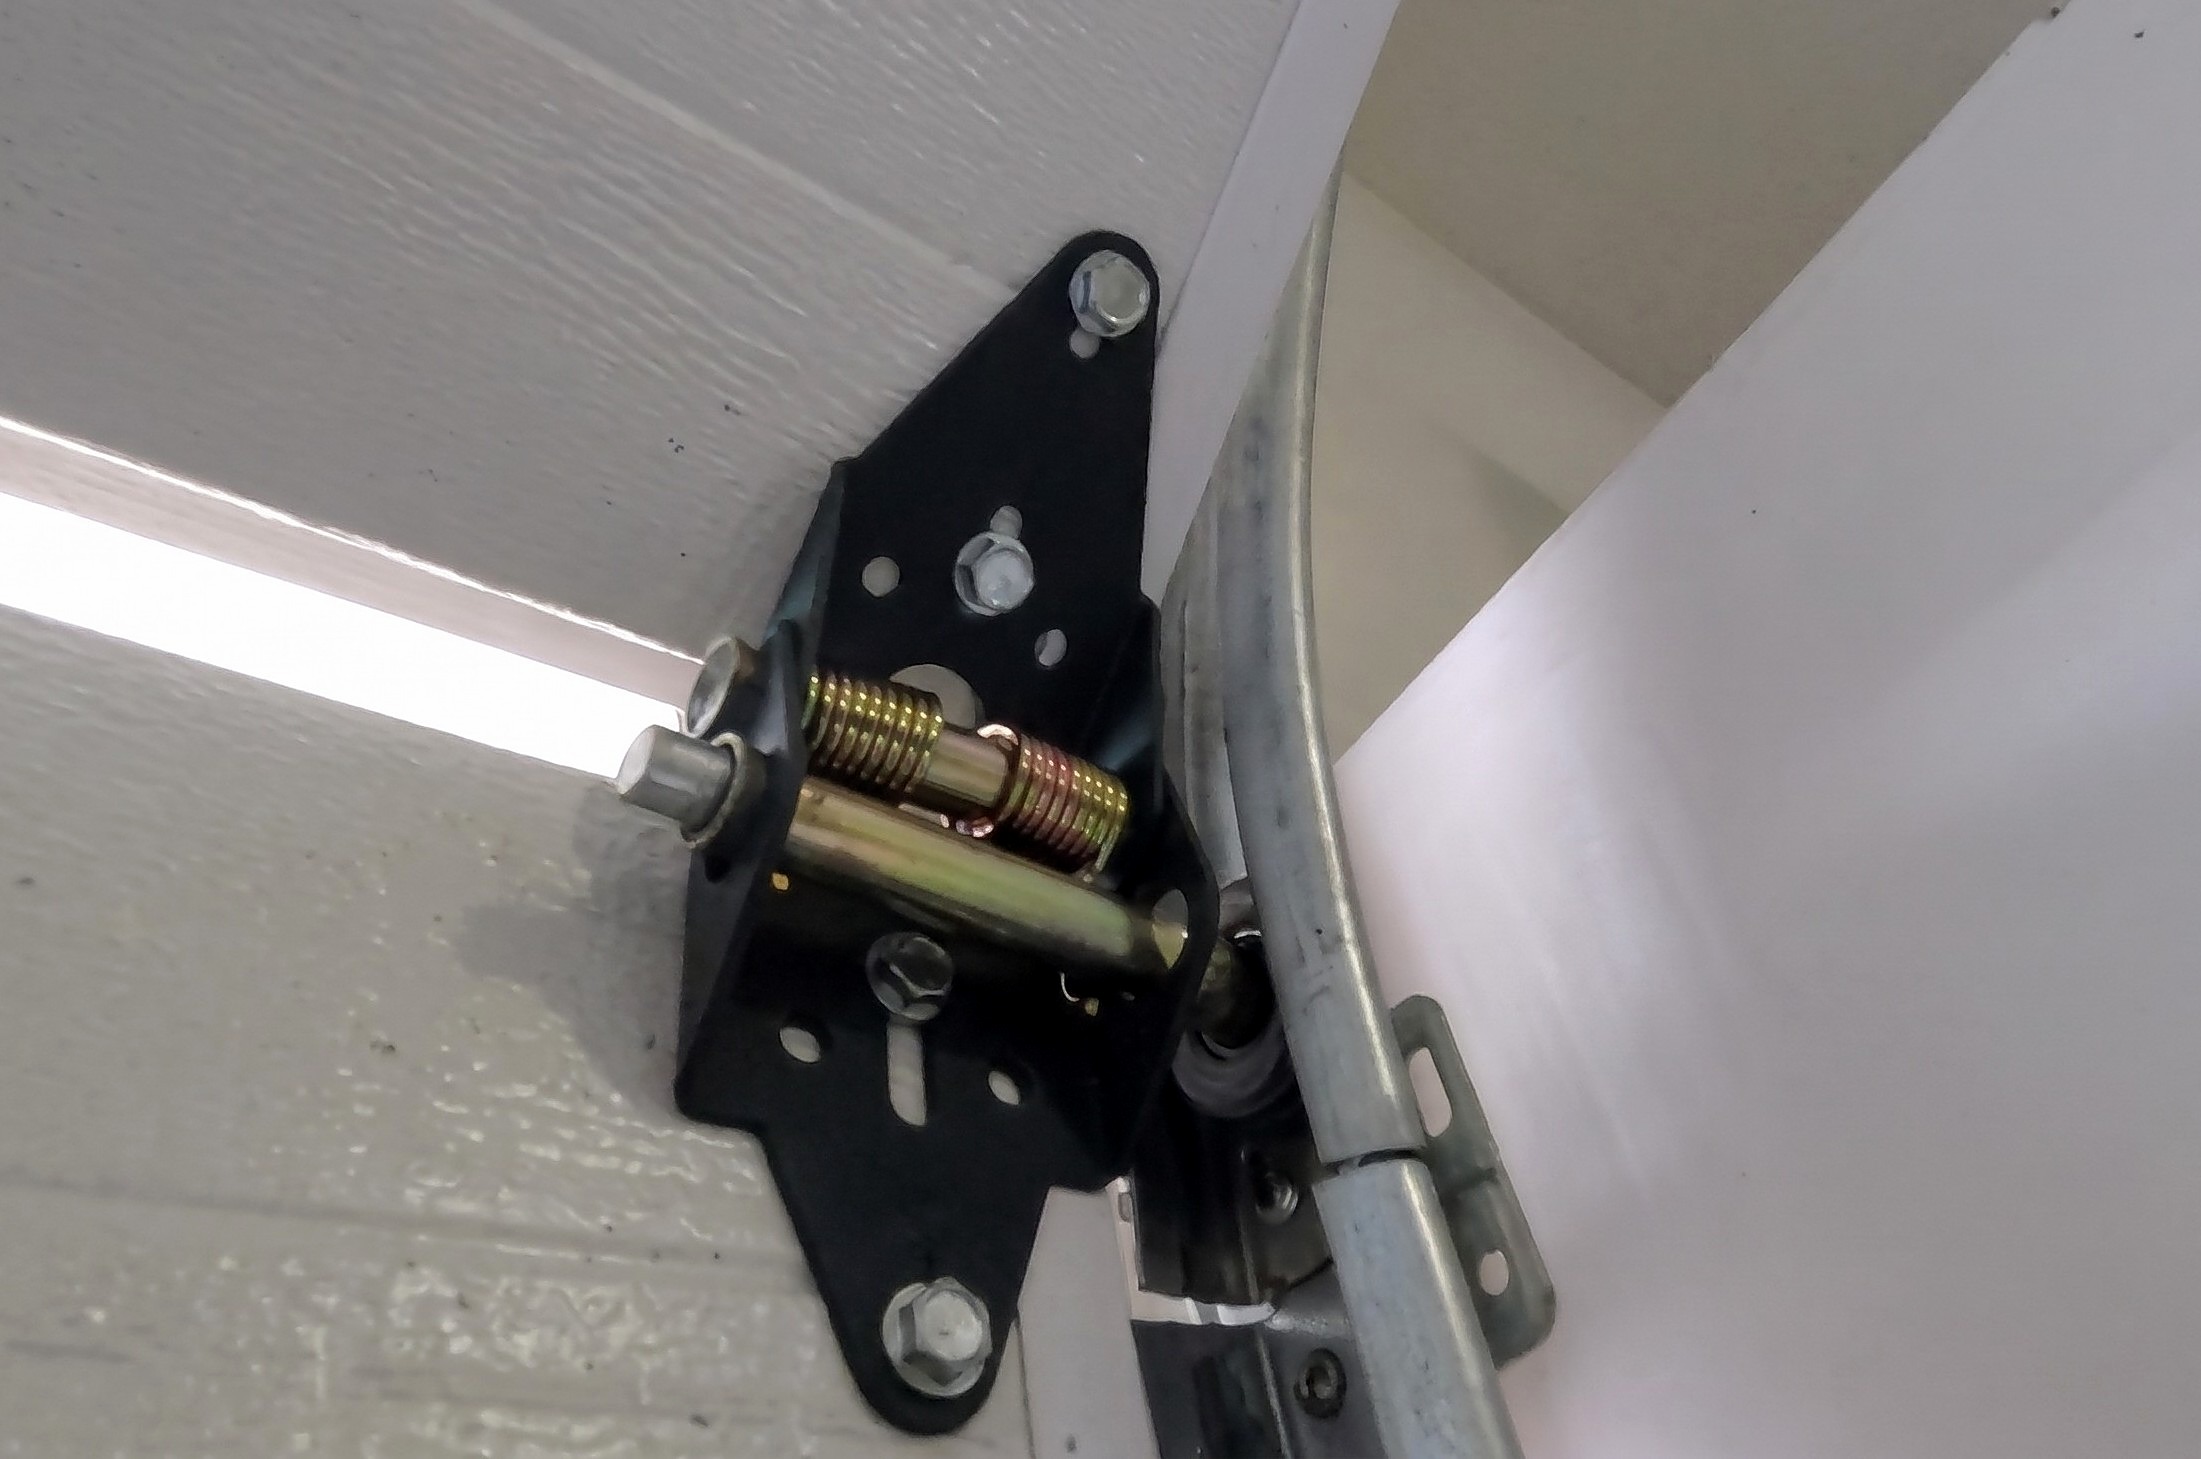
Parts in this step: (A) garage door, (B) outer side hinge
You'll need: Work gloves
- 4.1 Manually lift and lower the garage door
- Wear work gloves before handling garage door (A) near the tracks.
- Lift the door fully open by hand, then pull it down.
- Hand-cycle the door a few times; feel for smooth, quiet travel.
- Adjust the top roller bracket inward or outward if the top panel needs fine-tuning.
- 4.2 Observe the spring-loaded hinge articulation in the track
- Watch each outer side hinge (B) pass through the upper track curve.
- Check the gold springs compress and extend smoothly to keep panel pressure.
- Listen to check that in-and-out door rattle is gone.
- Tip: Hand-test the door several times before reconnecting the power opener so the hinges settle.
- Heads up: Keep fingers off hinge plates, rollers, and springs while lifting and lowering the door.
Before you move on: Door lifts and closes smoothly by hand; all six spring-loaded hinges compress cleanly in track bends.
Step 5: Verify the Exterior and Interior Seal
Reconnect the opener; check inside and out that side weather stripping blocks daylight and cold air.
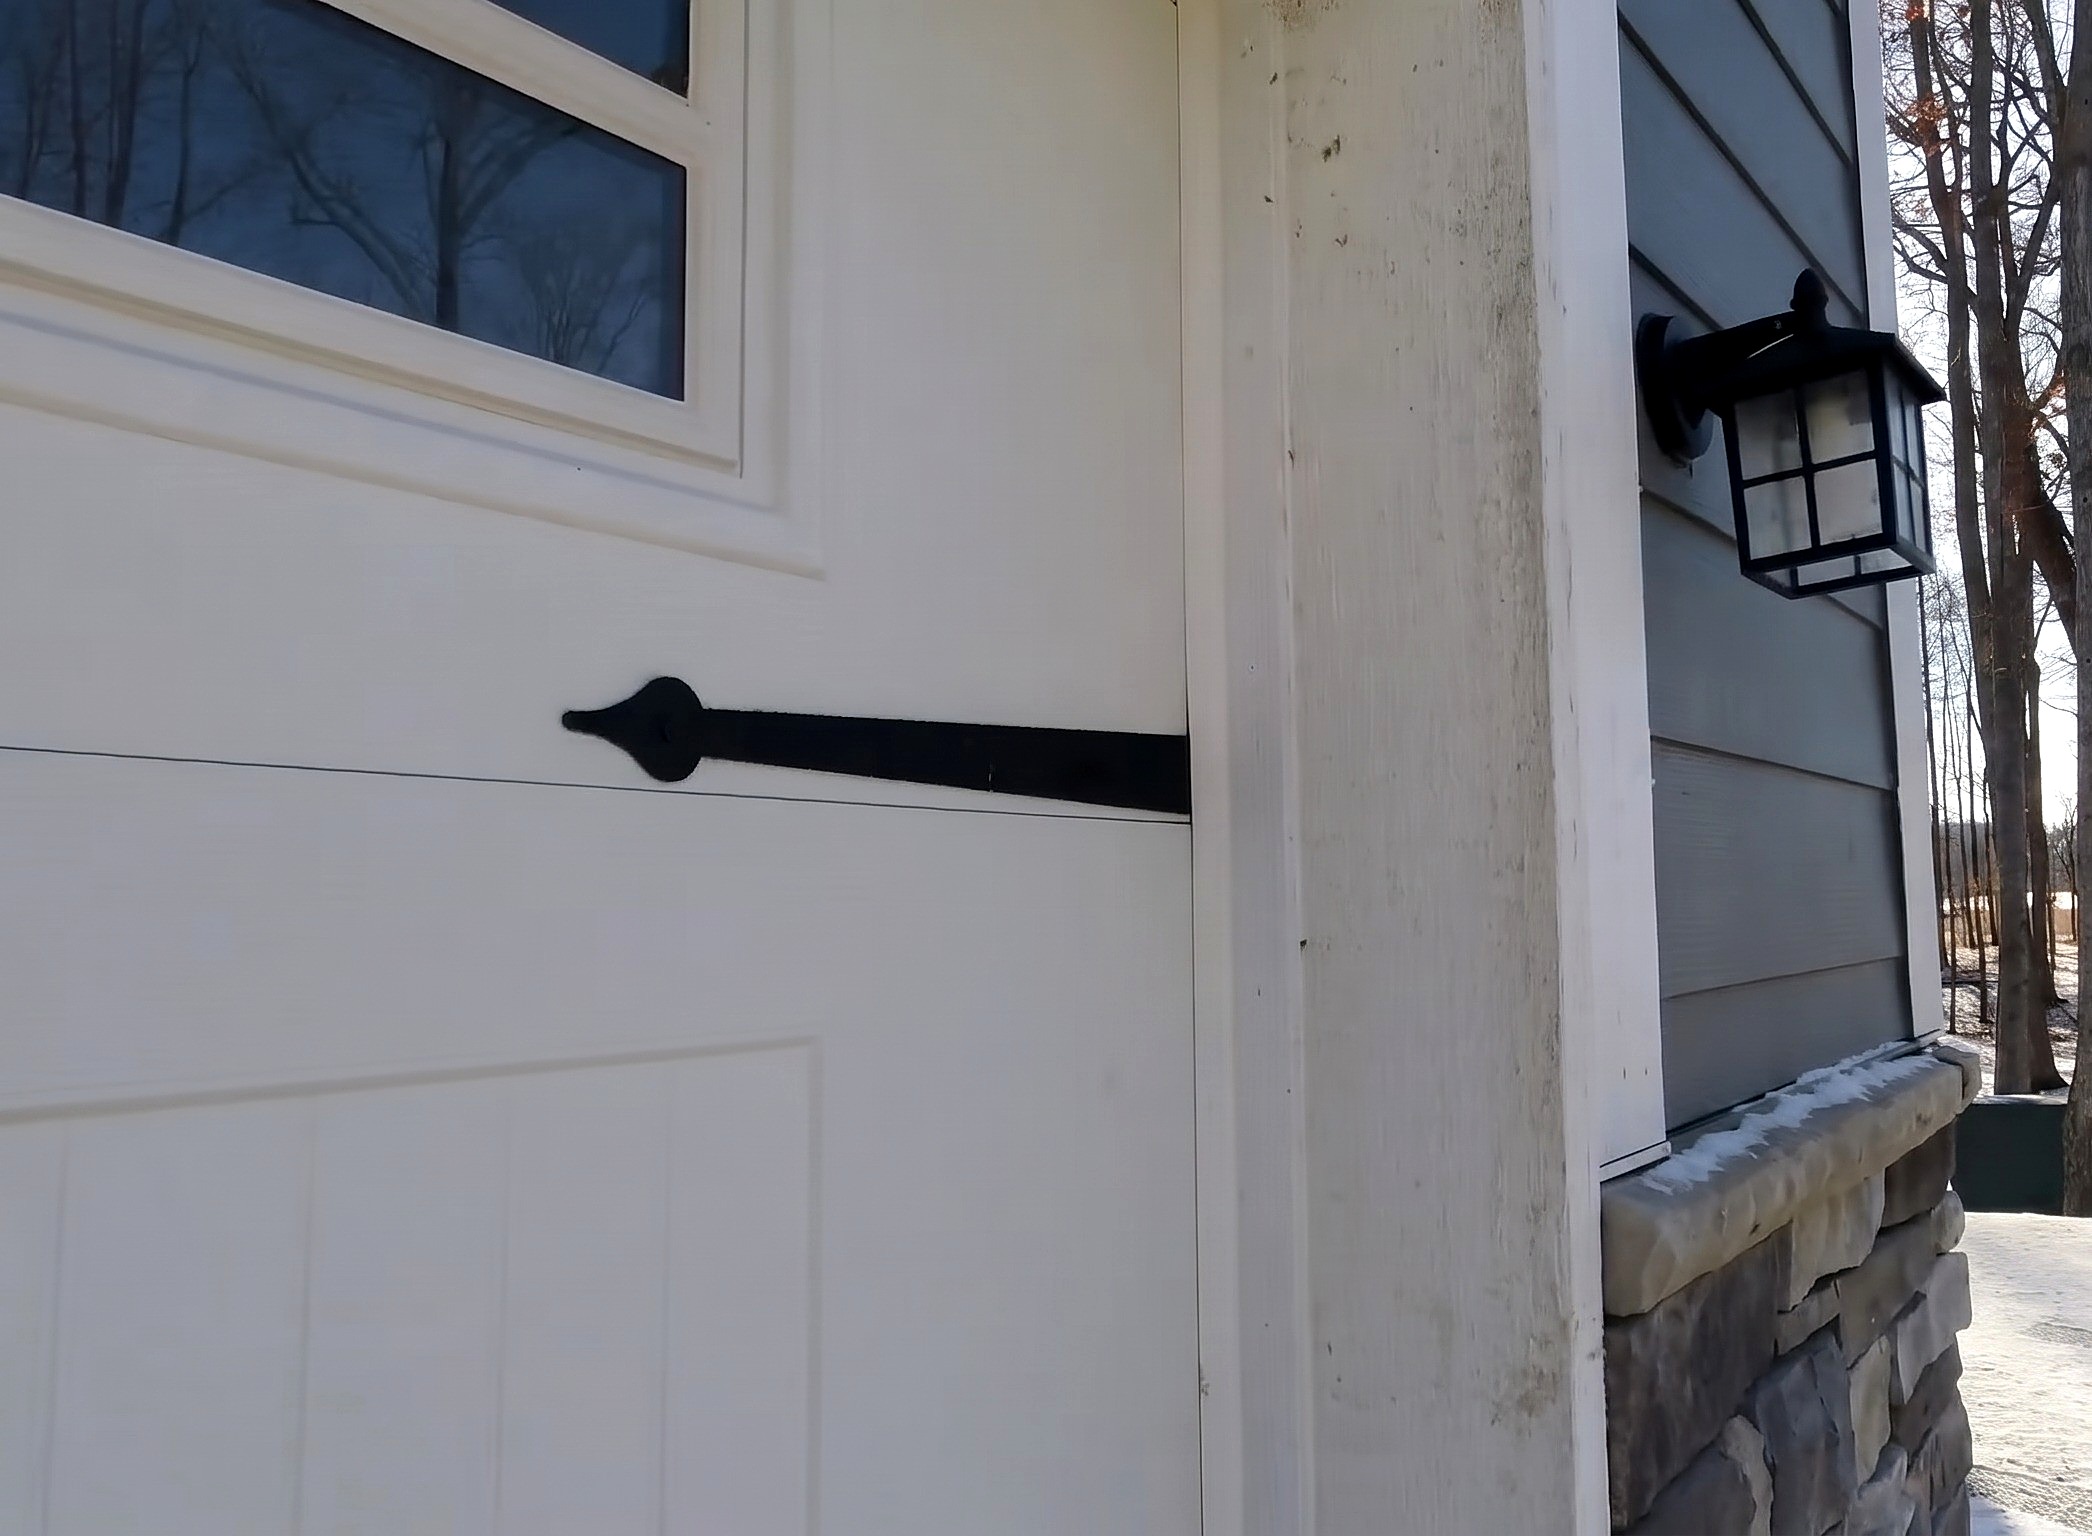
Parts in this step: (A) garage door, (B) outer side hinge
- 5.1 Inspect the exterior weather stripping contact on both sides
- Reconnect the opener carriage to garage door (A) and close it.
- Outside, check the vertical weather stripping along both sides.
- Check outer side hinge (B) springs press middle panels flush against the seal.
- Check whether any tiny gap remains at a physically offset horizontal panel seam.
- 5.2 Check for daylight along both interior tracks
- Go back inside with the door closed under normal opener down-pressure.
- Check both vertical tracks, bottom to top, for daylight.
- Feel along both inner jamb edges to check cold drafts are blocked.
Key measurements
- Gap reduction: closes up to a 1/4 in gap between panels and exterior weather stripping.
- Tip: Reconnect the power opener before checking the seal so the top panel has normal closing pressure.
Before you move on: Both sides seal against exterior weather stripping; no daylight shows along interior tracks.
Finishing
Last Touches
- Collect the six old hinges and clear tools from the tracks.
- Return equipment moved from inside the garage door.
Care
- Check hinge springs periodically to confirm they keep panel tension.
- Replace any hinge spring that fatigues over time.
Alternatives
- Drilling track rivets to bolt the track on a slide moves it inward, over-compressing the tight top seal.
Prove the fix
| Check | What you should see | If not |
|---|---|---|
| Hand-cycle the door open and closed several times before reconnecting the opener. | Door runs smoothly and quietly through curved tracks without binding or rattling in and out. | After hand-cycling the door, adjust the top roller bracket slightly in or out. |
| Reconnect opener, close door, and check both exterior vertical weather stripping seals. | Spring-loaded hinges push middle panels flush against the weather stripping, closing up to a 1/4 in gap. | Check if a small gap remains at a single horizontal seam where one panel sits slightly behind the next. |
| Stand inside the closed garage in daylight and check both vertical tracks bottom to top. | Daylight and cold air drafts are blocked along both sides. |
These Specs are built from Indy Farm Life's video “Seal Garage Door Side Gaps with Spring-Loaded Hinges”. Open the Seal Garage Door Side Gaps with Spring-Loaded Hinges project page.
