Spetz Specs No. 4811: step-by-step assembly & installation guide
Installing Perforated Gutter Guards on a Steep Roof
The complete step-by-step guide made from Indy Farm Life's YouTube video, free on Spetz. For the video, a step-by-step player and answers to your questions, see the Installing Perforated Gutter Guards on a Steep Roof project page.
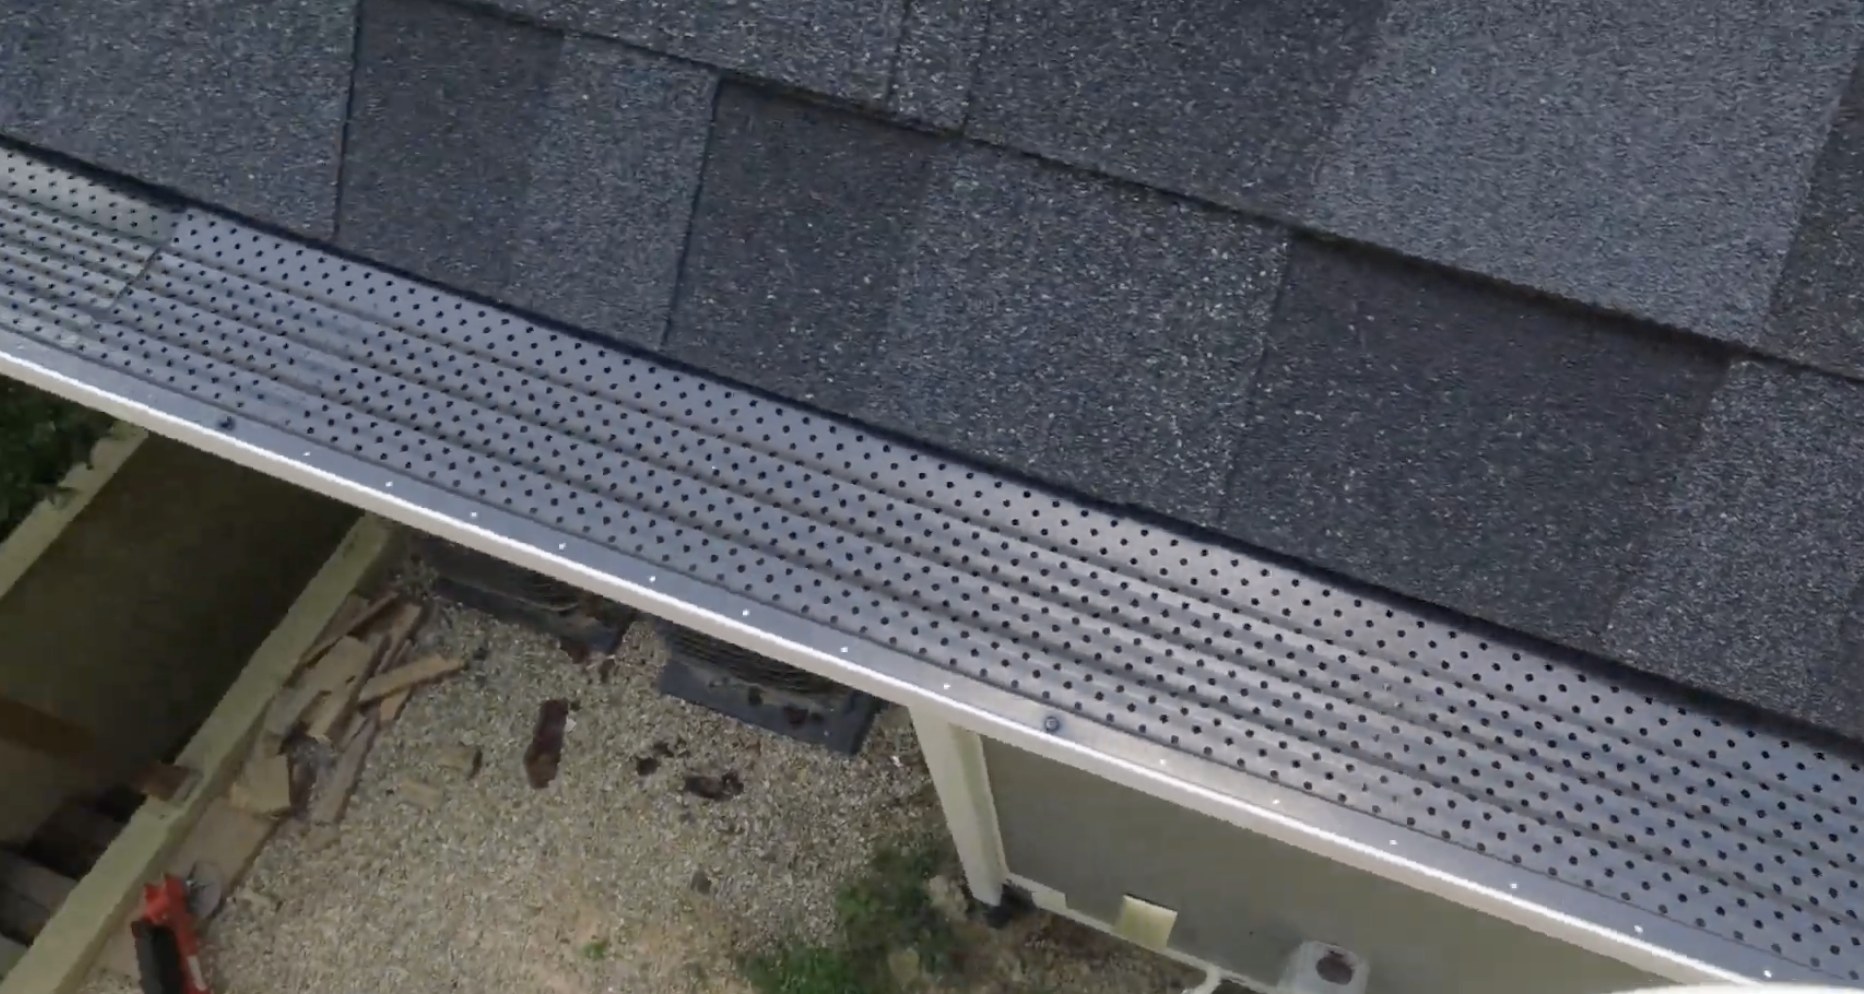
4 steps, 2 parts, 6 tools, 3 materials
Overview
The Unit
- LeafTek perforated aluminum gutter guards: 4-foot sections for 5-inch or 6-inch gutters.
- Raised bevels and perforations catch fast runoff on steep 10/12 pitch roofs without overflow.
Why Do It Yourself
- Self-installation costs about $600 in materials versus $2,800 to $2,900 professionally.
- Screwing panels to the front lip strengthens gutters against winter ice dams.
What It Takes
- Bring a cordless drill, tin snips, leaf blower, and safe roof access.
- Once clean, six 4-foot panels (24 linear feet) go up in 15 minutes.
What Decides Success
- Clean all muck from gutters before screwing panels down.
- Skip downspout strainers in heavy woods so fine silt washes down the spout.
Health and safety
Steep Roof and Lift Safety
- Use a towable articulating boom lift, scaffolding, or a properly secured ladder when working along high, steep eaves.
- Position the towable articulating boom lift on firm, level ground and never lean outside the guardrails while elevated.
- Never step onto a steep-pitched roof; reposition the boom lift or ladder frequently instead of overreaching along the gutter.
Sheet Metal and Cutting Hazards
- Wear cut-resistant gloves and eye protection as protective equipment when cleaning gutters and cutting perforated aluminum guards.
- Keep fingers clear of the tin snips blades and watch for sharp burrs on freshly cut 4-foot aluminum sections.
- Store cut aluminum scraps safely instead of dropping sharp metal pieces off the eaves.
Gutter Cleaning and Leaf Blower
- Clear the area below the eaves before dropping wet debris by hand or blowing out the gutters.
- Wear heavy gloves when clearing gutters by hand to guard against sharp sheet metal edges and exposed fasteners.
- Wear eye protection and a dust mask when operating the handheld leaf blower to clear dry debris and fine silt.
Drilling and Fastening at Height
- Keep your supporting hand clear of the magnetic nut driver bit when driving self-tapping screws with the 20V cordless drill.
- Keep a balanced stance when sliding panels under shingles or prying with the flathead screwdriver at height.
- Secure the cordless drill, tin snips, and screws while elevated so tools cannot fall from the eaves.
Before you open the box
- Measure gutter width to order matching 5-inch or 6-inch guards.
- Check roof pitch: steep 10/12 pitches need perforated aluminum because water overshoots micro-mesh.
- Pick black aluminum to absorb solar heat (up to 125°F) and melt winter snow.
- Buy an extra box of self-tapping screws first; three per panel exceeds the kit pack.
- Place the articulating boom lift or ladder on firm, level ground.
Tools
- Cordless Drill/Driver (DeWalt, 20V)
- Magnetic Nut Driver Bit (magnetic driver bit)
- Articulating Boom Lift (towable articulating boom lift, JLG, T350) (optional)
- Leaf Blower (handheld leaf blower) (optional)
- Tin Snips
- Small Screwdriver (Flathead) (optional)
Materials
- Perforated Aluminum Gutter Guards (Black, LeafTek, perforated aluminum, 6 in. width)
- Self-tapping screws
- Universal Downspout Strainer (1 per downspout, expandable plastic downspout strainer, Amerimax, 2 1/2" to 4" ROUND)
Hardware
| Hardware | Size | Count | Used in steps |
|---|---|---|---|
| Self-tapping sheet metal screw | 3 per 4 ft panel, plus 1 at each corner or seam | 3, 4 | |
| Magnetic driver tip | 1 per screw pack |
What's in the box
| Part | Name | Qty | Size | Notes |
|---|---|---|---|---|
| A | Downspout strainer cap | x1 | Optional roll-up insert (1 per downspout). Creator later advises against using them as fine debris can clog them. | |
| B | Perforated aluminum gutter guard (4 ft section) | count yours | 6 in. wide black aluminum with pre-drilled front holes and an overlapping end tab. Sold in 32, 100, or 200 ft packs. |

Before you start
Unbox and Sort
- Check the 4-foot panel pack matches your total gutter footage.
- Find the self-tapping screws and magnetic driver tip in the hardware pack.
Tool Set-Up
- Chuck the magnetic nut driver bit into your 20V cordless drill/driver.
- Keep tin snips and a small flathead screwdriver handy to fit panels.
Step by step
Step 1: Clean the Gutters
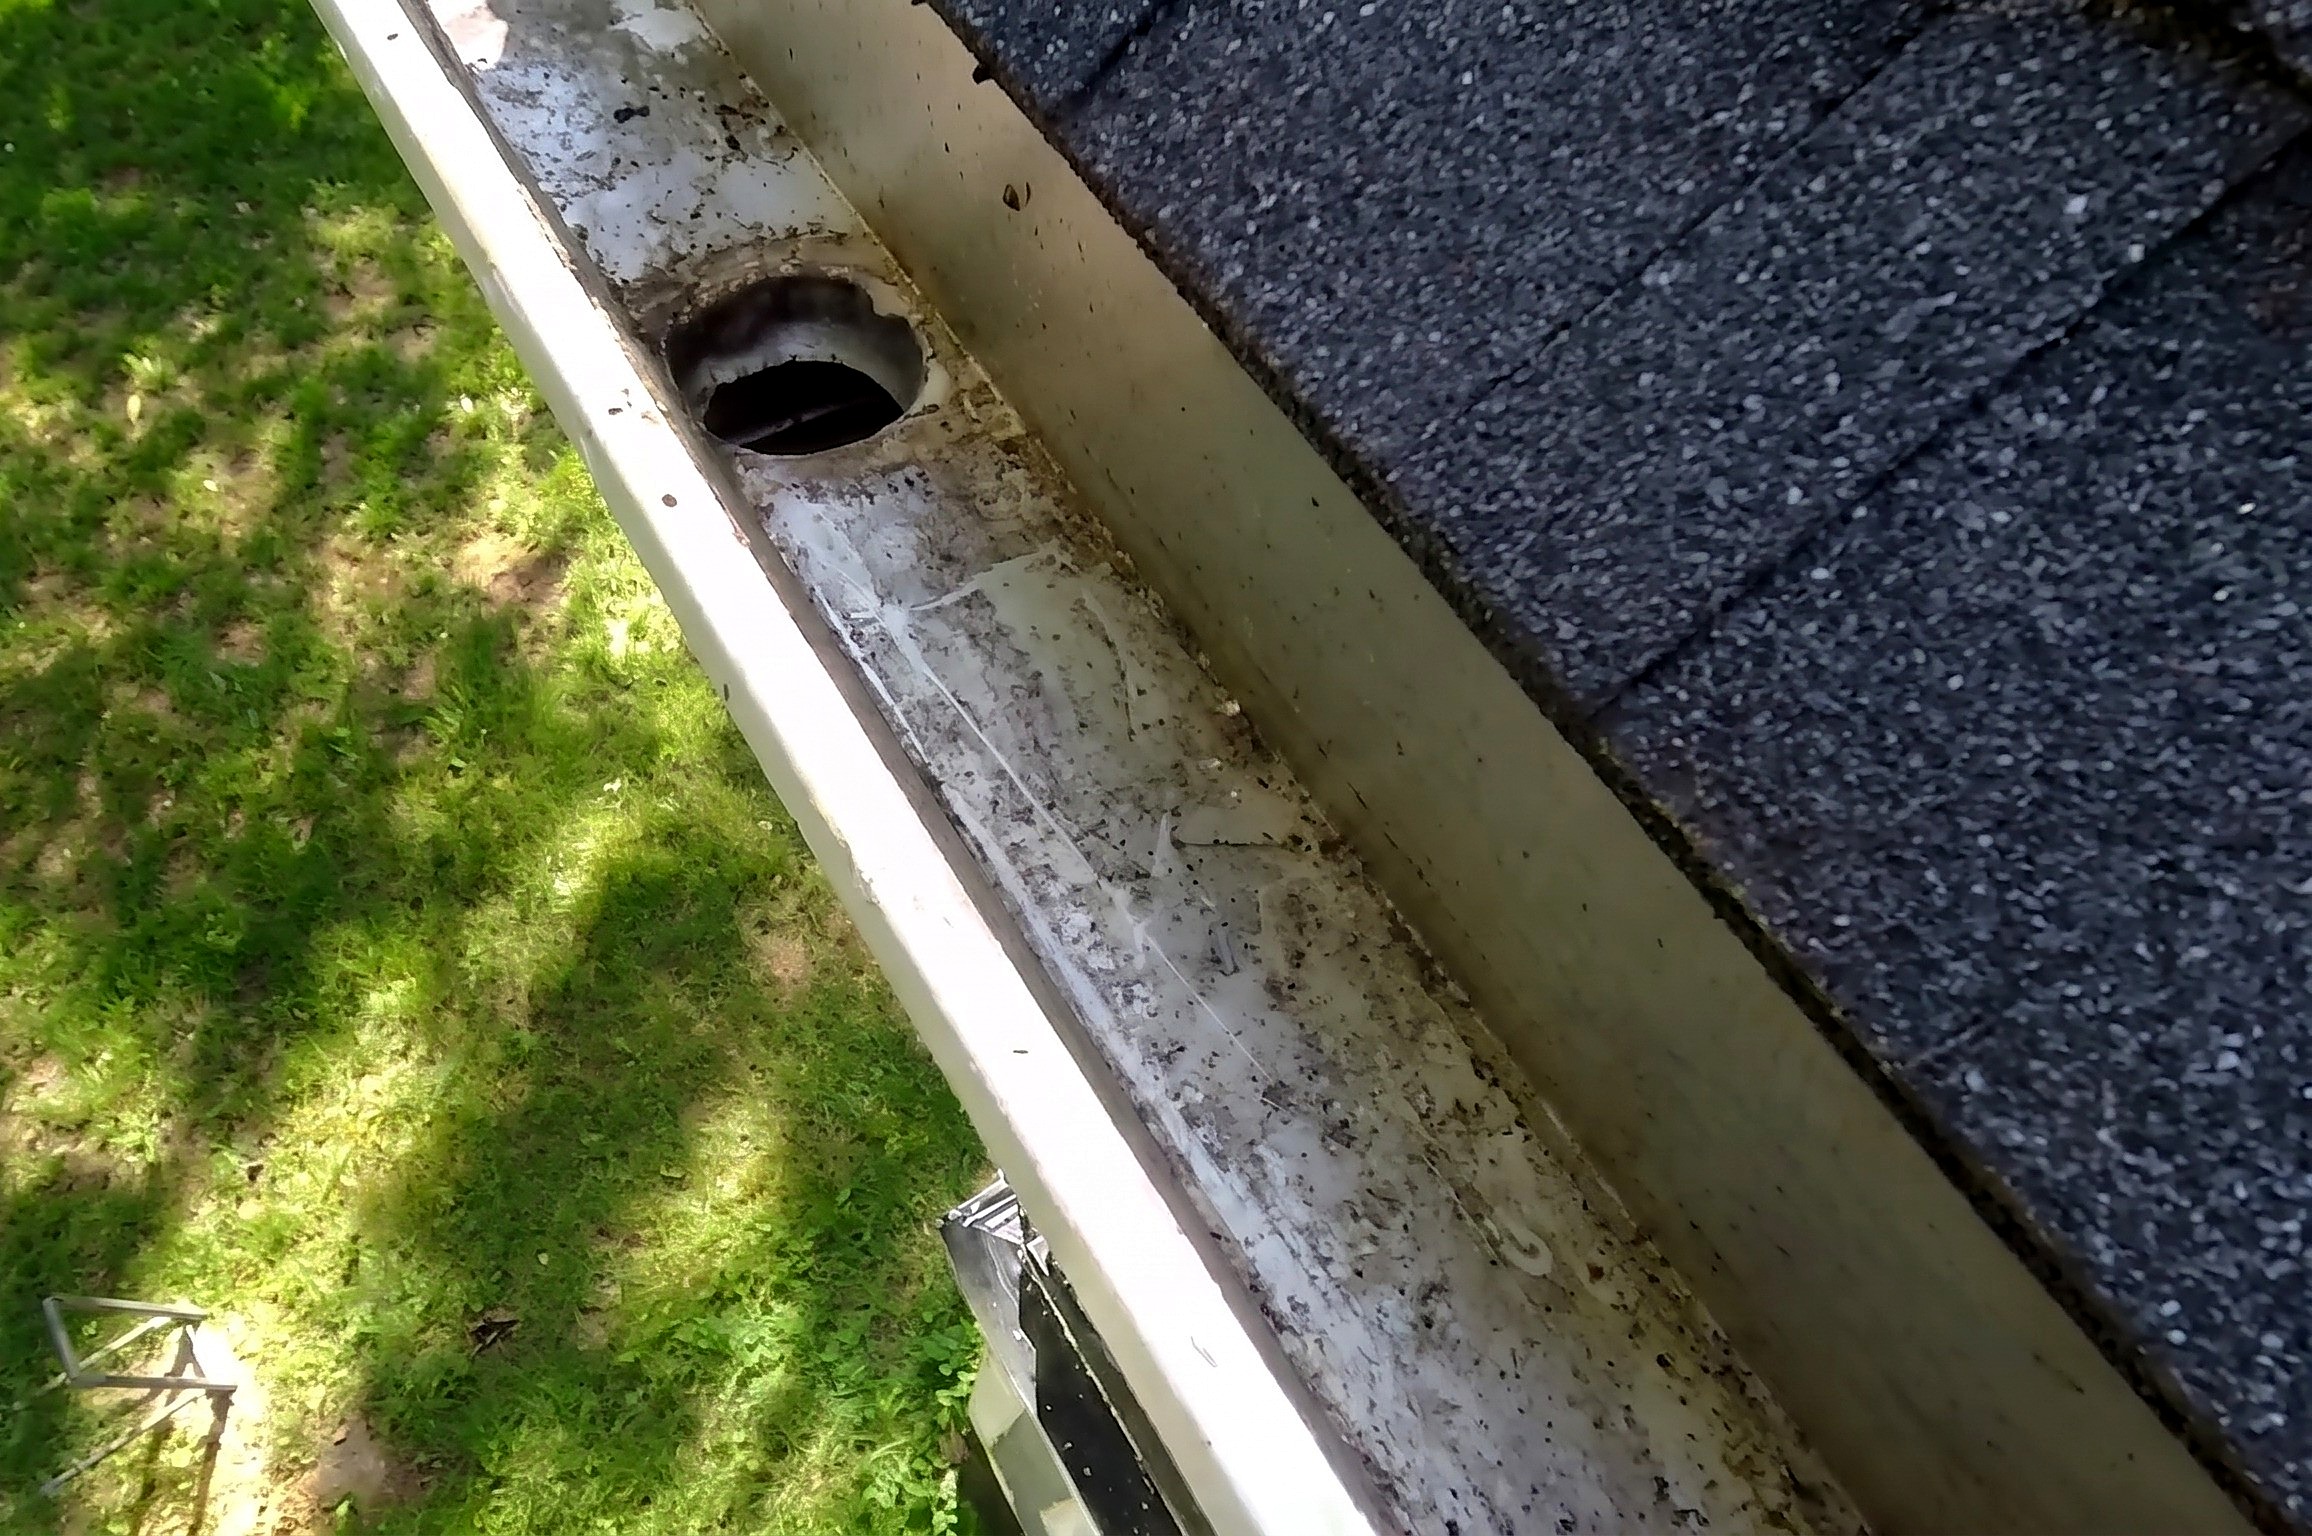
Clear packed leaves, twigs, and loose dirt from the gutter trough and downspouts.
You'll need: Leaf Blower, Articulating Boom Lift
- 1.1 Remove Large Debris by Hand
- Hand-scoop packed leaves, twigs, and dammed muck from the gutter trough.
- Clear matted debris from downspout inlets so water drains without backing up.
- 1.2 Blow Out Fine Debris
- Blow remaining dry dirt, oak tassels, and shingle grit out with a leaf blower.
- Aim airflow toward the downspout or open end until the gutter trough is bare.
- Tip: Clean gutters on a dry day so the blower clears fine dust without caking.
- Heads up: Clear the area below the eaves before dropping wet debris by hand.
Before you move on: Check the full gutter length and downspout openings so no leaf dams remain.
Step 2: Install Downspout Strainers (Optional)
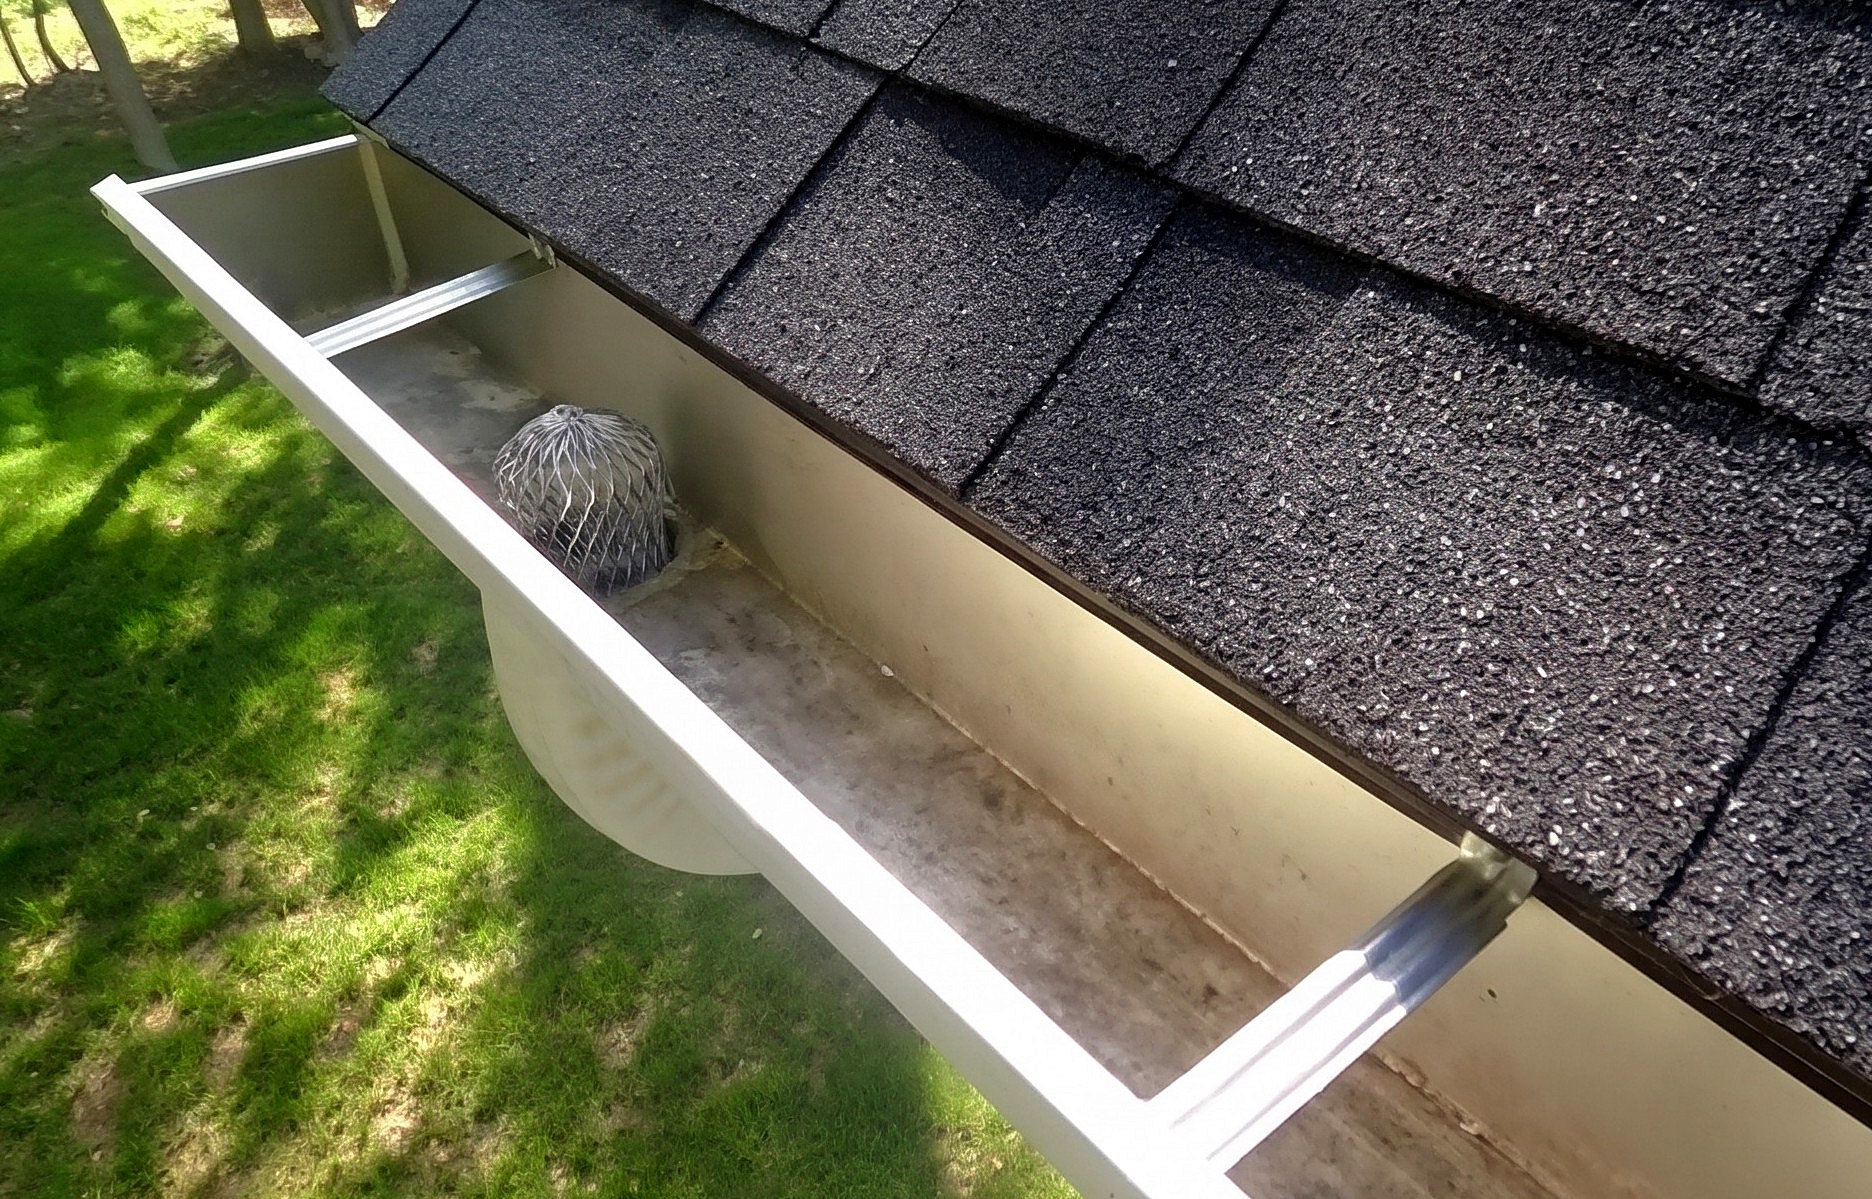
Fit optional roll-up strainers in downspout outlets, or leave open so fine sediment washes out.
Parts in this step: (A) Downspout strainer cap
You'll need: Articulating Boom Lift, Universal Downspout Strainer
- 2.1 Insert the Strainer
- Roll downspout strainer cap (A) tightly in your fingers.
- Push the strainer into the 2 1/2 to 4-inch downspout inlet to expand snugly.
- Omit the strainer in heavy woods so fine silt washes down the spout.
Key measurements
- Downspout strainer fit: 2 1/2 in. to 4 in. round downspout opening
- Tip: Open downspout inlets let tiny debris passing through the perforations flush away harmlessly.
- Heads up: Under perforated guards, downspout strainers trap fine oak silt and clog the outlet.
Before you move on: Check the strainer sits upright in the outlet, or the open downspout is clear.
Step 3: Install Gutter Guards
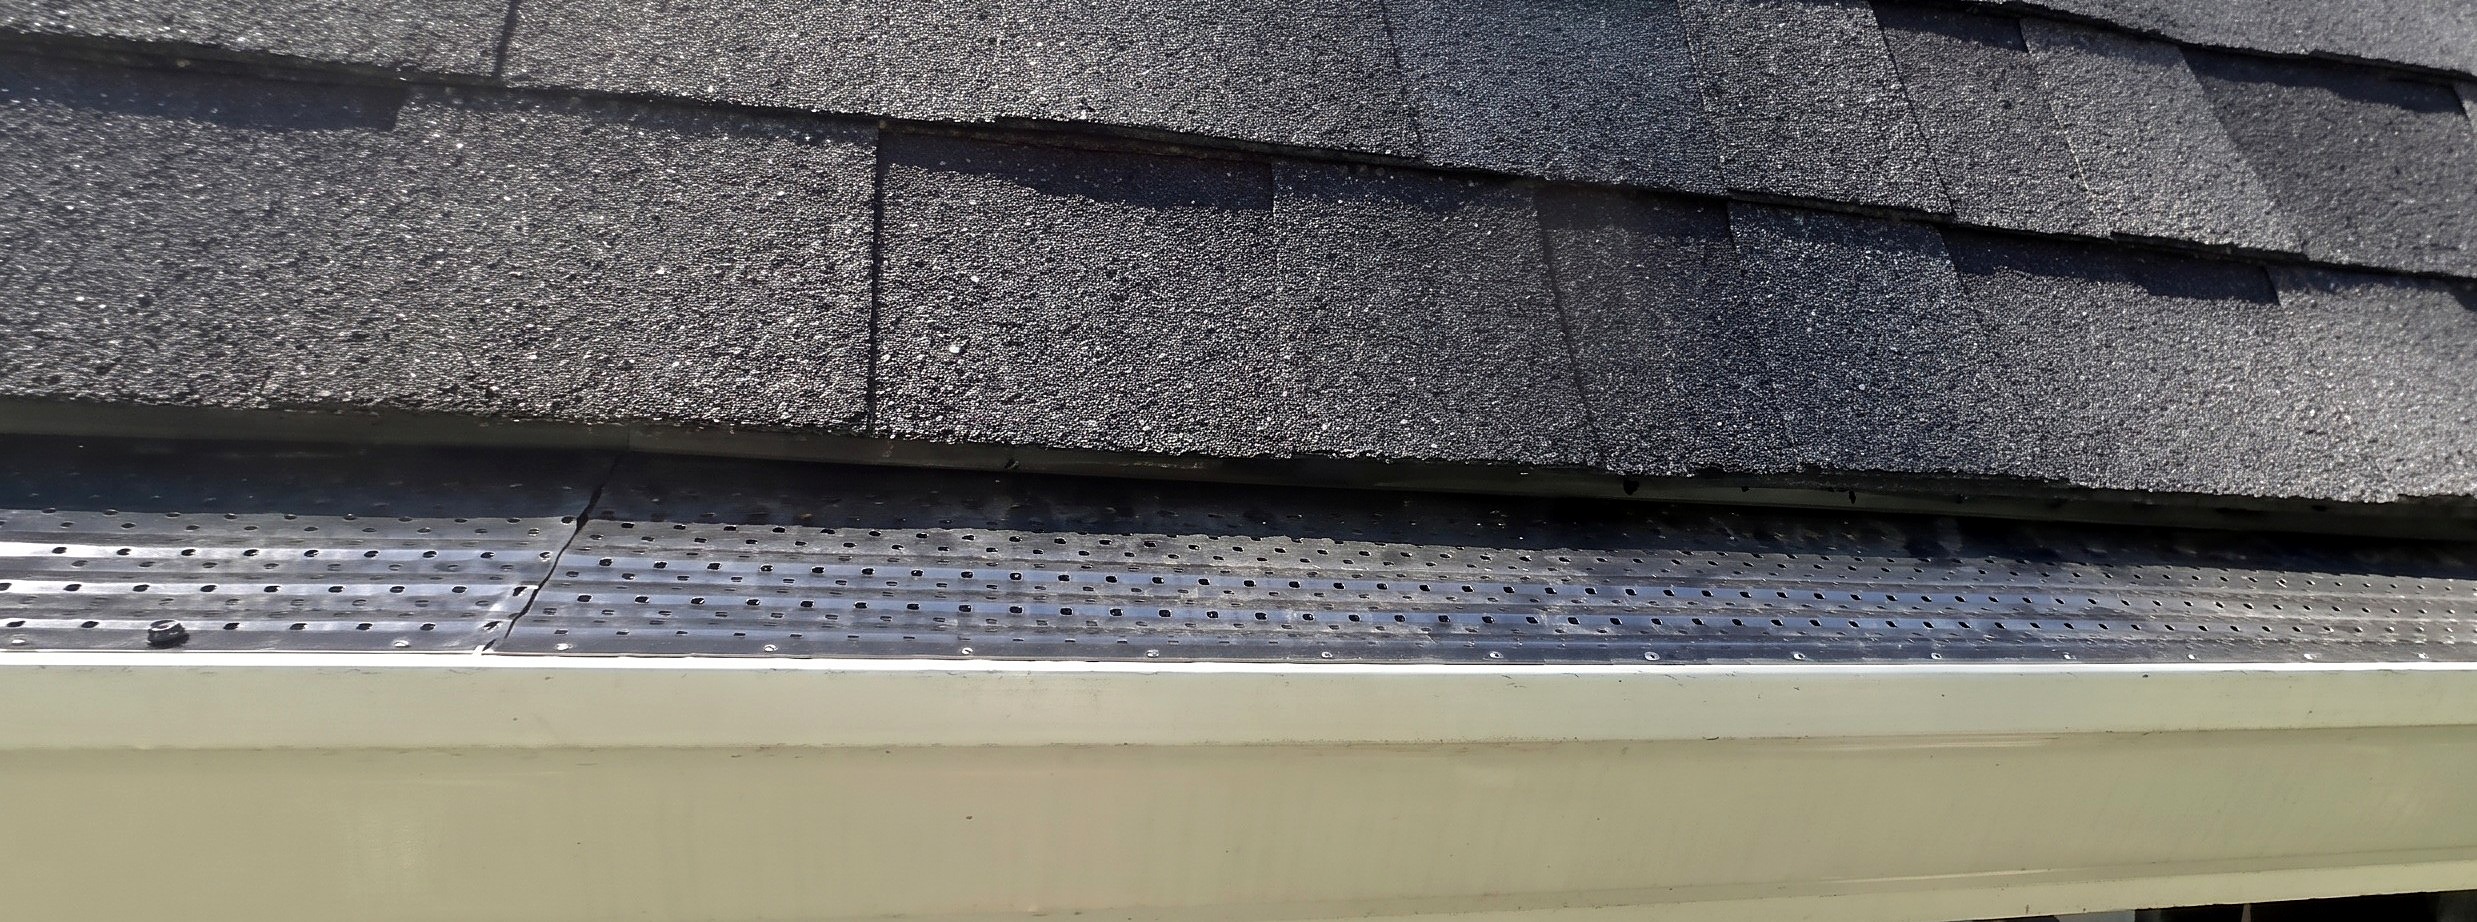
Tuck 4-foot perforated aluminum panels under shingles, screw to the front gutter lip, and miter corners.
Parts in this step: (B) Perforated aluminum gutter guard (4 ft section)
You'll need: Cordless Drill/Driver, Magnetic Nut Driver Bit, Tin Snips, Small Screwdriver, Articulating Boom Lift, Perforated Aluminum Gutter Guards, Self-tapping screws, Self-tapping sheet metal screw
- 3.1 Position the First Guard
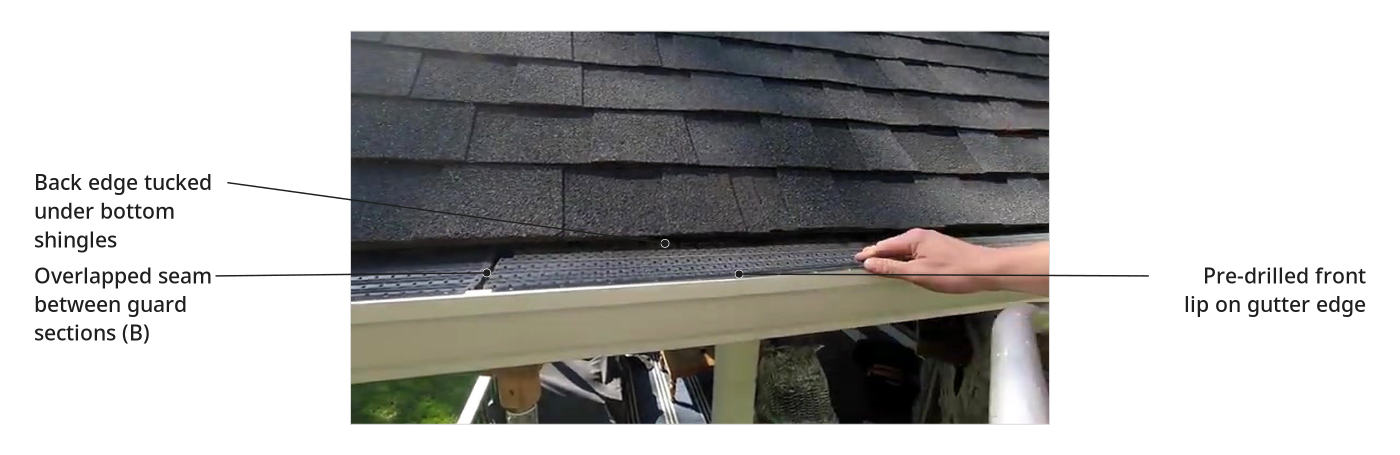
- Set the perforated aluminum gutter guard (4 ft section) (B) ridges up, holes forward.
- Slide the back edge under the bottom row of roof shingles.
- Rest the pre-drilled front lip flat on the outer gutter edge.
- Hook a small flathead screwdriver in a front hole; pull tight panels forward.
- 3.2 Secure with Screws
- Drive three self-tapping sheet metal screws evenly along the front lip into the gutter.
- Pin square starting corner edges shut with one extra screw.
- Leave the 4-foot panel's far end unscrewed to tuck the next section under.
- 3.3 Overlap and Continue
- Slide the next guard section (B) under the shingles and previous panel end.
- Pull the back edge slightly forward from the shingles to flatten downward bows.
- Fit a 6-inch cut section at the high end for later hose flushing.
- 3.4 Cut and Fit Corners
- Cut meeting ends of two guard sections (B) at 45-degree angles with tin snips.
- Overlap mitered edges at the outside corner and fold sharp tabs flat.
- Drive self-tapping sheet metal screws through the front lip on both corner sides.
Key measurements
- Guard panel size: 6 in. wide by 4 ft long
- Shingle tuck: slide the back edge under the bottom row of shingles
- Fastener count: 3 screws evenly across each 4 ft front lip
- Outside corner cut: 45-degree miter on meeting ends
- Tip: Leave each panel's far end unpinned until the next tab slides under.
- Tip: Pulling the back edge out slightly removes dips so wind blows dry leaves off.
- Heads up: Pushing the back edge too far under shingles bows panels down, pooling leaves.
Before you move on: Sight down the installed panels to confirm they sit flat without dips and overlap cleanly at the tabs.
Step 4: Continue Installation
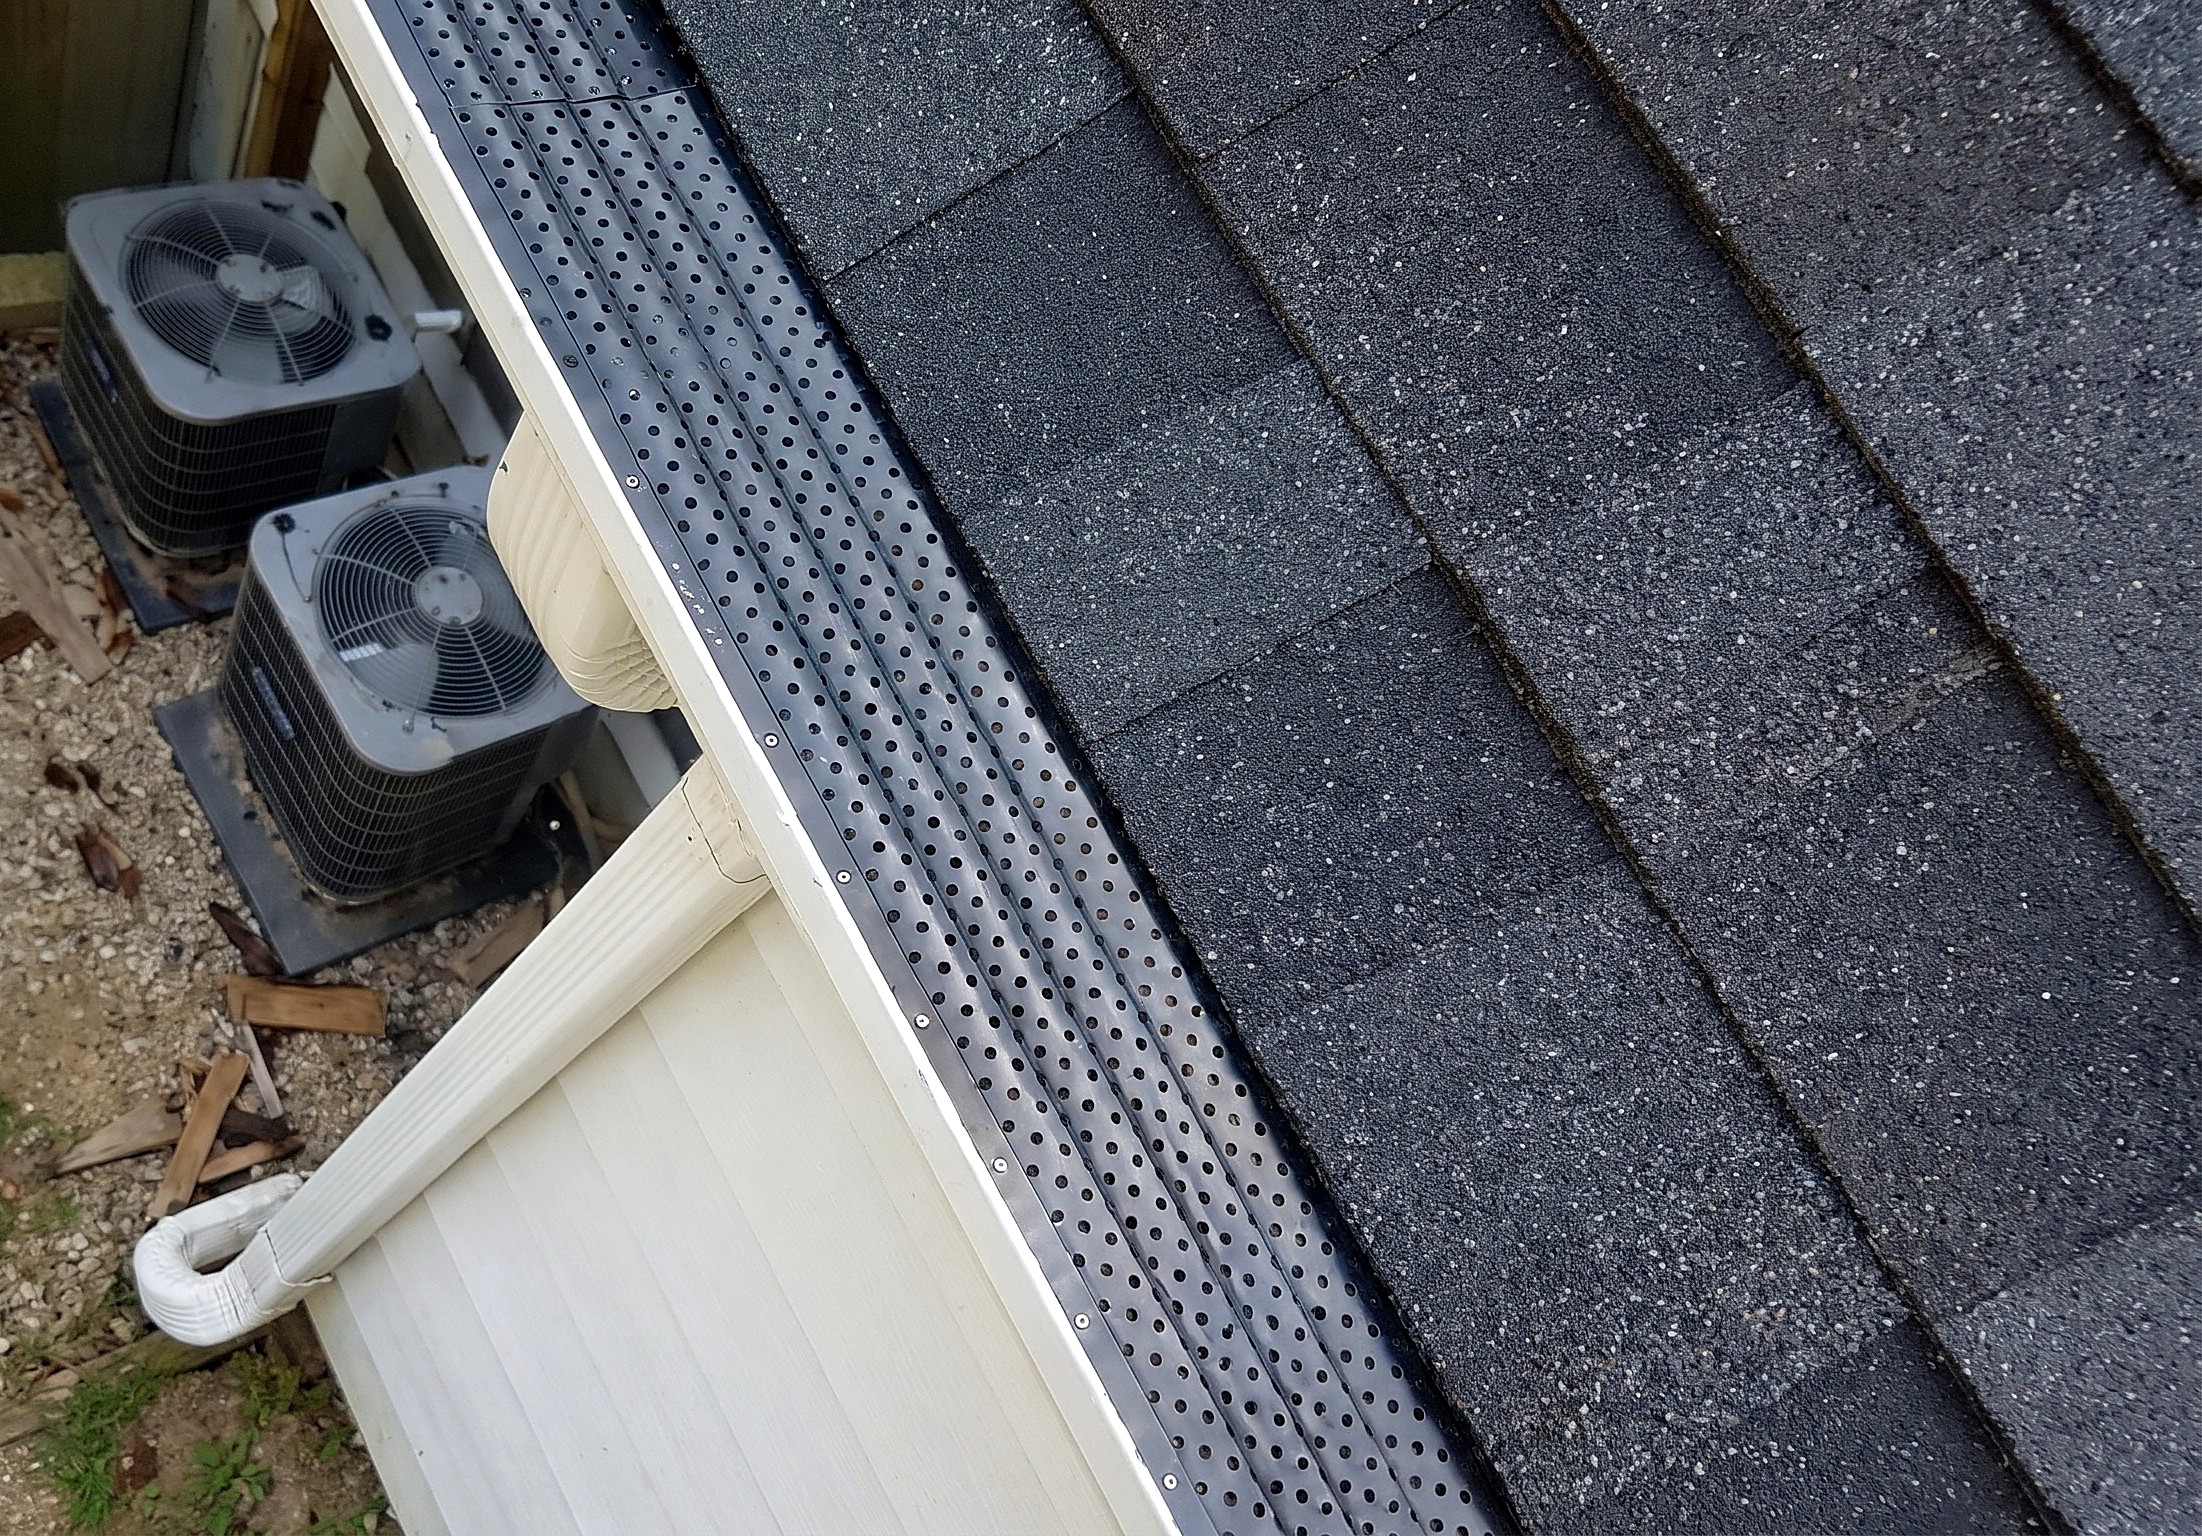
Fasten remaining overlapping panels along the run so the system sits flat and rigid.
Parts in this step: (B) Perforated aluminum gutter guard (4 ft section)
You'll need: Cordless Drill/Driver, Magnetic Nut Driver Bit, Articulating Boom Lift, Perforated Aluminum Gutter Guards, Self-tapping screws, Self-tapping sheet metal screw
- 4.1 Secure Overlapping Sections
- Drive three self-tapping sheet metal screws across each guard section (B) front lip.
- Drive an extra screw through overlapping front lips if a seam pops up.
- Overlap and screw 4-foot panels until the gutter run is sealed.
Key measurements
- Installation pace: 6 panels (24 linear ft) in about 15 minutes
- Tip: Screwing a raised seam flattens it, though the screw head may catch twigs.
- Tip: Screwing continuous aluminum panels to the front lip adds tensile strength for snow and ice.
Before you move on: Check every front lip and corner overlap is screwed tight without gaps.
Finishing
Annual Maintenance
- Unscrew one end panel every year or two; flush fine silt with a garden hose.
- Remove downspout strainer caps if fine oak tassels or dirt clog the outlet.
Alternatives
- Use stainless micro-mesh guards on low-pitched roofs where slower runoff soaks through fine mesh.
- Pick white perforated aluminum guards over black only to match white roof shingles.
Test it before you call it done
| Check | What you should see | If not |
|---|---|---|
| Watch the gutters in heavy rain (up to 2 to 3 inches over 90 minutes). | Fast runoff drops through perforations without waterfalling over the front lip. | Pull bowed panels' back edges slightly forward to sit level across the gutter. |
| Inspect the guards after sun dries wet leaves. | Wind under the raised bevels lifts and blows dry leaves off the roof. | Flatten downward panel dips where leaves settle and pool. |
| Unscrew and lift one panel over a downspout after 8 to 12 months. | The trough stays free of leaf dams, holding only thin fine silt. | Remove the downspout strainer cap so fine silt washes down without damming. |
These Specs are built from Indy Farm Life's video “Installing Perforated Gutter Guards on a Steep Roof”. Open the Installing Perforated Gutter Guards on a Steep Roof project page.
